
Popular categories
Looking for a yarn?


Comments / Questions (20)
![]() Maj Hamilton Poulsen wrote:
Maj Hamilton Poulsen wrote:
Storlek 1-3 månader: När jag delar på arbetet, ska jag då sticka de 42 maskorna (ärm)+ 7 när jag sätter dom på en avmaskningssticka?
08.05.2025 - 19:34DROPS Design answered:
Hei Maj. De 42 maskene til erme settes på en tråd (skal ikke strikkes), og når de sitter på en tråd, legges det opp 7 nye maker (under ermet). mvh DROPS Design
12.05.2025 - 13:39
![]() Cecile Thobie wrote:
Cecile Thobie wrote:
Bonjour, je ne comprends pas comment faire pour monter 7 mailles sous la manche ? Une fois que j'ai relevé les 48 mailles sur un fil pour la manche, dois je monter les 7 mailles juste avant les côtes anglaise ? Merci pour vos eclaircissements. Cécile
08.03.2025 - 18:05DROPS Design answered:
Bonjour Cécile, ces 7 mailles vont remplacer les mailles de la manche et vont se tricoter elles aussi en côtes anglaises, pour les côtés du gilet. Montez ces mailles comme dans cette vidéo ou dans cette leçon. Retrouvez également comment diviser un pull (dans la leçon), à partir de la photo 10 dans cette leçon. Bon tricot!
10.03.2025 - 08:22
![]() Nicki wrote:
Nicki wrote:
Under Yoke the instructions say to insert the markers on a right side row. Then knit one row from the wrong side. Then i get confused as it says increase the Raglan every second row, ie a wrong side. But under the Raglan instructions at the beginning it says increase on the right side. Please can you explain what this means as it seems to contradict itself. Thanks
19.11.2024 - 16:47DROPS Design answered:
Hi Nicki, The first increases for raglan are on the next row from the right side (row 3), then every 2nd row thereafter, always from the right side. Happy knitting!
20.11.2024 - 06:55
![]() Inger Nilsson wrote:
Inger Nilsson wrote:
Vill ersätta garnet drops alpacka 500 gram 2 trådar med drops mix 4 trådar. Hur mycket garn behövs med drops mix 4 trådar 500 g?
14.11.2024 - 17:30DROPS Design answered:
Hej Inger. Jag förstår inte vilket garn du vill byta till, men du kan använda vår garn konverterare för att få fram hur mycket garn du behöver vid byte av garn. Mvh DROPS Design
15.11.2024 - 08:07
![]() Jpv wrote:
Jpv wrote:
What is British English? English is English, the clue is in the name of the country it comes from - England!!! It does not need to be qualified with the word British. Americans do not know how to speak English properly, so have to explain the poor spelling and pronunciation, by putting American in front. Please do not put British in front of English it’s our language, and should just be called ENGLISH.
28.10.2024 - 18:18
![]() Dagmar wrote:
Dagmar wrote:
Wie ist das gemeint bei der Raglanzunahme, in jeder 2. Reihe insgesamt 11x in der Höhe zunehmen, dann in jeder 4. Reihe 8 in der Höhe zunehmen? Meint ihr da an 11 Reihen bzw. 8 Reihen (da also 2x) oder?
07.10.2024 - 13:22DROPS Design answered:
Liebe Dagmar, zuerst nehmen Sie in jeder 2. Reihe = in jeder Hin-Reihe insgesamt 11 Mal (5. Größe) zu, dh so stricken: *1 Hin-Reihe mit Zunahmen, 1 Rück-Reihe ohne Zunahmen*, von *bis* insgeamt 11 Mal stricken = 22 Reihen, dann nehmen Sie in jeder 4. Reihe (= in jeder 2. Hin-Reihe 8 Mal zu, dh so stricken: *1 Hin-Reihe mit Zunahmen, 3 Reihen (1 Rück-, 1 Hin-, 1 Rückreihe) ohne Zunahmen*, und von *bis* insgesamt 8 Mal stricken (= 32 Reihen). Viel Spaß beim Stricken!
07.10.2024 - 15:53
![]() Kathrin wrote:
Kathrin wrote:
Die Ärmel - insbesondere bei den kleinsten Größen - kann man unmöglich mit einer Rundstricknadel stricken, habe das Nadelspiel genommen... Sehr hübsch wird das Jäckchen!
02.07.2024 - 18:38
![]() Eliška wrote:
Eliška wrote:
Dobrý den, chtěla jsem se zeptat na rukávy. Pletu je v řadách nebo na kruhové jehlici dokola? A v podpaží nahazuji oka navíc, či nabírám oka z podpaží trupu, abych se vyhla zašívání na konci? Předem mnohokrát děkuji za pomoc.
15.10.2023 - 10:23DROPS Design answered:
Dobrý den, Eliško, u tohoto svetříku pleteme rukávy sice na kruhové jehlici, ale v řadách (tj. střídáme lícovou a rubovou řadu). Nakonec dolní stranu rukávu vč. podpaží sešijeme. Hodně zdaru! Hana
18.10.2023 - 11:26
![]() Carine wrote:
Carine wrote:
Bonjour, Quel diamètre font les boutons ? Merci
23.05.2023 - 21:49DROPS Design answered:
Bonjour Carine, vous retrouverez tous nos boutons ici avec leur descriptif respectif; ceux-ci font 15 mm de diamètre. Bon tricot!
24.05.2023 - 08:18
![]() Geeta Fry wrote:
Geeta Fry wrote:
BODY: = 118-134-142-154 (162-178) stitches. Continue with garter stitch and English rib as before, working the new stitches under each sleeve in English rib (on the first row these stitches do not have yarn overs). With reference to the above instruction, for the Enlish rib section, I would now knit row 2 of the English Rib pattern. However, as you state, there are no yarn overs for the new stitches - how do I knit these with the correct pattern? Help!
20.03.2023 - 15:27DROPS Design answered:
Dear Mrs Fry, on row 2 in English rib you repeat (YO, slip 1 as if to P, K tog YO and next stitch) - when working the new stitches mid under sleeve, you will just have to knit the stitches since they don't have been slipped with a YO on previous row, this means you just knit them. Happy knitting!
20.03.2023 - 15:39
|
|
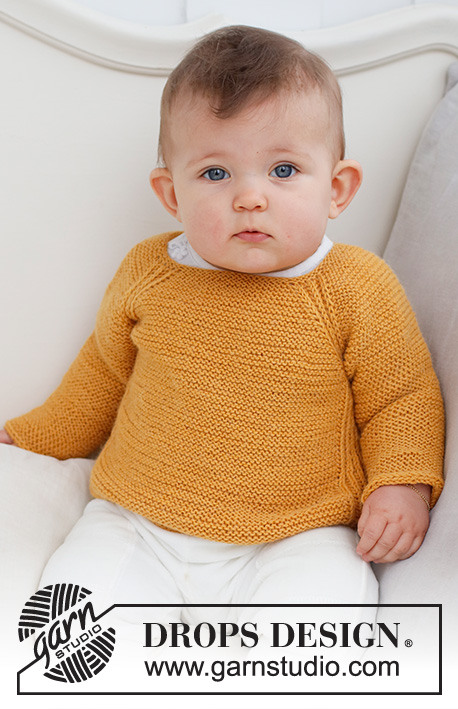
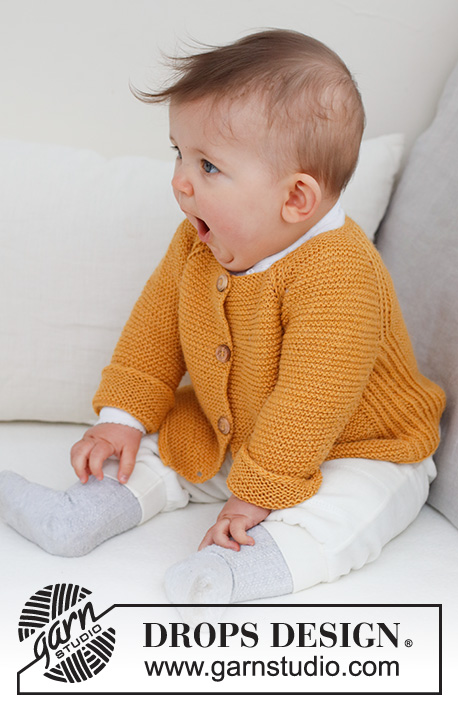
Happy Sunflower Cardigan#happysunflowercardigan |
|
 |
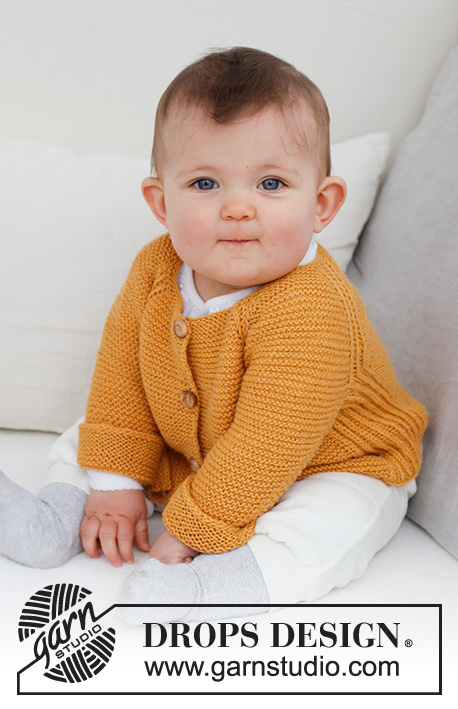 |
Knitted jacket for babies and children in DROPS Nord. The piece is worked top down with raglan, English rib and garter stitch. Sizes 0 - 4 years.
DROPS Baby 43-10 |
|
|
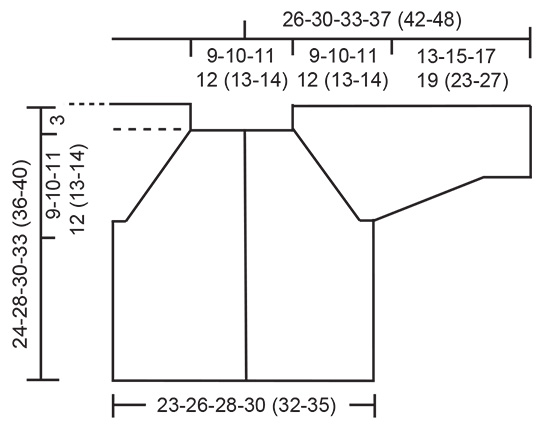
------------------------------------------------------- EXPLANATIONS FOR THE PATTERN: ------------------------------------------------------- RIDGE/GARTER STITCH (worked back and forth): Knit all rows. 1 ridge = knit 2 rows. ------------------------------------------------------- ENGLISH RIB: ROW 1 (right side): * Knit 1, 1 yarn over, slip 1 stitch as if to purl *, work from *-* 1 more time, knit 1. ROW 2 (wrong side): * 1 yarn over, slip 1 stitch as if to purl, knit the yarn over and slipped stitch together *, work from *-* 1 more time and finish with 1 yarn over, slip 1 stitch as if to purl. ROW 3 (right side): * Knit together the yarn over and slipped stitch, 1 yarn over, slip 1 stitch as if to purl *, work from *-* 1 more time, knit the yarn over and slipped stitch together. Repeat rows 2 and 3 onwards. RAGLAN: All increases are worked from the right side. Increase 8 stitches as follows: Work garter stitch to the marker before the English rib, make 1 yarn over, move the marker to the right needle, work English rib over 5 stitches, move the marker to the right needle, 1 yarn over. Repeat at all markers (= 1 stitch increased on each side of the English rib sections = 8 stitches increased). On the next row knit the yarn overs twisted to avoid holes and then work the new stitches in garter stitch. DECREASE TIP (sleeves): All decreases are worked from the right side! Decrease 1 stitch on each side as follows: Work 1 garter stitch, slip 1 stitch as if to knit, knit 1 and pass the slipped stitch over (= 1 stitch decreased), work garter stitch until there are 3 stitches left, knit 2 together (= 1 stitch decreased) and 1 garter stitch (= 2 stitches decreased on the row). BUTTONHOLES: The first buttonhole is worked when the piece measures 1 cm, then the next 3-3-4-4 (5-5) buttonholes with approx. 5-6-5-6 (5-6) cm between each one. Work the buttonholes on the right band (when the garment is worn) from the right side as follows: Work until there are 4 stitches left on the row, knit 2 together, 1 yarn over and knit 2. On the next row knit the yarn over to leave a hole. I-CORD CAST-OFF: * Knit 2, knit the next 2 stitches twisted together, place the 3 stitches from the right needle onto the left needle (in the same order) *. Work from *-* until there are 3 stitches left on the left needle, knit these 3 stitches together. Cut the strand and pull it through the last stitch. Fasten well. ------------------------------------------------------- START THE PIECE HERE: ------------------------------------------------------- JACKET – SHORT OVERVIEW OF THE PIECE: The jacket is worked top down, back and forth with circular needle. The sleeves are worked back and forth with circular needle and sewn together to finish. YOKE: Cast on 72-76-80-84 (90-94) stitches (including 4 band stitches on each side) with circular needle size 3 mm and DROPS Nord. Work 2 RIDGES – see description above, and increase 8-8-8-8 (6-6) stitches evenly spaced on the last row = 80-84-88-92 (96-100) stitches. On the next row from the right side insert markers, which will follow your work onwards, as follows: Work 11-12-13-14 (15-16) stitches in garter stitch (left front piece), insert 1 marker, work 5 stitches in ENGLISH RIB – read description above, insert 1 marker, work 12 stitches in garter stitch (sleeve), insert 1 marker, work 5 stitches in English rib, insert 1 marker, work 14-16-18-20 (22-24) stitches in garter stitch (back piece), insert 1 marker, work 5 stitches in English rib, insert 1 marker, work 12 stitches in garter stitch (sleeve), insert 1 marker, work 5 stitches in English rib, insert 1 marker, work 11-12-13-14 (15-16) stitches in garter stitch and work the BUTTONHOLE – read description above (right front piece). You have 8 markers, which show where you will work English rib and increase to raglan. Knit 1 row from the wrong side, apart from the sections in English rib. REMEMBER THE KNITTING TENSION! Now start to increase to RAGLAN on each side of all the sections of English rib: Increase every 2nd row 4-6-7-10 (11-14) times, then every 4th row 8-9-9-8 (8-8) times = 176-204-216-236 (248-276) stitches. Continue the pattern without further increases until the piece measures 9-10-11-12 (13-14) cm from the cast-on edge. On the next row from the right side, divide for the body and sleeves as follows: Work 23-27-29-32 (34-38) stitches in garter stitch and 5 stitches in English rib, place the next 36-42-44-48 (50-56) stitches on a thread for the sleeve, cast on 7 stitches under the sleeve, work 5 stitches in English rib, 38-46-50-56 (60-68) stitches in garter stitch, 5 stitches in English rib, place the next 36-42-44-48 (50-56) stitches on a thread for the sleeve, cast on 7 stitches under the sleeve, work 5 stitches in English rib and 23-27-29-32 (34-38) stitches in garter stitch. BODY: = 118-134-142-154 (162-178) stitches. Continue with garter stitch and English rib as before, working the new stitches under each sleeve in English rib (on the first row these stitches do not have yarn overs). Work until the body measures 12-15-16-18 (20-23) cm, from the division. Read I-CORD CAST-OFF and cast off from the right side. The jacket measures approx. 24-28-30-33 (36-40) cm from the shoulder down. SLEEVES: Place the 36-42-44-48 (50-56) stitches from the thread on one side on circular needle size 3 mm. Work garter stitch back and forth, on the first 2 rows cast on 4 stitches at the end of each row = 44-50-52-56 (58-64) stitches. When the sleeve measures 2 cm decrease 1 stitch on each side - read DECREASE TIP. Decrease like this every 8th-8th-6th-6th (8th-8th) row a total of 4-7-8-9 (8-10) times = 36-36-36-38 (42-44) stitches. Work until the sleeve measures 13-15-17-19 (23-27) cm. Cast off with I-CORD CAST-OFF from the right side. Work the other sleeve in the same way. ASSEMBLY: Sew the sleeve seams in the outermost loop of the outermost stitch, so the seam is flat. Sew the openings under the sleeves. Sew the buttons onto the left band. |
|
|
|
Have you finished this pattern?Tag your pictures with #dropspattern #happysunflowercardigan or submit them to the #dropsfan gallery. Do you need help with this pattern?You'll find 27 tutorial videos, a Comments/Questions area and more by visiting the pattern on garnstudio.com. © 1982-2025 DROPS Design A/S. We reserve all rights. This document, including all its sub-sections, has copyrights. Read more about what you can do with our patterns at the bottom of each pattern on our site. |
|


With over 40 years in knitting and crochet design, DROPS Design offers one of the most extensive collections of free patterns on the internet - translated to 17 languages. As of today we count 314 catalogues and 11822 patterns translated into English (UK/cm).
We work hard to bring you the best knitting and crochet have to offer, inspiration and advice as well as great quality yarns at incredible prices! Would you like to use our patterns for other than personal use? You can read what you are allowed to do in the Copyright text at the bottom of all our patterns. Happy crafting!
Post a comment to pattern DROPS Baby 43-10
We would love to hear what you have to say about this pattern!
If you want to leave a question, please make sure you select the correct category in the form below, to speed up the answering process. Required fields are marked *.