
Looking for a yarn?


Comments / Questions (3)
![]() Maria Nielsen wrote:
Maria Nielsen wrote:
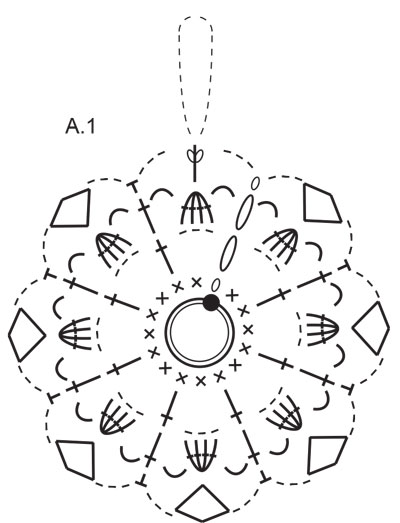
Jeg er ikke god til diagrammer, så er det ikke muligt I skriver opskriften istedet? Det er en super fin stjerne
09.11.2024 - 09:49DROPS Design answered:
Hei Maria. Det har vi ikke mulighet til, men å lese diagrammer er ikke så komplisert. Ta en titt under TIPS & HJÆLP - DROPS Lektioner - Læs en opskrift - Hvordan læses hæklediagrammer. mvh DROPS Design
11.11.2024 - 13:01
![]() Steph S wrote:
Steph S wrote:
I'm not understanding the last part of the diagram "symbols = work 1 treble crochet in stitch below, work 3 chain stitches, insert the hook down through the top of the treble crochet and continue through the top loop of the same treble crochet (= 2 loops on hook), pick up the strand and pull it through all 3 loops on the hook, work 1 more treble crochet in stitch below (same stitch as the previous treble crochet)."
10.12.2023 - 19:31DROPS Design answered:
Dear Steph, you can see the following video to see more clearly how to work this stitch: https://www.garnstudio.com/video.php?id=1594&lang=en. Happy crocheting!
10.12.2023 - 23:46
![]() Anneli wrote:
Anneli wrote:
Väga ilus muster. Pildil ei ole ilmselt lõng DROPS Muskat, sest Muskat on läikivam ja ei ole nii "karvane" lõng.
18.12.2020 - 10:55
|
||||||||||||||||||||||||||||||||||
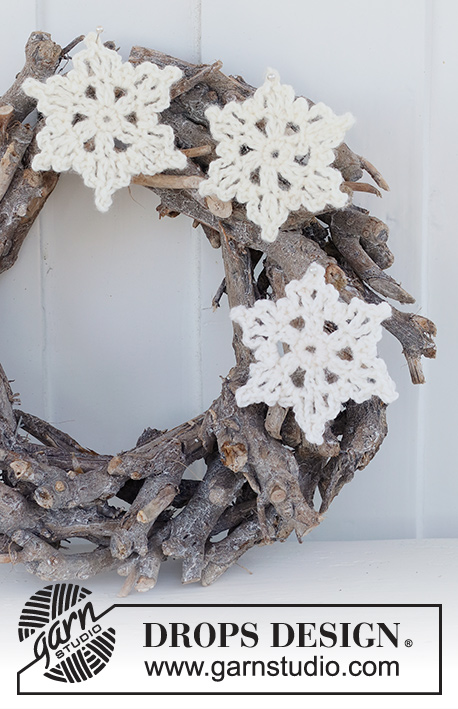
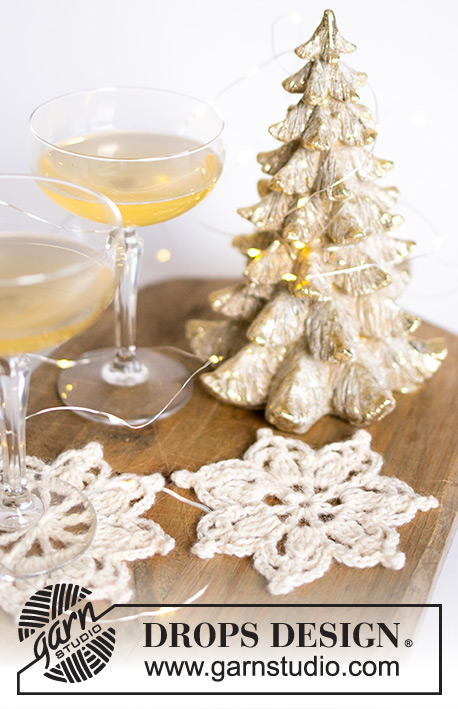
Sparkling Snow#sparklingsnowcoasters |
||||||||||||||||||||||||||||||||||
 |
 |
|||||||||||||||||||||||||||||||||
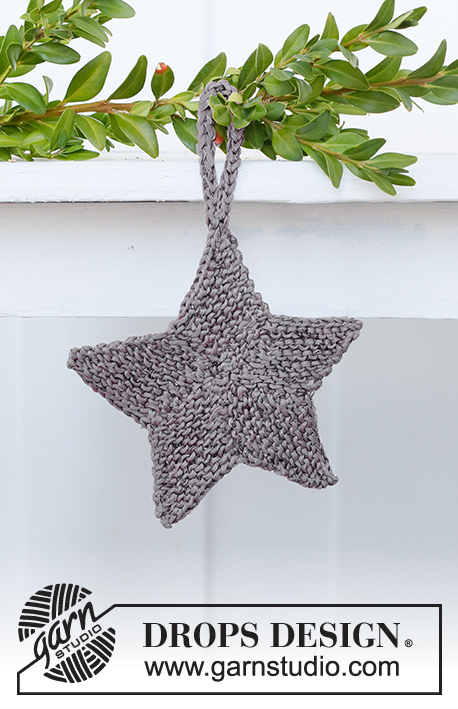
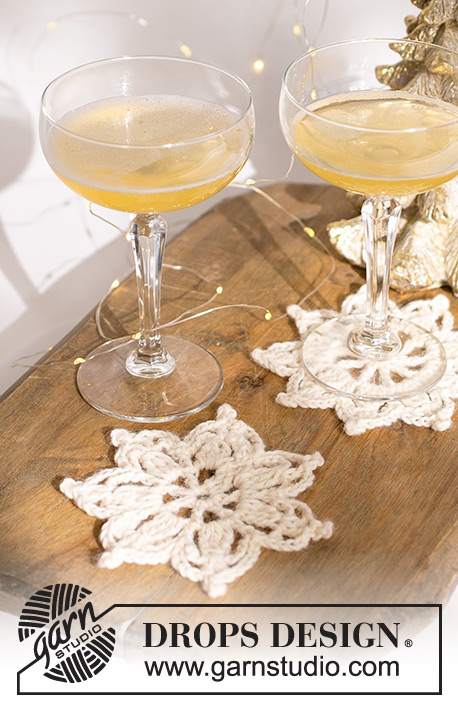
Crocheted star-shaped Christmas decoration/coaster in DROPS Muskat. Theme: Christmas.
DROPS Extra 0-1517 |
||||||||||||||||||||||||||||||||||
|
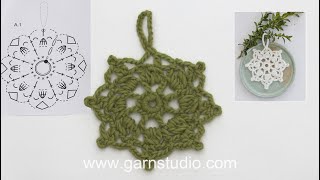
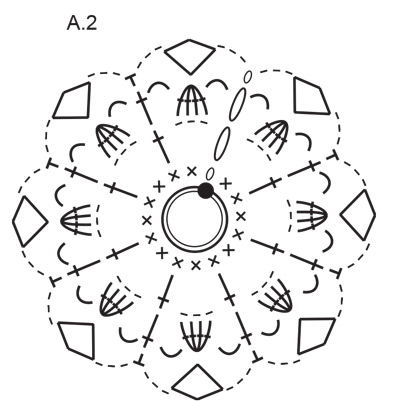
------------------------------------------------------- EXPLANATIONS FOR THE PATTERN: ------------------------------------------------------- PATTERN: See diagram A.1 and A.2. CHAIN STITCH: If you work outermost on the hook the chain stitch will often be too tight; 1 chain stitch should be as long as 1 double crochet is wide. ------------------------------------------------------- START THE PIECE HERE: ------------------------------------------------------- DECORATION / COASTER – SHORT OVERVIEW OF THE PIECE: The piece is worked from the middle outwards, according to the diagram. DECORATION /COASTER: Use crochet hook size 3.5 mm = US E/4 and Muskat. Read CHAIN STITCH in explanations above. Work diagram A.1 for star with loop and A.2 for star without loop.. REMEMBER THE CROCHET GAUGE! When the diagram has been completed, cut and fasten the strand. If you wish, the decoration can be stiffened so it hangs neatly. Dip it in sugared water or colorless fizzy drink and lay it flat to dry. |
||||||||||||||||||||||||||||||||||
Diagram explanations |
||||||||||||||||||||||||||||||||||
|
||||||||||||||||||||||||||||||||||
|
||||||||||||||||||||||||||||||||||
|
||||||||||||||||||||||||||||||||||
Have you finished this pattern?Tag your pictures with #dropspattern #sparklingsnowcoasters or submit them to the #dropsfan gallery. Do you need help with this pattern?You'll find 10 tutorial videos, a Comments/Questions area and more by visiting the pattern on garnstudio.com. © 1982-2025 DROPS Design A/S. We reserve all rights. This document, including all its sub-sections, has copyrights. Read more about what you can do with our patterns at the bottom of each pattern on our site. |
||||||||||||||||||||||||||||||||||


With over 40 years in knitting and crochet design, DROPS Design offers one of the most extensive collections of free patterns on the internet - translated to 17 languages. As of today we count 314 catalogs and 11821 patterns - 11811 of which are translated into English (US/in).
We work hard to bring you the best knitting and crochet have to offer, inspiration and advice as well as great quality yarns at incredible prices! Would you like to use our patterns for other than personal use? You can read what you are allowed to do in the Copyright text at the bottom of all our patterns. Happy crafting!
Post a comment to pattern DROPS Extra 0-1517
We would love to hear what you have to say about this pattern!
If you want to leave a question, please make sure you select the correct category in the form below, to speed up the answering process. Required fields are marked *.