
Looking for a yarn?


Comments / Questions (32)
![]() Regina wrote:
Regina wrote:
Hallo, was bedeutet : je 1 Randmasche kraus rechtsbeidseitig? Wenn ich die teile getrennt weiter stricke. Wird dann die 1. Und letzte Masche immer gestrickt? Oder die 1.immer re. abgehoben und die letzte re gestrickt ? Wie bei Knötchenrand. Danke schon mal im voraus
15.10.2023 - 17:31DROPS Design answered:
Liebe Regina, die Randmaschen (- die 1. und die letzte Masche) werden rechts bei jeder Reihe (Hin- sowie Rück-Reihe) gestrickt - in diesem Video zeigen wir, wie man ein Vollpatent mit 1 Randmasche kraus rechts strickt.. Viel Spaß beim stricken!
16.10.2023 - 10:04
![]() Emmanuelle wrote:
Emmanuelle wrote:
J'ai eu le même problème que Mme Bougant au moment de la séparation du dos et du devant et des mailles à rabattre. Le problème vient je pense d'une ambiguïté dans les explications (en français notamment) où l'on peut comprendre que la séparation doit intervenir au niveau d'un tour 2... alors que si on la fait au niveau d'un tour 1, il n'y a aucun souci, tout se passe parfaitement bien. Peut-être faudrait-il l'indiquer un peu plus clairement.
11.10.2023 - 18:43DROPS Design answered:
Bonjour Emmanuelle, le tour de séparation du dos et du devant doit bien être un tour comme le 2ème tour des côtes anglaises, et pas comme le premier, ainsi la 1ère maille rabattue au début du tour est la maille que l'on doit tricoter ensemble à l'envers avec son jeté (- la 1ère maille du tour 2 quand on répète de `*-*). Bon tricot!
12.10.2023 - 09:17
![]() Pia Olofsson wrote:
Pia Olofsson wrote:
Hej. Olika garnmängder i mönstret. KID silk liten mängd i förhållande till det andra? Första varvet helpatent går ej att göra fick se ett annat mönster Förstår inte ert första varv? Vänliga hälsningar Pia
28.09.2023 - 10:22DROPS Design answered:
Hej Pia, jo da du har flere meter på Kid-Silk, så behøver du ikke lige så mange nøgler. Jo det går! Du starter med HELPATENT RUNT när du har stickat resåren och bytt till sticka 5,5
05.10.2023 - 10:19
![]() Marie-Laure Bougant wrote:
Marie-Laure Bougant wrote:
Bonsoir, Désolée de reposter mais personne sur Drops Facebook n’a de solution. Sur la photo que j’ai envoyé, on voit bien que sur le premier rang à tricoter sur l’envers les jetés sont obligatoirement croisés avec la maille glissée, ce qui rend impossible de ne pas avoir cette démarcation. Savez-vous qui tricote les modèles Drops ? Merci
14.06.2023 - 19:10DROPS Design answered:
Bonjour Mme Bougant, vérifiez bien la façon de réaliser les côtes anglaises (les jetés par-dessus les mailles glissées), ces mailles doivent être tricotées ensemble, si votre jeté apparaît torse il est sûrement possible que vous le replaciez simplement comme il faut. J'ai personnellement souvent tricoté ce type de côtes anglaises et même fait un échantillon au moment de vous répondre la première fois, je suis toujours tombée juste. Consultez les différentes vidéos des côtes anglaises en rond et en allers et retours, cela devrait vous aider. Votre magasin peut également avoir l'expérience de ce type de souci ou bien un autre forum. Bonne chance!
15.06.2023 - 08:53
![]() Marie-Laure Bougant wrote:
Marie-Laure Bougant wrote:
En fait le problème se situe sur le rang où l’on doit rabattre les mailles
12.06.2023 - 12:46DROPS Design answered:
Bonjour Mme Bougant, la 1ère m du tour doit être une m envers, et c'est cette m que l'on rabat, on tricote la moitié des mailles (cf votre taille) et on rabat la m suivante = une m envers, et on termine le tour. Ensuite, on doit tourner pour tricoter le rang suivant sur l'envers, les côtes anglaises se tricotent maintenant différemment de la 1ère partie. N'hésitez pas à demander directement conseil à votre magasin (même par mail ou téléphone) ou demandez conseil (en montrant une photo votre ouvrage) dans notre groupe DROPS Workshop, pour que d'autres tricoteuses puissent essayer de vous aider. Bon tricot!
12.06.2023 - 13:38
![]() Marie-Laure Bougant wrote:
Marie-Laure Bougant wrote:
Bonjour, Je reviens vers vous pour le même problème. Il faut rabattre ensembles le jeté et la maille envers quand on sépare? J’ai détricoté car en repartant sur l’envers, certaines mailles sont croisées et on voit clairement une ligne de démarcation. Je suis perdue. Merci de votre aide
10.06.2023 - 13:57DROPS Design answered:
Bonjour Mme Bougant, je ne suis pas bien sûre de comprendre vos mailles croisées, lorsque vous avez tricoté le dernier tour en rabattant 1 m de chaque côté, vous devez tricoter le 1er rang sur l'envers comme indiqué sous les CÔTES ANGLAISES en allers et retours (devant et dos):, commencez par *1 jeté et glissez la m suivante à l'envers, tricotez ensemble à l'endroit la maille suivante et son jeté*, répétez de *à* et montez 1 maille. Tricotez ensuite le rang 2 avec 1 m lis au point mouse (la maille montée), et répétez de *-* du rang 2 en montant 1 m à la fin du rang. Répétez ensuite les rangs 3 et 4. Bon tricot!
12.06.2023 - 09:32
![]() Marie-Laure Bougant wrote:
Marie-Laure Bougant wrote:
Bonjour, J’ai un problème pour séparer le devant et le dos. La vidéo d’aide pour rabattre les mailles en côtes anglaises avec jeté montre un rabattage en aller retour qui ne correspond pas avec la première maille en rond qui commence au rang 2 par un jeté et une maille glissée puis une maille endroit. Comment faut-il faire donc pour rabattre le jeté et la maille glissée envers ? Merci
06.06.2023 - 15:19DROPS Design answered:
Bonjour Mme Bougant, lorsque l'on sépare le dos et le devant pour les tricoter séparément en allers et retours on rabat simplement la 1ère maille du tour (1 maille envers), puis on tricote comme avant les mailles suivantes (cf nombre pour votre taille) et on rabat 1 maille envers et on tricote les dernières mailles. Vous avez maintenant 1 m endroit des côtes anglaises au début et à la fin du dos et du devant. Tricotez le rang 1 des CÔTES ANGLAISES en allers et retours (devant et dos):: vous montez 1 m à la fin du rang, au rang 2, vous montez 1 m à la fin du rang = vous avez 1 m lisière de chaque côté. Continuez en répétant les rangs 3 et 4. Bon tricot!
06.06.2023 - 17:19
![]() Sara wrote:
Sara wrote:
Når bol skal deles opp til bak-og fremstykke får jeg det ikke til å bli riktig mønster., altså når jeg skal starte på patenstrikk pinne 1 fra vrangsiden. Mønsteret flyttet enten på seg ellerså får jeg hull i den ene raden. Jeg forstår ikke hva jeg gjør feil. Finnes det en annen eller bedre forklaring for de pinnene ?
21.03.2023 - 21:51DROPS Design answered:
Hei Sara. Usikker på du gjør som blir feil, men prøv å strikk slik at patentmaskene kommer over hverandre og husk at det skal legges opp 1 ny maske i hver side (kantmaske). mvh DROPS Design
27.03.2023 - 10:50
![]() Nicole wrote:
Nicole wrote:
Ich habe den Rumpf in Vorder- und Rückenteil getrennt, das Vorderteil stillgelgt und die Arbeit gewendet. nun geht es ja mit der Rückrunde des Rückenteils weiter. In der Beschreibung steht, dass die Masche mit dem Umschlag rechts zusammengestrickt wird. Bei mir ist es aber links. Wo könnte mein Fehler sein? Kann ich trotzdem weiterstricken, mur eben einfach links zusammenstricken, oder passt der ganze Rest dann nicht?
04.01.2023 - 15:55
![]() Nicole wrote:
Nicole wrote:
Liebes Dops Team, ich habe ein Problem beim Übergang vom Rumpfteil (in Runden) zu Vorder- und Rückenteil. Ich habe die Vorbereitung dazu mit den 75 Maschen und dazwischen 1M abketten gestrickt. • Stricke ich jetzt das Rückenteil zurück (Vorderteil auf einem Faden stilllegen)? • Welche Runde des Vollpatents folgt jetzt - Runde 1 oder Runde 3? Liebe Grüße, Nicole
25.12.2022 - 19:13DROPS Design answered:
Liebe Nicole, die 75 Maschen für Vorderteil legen Sie still und wenden Sie die Arbeit, damit die 1. Reihe eine Rückreihe wird, und jetzt stricken Sie VOLLPATENT in Hin- und Rück-Reihen (gilt für Vorderteil und Rückenteil): - am Ende der 2. Reihe haben Sie 1 Masche beidseitig angeschlagen = 77 Maschen, dann wiederholen Sie die 3. + die 4. Reihe. Viel Spaß beim stricken!
02.01.2023 - 09:02
|
|
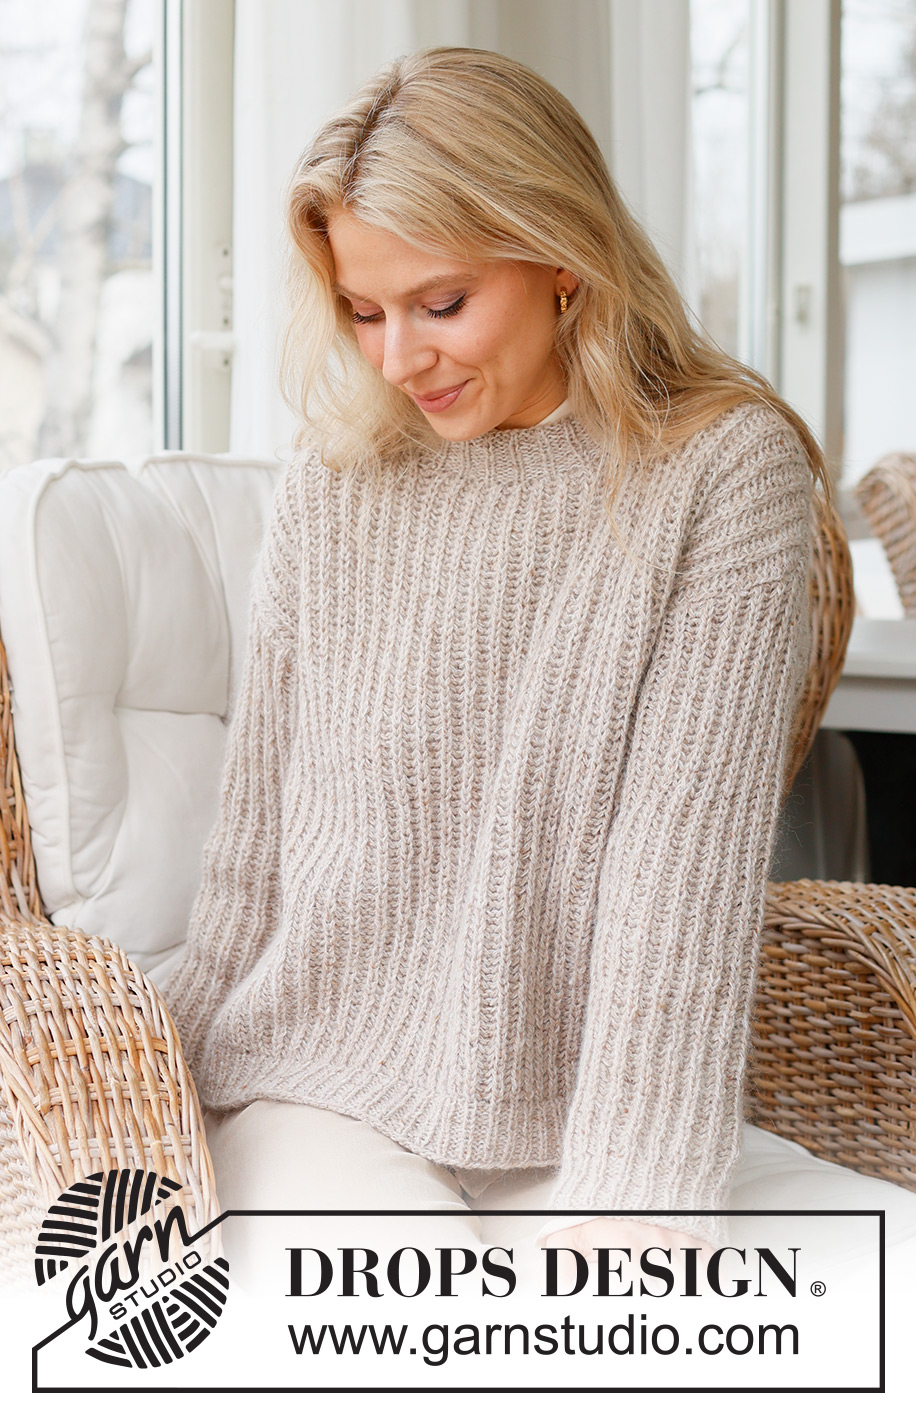
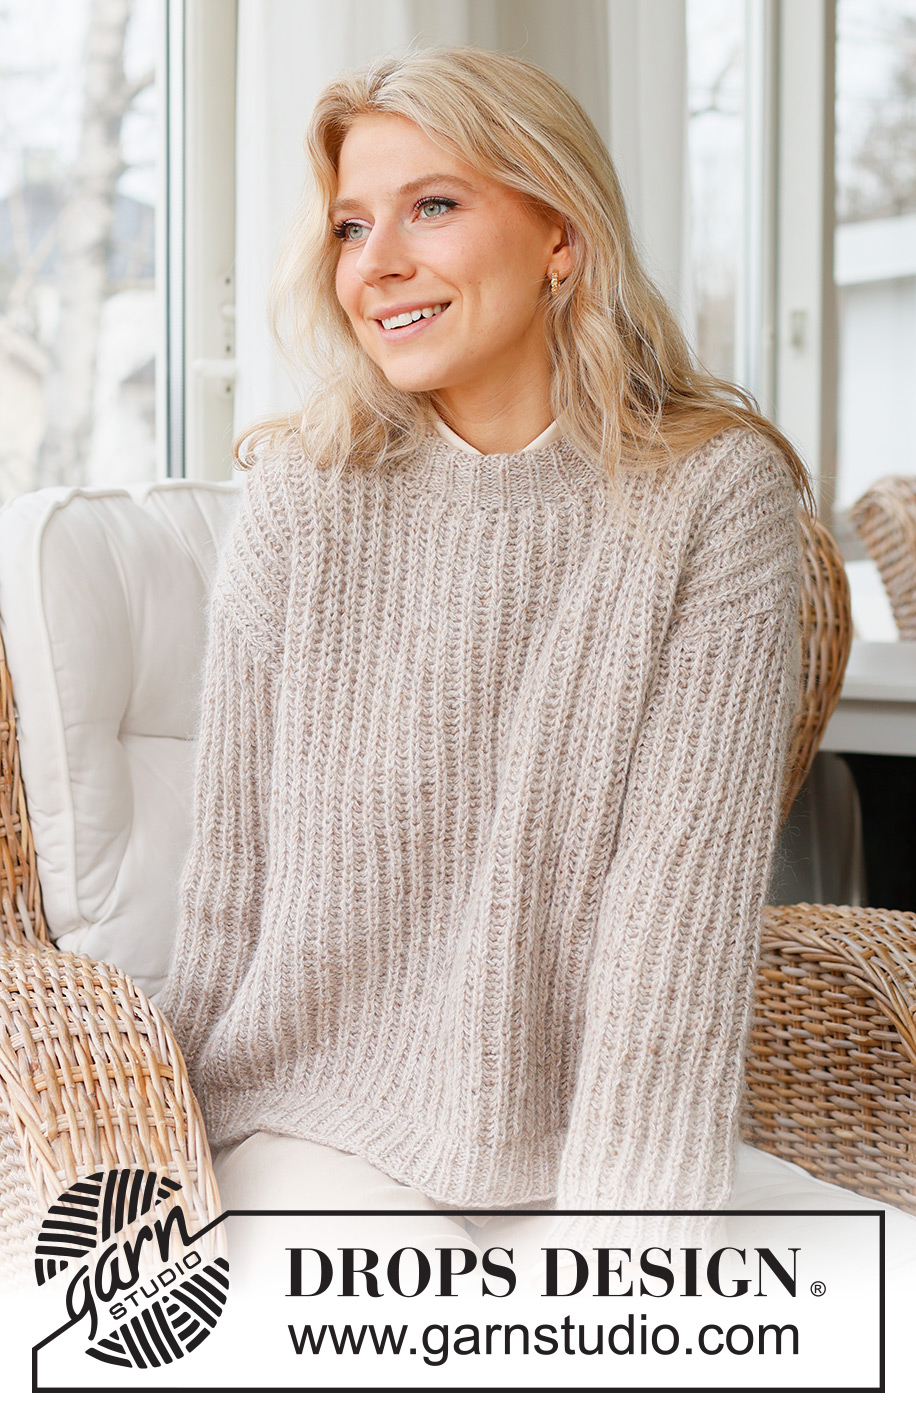
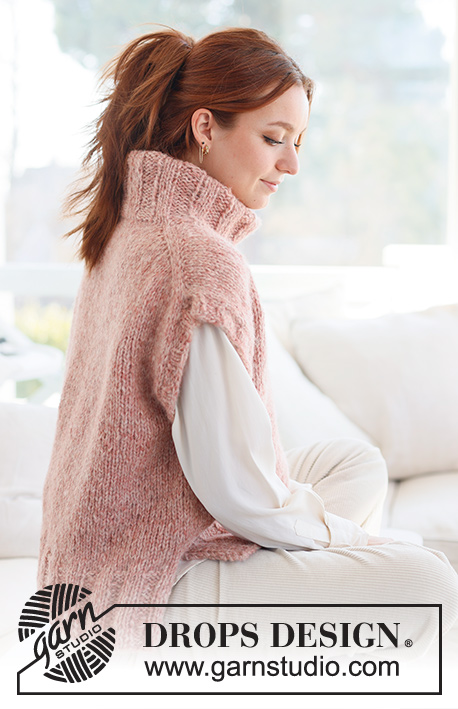
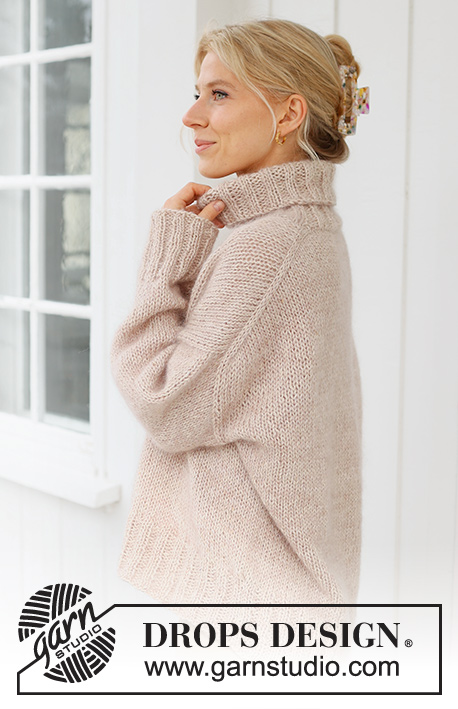
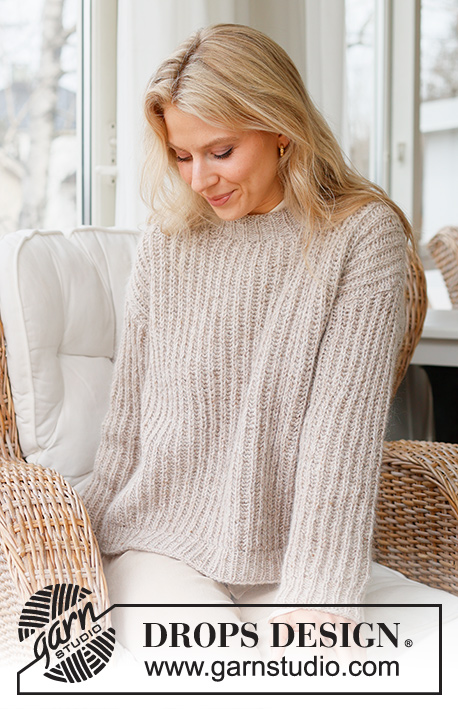
Caramel Macchiato#caramelmacchiatosweater |
|
 |
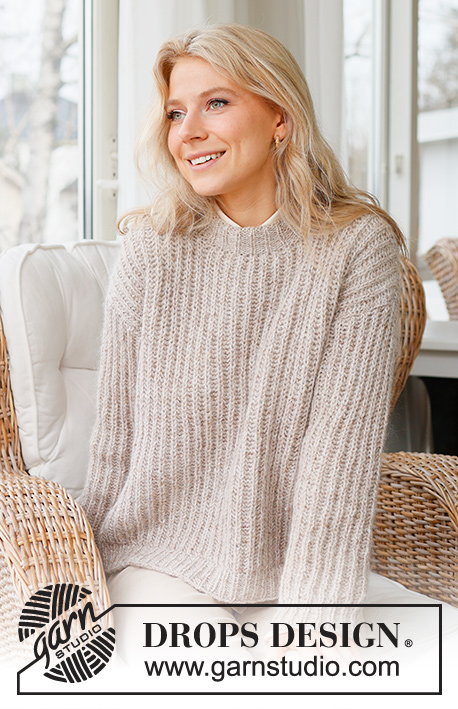 |
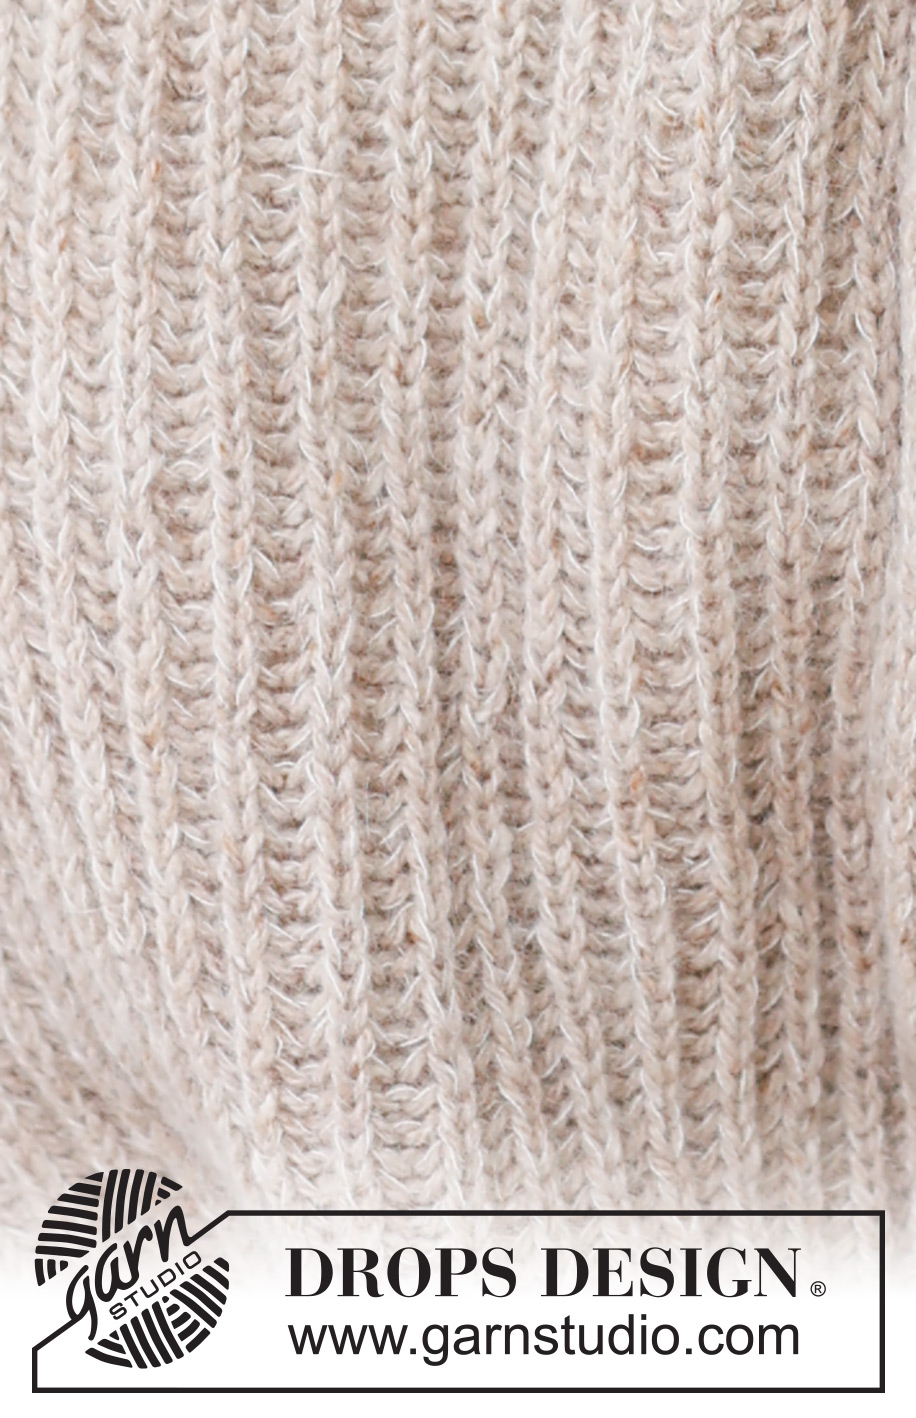
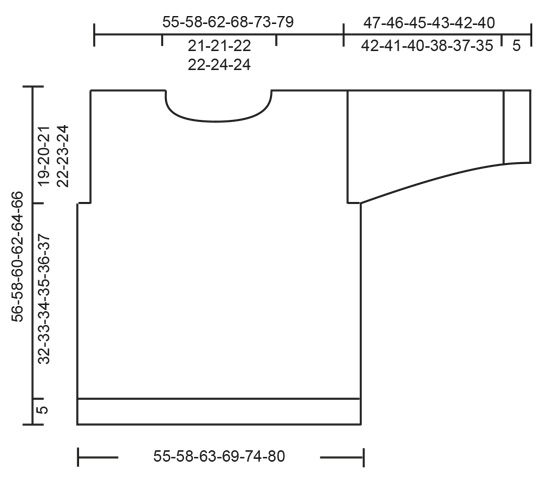
Knitted jumper in DROPS Soft Tweed and DROPS Kid-Silk. Piece is knitted bottom up with English rib. Size: S - XXXL
DROPS 237-20 |
|
|
---------------------------------------------------------- EXPLANATION FOR THE PATTERN: ---------------------------------------------------------- GARTER STITCH (back and forth): Knit all rows. 1 ridge vertically = knit 2 rows. ENGLISH RIB back and forth (applies to front and back piece): ROW 1 (= wrong side): Work 1 edge stitch in garter stitch, * Make 1 yarn over, slip 1 stitch on to right needle purlwise, knit yarn over and slipped stitch together *, work from *-* until 1 stitch remains, make 1 yarn over, slip 1 stitch on to right needle purlwise and cast on 1 new stitch and the end of row. ROW 2 (= right side): Work 1 edge stitch in garter stitch, * knit yarn over and slipped stitch together, make 1 yarn over, slip 1 stitch on to right needle purlwise *, work from *-* until 2 stitches remain, knit yarn over and slipped stitch together and 1 edge stitch in garter stitch. ROW 3 (= wrong side): Work 1 edge stitch in garter stitch, * make 1 yarn over, slip 1 stitch on to right needle purlwise, knit yarn over and slipped stitch together *, work from *-* until 2 stitches remain, make 1 yarn over, slip 1 stitch on to right needle purlwise and 1 edge stitch in garter stitch. ROW 4 (= right side): Work 1 edge stitch in garter stitch, * knit yarn over and slipped stitch together, make 1 yarn over, slip 1 stitch on to right needle purlwise *, work from *-* until 2 stitches remain, knit yarn over and slipped stitch together and 1 edge stitch in garter stitch. Repeat rows 3 and 4. ENGLISH RIB in the round (applies to body and sleeves): ROUND 1: * Make 1 yarn over, slip 1 stitch purlwise, knit yarn over and slipped stitch together *, repeat from *-* the entire round. ROUND 2: * Purl yarn over and the slipped stitch together, make 1 yarn over, slip 1 stitch purlwise *, repeat from *-* the entire round. Repeat rounds 1 to 2. ENGLISH RIB STITCH: When counting the stitches, the yarn overs are not counted as stitches. DECREASE TIP (applies to neck): All decreases are done on a row from the right side! DECREASE 2 STITCHES AT THE BEGINNING OF ROW AS FOLLOWS: Work 1 edge stitch in garter stitch and 1 English rib stitch as before, slip next stitch and related yarn over on to right needle knitwise, knit the next 2 stitches (and related yarn over) together and lift slipped stitch and yarn over over stitches worked together. DECREASE 2 STITCHES AT THE END OF ROW AS FOLLOWS: Work until 5 stitches remain, knit the next 3 stitches (and related yarn overs) together, work 1 English rib stitch as before and 1 edge stitch in garter stitch. INCREASE TIP (applies to sleeves): Work 3 stitches in 1 knit stitch as follows: Knit yarn over and stitch together but wait to slip stitch and yarn over off the needle, make 1 yarn over on right needle and knit stitch and yarn over together 1 more time, then slip knit stitch and yarn over knitted off left needle = 3 stitches. Increase alternately in first and last knit stitch on round. Do first increase in first knit stitch, second increase in last knit stitch etc. ---------------------------------------------------------- START THE PIECE HERE: ---------------------------------------------------------- JUMPER - SHORT OVERVIEW OF THE PIECE: Work body in the round, bottom up. Divide the piece for front piece and back piece and finish each part separately back and forth. Work sleeves in the round on double pointed needles/a short circular needle. Neck edge is worked in the round. BODY: Cast on 216-228-246-270-288-312 stitches on circular needle size 4 mm with 1 strand of each quality. Knit 1 round. Work rib (purl 2/knit 1). When rib measures 5 cm, work next round as follows: * Purl 2 together, make 1 yarn over, slip 1 stitch on to right needle purlwise *, work from *-* over all stitches = 144-152-164-180-192-208 stitches. Switch to circular needle size 5.5 mm. Work ENGLISH RIB in the round - read explanation above. Read ENGLISH RIB STITCH! When piece measures 37-38-39-40-41-42 cm, adjust so that next round is 1st round in English rib, divide the piece into front piece and back piece as follows: Insert 1 marker at the beginning of the round, decrease 1 stitch by knitting together 2 stitches + 1 yarn over, work as before over the next 70-74-80-88-94-102 stitches, insert 1 marker, decrease 1 stitch by knitting together 2 stitches + 1 yarn over, work as before over the last 70-74-80-88-94-102 stitches and cast on 1 new stitch at the end of the round. There are 71-75-81-89-95-103 stitches between markers for front and back pieces + 1 edge stitch at the end of the round. Now finish each part separately. BACK PIECE: Now work ENGLISH RIB back and forth – read explanation above (work first row from wrong side). When the first row has been worked, there are 73-77-83-91-97-105 stitches on needle. Work English rib with 1 edge stitch in garter stitch in each side. When piece measures 52-54-56-58-60-62 cm, cast off the middle 23-23-25-25-27-27 stitches for neck on next row from right side and finish each shoulder separately (25-27-29-33-35-39 stitches remain on each shoulder). On next row from right side decrease 2 stitches for neck – read DECREASE TIP = 23-25-27-31-33-37 stitches. Cast off with knit over knit and purl over purl when piece measures 56-58-60-62-64-66 cm (work yarn overs together with stitch they belong to). Work the other shoulder the same way. FRONT PIECE: Slip stitches back on circular needle size 5,5 mm, start casting on 1 new stitch at the end of the row (seen from right side), turn piece and work ENGLISH RIB back and forth as back piece until piece measures 48-50-50-52-52-54 cm. On next row from right side, slip the middle 15-15-17-17-19-19 stitches on a thread for neck and finish each shoulder separately (29-31-33-37-39-43 stitches remain on each shoulder). On next row from right side decrease 2 stitches for neck. Decrease like this every 8th-8th-10th-10th-12th-12th row 3 times in total = 23-25-27-31-33-37 stitches. Cast off with knit over knit and purl over purl when piece measures 56-58-60-62-64-66 cm (work yarn overs together with stitch they belong to). Work the other shoulder the same way. SLEEVES: Cast on 54-54-57-60-63-66 stitches on double pointed needles size 4 mm with 1 strand of each quality. Knit 1 round. Work rib (purl 2/knit 1). When rib measures 5 cm, work next round as follows: * Purl 2 together, make 1 yarn over, slip 1 stitch on to right needle purlwise *, work from *-* over all stitches = 36-36-38-40-42-44 stitches. Switch to double pointed needles size 5.5 mm. Work ENGLISH RIB in the round. When sleeve measures 20-20-18-16-14-12 cm, increase 2 stitches on next round - read INCREASE TIP. Work the increased stitches in English rib. On first round work the increased stitches without yarn overs. Increase like this every 10th round 7-8-9-9-9-9 times in total = 50-52-56-58-60-62 stitches. Cast off with knit over knit and purl over purl (work yarn overs together with stitches they belong to) when sleeve measures 47-46-45-43-42-40 cm. Work the other sleeve the same way. ASSEMBLY: Sew the shoulder seams. Sew in sleeves inside 1 edge stitch along armholes. NECK EDGE: Pick up approx. 84 to 114 stitches (including stitches on thread) on a short circular needle size 4 mm with 1 strand of each quality. Work yarn overs that belong to English rib stitches from thread together with stitch they belong to. Number of stitches must be divisible 3. Work rib (purl 2/knit 1). When rib measures 4 cm, cast off knit over knit and purl over purl. |
|
 |
|
Have you finished this pattern?Tag your pictures with #dropspattern #caramelmacchiatosweater or submit them to the #dropsfan gallery. Do you need help with this pattern?You'll find 27 tutorial videos, a Comments/Questions area and more by visiting the pattern on garnstudio.com. © 1982-2025 DROPS Design A/S. We reserve all rights. This document, including all its sub-sections, has copyrights. Read more about what you can do with our patterns at the bottom of each pattern on our site. |
|


With over 40 years in knitting and crochet design, DROPS Design offers one of the most extensive collections of free patterns on the internet - translated to 17 languages. As of today we count 320 catalogues and 12094 patterns translated into English (UK/cm). 12094
We work hard to bring you the best knitting and crochet have to offer, inspiration and advice as well as great quality yarns at incredible prices! Would you like to use our patterns for other than personal use? You can read what you are allowed to do in the Copyright text at the bottom of all our patterns. Happy crafting!
Post a comment to pattern DROPS 237-20
We would love to hear what you have to say about this pattern!
If you want to leave a question, please make sure you select the correct category in the form below, to speed up the answering process. Required fields are marked *.