Comments / Questions (33)
![]() Monique wrote:
Monique wrote:
Hi I am new to knitting, I crochet normally. In the increase section after working the short rows do you increase 17stitches in total? Because 124 (small) + 17 isn’t 152 st it’s 141? What does “(including the short rows)” mean? Also when you are knitting 60 then inc 1 it doesn’t line up evenly each round is that planned? Thanks for the help :)
22.01.2024 - 00:26DROPS Design answered:
Dear Monique, you have to increase a total of 17 times, you already increased 10 times with the short rows = 84 sts + 10x4= 124 sts, you have to increase 7 more times: 124 +4x7= 152 sts. The increases should always be worked on same place, ie the number of sts between increases will increase by 2 after every increase round., on 2nd time you will work 62 sts, 3rd time 64 sts... Happy knitting!
22.01.2024 - 10:39
![]() Ute Neumann wrote:
Ute Neumann wrote:
Für dieses Modell PIECE OF SKY, Größe XL, mit Drops 230-50 Modell as -169, Garngruppe C, Apaca Silk..benötige ich WIEVIEL GRAMM ????????????? Dazu hatten wir heute/03.11.23 schon Mailes gesendet...leider ohne Ergebnis Ute Neumann
03.11.2023 - 22:23DROPS Design answered:
Liebe Frau Neumann, die Garnmenge für jede Grösse finden Sie unten beim Kopfteil, so z.B. in S brauchen Sie 125 g DROPS Brushed Alpaca Silk / 25 g das Knäuel = 5 Knäuel werden in S gebraucht. Viel Spaß beim stricken!
06.11.2023 - 07:55
![]() ROBERT Maryse wrote:
ROBERT Maryse wrote:
Bonjour, je ne comprends pas comment faire les côtes mousse. 2rangs endroits???? Merci pour votre aide
29.09.2023 - 15:49DROPS Design answered:
Bonjour Mme Robert, pour former 1 côte mousse, on va tricoter 2 rangs endroit (1 rang endroit sur l'endroit + 1 rang endroit sur l'envers); au tout début, on va donc tricoter 6 rangs endroit au total pour avoir 3 côtes mousse. Dans cette vidéo, nous montrons comment tricoter ce col, cela pourra peut-être vous aider? Bon tricot!
02.10.2023 - 08:54
![]() Vivian Eersels wrote:
Vivian Eersels wrote:
Ik heb de verkorte naalden gedaan en begin nu met 1 recht , 1 meerderen , 62 recht.... Begin ik die rij eigenlijk in het midden van de schouder of op het einde ervan? Dit zijn 22 steken .
15.09.2023 - 22:40DROPS Design answered:
Dag Vivian,
Je verplaatst het begin van de naald tussen markeerdraad 2 en markeerdraad 3 en dan in tussen de 2 steken die tussen die markeerdraden in zitten.
18.09.2023 - 20:30
![]() Mari wrote:
Mari wrote:
I will do this one in M, but I wonder how I can increase the with of the collar, as I want it a little bit wider as a boatneck ?
08.04.2023 - 20:07DROPS Design answered:
Dear Mari, to increase the width you should cast on more stitches for the neck and then decrease more stitches, to reach the necessary yoke stitches (88), as long as your gauge matches the one in the pattern. You can see how to calculate a pattern here: https://www.garnstudio.com/lesson.php?id=25&cid=19 Take into account that this is still a round neck; to work a boat neck you should adapt your pattern to another one with a boat neck; you can find them in our collection by searching: "boat neck". Happy knitting!
08.04.2023 - 21:08
![]() Krystyna wrote:
Krystyna wrote:
Po markerze oznaczajacym poczatek okrazenia, gdzie umiescic nastepny marker? Po pierwszym oczku, czy po 47 oczku(rozmiar xl)
24.03.2023 - 19:56DROPS Design answered:
Witaj Krysiu, ten pierwszy marker oznaczający początek okrążenia powinien być w innym kolorze niż 4 pozostałe i będzie cały czas w tym samym miejscu. Teraz umieszczasz 4 markery, bez przerabiania (markery są między 2 oczkami) - pierwszy z nich jest za 1 oczkiem, kolejny za 47 oczkami i dalej wg opisu - patrz KARCZEK. Pozdrawiamy!
27.03.2023 - 10:12
![]() Ingrid Quan wrote:
Ingrid Quan wrote:
Bonjour, Comment savoir combien de pelotes seront nécessaires quand on choisit un modèle s'il vous plait? Merci beaucoup!
26.01.2023 - 14:23DROPS Design answered:
Bonjour Mme Quan, vous retrouverez systématiquement la quantité nécessaire pour chaque taille dans l'ordre indiqué, sous l'en-tête, autrement dit, il faut ici en taille S: 125 g DROPS Brushed Alpaca Silk/25 la pelote = 5 pelotes Brushed Alpaca Silk en taille S. Bon tricot!
26.01.2023 - 15:50
![]() Kieffer wrote:
Kieffer wrote:
Bonjour, Puis-je utiliser l'association de fils "DROPS Kid-Silk 16, violet foncé + DROPS Flora 09, améthyste" pour ce modèle ? Merci !
07.01.2023 - 08:58DROPS Design answered:
Bonjour Mme Kieffer, pour toute assistance au choix des couleurs, merci de bien vouloir contacter directement votre magasin DROPS, on pourra vous aider, même par mail ou téléphone. Bon tricot!
09.01.2023 - 08:56
![]() Kieffer wrote:
Kieffer wrote:
Bonjour ! \r\nPuis-je utiliser l\'association de fils \"DROPS Kid-Silk 16, violet foncé + DROPS Flora 09, améthyste\" pour ce modèle ? Je souhaiterai qu\'il soit plus dense !\r\nMerci pour votre retour,\r\nAlexia
07.01.2023 - 08:56
![]() Tiina wrote:
Tiina wrote:
Kaarrokken neulomisen aloitus, käsketään neuloa suljettuna neuleena mutta saman tien aloitetaan satulaolkapään teko muutamalla silmukalla edes takaisin. Laitetaanko muut silmukat odottamaan apulangalle. Lisäksi ohjeessa puhutaan kunnes molemmissa reunoissa on 10 lyhennettyä kerrosta. Neulotaanko ne siis yhtä aikaa vai kuinka?
20.11.2022 - 20:16DROPS Design answered:
Kun tehdään satulaolkapää, silmukoita ei siirretä apulangalle, vaan työ käännetään kerroksen keskellä (silmukat odottavat puikolla). Reunoilla tarkoitetaan satulaolkapään kumpaakin reunaa.
16.01.2023 - 18:02
Piece of Sky#pieceofskysweater |
|
 |
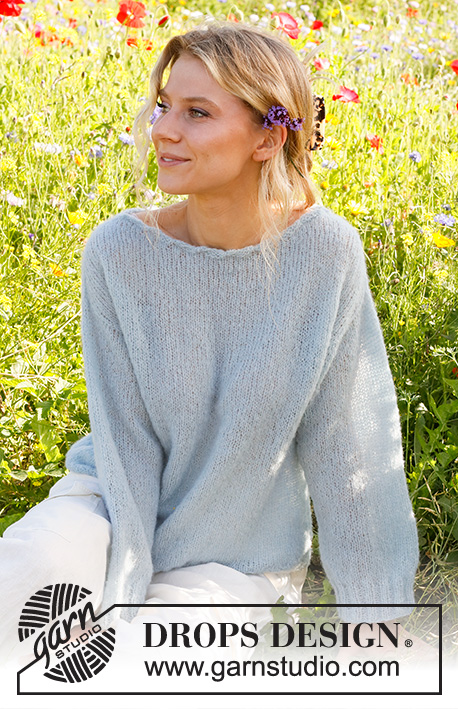 |
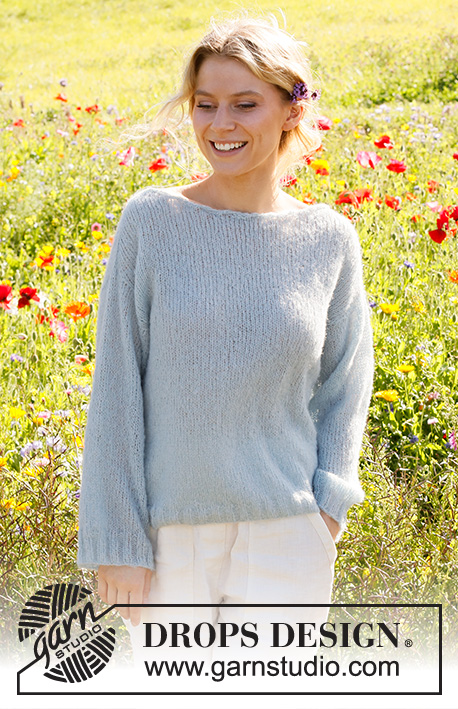
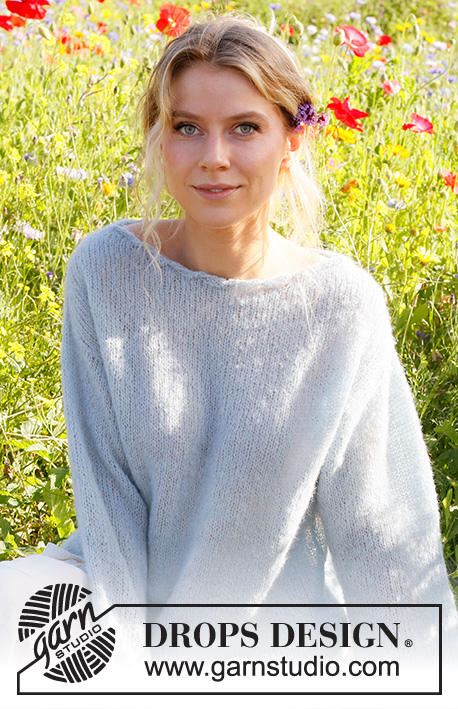
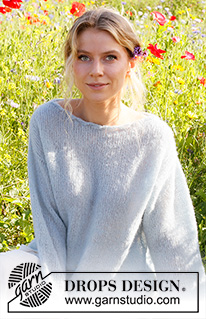
Knitted jumper in DROPS Brushed Alpaca Silk. The piece is worked top down, with increases for shoulders and decorative neck. Sizes S - XXXL.
DROPS 230-50 |
|
|
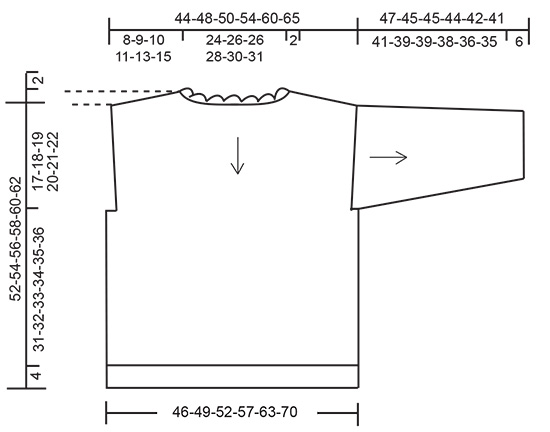
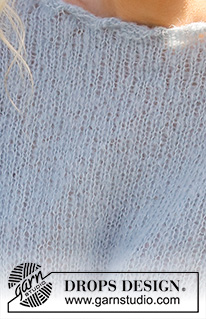
------------------------------------------------------- EXPLANATIONS FOR THE PATTERN: ------------------------------------------------------- RIDGE/GARTER STITCH (worked back and forth): Knit all rows. 1 ridge = knit 2 rows. INCREASE TIP (shoulders): RIGHT SIDE: Increase after markers 1 and 3 and before markers 2 and 4. BEFORE MARKER: The new stitch twists to the right. Use the left needle to pick up the strand between 2 stitches from the previous round/row, pick the strand up from the back and knit in the front loop. AFTER MARKER: The new stitch twists to the left. Use the left needle to pick up the strand between 2 stitches from the previous round/row, pick the strand up from the front and knit in the back loop. WRONG SIDE: Increase after markers 4 and 2 and before markers 3 and 1. BEFORE MARKER: The new stitch twists to the right. Use the left needle to pick up the strand between 2 stitches from the previous row, pick the strand up from the front and purl in the back loop. AFTER MARKER: The new stitch twists to the left. Use the left needle to pick up the strand between 2 stitches from the previous row, pick the strand up from the back and purl in the front loop. DECREASE TIP: All decreases are worked from the right side! Work 1 garter stitch, slip 1 stitch as if to knit, knit 1, pass the slipped stitch over the knitted stitch, work until there are 3 stitches left on the row, knit 2 together and 1 garter stitch. ------------------------------------------------------- START THE PIECE HERE: ------------------------------------------------------- JUMPER – SHORT OVERVIEW OF THE PIECE: The jumper is worked top down. The neck is worked back and forth, then the yoke in the round. The yoke is divided for the body and sleeves. Front and back pieces are worked separately back and forth with circular needle. The sleeves are worked back and forth with circular needle. NECK: Cast on 98-104-104-110-116-122 stitches with circular needle size 4 mm and DROPS Brushed Alpaca Silk. Work 3 RIDGES – read description above, back and forth. To create a rolling-edge work as follows from the right side: 1 edge stitch in garter stitch, knit 3, * twist the stitches on the right needle 360 degrees as follows: Take the strand to the right side and take the right needle under the piece and up to the right side, knit 6 *, work from *-* until there are 4 stitches left, knit 3 and 1 edge stitch in garter stitch. Now join the piece and continue in the round. Knit 1 round and decrease 14-16-10-12-14-16 stitches evenly spaced = 84-88-94-98-102-106 stitches. Insert 1 marker at the beginning of the round; the yoke is measured from this marker. YOKE: Change to circular needle size 5 mm. Insert 4 markers without working the stitches and insert them between 2 stitches: Count 1 stitch (shoulder-stitch), insert marker-1, count 40-42-45-47-49-51 stitches (back piece), insert marker-2, count 2 stitches (shoulder-stitches), insert marker-3, count 40-42-45-47-49-51 stitches (front piece), insert marker-4, there is 1 stitch left (shoulder-stitch). Now work short rows in stocking stitch over one shoulder AT THE SAME TIME as you increase 2 stitches for the shoulder on each row – read INCREASE TIP, as follows: Work 3 stitches past marker-1 – remember to increase on the shoulder, turn, tighten the strand and work 3 stitches past marker-4 – remember to increase, turn, tighten the strand, * work 3 stitches past the previous short row – remember to increase, turn, tighten the strand, work 3 stitches past the previous short row on the other side, turn, tighten the strand *, work from *-* until you have worked 10 short rows on each side, finish the last row at the beginning of the round (between the 2 stitches between markers 1 and 4). You have increased 10 stitches at each marker. Cut the strand. Move the start of the round to between the 2 stitches between markers 2 and 3 and work short rows here in the same way as on the first shoulder. When the short rows are finished, there are 124-128-134-138-142-146 stitches. REMEMBER THE KNITTING TENSION! Work the next round as follows (the start of the round is still between markers 2 and 3): Knit 1, increase 1 stitch for the shoulder, knit 60-62-65-67-69-71, increase 1 stitch for the shoulder, knit 2, increase 1 stitch for the shoulder, knit 60-62-65-67-69-71, increase 1 stitch for the shoulder, knit 1. Continue working and increase for the shoulders each round. The increased stitches are worked in stocking stitch. When you have increased 17-19-21-24-28-33 times (including the short rows) there are 152-164-178-194-214-238 stitches. The piece measures approx. 8-9-10-11-13-15 cm. Now divide for the front and back pieces as follows: Knit 1 stitch and place it on a thread for the sleeve, work 74-80-87-95-105-117 stitches in stocking stitch (front piece), knit 2, place these 2 stitches on a thread for the sleeve, work 74-80-87-95-105-117 stitches in stocking stitch and place these stitches on a thread for the back piece, knit 1 and place this stitch on the thread for the sleeve. Cut the strand. FRONT PIECE: = 74-80-87-95-105-117 stitches. Continue back and forth with stocking stitch and 1 edge stitch in GARTER STITCH – read description above, on each side. The front is measured from the division. When the piece measures 4 cm, decrease 1 stitch on each side – read DECREASE TIP! Decrease like this every 4 cm a total of 3-3-4-4-4-4 times = 68-74-79-87-97-109 stitches. When the piece measures 17-18-19-20-21-22 cm from the division, cast on 6 stitches at the end of the next 2 rows = 80-86-91-99-109-121 stitches. Continue with stocking stitch and 1 stitch in garter stitch on each side. When the piece measures approx. 31-32-33-34-35-36 cm from the 6 cast-on stitches, knit 1 row from the right side and increase 6-8-11-11-13-13 stitches evenly spaced = 86-94-102-110-122-134 stitches. Change to circular needle size 4 mm and work rib from the wrong side as follows: 1 garter stitch, knit 1, * purl 2, knit 2 *, work from *-* until there are 4 stitches left, purl 2, knit 1 and 1 garter stitch. Cast off when the rib measures 4 cm. BACK PIECE: Place the 74-80-87-95-105-117 stitches for the back piece on circular needle size 5 mm and work in the same way as the front piece. SLEEVES: Start at the cast-on stitches for the armhole on the back piece. Using circular needle size 5 mm, work as follows from the right side: Knit up 1 stitch in each of the 6 cast-on stitches under sleeve, knit up 23-25-26-28-30-31 stitches as far as the 2 stitches on the thread (shoulder-stitches), place these 2 stitches on the needle and knit them, knit up 23-25-26-28-30-31 stitches to the cast-on stitches under sleeve on the front piece and knit up 1 stitch in each of these 6 stitches = 60-64-66-70-74-76 stitches. Work stocking stitch back and forth, with 1 edge stitch in garter stitch on each side. When the sleeve measures 4 cm, decrease 1 stitch on each side. Decrease like this every 12-12-8-6-4-4 cm a total of 3-3-4-5-7-7 times = 54-58-58-60-60-62 stitches. When the sleeve measures 41-39-39-38-36-35 cm, knit 1 row from the right side and increase 0-0-0-2-2-0 stitches evenly spaced = 54-58-58-62-62-62 stitches. Change to circular needle size 4 mm and work rib from the wrong side as follows: 1 garter stitch, * knit 2, purl 2 *, work from *-* and 1 garter stitch. Cast off when the rib measures 6 cm. The sleeve measures approx. 47-45-45-44-42-41 cm. Work the other sleeve in the same way, but starting at the cast-on stitches for the armhole on the front piece. ASSEMBLY: Sew the sleeve and side seams in one go, inside the 1 edge stitch. Sew the neck together mid-back, inside the 1 edge stitch. |
|
|
|
Have you finished this pattern?Tag your pictures with #dropspattern #pieceofskysweater or submit them to the #dropsfan gallery. Do you need help with this pattern?You'll find 31 tutorial videos, a Comments/Questions area and more by visiting the pattern on garnstudio.com. © 1982-2025 DROPS Design A/S. We reserve all rights. This document, including all its sub-sections, has copyrights. Read more about what you can do with our patterns at the bottom of each pattern on our site. |
|






Post a comment to pattern DROPS 230-50
We would love to hear what you have to say about this pattern!
If you want to leave a question, please make sure you select the correct category in the form below, to speed up the answering process. Required fields are marked *.