
Popular categories
Looking for a yarn?


Comments / Questions (6)
![]() DESBORDES wrote:
DESBORDES wrote:
Bonjour, Pour les augmentations Empiècement et Manches, n'y aurait-il pas inversion ? Augmentations tricotées en A1 pour l'empiècement (dos/devant) et en jersey pour les manches ? L'inverse est indiqué. Merci de votre réponse.
04.12.2023 - 11:21DROPS Design answered:
Bonjour Mme Desbordes, tout à fait, on doit tricoter les augmentations des épaules en suivant A.1 et non en jersey, et celles des manches en jersey et pas en A.1, merci pour l'info, la correction va suivre. Bon tricot!
04.12.2023 - 16:10
![]() Wil Kerkmeer wrote:
Wil Kerkmeer wrote:
Extra info ik kom aam 8 cm
10.03.2021 - 07:47
![]() Wil wrote:
Wil wrote:
Heb ik gedaan,ik kwam in de breedte wel uit, niet in de lengte en hoopte door mijn best te doen iets losser nog te breien het te kunnen oplossen. Wat adviseer je mij? Grotere maat of grotere naald? Vrgr
10.03.2021 - 07:42DROPS Design answered:
Dag Wil,
Als je in de breedte wel uitkomt, maar in de lengte niet, dan blijft het probleem als je een grotere maat kiest, want dan wordt je kledingstuk namelijk veel breder. Wellicht is het een oplossing om een paar naalden zonder meerderingen te breien om tot de juiste lengte van de zadelschouder te komen.
18.03.2021 - 10:54
![]() Wil wrote:
Wil wrote:
Bij meerderen zadelschouders in xl, kom ik bij het maken van 14 toeren vanaf mijn markeerdraad lang niet aan 9cm. Wat te doen?. Vrgr.
09.03.2021 - 09:22DROPS Design answered:
Dag Wil,
Heb je van te voren een proeflapje gemaakt en de stekenverhouding gecontroleerd? Bij een stekenverhouding van 16 naalden in de hoogte is 10 cm, zouden 14 naalden namelijk ongeveer 9 cm moeten zijn.
09.03.2021 - 20:25
![]() Karina wrote:
Karina wrote:
Soft Cardigan
08.01.2021 - 01:02
![]() Marioli wrote:
Marioli wrote:
Chaqueta de aspecto muy confortable y bonita
07.01.2021 - 23:02
|
|||||||||||||||||||||||||
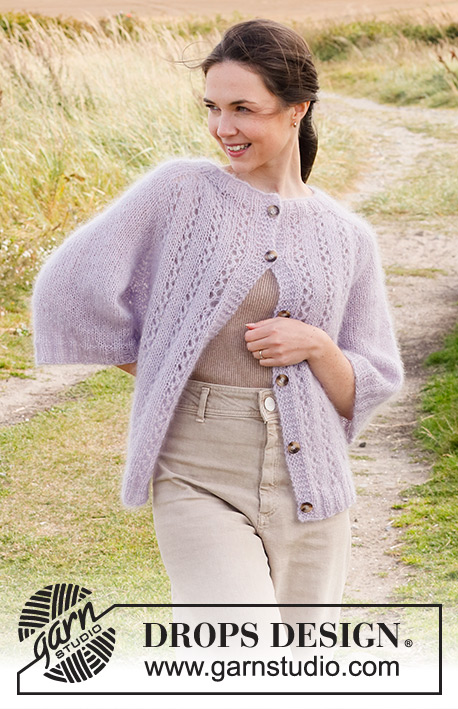
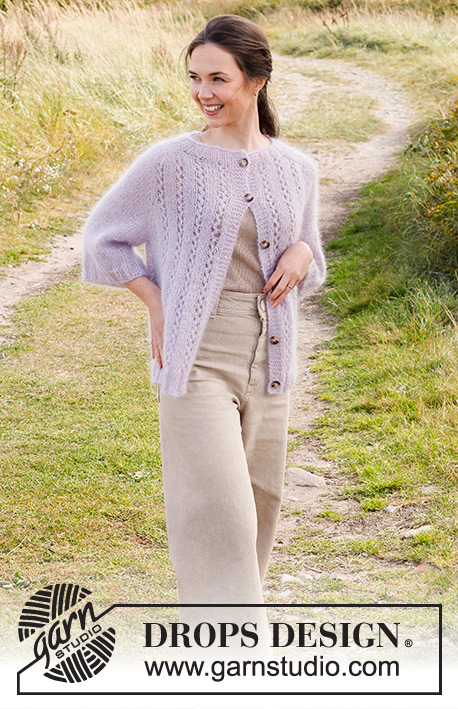
Lost in Lavender Cardigan#lostinlavendercardigan |
|||||||||||||||||||||||||
 |
 |
||||||||||||||||||||||||
Knitted jacket with saddle-shoulders and lace pattern in 3 strands DROPS Kid-Silk. The piece is worked top down. Sizes S - XXXL.
DROPS 222-2 |
|||||||||||||||||||||||||
|
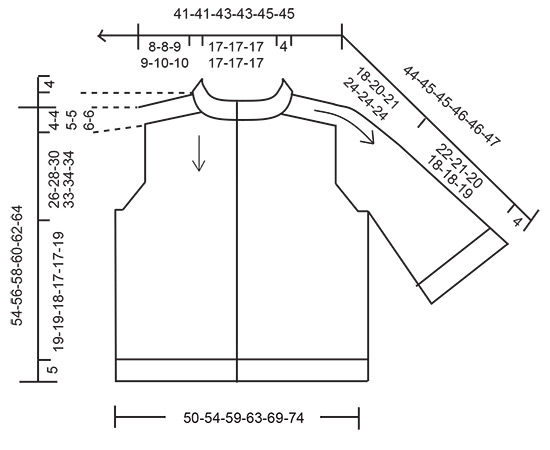
------------------------------------------------------- EXPLANATIONS FOR THE PATTERN: ------------------------------------------------------- PATTERN: See diagram A.1. RIDGE/GARTER STITCH (worked back and forth): Knit all rows. 1 ridge in height = Knit 2 rows. INCREASE TIP-1 (evenly spaced): To work out how to increase evenly, count the total number of stitches on the needle (e.g. 76 stitches) minus the bands (e.g. 10 stitches) and divide the remaining stitches by the number of increases to be made (e.g. 6) = 11. In this example, increase by making 1 yarn over after each 11th stitch. Do not increase on bands. On the next row work the yarn overs twisted to avoid holes. INCREASE TIP-2 (from the right side): BEFORE MARKER: The new stitch will twist to the right. Use the left needle to pick up the back strand between 2 stitches from the previous round and knit in the front loop. AFTER MARKER: The new stitch will twist to the left. Use the left needle to pick up the front strand between 2 stitches from the previous round and knit in the back loop. INCREASE TIP-3 (from the wrong side): BEFORE MARKER: The new stitch will twist to the right. Use the left needle to pick up the front strand between 2 stitches from the previous round and purl in the back loop. AFTER MARKER: The new stitch will twist to the left. Use the left needle to pick up the back strand between 2 stitches from the previous round and purl in the front loop. BUTTONHOLES: Work buttonholes on the right band (when the garment is worn). Work from the right side when there are 3 stitches left on the row as follows: Make 1 yarn over, knit 2 together and knit 1. On the next row (wrong side), knit the yarn over to leave a hole. The first buttonhole is worked when the rib on the neck measures approx. 1½-2 cm. Then work the other 5-5-6-6-6-6 buttonholes with approx. 8½ 9-8-8½-8½-9 cm between each one. INCREASE TIP-4 (sleeves): Start 1 stitch before the marker under the sleeve. Make 1 yarn over, knit 2 (marker thread sits between these 2 stitches), 1 yarn over. On the next round knit the yarn over twisted to avoid a hole. KNITTING TIP: Because the whole garment is worked with 3 strands; in some sizes it will be necessary to use the strand from both the inside and outside of the remaining skein. CASTING-OFF TIP: To avoid the cast-off edge being tight you can cast off with a larger size needle. If the edge is still tight, make 1 yarn over after approx. each 4th stitch at the same time as casting off; the yarn overs are cast off as normal stitches. ------------------------------------------------------- START THE PIECE HERE: ------------------------------------------------------- JACKET – SHORT OVERVIEW OF THE PIECE. The jacket is worked back and forth with circular needle, top down. Stitches are increased for the shoulders, then stitches are increased for the sleeves. The yoke is divided for the body and sleeves and the body is continued back and forth with circular needle. The sleeves are worked in the round, top down. The piece is worked with 3 strands of Kid-Silk – read KNITTING TIP. NECK: Cast on 76-76-80-80-84-84 stitches (including 5 band stitches on each side) with circular needle size 5 mm and 3 strands Kid-Silk. Purl 1 row from the wrong side. The next row is worked as follows – from the right side: 5 band stitches in GARTER STITCH – see description above, * knit 2, purl 2 *, work from *-* until there are 7 stitches left on the row, knit 2 and 5 band stitches in garter stitch. Work BUTTONHOLES on the right band – read description above. Work this rib for 4 cm; on the last row increase 6 stitches evenly spaced – read INCREASE TIP-1 = 82-82-86-86-90-90 stitches. Change to circular needle size 6 mm. YOKE: Insert a marker thread at the beginning of the row – THE PIECE IS NOW MEASURED FROM HERE! In addition, insert 4 other markers as described below – without working the stitches and each marker is inserted between 2 stitches. These markers are used when increasing for the saddle-shoulders. Marker 1: Count 17-17-17-17-17-17 stitches (= front piece), insert marker before the next stitch. Marker 2: Count 12-12-14-14-16-16 stitches from marker 1 (= shoulder), insert marker before the next stitch. Marker 3: Count 24-24-24-24-24-24 stitches from marker 2 (= back piece), insert marker before the next stitch. Marker 4: Count 12-12-14-14-16-16 stitches from marker 3 (= shoulder), insert marker before the next stitch. There are 17-17-17-17-17-17 stitches left on the front piece after marker 4. Allow the markers to follow your work onwards; they are used when increasing. INCREASE FOR SHOULDERS (back and forth, increasing on each row): Read the whole section before continuing! The piece is continued with A.1 on the front pieces (= 2 repeats of 6 stitches in width) and back piece (= 4 repeats of 6 stitches in width) and stocking stitch over the shoulders/sleeves. The 5 band stitches on each side are worked in garter stitch. AT THE SAME TIME on the first row from the right side increase 4 stitches for the saddle-shoulders as follows: Increase BEFORE markers 1 and 3 and AFTER markers 2 and 4 – read INCREASE TIP-2. You are only increasing on the front and back pieces, the number of stitches on the shoulders remains the same. On the next row from the wrong side increase 4 stitches as follows: Increase BEFORE markers 4 and 2 and AFTER markers 3 and 1 – read INCREASE TIP-3. In other words you increase on EVERY row, and increase differently on the right and wrong side - to give neat increases. Continue this pattern and increase in the same way on every row (both from the right and wrong side) a total of 12-12-14-14-16-16 times = 130-130-142-142-154-154 stitches (the increased stitches are worked in A.1). REMEMBER THE KNITTING TENSION! After the last increase, the piece measures 8-8-9-9-10-10 cm from the marker on the neck. Now increase for the sleeves as described below. INCREASE FOR SLEEVES: NOTE! Do not increase in size XXXL, continue with increases for yoke in this size. SIZES S-M-L-XL-XXL: Work stocking stitch and A.1 as before. AT THE SAME TIME, on the next row, increase 4 stitches for the sleeves as follows: Increase AFTER markers 1 and 3 and BEFORE markers 2 and 4 – remember INCREASE TIP-2 You are only increasing on the sleeves, the number of stitches on the front and back pieces remains the same. The increased stitches are worked into stocking stitch. Increase like this every 2nd row (i.e. each row from the right side) a total of 5-4-5-4-3 times = 150-146-162-158-166 stitches. The piece measures approx. 14-12-15-13-13 cm from the marker on the neck. Now increase for the yoke as described below. ALL SIZES: INCREASES FOR YOKE: Move each marker so they are inserted in a stitch (not between 2 stitches). Move the 4 markers so each marker sits in the outermost sleeve stitches on each side. There are now 20-18-22-18-20-14 stitches between the marker-stitches on each sleeve. On the next row from the right side increase 8 stitches by increasing both before and after all 4 marker-stitches – remember INCREASE TIP-2. You are now increasing on both the front and back pieces and on the sleeves, and the increased stitches are worked into A.1 on the body and in stocking stitch on the sleeves. Increase like this every 2nd row (i.e. each row from the right side) a total of 9-12-12-15-16-19 times = 222-242-258-278-294-306 stitches. When all the increases are finished, the piece measures approx. 26-28-30-33-34-34 cm from the marker on the neck. If the piece is shorter than this, continue working, without further increases to the correct length. On the next row from the right side, divide for the body and sleeves as follows: Work the first 38-41-43-46-49-52 stitches (= left front piece), place the next 40-44-48-52-54-54 stitches on a thread for the sleeve, cast on 4-4-6-6-8-10 stitches under the sleeve, work 66-72-76-82-88-94 stitches (= back piece), place the next 40-44-48-52-54-54 stitches on a thread for the sleeve, cast on 4-4-6-6-8-10 stitches under the sleeve, work the last 38-41-43-46-49-52 stitches (= right front piece). Body and sleeves are finished separately. BODY: = 150-162-174-186-202-218 stitches. Continue the pattern, with 5 band stitches in garter stitch on each side and A.1 over the other stitches; the stitches which do not fit into the pattern on each side are worked in stocking stitch. When the piece measures 19-19-18-17-17-19 cm from the division, knit 1 row from the right side where you increase 2 stitches = 152-164-176-188-204-220 stitches. Change to circular needle size 5 mm. The next row is worked as follows from the wrong side: 5 band stitches in garter stitch, * purl 2, knit 2 *, work from *-* until there are 7 stitches left, purl 2 and 5 band stitches in garter stitch. Continue this rib for 5 cm. Loosely cast off with knit over knit and purl over purl, read CASTING-OFF TIP. The jacket measures approx. 54-56-58-60-62-64 cm from the shoulder. SLEEVE: Place the 40-44-48-52-54-54 stitches from the thread on the one side of the piece on short circular needle/double pointed needles size 6 mm. In addition, knit up 1 stitch in each of the 4-4-6-6-8-10 new stitches under the sleeve = 44-48-54-58-62-64 stitches. Insert 1 marker in the middle of the new stitches under the sleeve; it will be used when increasing under the sleeve. Work stocking stitch in the round. When the piece measures 3 cm from the division, increase 1 stitch on each side of the marker – read INCREASE TIP-4. Repeat the increase every 3 cm a total of 6 times in all sizes = 56-60-66-70-74-76 stitches. Continue with stocking stitch until the sleeve measures 22-21-20-18-18-19 cm from the division. Knit 1 round where you increase 0-0-2-2-2-0 stitches evenly spaced = 56-60-68-72-76-76 stitches. Change to double pointed needles size 5 mm. Work rib (knit 2, purl 2) for 4 cm. Cast off with knit over knit and purl over purl – remember CASTING-OFF TIP. The sleeve measures 26-25-24-22-22-23 cm from the division. Work the other sleeve in the same way. ASSEMBLY: Sew the buttons onto the left band. |
|||||||||||||||||||||||||
Diagram explanations |
|||||||||||||||||||||||||
|
|||||||||||||||||||||||||

|
|||||||||||||||||||||||||
|
|||||||||||||||||||||||||

|
|||||||||||||||||||||||||
Have you finished this pattern?Tag your pictures with #dropspattern #lostinlavendercardigan or submit them to the #dropsfan gallery. Do you need help with this pattern?You'll find 30 tutorial videos, a Comments/Questions area and more by visiting the pattern on garnstudio.com. © 1982-2025 DROPS Design A/S. We reserve all rights. This document, including all its sub-sections, has copyrights. Read more about what you can do with our patterns at the bottom of each pattern on our site. |
|||||||||||||||||||||||||


With over 40 years in knitting and crochet design, DROPS Design offers one of the most extensive collections of free patterns on the internet - translated to 17 languages. As of today we count 314 catalogues and 11820 patterns translated into English (UK/cm). 11820
We work hard to bring you the best knitting and crochet have to offer, inspiration and advice as well as great quality yarns at incredible prices! Would you like to use our patterns for other than personal use? You can read what you are allowed to do in the Copyright text at the bottom of all our patterns. Happy crafting!
Post a comment to pattern DROPS 222-2
We would love to hear what you have to say about this pattern!
If you want to leave a question, please make sure you select the correct category in the form below, to speed up the answering process. Required fields are marked *.