
Categorie popolari
State cercando un filato?


Commenti / Domande (84)
![]() Kim Oliver ha scritto:
Kim Oliver ha scritto:
At body increases every 10th row - I have done the arithmetic and don't think these should include side increases, just those on either side of the cables? Thanks for your ongoing help, Kim
11.07.2019 - 14:29DROPS Design ha risposto:
Dear Mrs Oliver, on body you increase first in the P-sections you first decreased (= 6 sts increased), then increase every 10th row on each side of the cables: 18 sts increased a total of 7 times. There were 144-160-172 sts + 6 + (18 sts x 7) = 276-292-304 sts in size S-M-L. Happy knitting!
11.07.2019 - 14:55
![]() Kim Oliver ha scritto:
Kim Oliver ha scritto:
Hallo again, just checking the pattern correction for the body. I cannot see what is different in the correction. Do I work straight for 4cm before beg my decreases? Many thanks, Kim
07.07.2019 - 13:46DROPS Design ha risposto:
Dear Kim, our pattern texts are updated immediately as there appears some correction - thats why you cant see any difference, i.e. pattern is correct, tab with correction details is for info what was corrected. Decreasing: after dividing piece you just continue with knitting pattern as before until piece measures 4 cm (from dividing); afterwards you start decreasing. Happy knitting!
07.07.2019 - 22:09
![]() Kim Oliver ha scritto:
Kim Oliver ha scritto:
Hello looking for advice with this pattern. I am knitting the smallest size and have charted the instructions starting at: ‘Now work pattern as follows from RS: 4 band sts in garter st, P 1, A.1 (= 4 sts) 2-2-2-3-3-3 times, P…’ the instructions that indicate where the garment is divided into sections, such as left front and then sleeve do not appear to be correct. Additionally, the instructions for increasing refer to A2 on raglan body and sleeve however if you read the pattern as
19.06.2019 - 15:10DROPS Design ha risposto:
Dear Mrs Oliver, in size S you will work and increase for raglan as follows: 4 band sts in garter st, P1, A.1 (= 4 sts) 2 times, P1, K1, increase for raglan on front piece here (= left front piece), A.2 (= 8 sts on 1st row), increase on sleeve here, K14 increase on sleeve here (= sleeve), A.2, increase on back piece here K1, P1, A.1 5 times, P1, K1, increase on back piece here (= back piece), A.2, K14, increase on sleeve here (= sleeve), A.2, increase on front piece hereK1, P1, A.1 2 times, P1, 4 band sts in garter st. - see increase on body and sleeve for your size. Happy knitting!
19.06.2019 - 15:43
![]() Kim Oliver ha scritto:
Kim Oliver ha scritto:
Thank you. I understand the way to read the diagram - it is the stitches in between that I am unsure about. On the WS how should I interpret the pattern? Do I use the same instructions and repeat the stitches except for the changes to diagram stitches? Should I be purling where I previously knitted? Thanks! Kim.
06.05.2019 - 16:00DROPS Design ha risposto:
Dear Mrs Oliver, the stitches between diagrams should be worked with K over K and P over P, ie where you worked at the end of RS row: P1, band sts, you will work band sts, K1 - and the sts worked K from RS will be P from WS. Happy knitting!
06.05.2019 - 16:05
![]() Kim Oliver ha scritto:
Kim Oliver ha scritto:
Yoke: 'Work one row from WS same way' - how do I read the instructions for the stitches between the chart. Do I begin : Band, P1, A1 - or do I change all purl stitches between the chart to knit?
06.05.2019 - 12:30DROPS Design ha risposto:
Dear Mrs Oliver, from WS work the diagrams reading from the left towards the right (= 2nd row = WS), and K over K, P over P remaining stitches (with the 4 front band sts in garter st as before). Read more about diagrams here. Happy knitting!
06.05.2019 - 14:48
![]() Kim Oliver ha scritto:
Kim Oliver ha scritto:
Yoke: First set of elevations, then a purl row. My garment suggests the next row should be knit, not purl after elevations have been worked. Am I wrong? Thanks - Kim
30.04.2019 - 15:33DROPS Design ha risposto:
Dear Mrs Oliver, the last short row on elevation is worked over 24-24-28-28-32-32 sts from WS, then turn and work from RS to the end of the row, turn and purl next row from WS over all sts (with 4 sts in garter st on each side), next row is now from RS. Happy knitting!
30.04.2019 - 16:52
![]() Bonita Poirier ha scritto:
Bonita Poirier ha scritto:
Please disregard previous question. I tried to delete it but could not. Thank you!
04.04.2019 - 19:22
![]() Bonita Poirier ha scritto:
Bonita Poirier ha scritto:
I have tried to alter the pattern to a size between what is given in the instructions. I am now at the part where I need to divide for sleeves. I am unable to tell from pictures whether or not the pattern on the raglan continues down the sleeve. I.e. when setting aside the stitches for the sleeve, are the pattern raglan stitches included? One raglan - from the front, or back or both?
04.04.2019 - 18:32DROPS Design ha risposto:
Dear Mrs Poirier, when you divide piece for sleeves the raglan stitches will be divided in two, one part for sleeve and one part for front/back pieces, ie you divide in the middle of the raglan stitches. Happy knitting!
05.04.2019 - 09:10
![]() Ingrid ha scritto:
Ingrid ha scritto:
In A1, the K between cables instead of P, is this every 11th row until the end? Thank you
08.02.2019 - 10:31DROPS Design ha risposto:
Dear Ingrid, correct, you will K the sts between cables every 11 row, ie every time you work row 11 in A.1 to the end. Happy knitting!
08.02.2019 - 11:59
![]() Chris Durb ha scritto:
Chris Durb ha scritto:
BODY: Inc 2 sts every other row 4-4-5-6-7-9 times and 1 st every other row 11-14-14-14-15-14 times ; Do I knit all 2 sts increase rows (row 1, 3, 5, 7 for Small) before I start the inc 1 st (for example starting with row 9 for small? Or am I to alternate 2 sts inc with the 1 st increase rows?
27.01.2019 - 22:18DROPS Design ha risposto:
Dear Mrs Durb, on the first increase row in size S, inc 2 sts on front pieces + on back piece and only 1 st on sleeves (=12 sts inc) 1 time, then inc 1 st on body and sleeves (= 8 sts inc) on every other round. Happy knitting!
28.01.2019 - 12:03
|
|||||||||||||||||||
Lobelia#lobeliacardigan |
|||||||||||||||||||
 |
 |
||||||||||||||||||
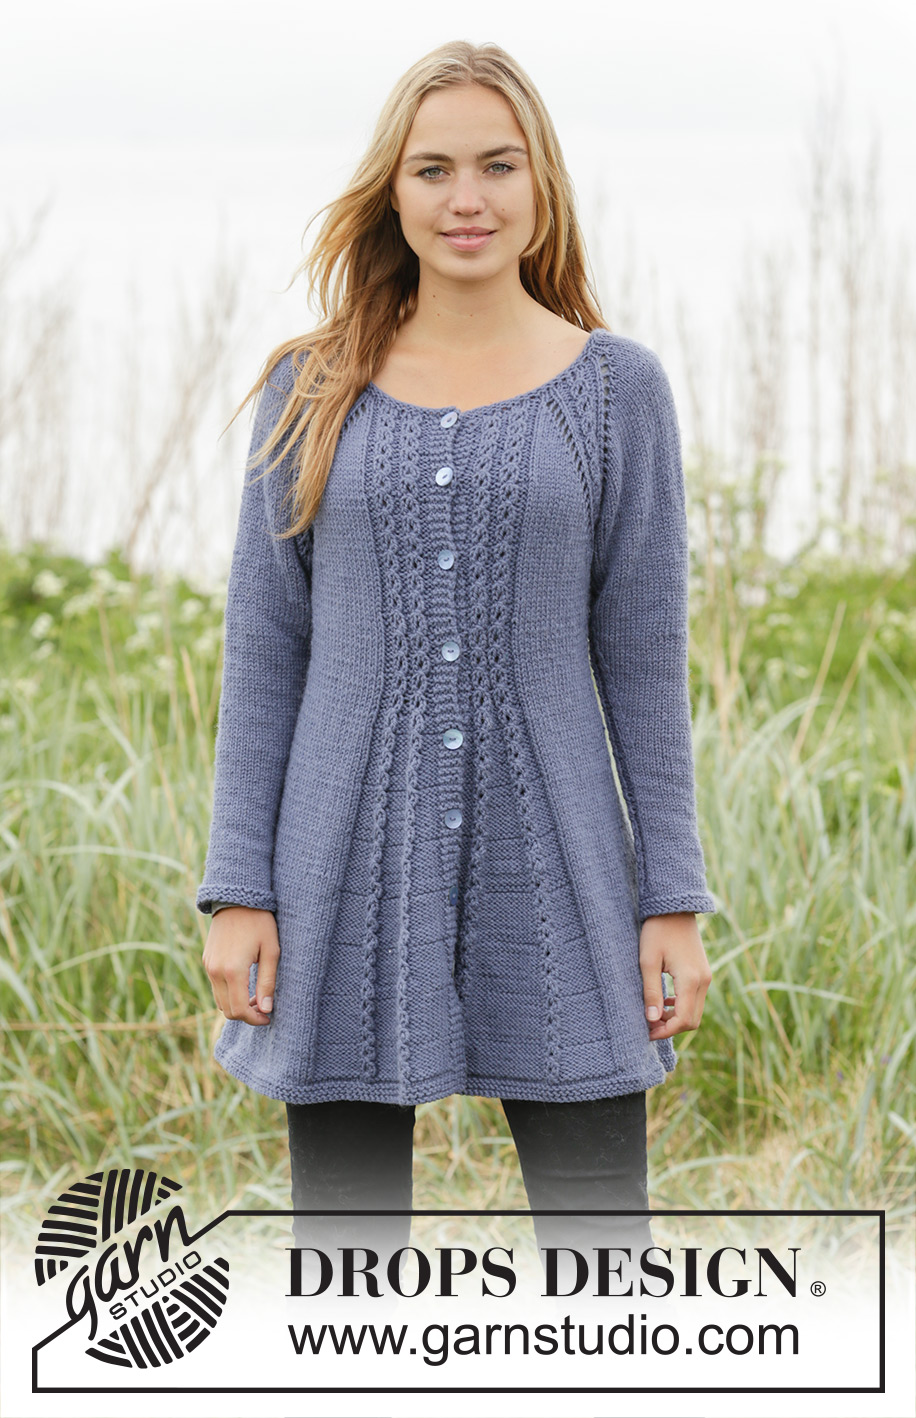
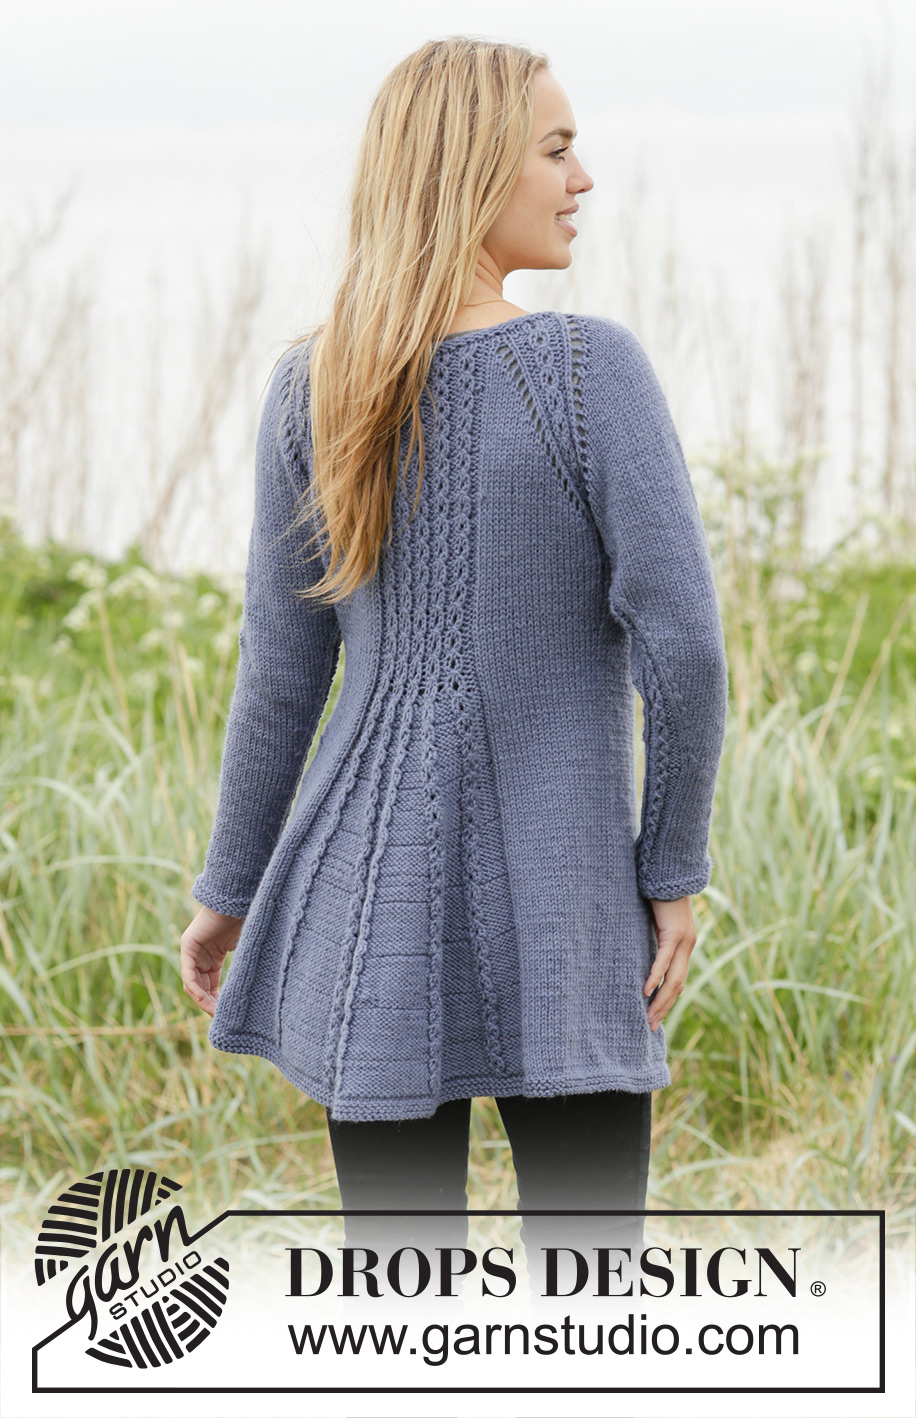
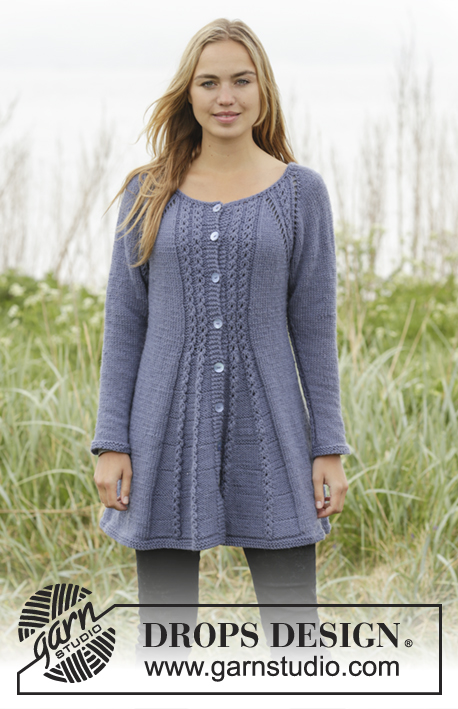
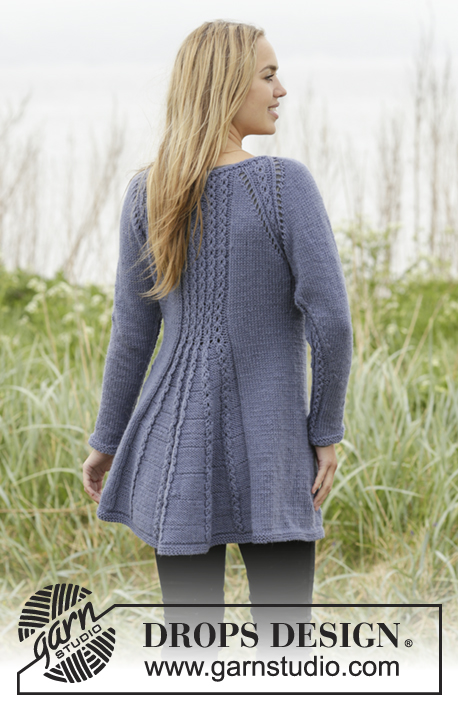
Giacca DROPS ai ferri, con raglan e trecce, lavorata dall’alto verso il basso (top down), in "Nepal". Taglie: Dalla S alla XXXL.
DROPS 171-14 |
|||||||||||||||||||
|
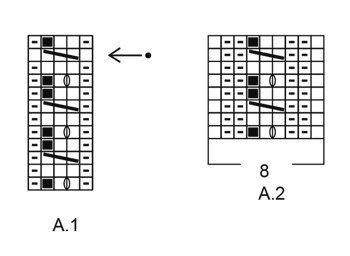
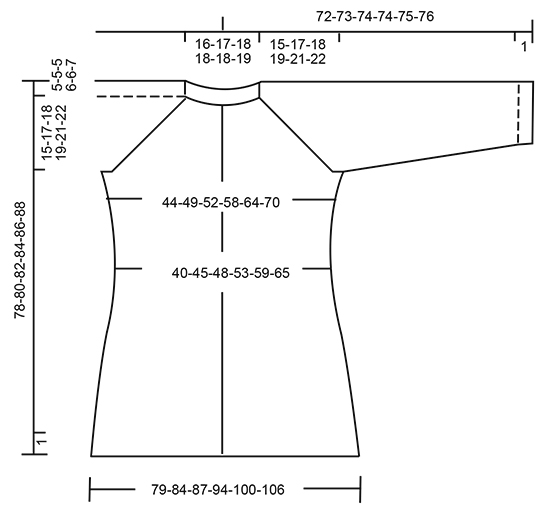
PUNTO LEGACCIO (in tondo): Lavorare * 1 giro a dir e 1 giro a rov *, ripetere da *-*. 1 costa a legaccio = 2 giri PUNTO LEGACCIO (avanti e indietro sui ferri): Lavorare tutti i ferri a dir. 1 costa a legaccio = 2 ferri a dir. MOTIVO: Vedere i diagrammi A.1 e A.2. I diagrammi mostrano tutti i ferri del motivo, visti sul diritto del lavoro. SUGGERIMENTO PER GLI AUMENTI -1 (per aumentare a intervalli regolari): Per calcolare ogni quante m aumentare, sottrarre dal numero complessivo delle m (p.es 97 m) le m dei bordi davanti (p.es 8 m) e dividere il risultato per il numero di aumenti da fare (p.es 20) = 4,4. Quindi, in questo esempio, bisogna aumentare 1 m ogni 4 e 5 m in modo alternato (e non aumentare sulle m dei bordi davanti). SUGGERIMENTO PER GLI AUMENTI-2 (davanti e dietro): Aumentare sempre sul diritto del lavoro. Per aumentare 1 m rov, fare 1 m gettata. Al ferro successivo, lavorare la m gettata a dir ritorto (quindi nel filo dietro e non in quello davanti) per evitare che si formi un buco. RAGLAN sulle MANICHE: Aumentare per le maniche 1 m dopo /prima del diagramma A.2 facendo 1 m gettata (= 2 m aumentate su ogni manica). Al ferro successivo, lavorare le m gettate a rov perché si formino dei buchi. RAGLAN sul DAVANTI E DIETRO: Aumentare 2 m prima /dopo il diagramma A.2 sui davanti e dietro (= 8 m aumentate in tutto), poi aumentare 1 m prima/dopo il diagramma A.2 sui davanti e dietro (= 4 m aumentate in tutto). Aumentare 2 m prima del diagramma A.2 come segue: Lavorare finché non rimane 1 m prima del diagramma A.2, 1 m gettata, 1 m dir, 1 m gettata. Aumentare 2 m dopo il diagramma A.2 come segue: 1 m gettata, 1 m dir, 1 m gettata. ATTENZIONE: Al ferro successivo lavorare a rov le m gettate più vicine al diagramma A.2 per formare dei buchi. Lavorare le altre m gettate a rov ritorto per evitare che si formino i buchi. Aumentare 1 m prima/dopo il diagramma A.2 come segue: per aumentare 1 m, fare 1 m gettata. Al ferro successivo, lavorare la m gettata a rov per formare un buco. SUGGERIMENTO PER LE DIMINUZIONI -1 (DAVANTI e DIETRO): Lavorare finché non rimangono 4 m prima del segno, 2 m insieme a dir, 4 m dir (il segno si trova tra queste m), passare la m successiva a dir senza lavorarla, 1 m dir, accavallare la m passata sulla m lavorata. Ripetere sull’altro lato (= 4 m diminuite). SUGGERIMENTO PER LE DIMINUZIONI -2 (maniche): Lavorare finché non rimangono 2 m prima del diagramma A.2, 2 m insieme a dir, diagramma A.2, passare la m successiva a dir senza lavorarla, 1 m dir, accavallare la m passata sulla m lavorata (= 2 m diminuite). ASOLE: Intrecciare le m per le ASOLE sul bordo davanti destro. Quindi sul bordo davanti alla fine del ferro, visto sul diritto del lavoro. 1 asola = lavorare insieme a dir la 3a e la 4a m dal bordo e fare 1 m gettata. Intrecciare le m per le asole quando il lavoro misura (dall’avvio delle m e lungo il bordo davanti): TAGLIA S: 2, 11, 20, 29, 38 e 47 cm. TAGLIA M: 2, 11, 20, 29, 38 e 47 cm. TAGLIA L: 2, 12, 21, 31, 40 e 50 cm. TAGLIA XL: 2, 12, 21, 31, 40 e 50 cm. TAGLIA XXL: 2, 12, 22, 32, 42 e 52 cm. TAGLIA XXXL: 2, 12, 22, 32, 42 e 52 cm. SUGGERIMENTO PER INTRECCIARE LE MAGLIE: Per evitare un bordo di chiusura delle m troppo stretto, potete usare un ferro più grande di ½ misura. ---------------------------------------------------------- GIACCA: Si lavora avanti e indietro sui ferri circolari, dall’alto verso il basso. SPRONE: Avviare 97-99-103-109-111-117 m (comprese 4 m per il bordo davanti a punto legaccio da ciascun lato) sui ferri circolari n° 4,5. Lavorare 2 coste a PUNTO LEGACCIO - vedere le spiegazioni sopra e aumentare 17-19-19-25-27-25 m a intervalli regolari nel corso dell’ultimo ferro sul diritto del lavoro - VEDERE IL SUGGERIMENTO PER GLI AUMENTI-1 = 114-118-122-134-138-142 m. Passare ai ferri circolari n° 5. Lavorare ora un’alzata a maglia rasata per lo scollo sul dietro, come segue: Lavorare le prime 61-63-67-73-77-79 m, girare e lavorare 16-16-20-20-24-24 m, girare e lavorare 20-20-24-24-28-28 m, girare e lavorare 24-24-28-28-32-32 m, girare e lavorare le restanti m. Lavorare ora 1 ferro a rov con 4 m per il bordo davanti a punto legaccio da ciascun lato. RICORDARSI DI INTRECCIARE LE M PER LE ASOLE ! Lavorare ora il motivo come segue sul diritto del lavoro: 4 m per il bordo davanti a punto legaccio, 1 m rov, diagramma A.1 (= 4 m) 2-2-2-3-3-3 volte, 1 m rov, 1-2-2-1-2-3 m dir (= davanti sinistro), diagramma A.2 (= 8 m sul 1° ferro), 14-14-16-16-16-16 m dir (= manica), diagramma A.2, 1-2-2-1-2-3 m dir, 1 m rov, diagramma A.1 5-5-5-7-7-7 volte, 1 m rov, 1-2-2-1-2-3 m dir, (= dietro), diagramma A.2, 14-14-16-16-16-16 m dir (= manica), diagramma A.2, 1-2-2-1-2-3 m dir, 1 m rov, diagramma A.1 2-2-2-3-3-3 volte, 1 m rov, 4 m per il bordo davanti a punto legaccio. Lavorare 1 ferro sul rovescio del lavoro in modo uguale. RICORDARSI DI MANTENERE LA CORRETTA TENSIONE DEL LAVORO ! Al ferro successivo sul diritto del lavoro, iniziare ad aumentare per il RAGLAN sul DAVANTI E DIETRO e per il RAGLAN sulle MANICHE – vedere le spiegazioni sopra. ATTENZIONE: aumentare in modo diverso sulle maniche e sul davanti e dietro. DAVANTI E DIETRO: Aumentare 2 m ogni 2 ferri 4-4-5-6-7-9 volte e 1 m ogni 2 ferri 11-14-14-14-15-14 volte (= 15-18-19-20-22-23 volte in tutto). MANICHE: Aumentare 1 m ogni 2 ferri 15-18-19-20-22-23 volte in tutto. Terminati tutti gli aumenti ci sono 250-278-294-318-342-362 m. Lavorare ora come segue sul rovescio del lavoro: Lavorare le prime 38-42-44-49-53-57 m (= davanti destro), mettere in attesa su un ferma maglie le 52-58-62-64-68-70 m successive (= manica), avviare 6-6-8-8-10-12 m sotto la manica, lavorare le 70-78-82-92-100-108 m successive (= dietro), mettere in attesa su un ferma maglie le 52-58-62-64-68-70 m successive (= manica), avviare 6-6-8-8-10-12 m sotto la manica, lavorare le rimanenti 38-42-44-49-53-57 m (= davanti sinistro). Il lavoro misura ca.15-17-18-19-21-22 cm lungo il bordo davanti. DAVANTI E DIETRO: Ci sono ora 158-174-186-206-226-246 m per i davanti e il dietro. DA ADESSO IN AVANTI MISURARE IL LAVORO DA QUESTO PUNTO. Proseguire con il motivo avanti e indietro come prima e inserire un segno al centro delle nuove m sotto la manica da ciascun lato. Diminuire ora da ciascun lato e seguendo il motivo come segue: DIMINUZIONI AI LATI: Quando il lavoro misura 4 cm, diminuire 1 m da ciascun lato di ognuno dei 2 segni ai lati - VEDERE IL SUGGERIMENTO PER LE DIMINUZIONI-1 (DAVANTI e DIETRO). Ripetere queste diminuzioni ogni 8 ferri 2 volte in tutto = 8 m diminuite in tutto. DIMINUZIONI SEGUENDO IL MOTIVO: Quando il lavoro misura 6 cm, diminuire 1 m rov lavorando 2 m insieme a rov in ogni sezione di m rov tra 2 trecce = 6-6-6-10-10-10 m diminuite (quindi diminuire 1-1-1-2-2-2 m su ogni davanti e 4-4-4-6-6-6 m sul dietro). Terminate tutte le diminuzioni, ci sono 144-160-172-188-208-228 m. Quando il lavoro misura 15-15-16-16-16-16 cm, aumentare 1 m rov in ogni sezione di m rov in cui era stata diminuita 1 m rov – VEDERE IL SUGGERIMENTO PER GLI AUMENTI-2 (= 6-6-6-10-10-10 m aumentate) = 150-166-178-198-218-238 m. Al ferro successivo sul diritto del lavoro, aumentare 1 m rov da ciascun lato di ogni treccia = 18-18-18-26-26-26 m aumentate. Aumentare in questo modo ogni 10-10-10-14-14-14 ferri (= quindi ogni 5-5-5-7-7-7 ferri sul diritto del lavoro) 7-7-7-5-5-5 volte in tutto = 276-292-304-328-348-368 m. Terminati tutti gli aumenti, proseguire avanti e indietro seguendo il motivo. Quando il lavoro misura 56-56-57-57-57-57 cm – assicurarsi di finire dopo un ferro 4 oppure un ferro 8 del motivo, lavorare 2 ferri a maglia rasata e lavorare le 4 m dei bordi davanti a punto legaccio da ciascun lato. Passare ai ferri circolari n° 4,5 e lavorare 2 coste a legaccio. Intrecciare le m - VEDERE IL SUGGERIMENTO PER INTRECCIARE LE MAGLIE MANICHE: Si lavorano in tondo sui ferri a doppia punta. Riportare sui ferri a doppia punta n° 5 le 52-58-62-64-68-70 m messe in attesa sul ferma maglie e riprendere 1 m in ognuna delle 6-6-8-8-10-12 nuove m avviate sotto la manica = 58-64-70-72-78-82 m. Inserire un segno al centro delle nuove m. DA ADESSO IN AVANTI MISURARE IL LAVORO DA QUESTO PUNTO. Lavorare ora il diagramma A.2 (= 8 m sul 1° ferro) al centro, sotto la manica (quindi ci sono 4 m del diagramma A.2 da ciascun lato del segno), lavorare le rimanenti m del giro a maglia rasata. Quando il lavoro misura 4 cm, diminuire 1 m da ciascun lato del diagramma A.2 - VEDERE IL SUGGERIMENTO PER LE DIMINUZIONI-2 (maniche). Diminuire in questo modo ogni 8-6-5-4-4-4 giri 11-14-15-19-18-19 volte in tutto = 36-36-40-40-42-44 m. Quando la manica misura 48-47-46-45-44-44 cm, passare ai ferri a doppia punta n° 4,5. Lavorare 2 coste a legaccio. Intrecciare le m. Lavorare la seconda manica in modo uguale. CONFEZIONE: Attaccare i bottoni sul bordo davanti sinistro. |
|||||||||||||||||||
Spiegazioni del diagramma |
|||||||||||||||||||
|
|||||||||||||||||||
 |
|||||||||||||||||||
 |
|||||||||||||||||||
Avete terminato questo modello?Allora taggate le vostre foto con #dropspattern #lobeliacardigan o inviatele alla #dropsfan gallery. Avete bisogno di aiuto con questo modello?Troverete 30 video tutorial, una sezione per i commenti/domande e molto altro guardando il modello su www.garnstudio.com © 1982-2026 DROPS Design A/S. Ci riserviamo tutti i diritti. Questo documento, compreso tutte le sue sotto-sezioni, è protetto dalle leggi sul copyright. Potete leggere quello che potete fare con i nostri modelli alla fine di ogni modello sul nostro sito. |
|||||||||||||||||||


Con oltre 40 anni di esperienza nel design di modelli di maglia e uncinetto, DROPS Design offre la più estesa collezione di modelli gratuiti su internet - tradotti in 17 lingue. Ad oggi vi possiamo fornire 324 cataloghi e 12290 modelli - 9561 dei quali sono tradotti in Italiano.
Ci stiamo impegnando molto per darvi il meglio che vi possiamo offrire in termini di maglia e uncinetto, ispirazioni e consigli così come filati di grande qualità ad un prezzo incredibile! Volete utilizzare i nostri modelli per qualcosa d'altro oltre al vostro uso personale? Potete leggere tutto ciò che è consentito nel testo sul Copyright in basso su tutte le pagine dei nostri modelli. Buon lavoro!
Lasciare un commento sul modello DROPS 171-14
Noi saremmo felici di ricevere i tuoi commenti e opinioni su questo modello!
Se vuoi fare una domanda, fai per favore attenzione a selezionare la categoria corretta nella casella qui sotto per velocizzare il processo di risposta. I campi richiesti sono indicati da *.