
Categorie popolari
State cercando un filato?


Commenti / Domande (44)
![]() Paulina Khan ha scritto:
Paulina Khan ha scritto:
Hei, det står strikk to masker rett i en maske.. Jeg forstod det slik at jeg tar to masker på pinnen og stikker begge rett .. men da får jeg 1 maske av 2.. så jeg skal ikke øke.. men det blir mindre masker på annen hver omgang.. Eller mener du lag 2 masker av 1 ?
05.07.2019 - 11:43DROPS Design ha risposto:
Hej Paulina, hvor i opskriften er du? Når vi skriver: Strikk 2 m rett i neste m, så betyder det at du strikker 2 m rett i neste (samme) maske. Du øker 1 m på denne måde. God fornøjelse!
05.07.2019 - 14:36
![]() Anna O ha scritto:
Anna O ha scritto:
Also, under "RAGLAN BODY" it says "K all YOs on next round to make holes". What does it mean? That I make a round with YOs only, or follow instructions under "Inc 2 sts as follows"? Thank you from a knitting noob!
07.06.2019 - 14:20DROPS Design ha risposto:
Hi Anna. There are supposed to be a row of holes along each side of the raglan line, you'll get this by working the yarn over normally on the next round - as opposed to working it twisted (no hole). Simply knit the yarn overs as a regular stitch. Happy knitting.
07.06.2019 - 14:47
![]() Anna O ha scritto:
Anna O ha scritto:
Hi. This it my first pattern, and I'm a bit lost. So far I've come to the line "On the next round beg inc for raglan". I don't get it, should I follow the instruction under "Inc as follows", or switch to increases under "RAGLAN BODY"? What order am I to read the instructions?
07.06.2019 - 14:19DROPS Design ha risposto:
Hi Anna. The increase for raglan are explained both places. At the top of patter, where it says RAGLAN BODY you'll find the specific instructions for how to make the increase, both when you're supposed to increase 2 stitches, and when you're supposed to increase only 1 stitch. The instructions in pattern repeats this, along with number of stitches worked in between increase etc. Follow instructions in the pattern text. There are supposed to be a row of holes along each side of the raglan line, you'll get this by working the yarn over normally on the next round - as opposed to working it twisted (no hole). Simply knit the yarn overs as a regular stitch. Happy knitting
07.06.2019 - 14:44
![]() Ingrid ha scritto:
Ingrid ha scritto:
Warum werden bei der Raglanschräge im Rumpfteil pro Seite zwei Maschen zugenommen? Das ist doch eher ungewöhnlich. Falls ich die Anleitung richtig verstanden habe. Normalerweise werden doch pro Zunahme Reihe 8 Maschen zugenommen, oder? Inwiefern ändert sich dabei der Schnitt?
06.03.2019 - 17:40DROPS Design ha risposto:
Liebe Ingrid, es wird 2 Maschen an jedem Ärmel zugenommen, aber es wird zuerst 4 M dann 2 M an Vorder- und Rückenteil zugenommen, so bekommt man die richtige Massen wie in der Skizze so wie den gewünschten Schnitt . Viel Spaß beim stricken!
07.03.2019 - 08:45Ana ha scritto:
Hello. It is my first Drop pattern and I am a little lost from the beginning. I have made the k2/p3 rib and now I have to increase 21 for my size L until 106 stitches, but I don't understand where and how. Have I to cast on, or knit front and back the firsts 21 st, or the lasts 21? Thanks from Spain.
30.11.2018 - 15:34DROPS Design ha risposto:
Dear Anna, you will have to increase evenly 21 stitches on next round worked with knit stitches - this lesson explains how to increase evenly on a round. Happy knitting!
30.11.2018 - 15:41
![]() B. Van Halderen ha scritto:
B. Van Halderen ha scritto:
Klopt het patroon en de patroon tekening (hals 16 cm) wel met de foto? Op de foto ziet de nek er wijd uit. Dat is ook wat ik graag wil. Maar 16 cm komt daar niet mee overeen. Ik hoor het graag. Mvg Barbara
23.10.2018 - 19:52DROPS Design ha risposto:
Dag B. Van Halderen
Als ik kijk naar het aantal op te zetten steken voor de hals, vermoed ik dat de tekening met de maten onderaan het patroon niet overeenkomt. Dat zal ik even na moeten vragen bij de ontwerpafdeling. Zodra ik antwoord heb kom ik bij je terug
24.10.2018 - 21:13
![]() Barbara ha scritto:
Barbara ha scritto:
Klopt het patroon en de patroon tekening (hals 16 cm) wel met de foto? Op de foto ziet de nek er wijd uit. Dat is ook wat ik graag wil. Maar 16 cm komt daar niet mee overeen. Ik hoor het graag. Mvg Barbara
06.10.2018 - 11:58
![]() Elizabeth Vanderstoop ha scritto:
Elizabeth Vanderstoop ha scritto:
On sleeves 14-15-16-17-19-20 more times (= 15-16-17-18-20-21 times in total), on body with 2 sts 7-9-11-14-16-20 more times (= 8-10-12-15-17-21 times in total) and then on body with 1 st 7-6-5-3-3-0 times. In these instructions I'm confused as to the meaning of " on body with 2 sts" and "on body with 1st" Thanks.
26.09.2018 - 03:50DROPS Design ha risposto:
Dear Mrs Vanderstoop, you first increase 1 stitch (the round explained you have just worked). You continue working the increase for raglan 14-20 more times on sleeve (= 2 sts increased on each sleeve), and increase 2 sts 7-10 more times on body (=4 sts increased on front and on back piece), then increase only 1 st 7-0 times in total (= 2 sts increased on front and back piece). See RAGLAN BODY & RAGLAN SLEEVE. Happy knitting!
26.09.2018 - 08:06
![]() Petra Hefner ha scritto:
Petra Hefner ha scritto:
Hello ! I have always loved DROPS Design. I am trying to calculate how much yarn I will need for Drops 169-7. Instructions for one color say 200g. My Cascade Yarn Baby Alpaca Chunky is 100g which is 108 yards. So 216 yards? Normally a pullover requires approximately 1000 yards of yarn. Can you clarify total yardage required ? Thank you very much for your help.
15.04.2018 - 18:34DROPS Design ha risposto:
Hi Petra, you're right, you need more than 1000 yards. In this case, we use Brushed Alpaca Silk, which has 306 yards in 25 grams, so of you take 8 balls of Alpaca silk (200 grs) = 306* 8 = 2448 yards.
15.04.2018 - 20:11
![]() Denise ha scritto:
Denise ha scritto:
Bonjour, Les mesures tombent parfaitement mais le résultat n'est pas une réussite!! Cela donne un tricot trop lâche, sans aucune tenue. Peut-être aurais-je dû tricoter une taille plus grande mais avec des aiguilles plus petites?..Des aig 5 ne semblent pas adapter pour ce modèle ,pourtant l'échantillon était bon!! Dommage. Cordialement
23.03.2018 - 15:44
|
|
Weekend Getaway#weekendgetawaysweater |
|
|
|
|
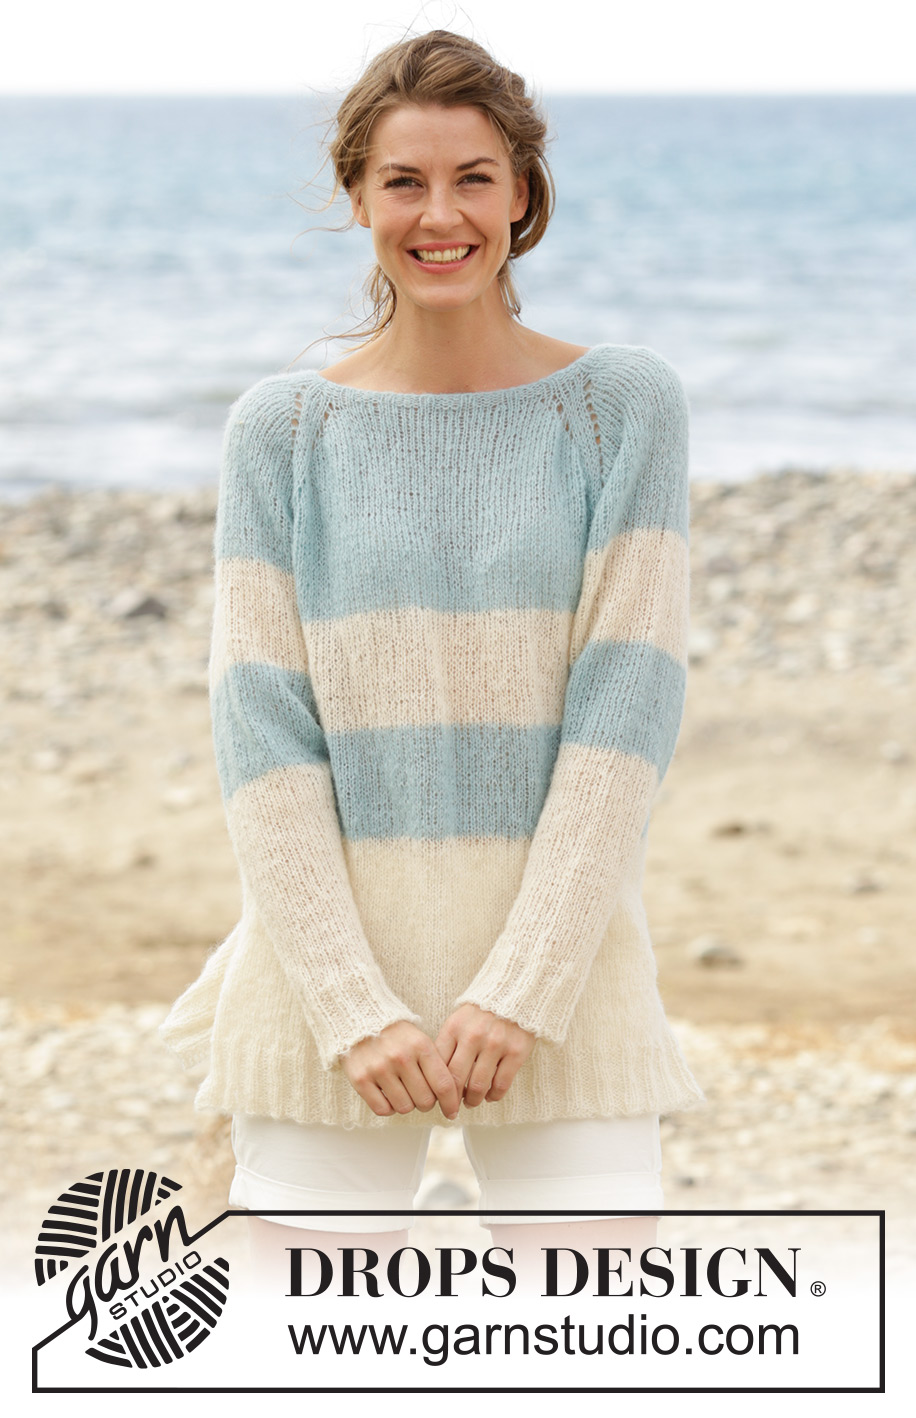
Maglia DROPS ai ferri, con raglan, spacchi ai lati e con strisce, lavorato dall’alto verso il basso (top down), in "Brushed Alpaca Silk". Taglie: Dalla S alla XXXL.
DROPS 169-7 |
|
|
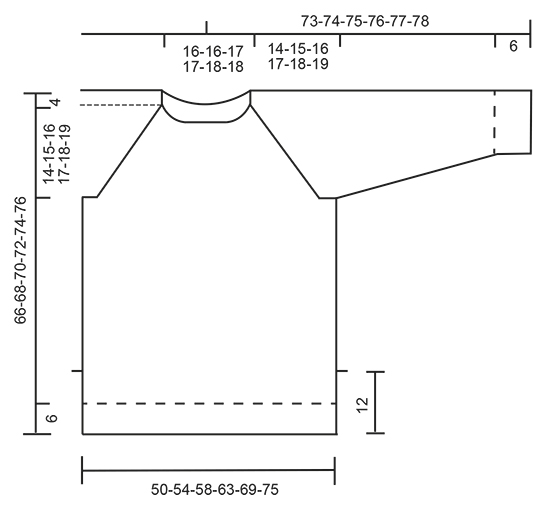
PUNTO LEGACCIO (in tondo): Lavorare * 1 giro a dir e 1 giro a rov *, ripetere da *-*. 1 “costa” a legaccio = 2 giri PUNTO LEGACCIO (avanti e indietro sui ferri): Lavorare tutti i ferri a dir. 1 “costa” a legaccio = 2 ferri a dir. STRISCE: Lavorare le strisce sul davanti/dietro e sulle maniche, come segue: Lavorare 9-9-10-10-11-11 cm con il colore panna. Lavorare 9-9-10-10-11-11 cm con il colore verde oceano chiaro, finire con il colore panna. RAGLAN SUL DAVANTI / DIETRO: ATTENZIONE: Al giro successivo, lavorare tutte le m gettate a dir; si devono formare i buchi. Aumentare 2 m come segue: Prima del 1° e del 3° segno: Lavorare finché non rimangono 3 m prima del segno, lavorare la m successiva 2 volte a dir, 1 m gettata, 2 m dir. Dopo il 2° ed il 4° segno: 2 m dir, 1 m gettata, lavorare la m successiva 2 volte a dir. Poi aumentare 1 m come segue: Prima del 1° e del 3° segno: Lavorare finché non rimangono 2 m prima del segno, 1 m gettata, 2 m dir. Dopo il 2° ed il 4° segno: 2 m dir, 1 m gettata. RAGLAN SULLE MANICHE: Aumentare 1 m dopo il 1° e il 3° segno, come segue: 2 m dir, 1 m gettata. Aumentare 1 m prima del 2° e del 4° segno, come segue: Lavorare finché non rimangono 2 m prima del segno, 1 m gettata, 2 m dir. Al giro successivo, lavorare le m gettate a dir: si devono formare i buchi. SUGGERIMENTO PER LE DIMINUZIONI: Diminuire come segue, prima del segno: Lavorare finché non rimangono 3 m prima del segno, lavorare 2 m insieme a dir, 1 m dir. Diminuire come segue, dopo il segno: 1 m dir, passare 1 m a dir senza lavorarla, 1 m dir, accavallare la m passata sulla m lavorata. ---------------------------------------------------------- MAGLIA: Si lavora a maglia rasata in tondo, dall’alto verso il basso fino agli spacchi laterali; dividere poi il lavoro e proseguire avanti e indietro fino alla fine del lavoro. ATTENZIONE: Inizio dei giri = al centro, sul dietro. SPRONE: Avviare 80-80-85-85-90-90 m sui ferri circolari n° 4,5 con il colore verde oceano chiaro. Lavorare 1 giro a dir. Lavorare 4 giri a coste (= 2 m dir / 3 m rov). Passare ai ferri circolari n° 5 e lavorare 1 giro a maglia rasata e, ALLO STESSO TEMPO, aumentare 18-20-21-25-24-30 m in modo uniforme = 98-100-106-110-114-120 m. Inserire ora 4 segni nel lavoro come segue: Lavorare le prime 15-16-16-16-17-18 m (= metà dietro), inserire il 1° segno, lavorare le 18-18-20-22-22-24 m successive (= manica), inserire il 2° segno, lavorare le 31-32-33-33-35-36 m successive (= davanti), inserire il 3° segno, lavorare le 18-18-20-22-22-24 m successive (= manica), inserire il 4° segno, lavorare le rimanenti 16-16-17-17-18-18 m (= metà dietro). Al giro successivo, iniziare ad aumentare per il RAGLAN. ATTENZIONE: gli aumenti del raglan sul davanti e dietro sono diversi da quelli sulle maniche - VEDERE RAGLAN SUL DAVANTI/DIETRO e RAGLAN SULLE MANICHE. Aumentare come segue: Lavorare finché non rimangono 3 m prima del 1° segno, lavorare la m successiva 2 volte a dir, 1 m gettata, 4 m dir (il segno si trova al centro di queste m), 1 m gettata, lavorare finché non rimangono 2 m prima del 2° segno, 1 m gettata, 4 m dir (il segno si trova al centro di queste m), 1 m gettata, lavorare la m successiva 2 volte a dir, lavorare finché non rimangono 3 m prima del 3° segno, lavorare la m successiva 2 volte a dir, 1 m gettata, 4 m dir (il segno si trova al centro di queste m), 1 m gettata, lavorare finché non rimangono 2 m prima del 4° segno, 1 m gettata, 4 m dir (il segno si trova al centro di queste m), 1 m gettata, lavorare la m successiva 2 volte a dir, lavorare le rimanenti m del giro. RICORDARSI LA TENSIONE DEL LAVORO! Ripetere questi aumenti ogni 2 giri come segue: sulle maniche: altre 14-15-16-17-19-20 volte (= 15-16-17-18-20-21 volte in tutto); sul davanti / dietro: aumentare ancora 2 m altre 7-9-11-14-16-20 volte (= 8-10-12-15-17-21 volte in tutto) e poi aumentare 1 m 7-6-5-3-3-0 volte. Terminati tutti gli aumenti, ci sono 250-268-290-314-342-372 m e il lavoro misura 14-15-16-17-18-19 cm dallo scollo al centro sul davanti verso il basso. Lavorare ora come segue: Lavorare le prime 38-42-45-49-54-60 m (= metà dietro), mettere in attesa su un ferma maglie le 48-50-54-58-62-66 m successive (= manica), avviare 8 m sotto la manica, lavorare le 77-84-91-99-109-120 m successive a dir (= davanti), mettere in attesa su un ferma maglie le 48-50-54-58-62-66 m successive (= manica), avviare 8 m sotto la manica, lavorare le rimanenti 39-42-46-50-55-60 m (= metà dietro). DA ADESSO IN AVANTI MISURARE IL LAVORO DA QUESTO PUNTO. DAVANTI E DIETRO: Ci sono ora 170-184-198-214-234-256 m. Proseguire in tondo a maglia rasata e a STRISCE - vedere le spiegazioni sopra. Quando il lavoro misura 35-36-37-38-39-40 cm, lavorare come segue: 39-43-46-50-55-61 m a maglia rasata, 6 m a PUNTO LEGACCIO - vedere le spiegazioni sopra, 79-86-93-101-111-122 m a maglia rasata, 6 m a punto legaccio, lavorare le restanti 40-43-47-51-56-61 m a maglia rasata. Proseguire in questo modo finché non sono state lavorate 2 coste a punto legaccio sulle 6 m ai lati (= m sopra agli spacchi laterali). Dividere ora il lavoro per il davanti e per il dietro, come segue: Lavorare le prime 42-46-49-53-58-64 m come prima (quindi a maglia rasata con 3 m a punto legaccio sul lato), girare e lavorare il ferro di ritorno sulle 85-92-99-107-117-128 m (lavorare le prime 3 m e le ultime 3 m a punto legaccio) = dietro. Mettere in attesa su un ferma maglie le rimanenti 85-92-99-107-117-128 m per il davanti. Lavorare le m sui ferri avanti e indietro finché il lavoro non misura 42-43-44-48-46-47 cm. Al ferro successivo sul diritto del lavoro, passare ai ferri circolari n° 4,5 e, allo stesso tempo, aumentare 13-16-19-21-21-25 m in modo uniforme (non aumentare sulle prime e sulle ultime 3 m) = 98-108-118-128-138-153 m. Lavorare 1 ferro sul rovescio del lavoro come prima. Proseguire a coste (2 m dir / 3 m rov) con 3 m a punto legaccio da ciascun lato. ATTENZIONE: Iniziare e finire le coste con 2 m dir prima e dopo le 3 m a punto legaccio ai lati. Quando le coste misurano 6 cm, intrecciare le m lavorando a dir le m dir e a rov le m rov. Il lavoro misura 66-68-70-72-74-76 cm in tutto dalla spalla. Riportare sui ferri di lavoro le m messe in attesa sul ferma maglie e lavorare come indicato per il dietro. MANICHE: Lavorare le maniche a maglia rasata in tondo sui ferri a doppia punta. Ci sono 48-50-54-58-62-66 m per ogni manica. Riportare sui ferri a doppia punta n° 5 le m messe in attesa sul ferma maglie e avviare 8 nuove m sotto la manica = 56-58-62-66-70-74 m. Lavorare in tondo, a maglia rasata e a strisce come indicato per il davanti e dietro e, ALLO STESSO TEMPO, inserire un segno al centro delle nuove m sotto la manica (quindi 4 nuove m prima e 4 nuove m dopo il segno). DA ADESSO IN AVANTI MISURARE IL LAVORO DA QUESTO PUNTO! Quando il lavoro misura 4 cm, diminuire 1 m da ciascun lato del segno - VEDERE IL SUGGERIMENTO PER LE DIMINUZIONI. Ripetere queste diminuzioni ca. ogni 4-4-3-3-2½-2½ cm altre 10-10-12-13-14-15 volte = 34-36-36-38-40-42 m. Quando la manica misura 45-45-45-45-44-44 cm (ATTENZIONE: misure più corte per le taglie più grandi perché lo sprone è più lungo), passare ai ferri a doppia punta n° 4,5 e aumentare 6-4-9-7-5-8 m in modo uniforme al giro successivo = 40-40-45-45-45-50 m. Lavorare a coste = 2 m dir / 3 m rov per 6 cm. Quando la manica misura 51-51-51-51-50-50 cm, intrecciare le m lavorando a dir le m dir e a rov le m rov. Lavorare l’altra manica in modo uguale. CONFEZIONE: Cucire le aperture sotto le maniche. |
|
 |
|
Avete terminato questo modello?Allora taggate le vostre foto con #dropspattern #weekendgetawaysweater o inviatele alla #dropsfan gallery. Avete bisogno di aiuto con questo modello?Troverete 27 video tutorial, una sezione per i commenti/domande e molto altro guardando il modello su www.garnstudio.com © 1982-2026 DROPS Design A/S. Ci riserviamo tutti i diritti. Questo documento, compreso tutte le sue sotto-sezioni, è protetto dalle leggi sul copyright. Potete leggere quello che potete fare con i nostri modelli alla fine di ogni modello sul nostro sito. |


Con oltre 40 anni di esperienza nel design di modelli di maglia e uncinetto, DROPS Design offre la più estesa collezione di modelli gratuiti su internet - tradotti in 17 lingue. Ad oggi vi possiamo fornire 324 cataloghi e 12290 modelli - 9561 dei quali sono tradotti in Italiano.
Ci stiamo impegnando molto per darvi il meglio che vi possiamo offrire in termini di maglia e uncinetto, ispirazioni e consigli così come filati di grande qualità ad un prezzo incredibile! Volete utilizzare i nostri modelli per qualcosa d'altro oltre al vostro uso personale? Potete leggere tutto ciò che è consentito nel testo sul Copyright in basso su tutte le pagine dei nostri modelli. Buon lavoro!
Lasciare un commento sul modello DROPS 169-7
Noi saremmo felici di ricevere i tuoi commenti e opinioni su questo modello!
Se vuoi fare una domanda, fai per favore attenzione a selezionare la categoria corretta nella casella qui sotto per velocizzare il processo di risposta. I campi richiesti sono indicati da *.