
Categorie popolari
State cercando un filato?


Commenti / Domande (221)
![]() Hazel ha scritto:
Hazel ha scritto:
Hi, I really love this pattern but I would like to knit it on straight needles, is there a way to convert it to seperate pieces? Many thanks, Hazel
30.10.2024 - 13:18DROPS Design ha risposto:
Dear Hazel, body is here worked back and forth on a circular needle to get enough room for all stitches, so that you can use a straight needle instead - read more about circular needles here. Happy knitting!
30.10.2024 - 13:50
![]() Caroline Boileau ha scritto:
Caroline Boileau ha scritto:
Explication incomplète pour les mailles glissées et que reste t'il pour dos et devant Comment je dois faire Merci
16.04.2024 - 13:42DROPS Design ha risposto:
Bonjour Mme Boileau, à quel niveau en êtes-vous précisément? Et quelle taille tricotez-vous? Ce sera ainsi plus facile de pouvoir vous aider avec ces infos complémentaires, merci pour votre compréhension.
16.04.2024 - 15:44
![]() Veronika Hammeke ha scritto:
Veronika Hammeke ha scritto:
Meine Fragen zur Anleitung: Nach „lesen Sie die Anleitung“ folgt: 1 Krausrippe Stricken, der Rest wird nicht gestrickt .Heißt das, ich wende,Stricke 5 Maschen ,wende wieder und eine ganze Reihe folgt?… weiter eine 1Kr-Rippe über die ersten 5 Maschen auf der anderen Seite..??? Wie stelle ich mir das vor ? Über eine Hilfestellung bin ich Ihnen dankbar. Mit freundlichen Grüßen Veronika Hammeke
10.04.2024 - 12:44DROPS Design ha risposto:
Liebe Frau Hammeke, meinen Sie nach 15-17-18 (20-21) cm ? Dann richtig, stricken Sie die ersten 5 Maschen bei der nächsten Hin-Reihe, wenden und diese 5 Maschen stricken (verkürzte Reihe), wenden, alle Masche wie zuvor stricken, wenden die ersten 5 Maschen stricken, wenden und diese 5 Maschen stricken = so haben Sie 1 extra Krausrippe über die Blenden-Maschen beidseitig gestrickt. Bei der nächsten Hin-Reihe beginnen die Abnahmen für den V-Halsausschnitt. Viel Spaß beim Stricken!
10.04.2024 - 13:55
![]() Dorette Henning ha scritto:
Dorette Henning ha scritto:
Es geht um die Abnahme für den Arm Ausschnitt nach Abnahme der 10 Maschen mittig zwischen den 20 Maschen der Krausrippe . Ich habe jetzt 5 Maschen für das Rückenteil auf jeder Seite. Wo nehme ich nun weiter für den Arm Ausschnitt ab. Wo muss ich abnehmen. Ich habe ja am Anfang die 5 Maschen der Krausrippe. Nehme ich da ab, dann reduziere ich ja die Krausrippe
01.04.2024 - 20:12DROPS Design ha risposto:
Liebe Frau Henning, man muss immer diese 5 Maschen krausrippe beidseitig beim Rückenteil behalten, dh die Abnahmen für den Armausschnitt werden am Anfang einer Hin-Reihe nach diesen 5 Maschen und am Anfang der Hin-Reihe vor diesen 5 Maschen - siehe ABNAHME FÜR DEN V-AUSSCHNITT UND DAS ARMLOCH IM DOPPELTEN PERLMUSTER: am Anfang der schriftlichten Anleitung. Viel Spaß beim Stricken!
02.04.2024 - 15:45
![]() Christa Strinert ha scritto:
Christa Strinert ha scritto:
Ich komme nicht weiter und zwar beim Arm Ausschnittn. Die Abnahme der mittleren 10 Maschen ist das genau von der Mitte der 144 maschen zu.machen oder jeweils nach dem Marker, dann 10 Maschen Krausrippe?
28.03.2024 - 15:56DROPS Design ha risposto:
Liebe Frau Strinert, vor dem Abkette für den Armausschnitt werden 20 Maschen (in 2. bis 5. Größe) = 10 Maschen beidseitig von den beiden Markierungen krausrechts gestrickt, dann werden die mittleren 10 Maschen = 5 Maschen beidseitig von den beiden Markierungen abgekettet, so bleiben 5 Maschen krausrechts am Armausschnitt. Viel Spaß beim Stricken!
02.04.2024 - 13:49
![]() Doris ha scritto:
Doris ha scritto:
I’m working on the 6/9 months size and am confused about the instructions under the body heading; after Dec 1 st every other row… everything afterwards is confusing. At what point in the pattern do you not work the back stitches? Thanks
28.03.2024 - 00:56DROPS Design ha risposto:
Dear Doris, for the 6/9 m size, after the "decrease 1 stitch" on the BACK, you knit with the double moss stitch and the edge stitches in garter stitch (as you knitted those stitches previously) until the piece 26 cm. Then knit with garter stitch on every stitch, but after another cm (when your piece is 27 cm) you cast off the middle 18 stitches. Now take the 11 stitches left on one side and knit with garter stitch for 1 more cm (the whole piece is 28 cm) and cast off. Now, repeat with the 11 stitch you have left on teh other side. Happy Knitting!
28.03.2024 - 09:04
![]() Anna Maria ha scritto:
Anna Maria ha scritto:
Tack för tidigare svar. Nu är jag på bakstycket (dvs efter att det står att man ska sticka fram- och bakst var för sig). Tråden är ju dock på framkanten, och jag har alla maskor på samma rundstickor. Ska man sticka sig fram till bakstycket och sen sätta framsidans maskor på en tråd och spara till senare? Eller hur är det tänkt att man ska fortsätta med bakstycket separat från detta? Och är meningen att man redan nu ska ha maskat av 16 gånger i kanterna enl tidigare stycke?
20.03.2024 - 15:04DROPS Design ha risposto:
Hei Anna Maria. Om du har tråden på forstykket og skal strikke bakstykket, må du klippe tråden og så starte på bakstykket. Evnt kan du strikke venstre forstykket først, om det er der du har tråden. mvh DROPS Design
02.04.2024 - 11:44
![]() Anna Maria ha scritto:
Anna Maria ha scritto:
Hej. Jag stickar Juniorvästen, och undrar över meningen ”Maska av 1 m på vartannat v (dvs på varje v från rätsidan) totalt 5-6-6 (6-6) gånger = 36-40-44 (52-60) m.” Om jag förstår rätt blir det två maskor mindre på varje varv med minskningar, men ska man alltså minska totalt 12 maskor (dvs minska 6 varv med två minskningar per varv)? Eller hur många gånger, med hur många maskor ska man minska totalt?
19.03.2024 - 14:41DROPS Design ha risposto:
Hej Anna Maria. Ja det stämmer ( om du stickar någon av de 4 största storlekarna). Du minskar 1 maska i varje sida 6 gånger, så du minskar totalt 12 maskor. Mvh DROPS Design
20.03.2024 - 08:10
![]() Rene Gould ha scritto:
Rene Gould ha scritto:
Hi nearly finishesd with your kind help but I’m stuck agin in pocket flap don’t understand where it says do rib k2/p2 then it says do 1garter stitch an k2 in each side really don’t understand please help thank you
13.03.2024 - 21:47DROPS Design ha risposto:
see below =)
14.03.2024 - 08:36
![]() Rene Gould ha scritto:
Rene Gould ha scritto:
Hi nearly finishesd with your kind help but I’m stuck agin in pocket flap don’t understand where it says do rib k2/p2 then it says do 1garter stitch an k2 in each side really don’t understand please help thank you
13.03.2024 - 21:32DROPS Design ha risposto:
Dear Mrs Gould, work as follows: 1 edge stitch in garter stitch, work rib *K2, P2* until 3 sts remain, then work K2 and 1 edge stitch in garter stitch. Happy knitting!
14.03.2024 - 08:35
|
|
Junior#juniorvest |
|
 |
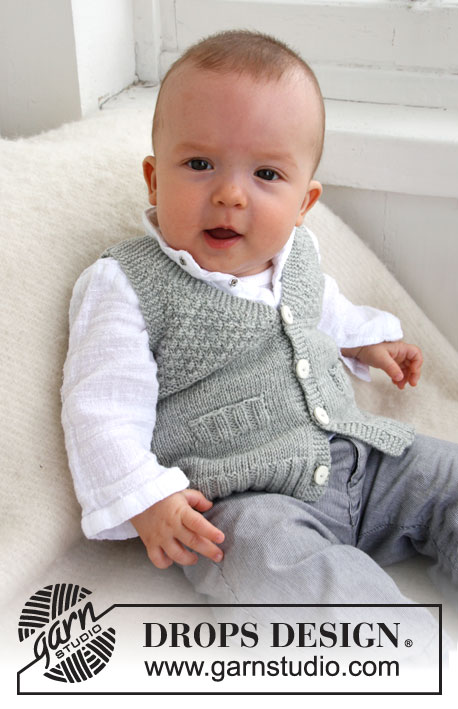 |
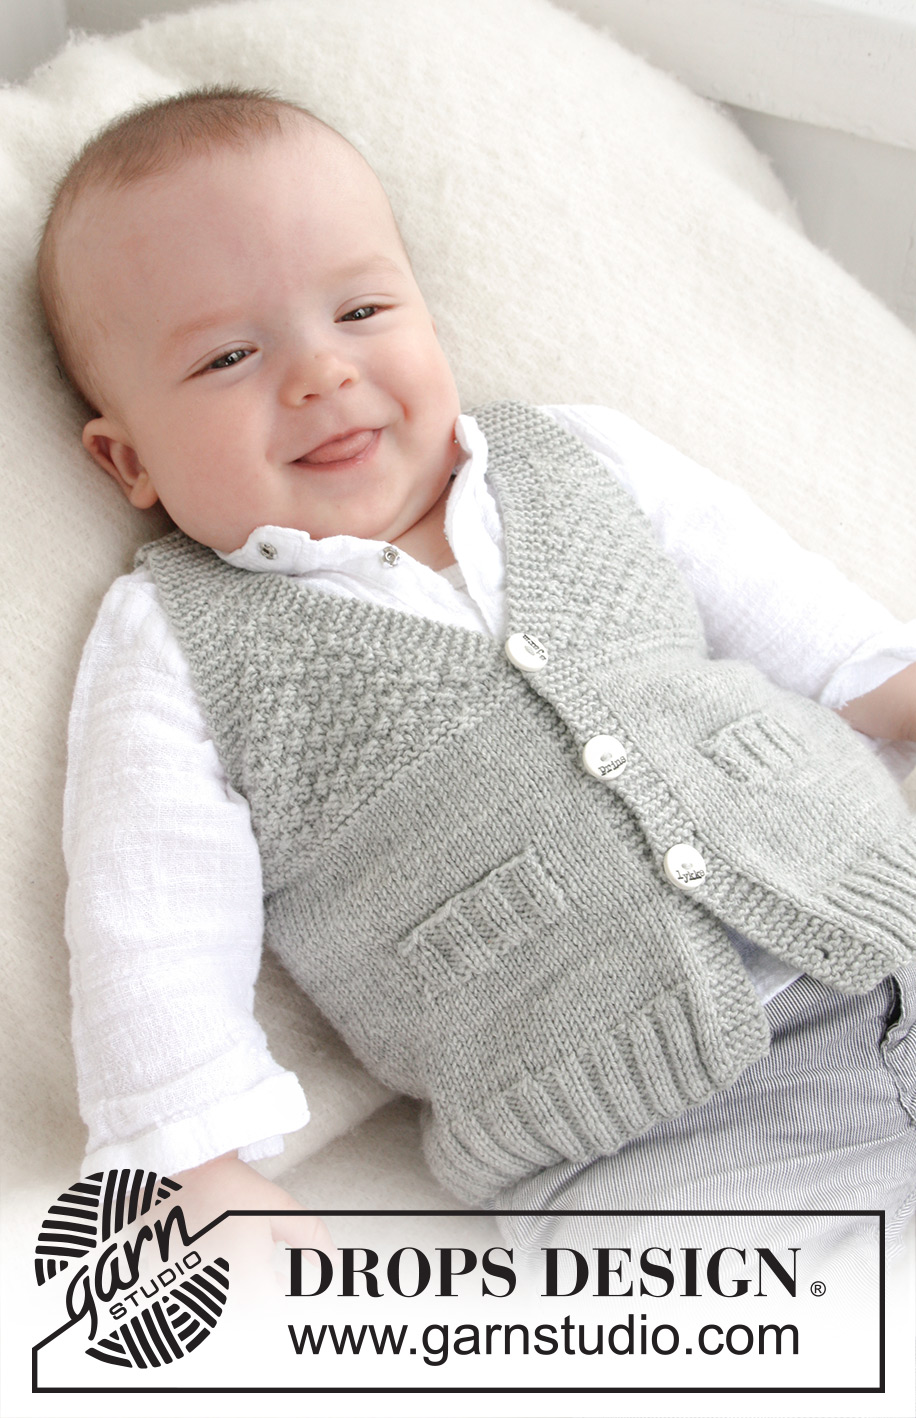
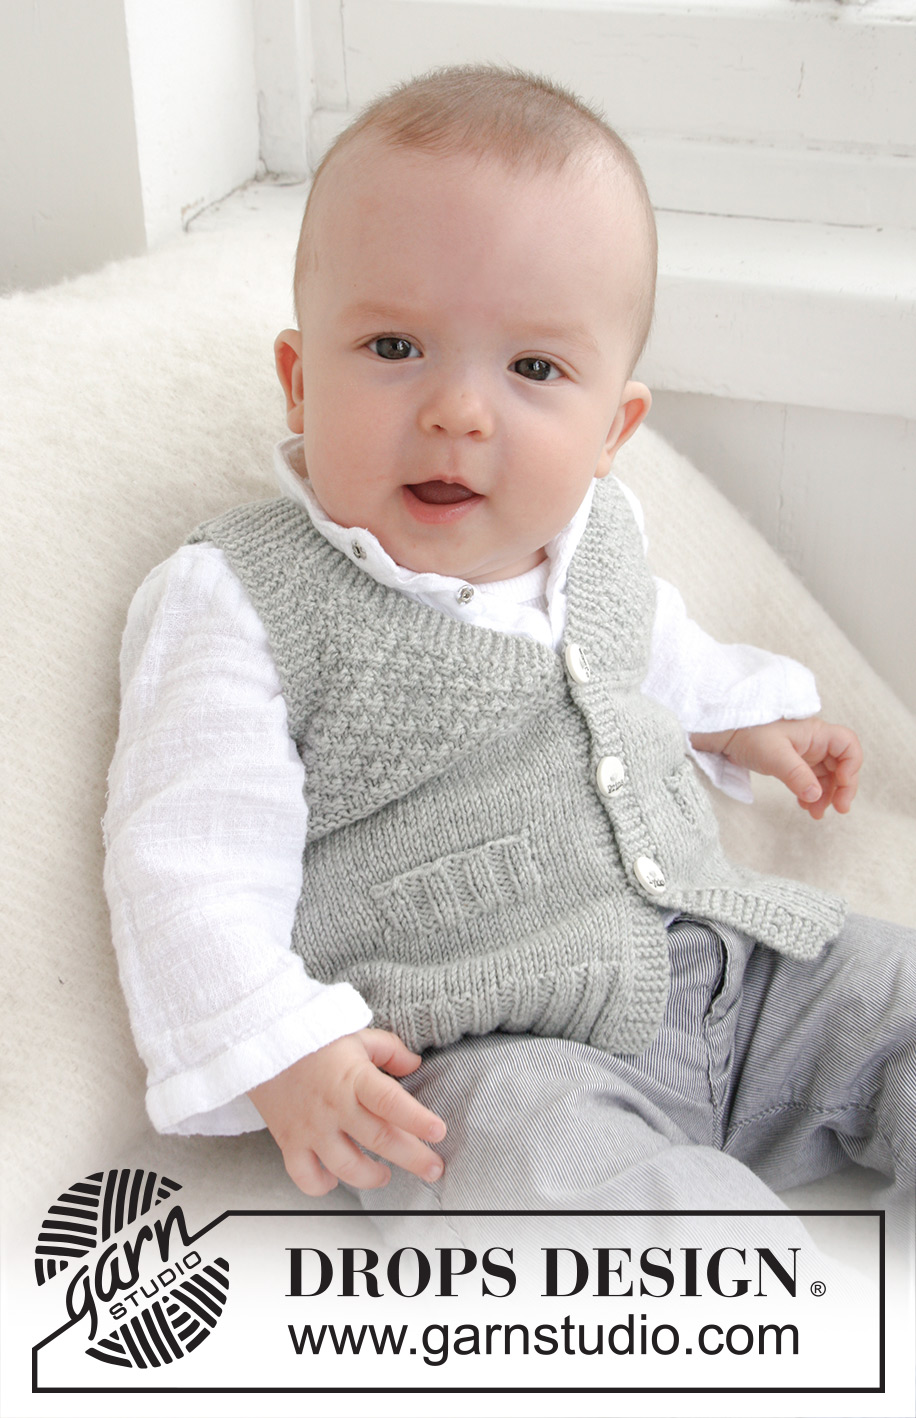
Gilet lavorato ai ferri con collo a V e motivo a punto fantasia per neonati e bambini in DROPS BabyMerino oppure in DROPS BabyAlpaca Silk.
DROPS Baby 21-8 |
|
|
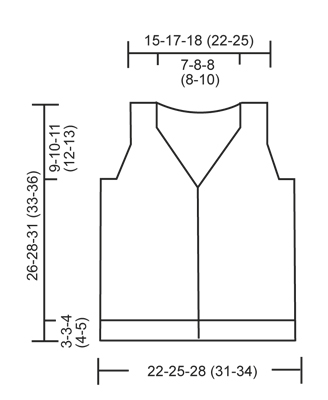
-------------------------------------------------------- M. A LEGACCIO (avanti e indietro sui ferri): Lavorare a dir. tutti i f. M. A GRANA DI RISO DOPPIA: 1° ferro: * 2 dir., 2 rov. *, ripetere da *-*. 2° ferro: dir. su dir. e rov. su rov. 3° ferro: rov. su dir. e dir. su rov. 4° ferro: come il 2° ferro. Ripetere i ferri 1-4. ASOLE: Intrecciare per le asole sul bordo destro 1 asola = lavorare insieme a dir. la seconda e la terza m. dal bordo e fare 1 gettato. Intrecciare per le asole quando il lavoro misura: TAGLIA 1/3 MESI: 2, 6, 10 e 14 cm. TAGLIA 6/9 MESI: 2, 7, 11 e 16 cm. TAGLIA 12/18 MESI: 2, 7, 12 e 17 cm. TAGLIA 2 ANNI: 2, 8, 13 e 19 cm. TAGLIA 3/4 ANNI: 2, 8, 14 e 20 cm. DIMINUIRE PER IL COLLO A V E PER GLI SCALFI A M. A GRANA DI RISO DOPPIA: Tutte le diminuzioni sono fatte da diritto del lavoro! DIMINUIRE COME SEGUE PRIMA DEL BORDO/BORDO DELLA MANICA: Quando l'ultima m. è a dir.: lavorare 2 m. insieme a dir. Quando l’ultima m. è un rov.: lavorare 2 m. insieme a rov. DIMINUIRE COME SEGUE DOPO IL BORDO/BORDO DELLA MANICA: Quando la prima m. è a dir.: passare la m. a dir., 1 dir., accavallare la m. passata sopra quella appena lavorata. Quando la prima m. è un rov.: lavorare 2 m. insieme a rov. ritorto (cioè lavorarle nel filo dietro anziché in quello davanti). -------------------------------------------------------- -------------------------------------------------------- CORPO: Lavorato avanti e indietro sui ferri circolari dal centro davanti. Con i ferri circolari n° 2,5 mm e il filato Baby Merino avviare 148-168-184 (204-224) m. Lavorare il 1° f. come segue sul diritto del lavoro: 5 m. a M. LEGACCIO (= bordo) – leggere la spiegazione sopra, * 2 m. dir., 2 m. rov. *, ripetere da *-* fino a quando non rimangono 7 m., finire con 2 m. dir. e 5 m. a M. LEGACCIO (= bordo). Continuare a coste in questo modo con 5 m. a m. legaccio da ogni lato fino a quando il lavoro non misuri 3-3-4 (4-5) cm – RICORDARSI DELLE ASOLE sul bordo – leggere la spiegazione sopra. Passare ai ferri circolari n°3 mm e lavorare a m. rasata ma continuare i bordi a m. legaccio come prima. ALLO STESSO TEMPO sul 1° f. dopo le coste, distribuire 32-36-40 (44-52) diminuzioni in modo uniforme (non diminuire sui bordi) = 116-132-144 (160-172) m. Inserire un segnapunti a 31-35-39 (43-45) m. a partire da ogni lato (= 54-62-66 (74-82) m. tra i segnapunti sul dietro). FARE ATTENZIONE ALLA TENSIONE DEL LAVORO! Quando il lavoro misura 7-7½-8 (9-10) cm, lavorare il f. successivo come segue sul diritto del lavoro: 5 m. a m. legaccio, 21-21-27 (27-31) m. a m. rasata, trasferire le ultime 16-16-20 (20-24) m. che sono state lavorate su un ferro ausiliario per la fessura della tasca, lavorare fino a quando non rimangono 10-10-12 (12-12) m. sul ferro, trasferire le ultime 16-16-20 (20-24) m. che sono state lavorate su un ferro ausiliario per la fessura della tasca, lavorare 5-5-7 (7-7) m. a m. rasata e finire con 5 m. a m. legaccio. Sul f. successivo avviare 16-16-20 (20-24) nuove m. su ognuno dei 2 ferri ausiliari con le m. = 116-132-144 (160-172) m. Continuare a m. rasata e a m. legaccio fino a quando il lavoro non misuri 13-14-16 (16-18) cm. Ora lavorare 4 f. a dir. su tutte le m. (= 2 creste di legaccio). Poi lavorare a MAGLIA A GRANA DI RISO DOPPIA – leggere la spiegazione sopra (continuare i bordi a m. legaccio come prima). LEGGERE TUTTA LA SEZIONE SEGUENTE PRIMA DI CONTINUARE! Quando il lavoro misura 15-17-18 (20-21) cm, lavorare 2 f. a m. legaccio sulle prime 5 m. sul ferro (non lavorare le altre m. sul ferro), poi lavorare 1 f. su tutte le m. prima di lavorare 2 f. a m. legaccio sulle prime 5 m. sul f. dall’altro lato del lavoro (per fare in modo che il collo a V sia carino). Quindi diminuire per il collo a V – leggere la spiegazione sopra: diminuire 1 m. ogni 2 ferri (cioè ogni f. sul dir. del lavoro) per un totale di 12-13-16 (16-16) volte. ALLO STESSO TEMPO quando il lavoro misura 16-17-19 (20-22) cm, lavorare 4 f. a m. legaccio sulle 18-20-20 (20-20) m. centrali da ogni lato (cioè su 9-10-10 (10-10) m. su ogni lato di entrambi i segnapunti) – lavorare le altre m. come prima. Sul f. successivo, intrecciare le 8-10-10 (10-10) m. centrali da ogni lato per lo scalfo e finire il davanti e il dietro in modo separato. DIETRO: = 46-52-56 (64-72) m. Lavorare a m. a grana di riso doppia con 5 m. a m. legaccio da ogni lato (= bordo della manica). ALLO STESSO TEMPO diminuire per gli scalfi – leggere la spiegazione sopra: diminuire 1 m. ogni 2 ferri (cioè su ogni f. sul diritto del lavoro) per un totale di 5-6-6 (6-6) volte = 36-40-44 (52-60) m. Continuare a m. a grana di riso doppia e m. legaccio fino a quando il lavoro non misuri 24-26-29 (31-34) cm. Ora lavorare a m. legaccio su tutte le m. fino alla lunghezza finale. ALLO STESSO TEMPO quando il lavoro misura 25-27-30 (32-35) cm, intrecciare le 16-18-20 (20-24) m. centrali per il collo = 10-11-12 (16-18) m. rimaste su ogni spalla. Ora finire ogni spalla in modo separato. Continuare con la m. legaccio fino a quando il lavoro misura 26-28-31 (33-36) cm, intrecciare. DAVANTI SINISTO: Continuare con la m. a grana di riso doppia e la m. legaccio e ALLO STESSO TEMPO diminuire per lo scalfo a lato come per il dietro e continuare a diminuire per il collo a V come prima. Alla fine dell’ultima diminuzione, rimangono 10-11-12 (16-18) m. sul ferro. Lavorare a m. legaccio su tutte le m. fino a quando il lavoro non misuri 26-28-31 (33-36) cm e intrecciare. DAVANTI DESTRO: Lavorare come il davanti sinistro ma al contrario. FESSURA PER LA TASCA: Trasferire le 16-16-20 (20-24) m. dal ferro ausiliario su uno dei davanti sui ferri n° 2,5 mm. Lavorare a coste con 1 m. a m. legaccio e 2 m. dir. a ogni lato (visto sul diritto del lavoro). Quando la fessura per la tasca misura 2½-2½-3 (3-3) cm, intrecciare senza stringere con dir. su dir. e rov. su rov. Cucire la fessura per la tasca al davanti con punti maglia da ogni lato. Cucire l’apertura della tasca alla parte inferiore della fessura della tasca (dove le m. sono state messe sul f. ausiliario) sul dietro. Lavorare l’altra fessura per la tasca nello stesso modo sull’altro davanti. CONFEZIONE: Cucire i margini delle spalle. Attaccare i bottoni. |
|
 |
|
Avete terminato questo modello?Allora taggate le vostre foto con #dropspattern #juniorvest o inviatele alla #dropsfan gallery. Avete bisogno di aiuto con questo modello?Troverete 13 video tutorial, una sezione per i commenti/domande e molto altro guardando il modello su www.garnstudio.com © 1982-2026 DROPS Design A/S. Ci riserviamo tutti i diritti. Questo documento, compreso tutte le sue sotto-sezioni, è protetto dalle leggi sul copyright. Potete leggere quello che potete fare con i nostri modelli alla fine di ogni modello sul nostro sito. |
|


Con oltre 40 anni di esperienza nel design di modelli di maglia e uncinetto, DROPS Design offre la più estesa collezione di modelli gratuiti su internet - tradotti in 17 lingue. Ad oggi vi possiamo fornire 325 cataloghi e 12298 modelli - 9569 dei quali sono tradotti in Italiano.
Ci stiamo impegnando molto per darvi il meglio che vi possiamo offrire in termini di maglia e uncinetto, ispirazioni e consigli così come filati di grande qualità ad un prezzo incredibile! Volete utilizzare i nostri modelli per qualcosa d'altro oltre al vostro uso personale? Potete leggere tutto ciò che è consentito nel testo sul Copyright in basso su tutte le pagine dei nostri modelli. Buon lavoro!
Lasciare un commento sul modello DROPS Baby 21-8
Noi saremmo felici di ricevere i tuoi commenti e opinioni su questo modello!
Se vuoi fare una domanda, fai per favore attenzione a selezionare la categoria corretta nella casella qui sotto per velocizzare il processo di risposta. I campi richiesti sono indicati da *.