Commenti / Domande (429)
![]() Wendy Helm ha scritto:
Wendy Helm ha scritto:
Ok confused about the end of the pattern I'm doing the largest size, you posted the following you will bind off 3 sts at the beg of row 1 and 2 (= at the beg of row each side), then 2 sts at the beg of the next next 4 rows (2 sts each side, then 1 st at the beg of the next 4 rows (2 sts each side), then 2 sts at the beg of next 4 rows (=2 sts each side) and finally 3 sts at the beg of next 2 rows (=3 sts each side) Question continued in next post
03.10.2015 - 22:45DROPS Design ha risposto:
Dear Mrs Helm, in the larger size you will bind off the mid 28 sts (= 154-28= 126sts remain), then on each side: 3 sts 1 time (=126-6=120), 2 sts 4 times (90-16=104), 1 st 4 times(104-8=96), 2 sts 4 times (96-16=80), 3 sts 1 time (80-6=74 sts).
05.10.2015 - 09:15
![]() Selina ha scritto:
Selina ha scritto:
Strikker xs, og har kommet til punktet hvor jeg skal sette av maskene til magen. Skal jeg felle 1 vrang, sette av ti masker, strikke 64m, felle 1 vr, og så snu? Og hvordan er det meningen å følge mønsteret etterpå? Skal man strikke alt som står i "mønsteret" (M2, 2vr...). Strikker man en linje for hver gang det står M2, M3 osv - og skal man fortsette på linja over når det står M2 igjen? Hvordan går det opp med kun 64 masker?
02.10.2015 - 00:10DROPS Design ha risposto:
Hej Selina, Jo når du har sat m på en tråd under maven, så fortsætter du over rygstykket som du har strikket det tidligere, men nu strikker du så anden hver p fra vrangen. Spørg også gerne hos din lokale DROPS butikk!
06.10.2015 - 14:56
![]() Wendy Helm ha scritto:
Wendy Helm ha scritto:
Thanks for the answers but now I have another question. I'm finished the top of the sweater back and forth for 4" and now I need to knit the 22 stitches on the stitch holder, question I guess is how do I get working yarn from the top section down to these 22 stitches in order to work these 22 stitches for 4"?
22.09.2015 - 02:16DROPS Design ha risposto:
Dear Mrs Helm, when you haver reach the desired hight over the back of the sweater, cut the thread, put sts on a st holder or a thread. Put sts from stomach back on the needles join the yarn and work these sts, take care that cable rows will be done from RS. Happy knitting!
22.09.2015 - 10:57
![]() Wendy Helm ha scritto:
Wendy Helm ha scritto:
Ok, to clarify my question above, I'm in the round working on cable row and I put the first 22 stitches on a holder, do I then continue by binding off the next pearl stitch? If so won't that put me back in the round since my yarn is coming off my right needle? Or do I turn the work and then knit back and forth? Confused?
18.09.2015 - 21:21DROPS Design ha risposto:
Dear Mrs Helm, on first round when dividing: work the first 22 sts and put them on a st holder, bind off the next P st, continue to the end of row, turn and bind off the first P st (= K st from RS) = 130 sts for back piece. Remember to adjust so that cables will be made from RS. Happy knitting!
19.09.2015 - 10:17
![]() Wendy Helm ha scritto:
Wendy Helm ha scritto:
I'm am working on the pattern and I'm now to where I would separate the piece - question Should I be working a cable row or non cable row before I separate? It seems like it should be a cable row from the right side as once I separate the work I will be starting on the wrong side? Is that correct? Am I turning my work to work the wrong side for the first row? The first four stiches on the needle show knit stitches but yet it says to bind on 1st P stitch?
18.09.2015 - 20:24DROPS Design ha risposto:
Dear Mrs Helm, you have to adjust so that the cable rows will be worked from RS. When dividing for leg, you will put on a st holder the firsst 10-22 sts (see size), ie M.2, P2, M.2 (in first size), then bind off next P st and continue as stated. Happy knitting!
19.09.2015 - 10:02
![]() Diana Lovatt ha scritto:
Diana Lovatt ha scritto:
Hi! I have three whippet boys, and one of them is in a need of this one because he is so sensitive towards the cold and wind. BUT! How do I adjust this pattern for a Whippet ?
31.05.2015 - 11:56DROPS Design ha risposto:
Dear Mrs Lovatt, you will find at the right side of the picture the measurements (chest width and back length) for each size, you can then adapt recalculating with your own measurements if necessary. Please contact your DROPS store for any individual assistance. Happy knitting!
01.06.2015 - 09:56
![]() Diana ha scritto:
Diana ha scritto:
Jag har tre Whippet-killar som jag skall göra denna tröja till och hoppas jag klarar av det då storlekarna här är mindre.
23.05.2015 - 15:46Maureen Hinton ha scritto:
Hi There, I would love to knit this jacket for my Daughters dog. I have been knitting for many years but I'm finding this pattern very hard to follow. I'm not very good a reading graphs. Is it possible to have the pattern written out completely row to row.. I look forward to hearing back from you. cheers Maureen Hinton
09.04.2015 - 06:31DROPS Design ha risposto:
Dear Mrs Hinton, you will find here explanations to how to read a diagram - for any individual assistance you are welcome to contact your DROPS store. Happy knitting!
09.04.2015 - 09:43
![]() Crystal ha scritto:
Crystal ha scritto:
Additional: If I can help anyone else in any way with pattern problems (small size only) I will be happy to help.
21.02.2015 - 23:21
![]() Crystal ha scritto:
Crystal ha scritto:
I have figured out what I'm supposed to do, but will probably need additional help before the project is completed. I have to admit that your explanations are somewhat confusing, but I was able to figure things out by looking at how the pattern flows. Quite a few people are having problems (including me), but once you have figured out the established pattern and diagram, it's basically a cake walk. I just wanted you to know this
21.02.2015 - 23:17
The Lookout |
|||||||||||||||||||
 |
 |
||||||||||||||||||
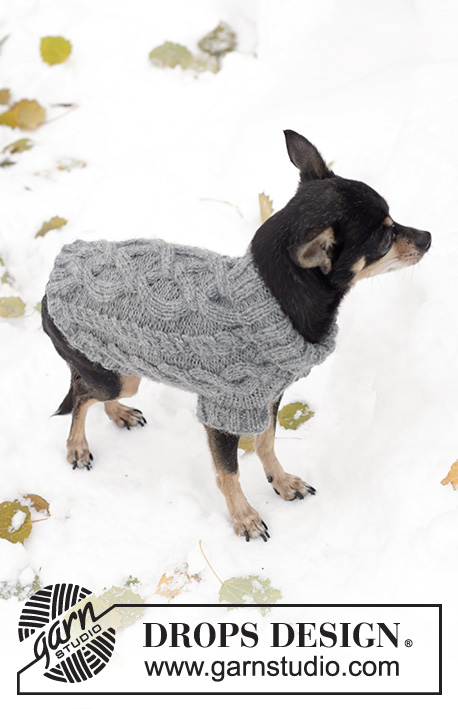
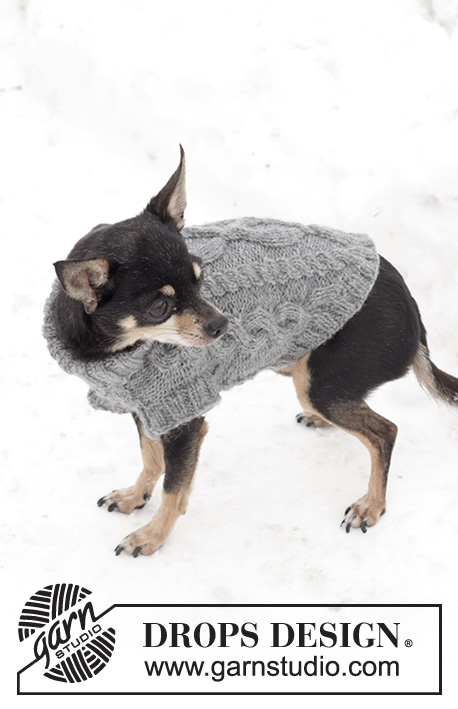
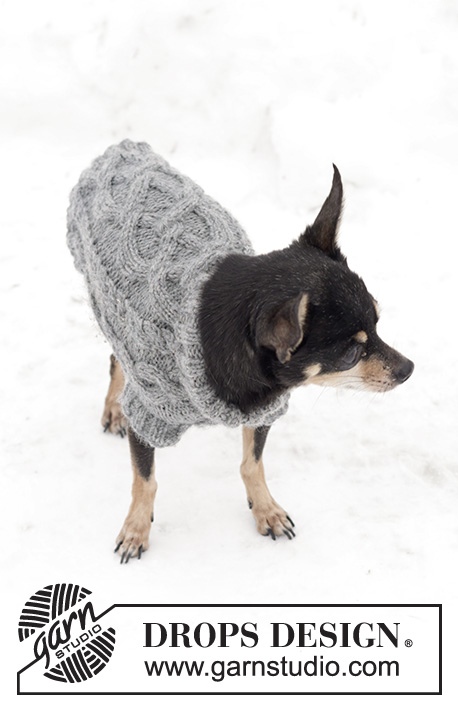
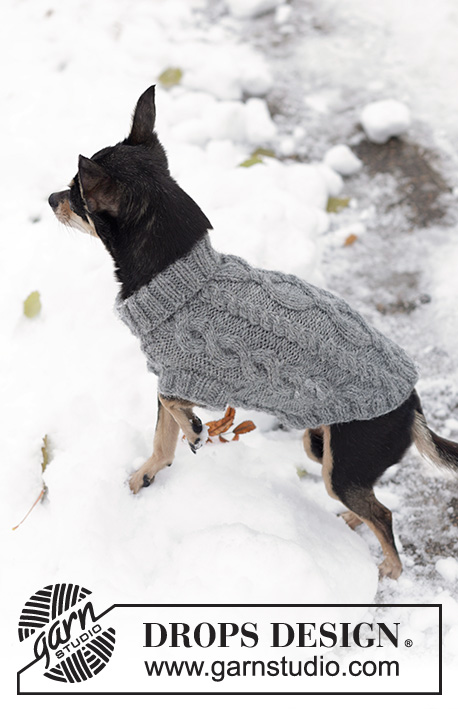
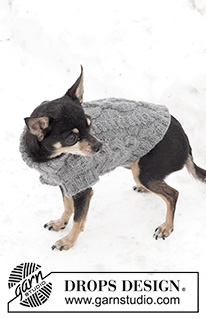
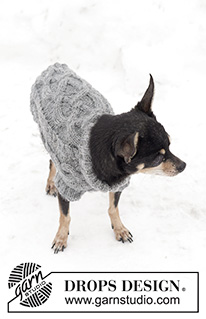
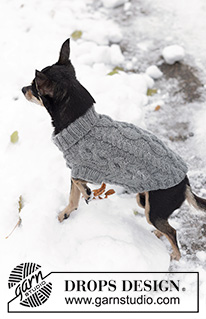
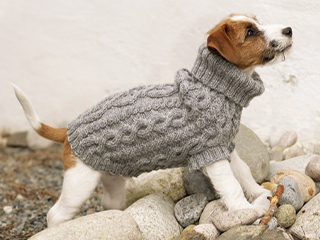
Cappottino DROPS per cani, ai ferri, in "Karisma" con motivo a trecce.
DROPS 102-43 |
|||||||||||||||||||
|
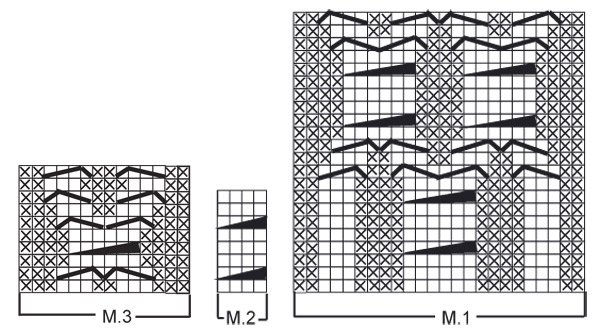
CAMPIONE: 21 m x 28 ferri = 10 x 10 cm a maglia rasata. MOTIVO: vedere i diagrammi da M.1 a M.3. I diagrammi mostrano il motivo sul diritto del lavoro. COSTE: * 2 m dir, 2 rov *, ripetere da *-* ----------------------------------------------------------- CAPPOTTINO: Si lavora in tondo dal collo verso il basso. Avviare 60-80-100 m con i ferri a doppia punta n° 3 e il filato grigio medio. Lavorare a coste per 8-10-12 cm (= é il colletto che verrà piegato in due). Proseguire con i ferri circolari piccoli n° 4 (ferri per calzini per la taglia più piccola). Lavorare 1 giro a dir e allo stesso tempo distribuire 16-32-54 aumenti in modo uniforme = 76-112-154 m. Proseguire con il motivo come segue: Taglia XS: M.2, 2 m rov , M.2, 3 m rov, M.3, M.2, M.1 (= centro sul dietro), M.2, M.3 e 3 m rov. Taglia S: * M.2, 2 m rov *, ripetere da *-* 2 volte, M.2, * M.3, M.2 *, ripetere da *-* 2 volte, M.1 (= centro sul dietro), * M.2, M.3 *, ripetere da *-* 2 volte. Taglia M: * M.2, 2 m rov *, ripetere da *-* 3 volte, M.2, * M.3, M.2 *, ripetere da *-* 3 volte, M.1 (= centro sul dietro), * M.2, M.3 *, ripetere da *-* 3 volte. ALLO STESSO TEMPO, quando il lavoro misura 12-16-20 cm, dividere il lavoro per le zampe anteriori, come segue: mettere in attesa, su un filo o su un ferma maglie, le prime 10-16-22 m (= pancia), intrecciare 1 m rov, lavorare avanti e indietro le restanti m e intrecciare la m dall’altro lato = 64-94-130 m (= schiena). Proseguire avanti e indietro su queste m per 6-8-10 cm (il lavoro misura 18-24-30 cm in tutto). Mettere queste m in attesa su un filo o su un ferma maglie e riprendere sui ferri di lavoro le m della pancia, messe precedentemente in attesa. Avviare 1 nuova m da ciascun lato = 12-18-24 m. Proseguire seguendo il motivo avanti e indietro con 1 m rov da ciascun lato. Dopo aver lavorato 6-8-10 cm, riprendere tutte le m sui ferri di lavoro = 76-112-154 m. Quando il lavoro misura 24-31-38 cm, intrecciare le 12-20-28 m centrali della pancia. Proseguire avanti e indietro sui ferri e allo stesso tempo intrecciare da ciascun lato, ogni 2 ferri, come segue: 3 m 1 volta, 2 m 2-3-4 volte, 1 m 2-3-4 volte, 2 m 2-3-4 volte e 3 m 1 volta = rimangono 32-50-74 m. Il lavoro misura ca. 30-39-48 cm. CONFEZIONE: Passare le m rimaste sul ferro circolare piccolo n° 3 e riprendere le m lungo il bordo di chiusura in modo che siano in tutto 84-108-140 m. Lavorare a coste per 2-3-4 cm; intrecciare le m senza stringere il filo. ZAMPE: Con i ferri a doppia punta n° 3, riprendere ca. 36-44-52 m attorno ad una delle aperture. Lavorare a coste per 2-3-4 cm; intrecciare senza stringere troppo il filo e lavorando a dir le m dir e a rov le m rov. Ripetere lungo l’altra apertura. |
|||||||||||||||||||
Spiegazioni del diagramma |
|||||||||||||||||||
|
|||||||||||||||||||
 |
|||||||||||||||||||
Avete terminato questo modello?Allora taggate le vostre foto con #dropspattern o inviatele alla #dropsfan gallery. Avete bisogno di aiuto con questo modello?Troverete 24 video tutorial, una sezione per i commenti/domande e molto altro guardando il modello su www.garnstudio.com © 1982-2026 DROPS Design A/S. Ci riserviamo tutti i diritti. Questo documento, compreso tutte le sue sotto-sezioni, è protetto dalle leggi sul copyright. Potete leggere quello che potete fare con i nostri modelli alla fine di ogni modello sul nostro sito. |
|||||||||||||||||||







Lasciare un commento sul modello DROPS 102-43
Noi saremmo felici di ricevere i tuoi commenti e opinioni su questo modello!
Se vuoi fare una domanda, fai per favore attenzione a selezionare la categoria corretta nella casella qui sotto per velocizzare il processo di risposta. I campi richiesti sono indicati da *.