
Popular categories
Looking for a yarn?


Comments / Questions (32)
![]() Hania Zozgórnik wrote:
Hania Zozgórnik wrote:
Dzien dobry. Nie moge znależć diagramu do tego wzoru. Pozdrawiam. Hania
23.06.2019 - 09:07DROPS Design answered:
Witaj Haniu! Przepraszam za tak późną odpowiedź. Jeśli będziesz w przyszłości miała pytania, proszę zaznacz w formularzu PYTANIE, a nie KOMENTARZ, wtedy szybciej odpowiemy. Opis ściegu fantazyjnego M1 jest w treści wzoru: *3 rz. dżersejem prawym, 1 rz. dżersejem lewym * (widok na prawej stronie robótki). Powtarzać od *do*. A propos, czy już zagłosowałaś na nową kolekcję DROPS Jesień/Zima, zapraszamy serdecznie!
07.06.2020 - 18:10
![]() Katharina wrote:
Katharina wrote:
Hallo, wo ist das Diagramm M2?
20.01.2019 - 18:07DROPS Design answered:
Liebe Katharina, Diagram M.2 finden Sie jetzt hier zusammen mit der Anleitung der Mütze. Viel Spaß beim stricken!
22.01.2019 - 15:05
![]() Rebecca Burghardt wrote:
Rebecca Burghardt wrote:
Liebes Drops- Team, die Mütze sieht wunderschön aus, toller Stil. Habe nur ein kleine Verständnis- Frage zur Anleitung: was bedeutet: " mit einem Faden jeder beiden Qualitäten..." Heißt das, die Mütze wird mit doppeltem Faden gestrickt? Vielen Dank im Voraus! Rebecca Ps. Danke, dass es Drops Design gibt:) Habe schon viele schöne Sachen von Euch gestrickt
08.11.2018 - 16:46DROPS Design answered:
Liebe Frau Burghardt, ja genau, die Mütze wird mit doppeltem Faden gestrickt, bzw mit 1 Faden Alpaca + 1 Faden Kid-Silk (Mascheprobe = 22 M x 30 Reihen mit den beiden Fäden). Viel Spaß beim stricken!
09.11.2018 - 07:58Kate wrote:
Never mind -- I just found the pattern for the hat. Thanks!
26.10.2018 - 00:22Kate wrote:
I have read the pattern and all the comments, but I cannot find complete instructions for making the hat. Could you please help me with that? Thank you!
25.10.2018 - 23:53DROPS Design answered:
Hi Kate, If you search for hat in the search box, the pattern for the one you want is there - pattern no: G-022b. Happy knitting!
26.10.2018 - 08:12
![]() Franca wrote:
Franca wrote:
Salve vorrei realizzare il cappello... il diagramma del motivo indica solo i ferri di andata ? nel senso che il ritorno si lavora per come si trovano grazie
18.01.2018 - 08:59DROPS Design answered:
Buongiorno Franca. Nel diagramma, trova tutti i ferri del motivo, sia quelli di andata che quelli di ritorno. La prima riga viene lavorata sul rovescio del lavoro. Le prime due righe del diagramma sono spiegate in dettaglio nel testo. Buon lavoro!
18.01.2018 - 09:04
![]() Evelyn Reisner wrote:
Evelyn Reisner wrote:
Do you have additional detailed instructions for the hat in this pattern. Each time I try to make this hat I have extra st on the cast on needle. I also would need info on where to do the cabling and how, front or back. I would love to make this hat but need additional information please!
07.11.2017 - 15:09DROPS Design answered:
Dear Mrs Reisner, see previous answer for diagram and number of sts. Please note that 1st row in diagram (= and every row from WS) is read from the bottom corner on the left side towards the right - read all rows from RS from the right towards the left. When diagram has been worked 1 time in height, repeat from row 1. Happy knitting!
07.11.2017 - 16:01
![]() Suzanne André wrote:
Suzanne André wrote:
Vous nous demandez si c'est un commentaire ou une question. Je suis allée sur question et n'ai jamais pu poser ma question. Le seul endroit où j'ai pu poser ma question est dans commentaire. Et que voulez-vous dire par site: ?
14.10.2017 - 20:15DROPS Design answered:
Bonjour Madame André, pour que votre commentaire ou question soit publié comme il se doit, il doit être enregistré soit sous l'une ou l'autre rubrique, et comme vous l'avez fait, vous trouverez la réponse ci-dessous. Bon tricot!
16.10.2017 - 09:31
![]() Suzanne André wrote:
Suzanne André wrote:
Question: J'aimerais savoir (modèle DROPS66-15, que veut dire 3 mailles lis au point mousse?
14.10.2017 - 20:07DROPS Design answered:
Bonjour Mme André, il fallait lire: R 2 (= endroit) : 1 m lis au point mousse, 5 m end, M2, 3 m end, 3 m env, 5 m end, 1 m lis au point mousse. Ce rang a été corrigé, merci. Bon tricot!
16.10.2017 - 09:30
![]() Benoist wrote:
Benoist wrote:
Merci beaucoup pour votre explication. Bonne semaine J.
29.02.2016 - 20:26
|
|
Elaine |
|
 |
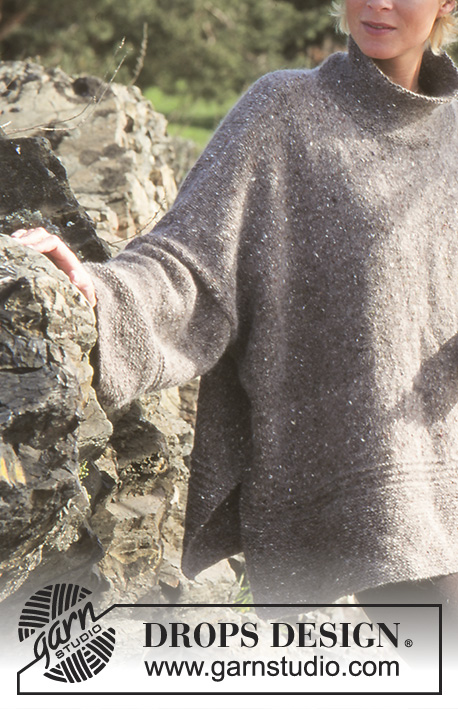 |
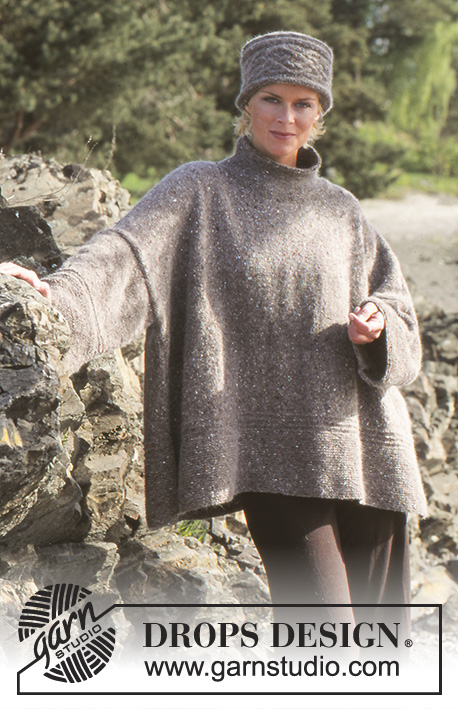
Knitted, oversized pullover in DROP S Alpaca and DROPS Kid-Silk. Size: S/M – M/L – L/XL
DROPS 66-15 |
|
|
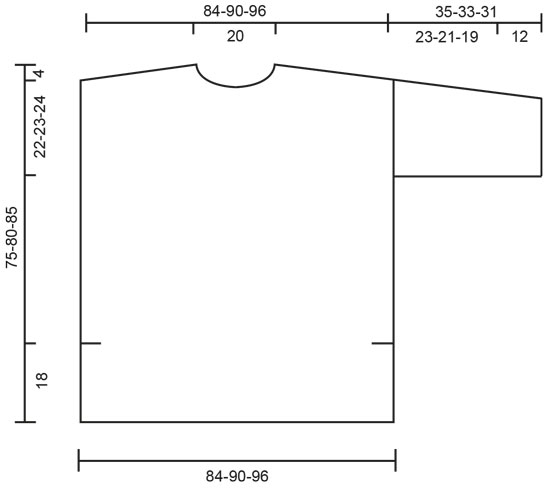
Garter st, when knitting flat: Knit all sts, all rows. Garter st, when knitting in the round: *Rnd 1, knit. Rnd 2, purl.* Repeat from * - *. Pattern: Pattern 1 = * 3 rows stocking st, 1 row reverse stocking st * (seen from the right side), repeat from * - *. -------------------------------------------------------- Front: Cast on 160-170-182 sts with 1 strand of each yarn held together. Knit garter st for 14-14-14 cm. Knit Pattern 1 - repeat 3 times total, but keep 5 sts at each side garter st. After Pattern 1 (the piece measures approx. 18 cm = this is the side slit) inc 1 new st at each side (for edge sts) = 162-172-184 sts. On the next 4 rows knit stocking st with 6 sts garter st at each side - there will be 4 rows garter st over the side slit. Knit stocking st over all sts to finished dimensions. When the piece measures 67-72-77 cm off the center 16-16-16 sts for the neck and work each side separately. Bind off at each neck edge every other row: 3 sts 1-1-1 time, 2 sts 2-2-2 times and 1 st 4-4-4 times. At the same time when the piece measures 71-76-81 cm bind off from the side edge every other row: 12-13-14 sts 4-4-4 times = 14-15-17 sts remain on shoulder. Bind off when the piece measures 75-80-85 cm. Back: Cast on and knit the same as the front, but bind off the center 34-34-34 sts for the neck when the piece measures 73-78-83 cm and work each side separately. Then bind off 2 sts at each neck edge on the next row. This will be after you begin the shoulder shaping. Bind off all sts when the piece measures 75-80-85 cm. Sleeve: Cast on 70-74-78 sts with 1 strand of each yarn held together and knit garter st for 12 cm. Knit Pattern 1 - repeat 3 times total, then continue in stocking st. After the garter st inc 1 st at each side 7-7-7 times every 3-2.5-2 cm = 84-88-92 sts. When the piece measures 35-33-31 cm bind off all sts. Assembly: Sew shoulder seams. With 1 strand of each yarn held together pick up approx. 90 - 100 sts around the neck on double-pointed needles. Knit garter st for 4 cm, decreasing 8 sts evenly distributed on the last row. Knit garter st for 4 cm more and dec 8 sts evenly distributed on the last row. Continue with garter st until the collar measures 12 cm, bind off loosely. Sew in sleeves, Sew sleeve and side seams in one using edge sts as a seam allowance - leave 18 cm open at each side for side slit. |
|
 |
|
Have you finished this pattern?Tag your pictures with #dropspattern or submit them to the #dropsfan gallery. Do you need help with this pattern?You'll find 20 tutorial videos, a Comments/Questions area and more by visiting the pattern on garnstudio.com. © 1982-2026 DROPS Design A/S. We reserve all rights. This document, including all its sub-sections, has copyrights. Read more about what you can do with our patterns at the bottom of each pattern on our site. |
|


With over 40 years in knitting and crochet design, DROPS Design offers one of the most extensive collections of free patterns on the internet - translated to 17 languages. As of today we count 324 catalogues and 12245 patterns translated into English (UK/cm). 12245
We work hard to bring you the best knitting and crochet have to offer, inspiration and advice as well as great quality yarns at incredible prices! Would you like to use our patterns for other than personal use? You can read what you are allowed to do in the Copyright text at the bottom of all our patterns. Happy crafting!
Post a comment to pattern DROPS 66-15
We would love to hear what you have to say about this pattern!
If you want to leave a question, please make sure you select the correct category in the form below, to speed up the answering process. Required fields are marked *.