
Popular categories
Looking for a yarn?


Comments / Questions (46)
![]() Titie Van Der Veen wrote:
Titie Van Der Veen wrote:
In de beschrijving van het patroon is het mij niet duidelijk of er na de plaatsing van de markeerders in het werk, dus na 19 cm. en na de 1 naald tricotsteek, verder wordt gebreid in het spiraalpatroon of dat er door minderingen een soort spiraalpatroon ontstaat. Indien er wordt geminderd, wat is dan de werkwijze? Ik kom er niet uit, Mag ik op korte termijn een reactie?
13.02.2015 - 18:56DROPS Design answered:
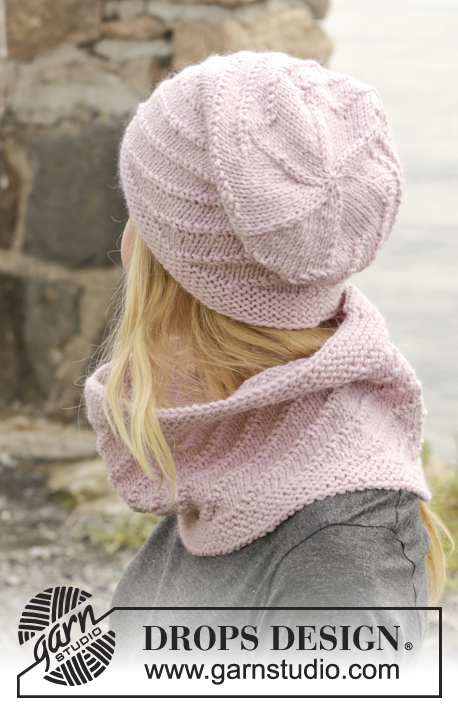
Hoi Titie. Na 19 cm brei je verder in tricotsteken. Door het plaatsen van de markeerders en de minderingen krijg je de spiraal aan de bovenkant, die ook te zien is op de tweede foto.
17.02.2015 - 16:01
![]() Pat wrote:
Pat wrote:
Can you use worsted weight for this pattern? Do you have a yarn equivalency chart for this and other patterns . I don't have drops at our local store and love lots of your patterns but don't know how to figure out a suitable equivalent
10.02.2015 - 02:46DROPS Design answered:
Dear Pat, please click here for all informations about our yarns and category and here to read more about getting our yarns from Canada. Happy knitting!
10.02.2015 - 09:11
![]() Pat wrote:
Pat wrote:
Thank you for explaning,it makes perfect sense now! It is a great feature to be able to ask and receive support as I am teaching myself. My mom was from England and was an amazing knit and crocheter but regrettably i didnt make the time to learn from her. Is it easy to extend the spiral to the top of the hat?
28.01.2015 - 14:02DROPS Design answered:
Dear Pat, you are very welcome. To extend the spiral to the top of the hat, you would have to adjust dec and pattern together - it may be easier to work as in the pattern. Happy knitting!
28.01.2015 - 16:37
![]() Kristi wrote:
Kristi wrote:
Eestikeelses õpetuses on viga. SPIRAL PATTERN: * P 2, K 5 *, repeat from *-* the entire round. Pattern is over 7 sts and no of sts are divisible by 7 + 1. When working in the round, the pattern will displace 1 st towards the right on every round and forms a spiral pattern.
03.01.2015 - 19:05
![]() Iris wrote:
Iris wrote:
Welche Abnahmen sind nach den gesetzten Markierungen zu stricken 2 Maschen rechts zusammen oder 2 Maschen rechts verschränkt zusammen?
10.12.2014 - 15:26DROPS Design answered:
Sie stricken die M immer direkt VOR jedem Markierer zusammen und zwar 2 M re zusammen, nicht verschränkt.
10.12.2014 - 23:04
![]() Tine wrote:
Tine wrote:
Nein, die Abnahmen habe ich nicht an derselben Stelle gemacht. Ich denke das wird das Problem sein. Ich muss wahrscheinlich wirklich direkt vor den Markierern die 2 re zusammen stricken und nicht irgendwo dazwischen. Ich probier es gleich nochmal aus und hoffe es klappt! Lieben Dank für die flotte Hilfe
08.12.2014 - 17:32DROPS Design answered:
Liebe Tine, ja dann wird es klappen, wenn Sie die Abnahmen immer an denselben Stellen machen! Viel Spaß beim Tragen!
08.12.2014 - 20:35
![]() Tine wrote:
Tine wrote:
Ich habe wie folgt gestrickt: ab 19 cm nur noch glatt rechts in allen Reihen. Nachdem die Markierungen angebracht waren habe ich 1 Runde glatt rechts ohne Abnahmen, 1 Runde glatt rechts mit Abnahmen im Wechsel 5x und dann in jeder Runde Abnahmen. Erhalte aber eben keine Strahlen wie auf dem Bild. Was habe ich falsch gemacht? Dankbar für Hilfe
08.12.2014 - 10:17DROPS Design answered:
Es klingt an sich alles richtig, was Sie gemacht haben. Haben Sie die Abnahmen immer an derselben Stelle gemacht, also immer vor den Markierern 2 M re zusammengestrickt? Die Markierer müssen ja immer an derselben Stelle bleiben.
08.12.2014 - 15:28
![]() Tine wrote:
Tine wrote:
Laut Anleitung soll ich ab 19-20 cm glatt rechts stricken. Dann erhalte ich aber nicht das Muster laut Abbildung. Das Spiralmuster läuft ja dann nicht weiter?!
07.12.2014 - 23:59DROPS Design answered:
Wenn Sie sich das zweite Foto anschauen, sehen Sie, dass die Mütze oben glatt rechts gestrickt ist, die Anleitung passt genau zu den Fotos. Die "Strahlen", die Sie auf dem Foto im Glatt-re-Gestrick sehen können, ergeben sich durch die Abnahmen an den Markierern. Die Mütze wird oben glatt re gestrickt, da das Spiralmuster mit den Abnahmen nicht mehr richtig aufgehen würde.
08.12.2014 - 09:27
![]() Cynthia wrote:
Cynthia wrote:
Bonjour, concernant les diminutions, je ne comprends pas comment un point jersey peut reproduire le motif observé sur la photographie. Faut-il donc poursuivre le point fantaisie ?
23.11.2014 - 14:39DROPS Design answered:
Bonjour Cynthia, à la fin du bonnet, quand il mesure 19-20 cm de hauteur totale, on continue en jersey (= tout à l'endroit) en faisant les diminutions indiquées. Bon tricot!
24.11.2014 - 11:27
![]() Nath wrote:
Nath wrote:
Bonjour, Pour le bonnet, pourriez-vous me dire qelle est la technique de diminution à employer ?
30.09.2014 - 14:15DROPS Design answered:
Bonjour Nath, les diminutions se tricotent en jersey, en rond, on va donc tricoter 2 m ens à l'end. Bon tricot!
30.09.2014 - 16:48
|
|
Belinda's Dream#belindasdreamset |
|
 |
 |
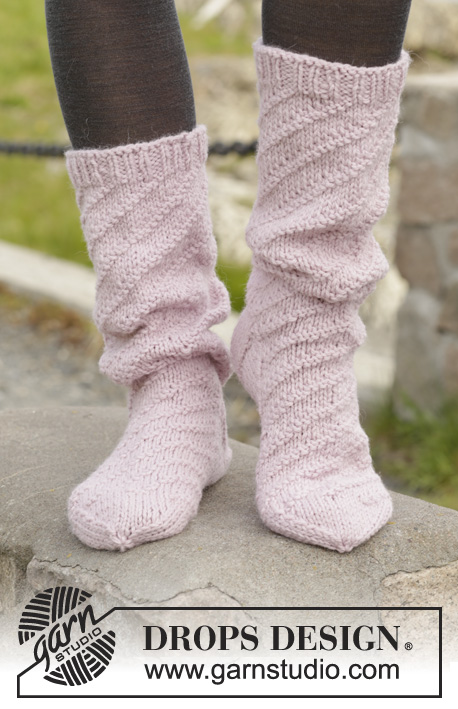
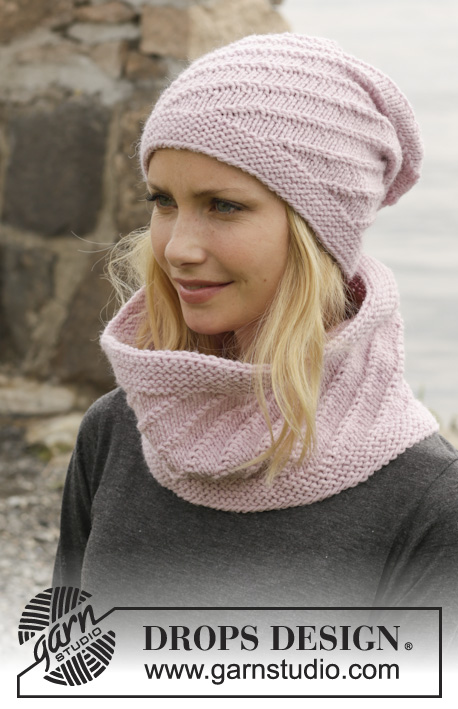
Knitted DROPS hat and neck warmer in garter st with spiral pattern in ”Nepal”.
DROPS 156-24 |
|
|
GARTER ST (in the round on circular needle): * K 1 round and P 1 round *, repeat from *-*. 1 ridge = 2 rounds. SPIRAL PATTERN: * P 2, K 5 *, repeat from *-* the entire round. Pattern is over 7 sts and no of sts are divisible by 7 + 1. When working in the round, the pattern will displace 1 st towards the right on every round and forms a spiral pattern. ---------------------------------------------------------- HAT: Worked in the round on circular needle, switch to double pointed needles when needed. Cast on 85-92 sts on circular needle size 4.5 mm with Nepal. Work in GARTER ST – see explanation above – until piece measures 3 cm. Then work SPIRAL PATTERN - see explanation above. REMEMBER THE KNITTING TENSION! When piece measures 19-20 cm, work in stocking st - AT THE SAME TIME on first round dec 1-2 sts = 84-90 sts. Then insert 6 markers in the piece 14-15 sts apart. On next round, dec 1 st before every marker = 78-84 sts. Repeat dec every other round 5-6 more times (= 6-7 times in total) = 48 sts. Then dec on every round 5 times in total = 18 sts. On next round K tog all sts 2 by 2 = 9-9 sts. Piece measures approx. 27-28 cm. Cut the yarn, use a needle and pull it through the remaining sts, tighten tog and fasten. ---------------------------------------------------------- NECK WARMER: Worked in the round on circular needle. Cast on 109-116 sts on circular needle size 4.5 mm with Nepal. Work 3 ridges in GARTER ST - see explanation above. K 1 round while AT THE SAME TIME dec 10 sts evenly = 99-106 sts. P 1 round. Work SPIRAL PATTERN – see explanation above – until piece measures 16-20 cm. REMEMBER THE KNITTING TENSION! Then work in garter st until piece measures 18-22 cm, finish with P 1 round and cast off with K on next round. |
|
Have you finished this pattern?Tag your pictures with #dropspattern #belindasdreamset or submit them to the #dropsfan gallery. Do you need help with this pattern?You'll find 15 tutorial videos, a Comments/Questions area and more by visiting the pattern on garnstudio.com. © 1982-2026 DROPS Design A/S. We reserve all rights. This document, including all its sub-sections, has copyrights. Read more about what you can do with our patterns at the bottom of each pattern on our site. |
|


With over 40 years in knitting and crochet design, DROPS Design offers one of the most extensive collections of free patterns on the internet - translated to 17 languages. As of today we count 324 catalogues and 12290 patterns translated into English (UK/cm). 12290
We work hard to bring you the best knitting and crochet have to offer, inspiration and advice as well as great quality yarns at incredible prices! Would you like to use our patterns for other than personal use? You can read what you are allowed to do in the Copyright text at the bottom of all our patterns. Happy crafting!
Post a comment to pattern DROPS 156-24
We would love to hear what you have to say about this pattern!
If you want to leave a question, please make sure you select the correct category in the form below, to speed up the answering process. Required fields are marked *.