
Popular categories
Looking for a yarn?


Comments / Questions (36)
![]() Helena Šindlerová wrote:
Helena Šindlerová wrote:
Pletla jsem z Paris na doporučené tloušťce jehlic, ale spouštěná oka byla příliš velká. Nakonec jsem si vzorek spuštěných ok upravila na: 3x nahodit jednou, 3x nahodit dvojitě, 3x nahodit jednou.
21.06.2021 - 11:46Maria Eugenia wrote:
Hola y gracias por su hermosa página web!! Mi pregunta es qué pasa si comienzo este modelo por la espalda y lo hago en una sola pieza hasta terminar el delantero? (Haciendo las mismas disminuciones y aumentos que indican para el escote, pero sin cerrar en los hombros para evitar la costura)? Gracias desde ya por su respuesta! Un gran saludo de Navidad y Año Nuevo desde Argentina.
20.12.2018 - 13:22DROPS Design answered:
Hola Maria. De este modo el dibujo no queda igual en el delantero y la espalda, porque una parte la quieres trabajar de arriba abajo y la otra parte de abajo arriba.
30.12.2018 - 15:50
![]() Heike Mauermann wrote:
Heike Mauermann wrote:
Hallo! Ich würde das Top gerne stricken.Meinen Sie,man kann es auch in Runden stricken? Ich versuche immer gerne mir das Zusammennähen zu ersparen. 😂
30.01.2018 - 13:59DROPS Design answered:
Liebe Frau Mauermann, es kann vielleicht auch klappen, aber mit einigen Muster ist es nicht immer so einfach das gleiche Ergebnis zu bekommen. Viel Spaß beim stricken!
30.01.2018 - 14:03
![]() Astrid wrote:
Astrid wrote:
Guten Tag, ich habe jetzt Vorder- und Rückenteil fertig, leider kann ich mir das Zusammennähen nicht richtig vorstellen, wegen der Fallmaschen am Rand. Für einen Tipp wäre ich sehr dankbar. PS: Müsste es in der Anleitung bei der Fertigstellung nicht heißen: "Die Seitennaht sollte ... cm über der Anschlagkante ENDEN" ?
18.04.2017 - 11:38DROPS Design answered:
Liebe Astrid, wenn Sie die Reihen mit den Fallmaschen zusammennähen, lassen Sie den Faden genau so long wie den Fallmaschen sein, damit es nicht so eng wird. Die Seitennaht beginnt hier von Anschlagskante und endet an der Anschlagskante. Viel Spaß beim zusammennähen!
18.04.2017 - 13:18
![]() Kristine wrote:
Kristine wrote:
I will rephrase my question. The difference between sizes for this pattern is 8 inches and is much different from sizing in your other patterns. How is it best to resize? Add stitches to the edges? Make the front and back different widths? My bust measurement is 34. In the pattern XS is 31.5 and S is 39.5.
15.03.2017 - 12:51DROPS Design answered:
Dear Kristine, as previously answered, you have to compare the measurements in chart with a similar garment (not from your own measurements), you can then choose to get a fitter or a looser shape as you rather like it to be. For any further personnal assistance, you are welcome to contact your DROPS store, even per mail or telephone. Happy knitting!
15.03.2017 - 15:26
![]() Krisitne wrote:
Krisitne wrote:
The sizing for this sweater is extreme. XS is too small and S is too big. I am a 34 bust. Would it work if i knit the back S and the front XS? I suggest this since I just finished the back. Would the arms work?
06.03.2017 - 20:26DROPS Design answered:
Dear Krisitne, compare the measurements in the chart with a similar garment you have and like the shape to find out the matching size. Read more here. Happy knitting!
07.03.2017 - 08:34
![]() Hanne wrote:
Hanne wrote:
Er gået igang med trøjen i L/XL i Paris på pind 6, tør ikke rigtig fortsætte, da arbejdet virker til at blive alt for bredt 😳
27.07.2016 - 14:47DROPS Design answered:
Hej Hanne. Stemmer din strikkefasthed? Du skal have 14 m i mönster i bredden per 10 cm. Stemmer det, saa er dit arbejde med 85 m ca 60 bredt som angivet paa maalskitsen. Skift eventuelt til en tyndere p om det ikke stemmer.
29.07.2016 - 11:11
![]() Beti wrote:
Beti wrote:
¿Se puede hacer este modelo con agujas rectas?
10.05.2016 - 08:18DROPS Design answered:
Hola Beti, si se puede. Utilizamos aguja circular porque es más cómoda para trabajar con muchos puntos.
17.05.2016 - 09:41
![]() Nathalie wrote:
Nathalie wrote:
Bonsoir, Je viens de commencer l'ouvrage, j'ai effectué le premier rang avec le point fantaisie (qui se répète 5 fois 14 mailles). Pour la suite, quand vous dites " Continuer en aller-retour, en point fantaisie" : - il s'agit bien de répéter 5 fois le diagramme A1 (de 14 mailles) pour terminer le rang ? - et de continuer les 8 rangs que composent le diagramme ? A répéter jusqu'à 34 cm de hauteur totale. J'espère que mes questions sont claires. Merci d'avance.
03.06.2015 - 22:37DROPS Design answered:
Bonjour Nathalie, c'est tout à fait exact, répétez le point fantaisie des 14 m (5 fois en largeur dans votre taille) sur 8 rangs jusqu'à 34 cm de hauteur totale. Quand le 8ème rang est tricoté, reprenez au rang 1 comme avant et ainsi de suite. plus d'infos sur les diagrammes ici. Bon tricot!
04.06.2015 - 08:31
![]() Esther wrote:
Esther wrote:
Hallo, ihr schreibt bei der Garngruppe C oder A+A. Bedeutet das, dass man bei der Garngruppe A das Garn doppelt nimmt? Und wie ist dann der Materialbedarf? LG Esther
30.05.2014 - 06:56DROPS Design answered:
Liebe Esther, ganz genau, A+A bedeutet, dass das Garn aus Gruppe mit 2-fachem Faden gestrickt wird. Die Garnmenge richtet sich immer nach der Lauflänge des jeweiligen Garns. Eine Hilfe zum Berechnen finden Sie unter "Tipps & Hilfe => Häufig gestellte Fragen" => Punkt 5. (Da Sie A aber doppelt nehmen müssen, brauchen Sie dann auch die doppelte Menge.)
31.05.2014 - 00:26
|
|||||||||||||||||||
Amanda#amandatop |
|||||||||||||||||||
|
|
|||||||||||||||||||
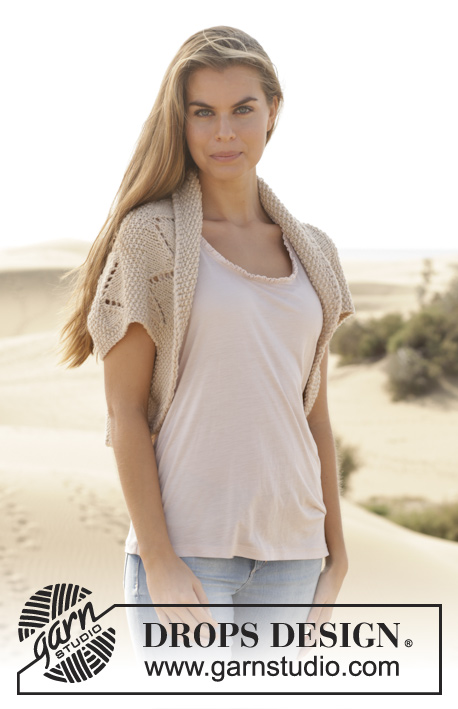
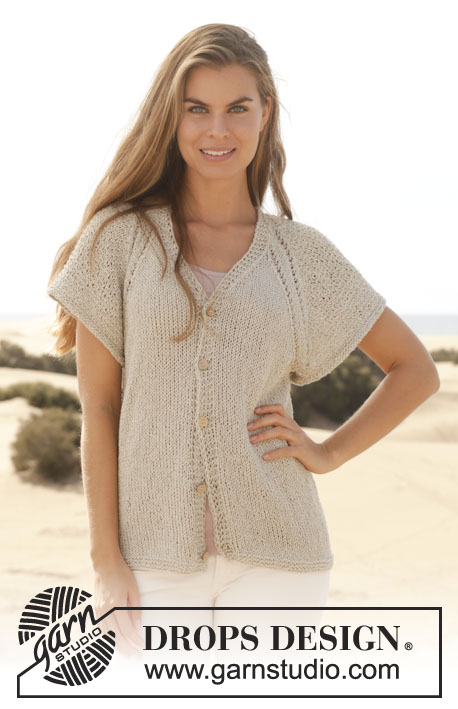
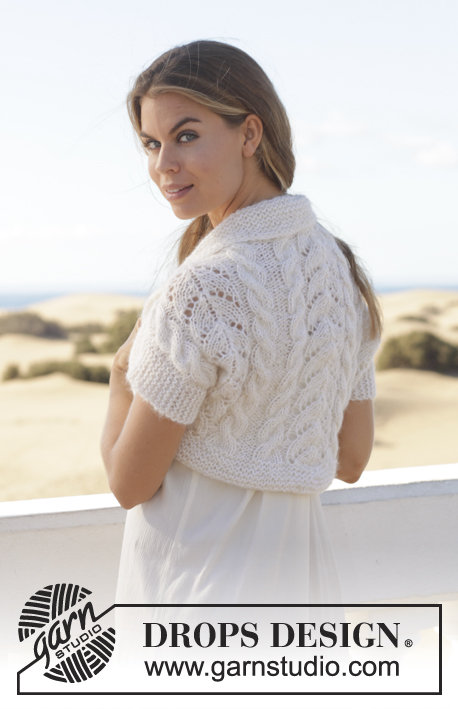
Knitted DROPS top in garter st with wave pattern in ”Bomull-Lin” or "Paris". Size: XS - XXXL.
DROPS 153-34 |
|||||||||||||||||||
|
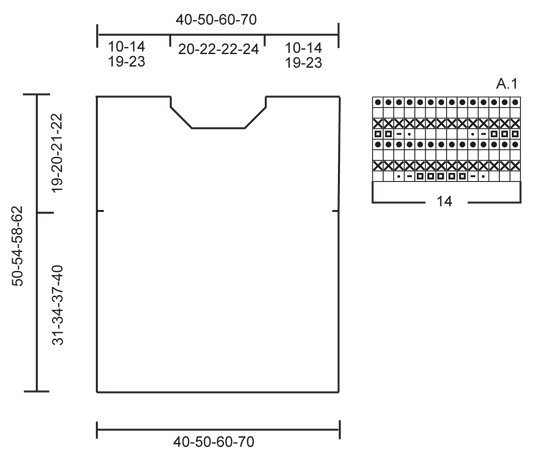
KNITTING TIP: To make the pattern fit, work 1 edge st in right side of piece seen from RS. GARTER ST (back and forth on needle): K all rows. 1 ridge = 2 rows K. PATTERN: See diagram A.1. The diagram shows all rows in pattern seen from RS. INCREASE TIP: Inc 1 st by picking up yarn between 2 sts from previous row. K this st twisted, i.e. work in back loop of st instead of front to avoid holes. DECREASE TIP: Dec inside 1 edge st in garter st. All dec are done from WS! Dec before 1 edge st as follows: K 2 tog. Dec after 1 edge st as follows: Slip 1 st as if to K, K 1, psso. TIP: Bomull-Lin will be more even and look better after it has been washed. When the garment is finished, soak it, stretch it to correct measurements - see chart, and leave it to dry flat. The garment will stretch approx. 5 cm in length after wash. ---------------------------------------------------------- BACK PIECE: Worked back and forth on circular needle with 1 edge st in garter st in right side seen from RS - READ KNITTING TIP! Cast on 57-71-85-99 sts on circular needle size 6 mm with Bomull-Lin. Work 1 ridge in GARTER ST - see explanation above. Continue to work PATTERN from RS as follows: 1 edge st in garter st, A.1 (= 14 sts) 4-5-6-7 times in total. Continue back and forth with pattern and 1 edge st in garter st in right side of piece. REMEMBER THE KNITTING TENSION! When piece measures 31-34-37-40 cm, insert a marker in each side to mark armholes. When piece measures 39-42-46-49 cm, continue in garter st AT THE SAME TIME on first row inc 3-4-5-6 sts evenly - READ INCREASE TIP (= 60-75-90-105 sts on needle). When piece measures 47-51-55-59 cm, cast off the middle 28-29-32-33 sts on next row from WS and finish each shoulder separately. On next row from WS, dec 1 st for neck - READ DECREASE TIP = 15-22-28-35 sts remain on shoulder. Cast off when piece measures 50-54-58-62 cm. Work the other shoulder the same way. FRONT PIECE: Cast on and work as back piece. When piece measures 42-45-49-52 cm, cast off the middle 20-21-22-23 sts on next row from WS and finish each shoulder separately. Then work in garter st and dec 1 st for neck on next row from WS - READ DECREASE TIP. Repeat dec on every row from WS 4-4-5-5 more times (i.e. 5-5-6-6 dec in total) = 15-22-28-35 sts remain on shoulder. Cast off when piece measures 50-54-58-62 cm. Work the other shoulder the same way. ASSEMBLY: Sew shoulder seams and side seams tog in outer loops of edge sts. Side seam should beg 31-34-37-40 cm from cast-on edge. When the garment is finished and assembled, soak it, stretch it to correct measurements - see chart, and leave it to dry flat. |
|||||||||||||||||||
Diagram explanations |
|||||||||||||||||||
|
|||||||||||||||||||
 |
|||||||||||||||||||
Have you finished this pattern?Tag your pictures with #dropspattern #amandatop or submit them to the #dropsfan gallery. Do you need help with this pattern?You'll find 16 tutorial videos, a Comments/Questions area and more by visiting the pattern on garnstudio.com. © 1982-2026 DROPS Design A/S. We reserve all rights. This document, including all its sub-sections, has copyrights. Read more about what you can do with our patterns at the bottom of each pattern on our site. |
|||||||||||||||||||


With over 40 years in knitting and crochet design, DROPS Design offers one of the most extensive collections of free patterns on the internet - translated to 17 languages. As of today we count 324 catalogues and 12290 patterns translated into English (UK/cm). 12290
We work hard to bring you the best knitting and crochet have to offer, inspiration and advice as well as great quality yarns at incredible prices! Would you like to use our patterns for other than personal use? You can read what you are allowed to do in the Copyright text at the bottom of all our patterns. Happy crafting!
Post a comment to pattern DROPS 153-34
We would love to hear what you have to say about this pattern!
If you want to leave a question, please make sure you select the correct category in the form below, to speed up the answering process. Required fields are marked *.