
Popular categories
Looking for a yarn?


























Comments / Questions (83)
 Alena wrote:
Dobry den jeste jsem chtela napsat ze v celkovem obvodu to bude delat 44 cm. To je nejak moc. Dekuji za vasi pomoc. Alena
07.07.2026 - 20:23
Alena wrote:
Dobry den jeste mne trapi jedna vec. Dole je to siroke pro mou velikost 88 cm. A u pruramku dela sire 66 cm. Pokud jsem to dobre precetla, tak se nikde nez se dil uhackuje k pruramkum nezuzuje neujima. Jak tedy nalozim s temi 22cm navic. Dekuji za odpoved. Alena
07.07.2026 - 19:34DROPS Design answered:
Dobrý den, Aleno. Ano tuto modifikaci musíte provést sama, jak na to se dozvíte v postupu popsaném již v předchozí odpovědi. Hodně zdaru!
12.07.2026 - 08:02
 Delaney wrote:
The pattern was actually hard for me, I've crocheted for about 3-4 years and read patterns for 2 of those but this one is still hard
30.06.2026 - 00:49DROPS Design answered:
Dear Mrs Delaney, should you have any questions about the pattern, feel free to use that section to ask; we'll do our best to help you. Happy crocheting!
01.07.2026 - 07:00
Alena wrote:
Dobry den je mozne z teto tuniky udelat saty? Proste to prodlouzit? Dekuji za vasi pomoc. Alena
29.06.2026 - 11:23DROPS Design answered:
Dobrý den paní Alenko, určitě ano. Změřte si obvod boků či nejširší části těla od pasu dolů a vyberte adekvátní velikost. V tomto případě zřejmě můžete zůstat u původní vel. XXXL. V daném vzoru bude poměrně nesnadné přidávat či ujímat, pokud by Vám vycházel obvod pod prsy příliš široký, doporučuji začít háčkovat živůtek (který se dá snadno tvarovat díky DS) o něco níže, např. již v pase a zúžit jej rovnoměrným sháčkováním potřebného počtu DS. Stejným způsobem můžete později DS přidat a díl tak opět rozšířit přes prsa rovnoměrným rozháčkováním každého jednoho DS na 2 DS. Budeme rádi, když se o svůj hotový výtvor podělíte a nesdílíte fotografii. Hodně zdaru! Markéta.
29.06.2026 - 11:50
Alena wrote:
Dobry den dekuji za vasi odpoved. Ja hackuji spis husteji. Mozna bude lepsi to vyparat k prvni rade a vynechat 2 sekvence vzoru. Tim to bude vychazet na 88cm sirka. Dekuji. Alena
26.06.2026 - 08:36DROPS Design answered:
Ano, v podstatě se můžete řídit pokyny k o číslo menší velikosti, abyste nemusela nic složitě přepočítávat. Držím palce! Markéta
26.06.2026 - 11:50
Alena wrote:
Dobry den dekuji za vasi odpoved. Mam uhackovane 4 rady a stale je to o 10 cm sirsi. Co s tim? Mam to vyparat nebo nechat? Dekuji. Alena
25.06.2026 - 12:04DROPS Design answered:
Dobrý den Alenko, omlouvám se teď jsem si všimla, že se spodní volánek háčkuje až na konec - tím to tedy nebude. Uháčkovala jste si před začátkem práce doporučený zkušební vzorek? Je totiž možné, že háčkujete o něco volněji a tak Vám díl vychází širší. Řešením by tak mohlo být, že si pro práci zvolíte menší velikost háčku. Zkuste, kdyžtak dáme opět hlavy dohromady. Hodně zdaru! Markéta.
26.06.2026 - 07:30
Alena wrote:
Dobry den, jestlize je vzor od retizku hackovany odspodu tak me vychazi sirka ne 88cm ale 98 cm. Hackuju presne podle navodu. Dekuju za pomoc. Qlena
21.06.2026 - 10:08DROPS Design answered:
Dobrý den Aleno, v následující řadě háčkujete vzor, v kterém některá řo počátečního řetízku postupně vynecháváte - tím by se měla šíře stáhnout na požadovaný rozměr. Na fotografiích můžete vidět, že spodní lem tuniky je díky tomu lehce zvlněný. Zkuste si uháčkovat několik řad vzorem a díl znovu změřit. Hodně zdaru!
25.06.2026 - 11:48
 Yolanda wrote:
Ik snap niet zo goed hoe ik de 4 patroonhh moet maken tot 32 cm hoogte a1 en dan 4 toeren dus maar als je dan weer bij toer 1 komt begint komt hetbpatroon niet uit als iknhet zo zie of moet ik alleen de eerste 2 rijen van a1 doen ik hoor graag van u mvg yolanda
07.07.2025 - 15:41DROPS Design answered:
Dag Yolanda,
Je haakt alle 4 toeren van A.1 in de hoogte, als je die klaar hebt, haak je opnieuw alle 4 toeren. Dit doe je steeds totdat je op de juiste hoogte bent.
08.07.2025 - 20:56
 Delphine wrote:
Je fais le modèle en taille L et j'arrive à la fin des diminutions pour les emmanchures mais il me reste 88 mailles et non 90 ?
31.05.2025 - 17:07DROPS Design answered:
Bonjour Delphine, en taille L, vous diminuez pour les emmanchures de chaque côté: 1 x 4 B, 1 x 3 B, 1 x 2 B et 4x 1 B soit (4+3+2+4=13 B de chaque côté donc 26 brides au total, vous aviez alors 116 brides - 26, il doit bien vous en rester 90. Bon crochet!
02.06.2025 - 08:03
Brenda Garrod wrote:
I would like to make the bottom larger so that it would be looser. Do you have any suggestions? I thought of using a larger crochet hook.
02.02.2025 - 16:13DROPS Design answered:
Dear Mrs Garrod, this could be an idea, maybe divide the height in so many crochet hook size you will use to get the desired width (remember to swatch before), to make a smoother "increase". Happy crocheting!
03.02.2025 - 14:04
|
||||||||||
Yasmin#yasmintunic |
||||||||||
 |
 |
|||||||||
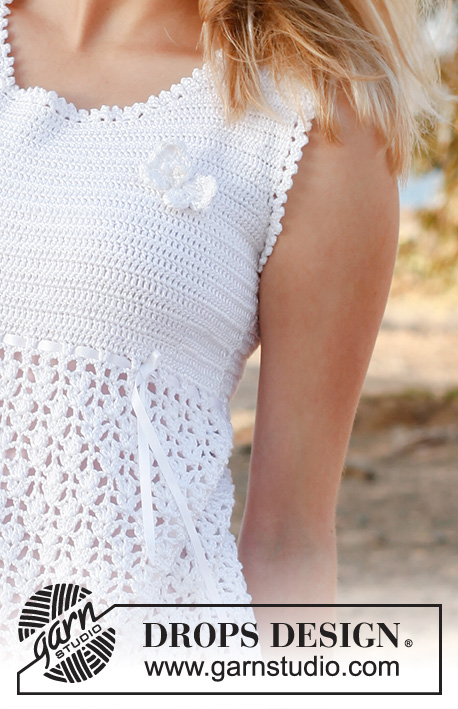
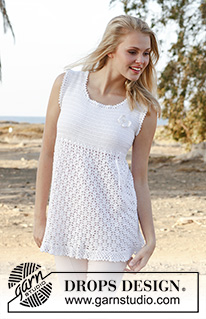
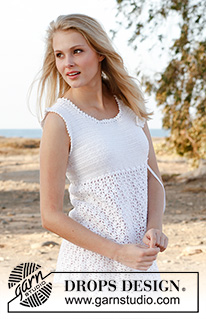
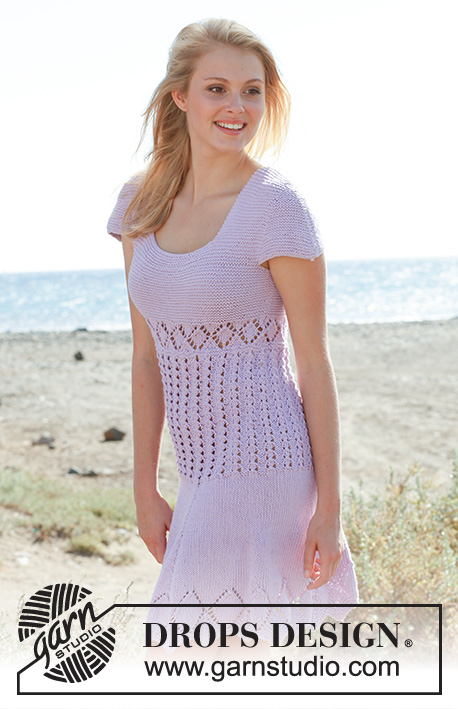
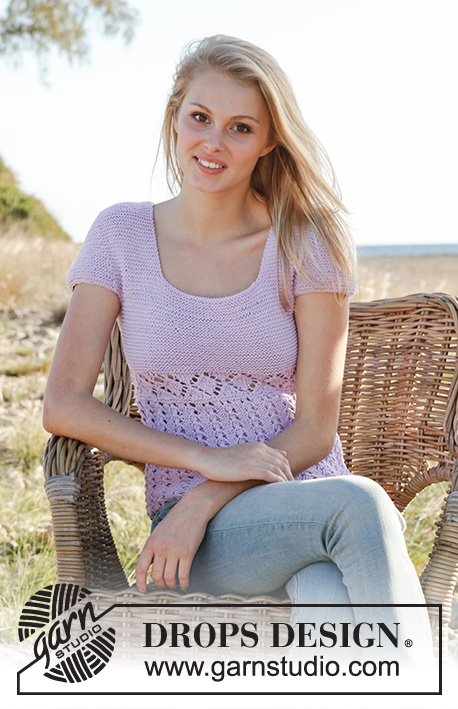
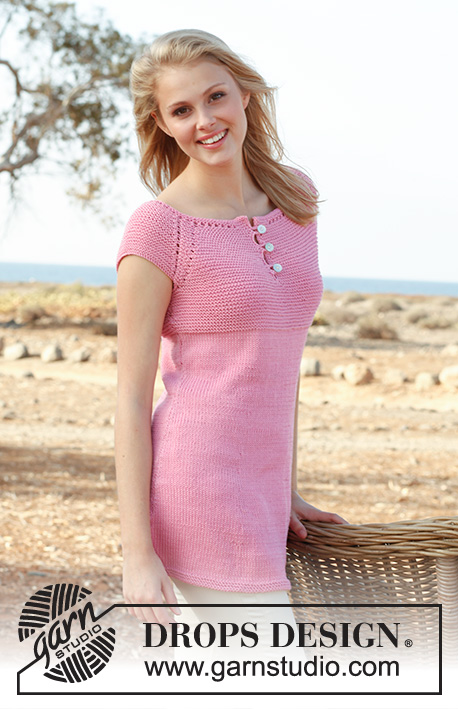
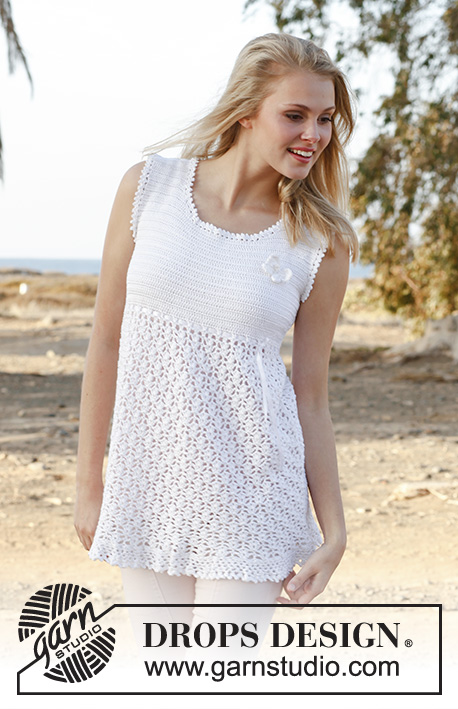
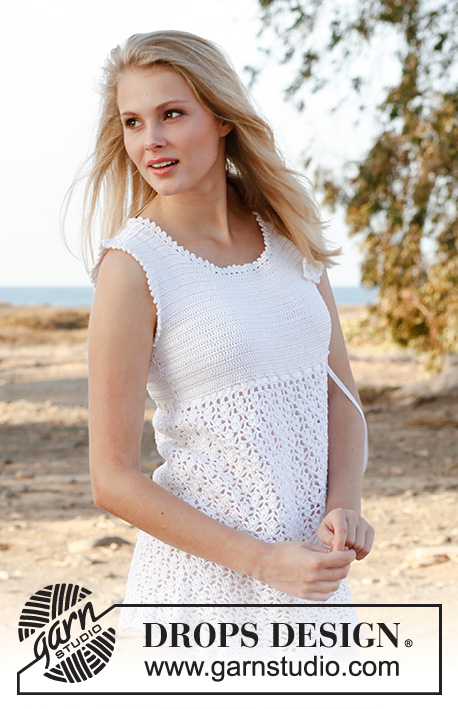
Crochet DROPS tunic with lace pattern, flounce at the bottom and butterfly for decoration in ”Cotton Viscose”.
DROPS 148-9 |
||||||||||
|
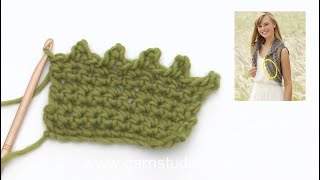
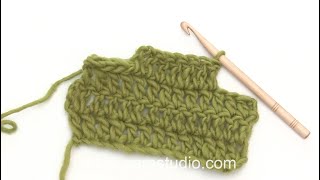
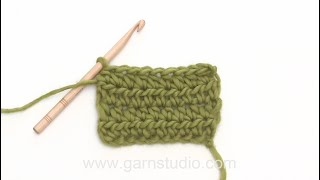
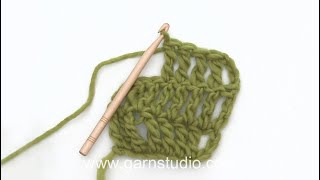
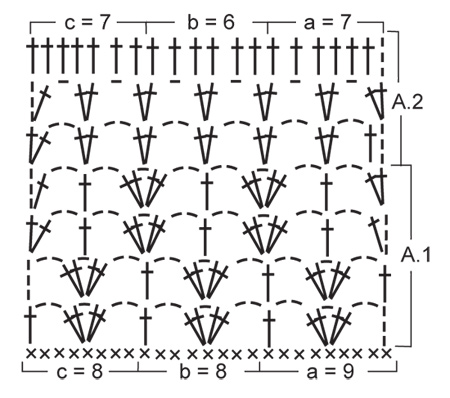
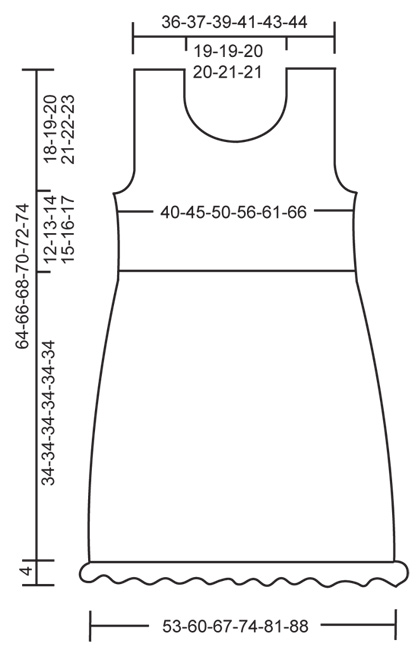
CROCHET INFO: Replace first tr on every row with 3 ch. PATTERN: See diagrams A.1 and A.2. DECREASE TIP (applies to neck and armhole): Dec at beg of row as follows: Work sl sts over no of tr to be dec. Dec at end of row as follows: When no of tr to be dec remains, turn. -------------------------------------------------------- TUNIC: Worked back and forth in 2 parts and sewn tog when finished. FRONT PIECE: Work 141-160-178-197-216-234 ch on hook size 3 mm with Cotton Viscose. Continue with 1 dc in 2nd ch from hook, then 1 dc in each of the next 6-4-8-6-4-8 ch, * skip 1 ch, 1 dc in each of the next 6 ch *, repeat from *-* the entire row = 121-137-153-169-185-201 dc. Continue pattern A.1 as follows: Diagram a over the first 9 dc, diagram b until 8 dc remain, then diagram c over these (= 15-17-19-21-23-25 repetitions in total on row). Repeat the 4 rows in diagram A.1 upwards until piece measures approx. 32 cm – finish after 4th row in diagram. REMEMBER THE CROCHET TENSION! Then work diagram A.2 one time vertically. When A.2 has been worked, there are 92-104-116-128-140-152 tr on row. Then work 1 tr in every tr - READ CROCHET INFO. When piece measures 46-47-48-49-50-51 cm, dec for armhole in each side on every row as follows – READ DECREASE TIP: 4 tr 1 time, 3 tr 0-0-1-1-2-3 times, 2 tr 0-1-1-3-3-4 times and 1 tr 1-3-4-4-5-4 times in each side = 82-86-90-94-98-102 tr remain on row. When piece measures 53-54-56-57-59-60 cm, beg neck dec and finish each shoulder separately. FIRST SHOULDER: Work tr back and forth over the first 28-30-31-33-34-36 tr in one side – AT THE SAME TIME dec towards the neck on every row: 3 tr 1 time, 2 tr 2 times and 1 tr 2 times = 19-21-22-24-25-27 tr remain on shoulder. When piece measures 64-66-68-70-72-74 cm, cut the thread. OTHER SHOULDER: Work the same way as the first. BACK PIECE: Work as front piece up to and with armhole dec = 82-86-90-94-98-102 tr on row. Continue to work until piece measures approx. 62-64-66-68-70-72 cm. Now finish each shoulder separately as follows: Work 1 row with tr over the first 21-23-24-26-27-29 tr, turn, dec the first 2 tr and work the rest of row, cut the thread. Repeat on the other shoulder. ASSEMBLY: Sew shoulder seams edge to edge to avoid a chunky seam. Sew side seams edge to edge so that they are less visible. FLOUNCE AT THE BOTTOM: Work in the dc row at the bottom of body as follows (beg in one side): ROUND 1: 1 dc in first dc, * 3 ch, skip 1 dc, 1 dc in next dc *, repeat from *-* the entire round, finish with 1 sl st in first dc. ROUND 2: 2 ch, 1 dc in first ch-loop, * 4 ch, 1 dc in next ch-loop *, repeat from *-* the entire round, finish with 1 sl st in first dc. ROUND 3: 2 ch, 1 dc in first ch-loop, * 4 ch, 1 dc in next ch-loop *, repeat from *-* the entire round, finish with 1 sl st in first dc. ROUND 4: 2 ch, 1 dc in first ch-loop, * 5 ch, 1 dc in next ch-loop *, repeat from *-* the entire round, finish with 1 sl st in first dc. ROUND 5: 2 ch, 1 dc in first ch-loop, * 5 ch, 1 dc in next ch-loop *, repeat from *-* the entire round, finish with 1 sl st in first dc. ROUND 6: Work as follows in every ch-loop: 2 dc + 1 picot (= 3 ch, 1 dc in first ch) + 2 dc. Cut and fasten the thread. EDGE AROUND THE ARMHOLES AND NECK: Beg mid back of neck and mid under armhole. ROUND 1: 1 dc in first st, * 3 ch, skip approx. ½ cm, 1 dc in next st *, repeat from *-* the entire round, finish with 1 sl st in first dc. ROUND 2: Work as follows in every ch-loop: 1 dc + 1 picot (= 3 ch, 1 dc in first ch) + 1 dc. Cut and fasten the thread. SILK RIBBON: Thread a silk ribbon in the row with eyelet holes at the top below the yoke – beg and end in the left side at the front and make a small bow. BUTTERFLY - for decoration: WINGS: Work 15 ch on hook size 3 mm. Work all rows from RS. ROW 1: Work 3 triple tr in 6th ch from hook, 1 ch, 1 tr in next ch, 2 ch (on 2nd row beg working here), 2 triple tr in next ch, 1 triple tr in next ch, 3 ch, 1 sl st in next ch, 3 ch (on 3rd row beg working here), 1 triple tr in next ch, 2 triple tr in next ch, 1 ch, 1 tr in next ch, 2 ch, 3 triple tr in next ch, 5 ch, 1 sl st in last ch. Cut and fasten the thread. ROW 2: Start by working 1 sl st in the second of the 2 ch from previous row (see 1st row), 1 ch, in next triple tr work as follows: 1 htr and 1 tr, in next triple tr work as follows: 1 tr (on 4th row beg working here), 1 ch, 1 dtr and 1 tr, in next triple tr work as follows: 1 tr and 1 htr, 1 ch, 1 sl st in the 1st of the 3 ch from previous row. Cut and fasten the thread. ROW 3: Start by working 1 sl st in the third of the 3 ch from 1st row (see 1st row), 1 ch, in next triple tr work as follows: 1 htr and 1 tr, in next triple tr work as follows: 1 tr (on 5th row beg working here), 1 dtr, 1 ch, 1 tr, in next triple tr work as follows: 1 tr and 1 htr, 1 ch, 1 sl st in 1 ch from 1st row. Cut and fasten the thread. ROW 4: Start by working 1 sl st in tr from 2nd row (see 2nd row), 1 ch, in next dtr work as follows: 1 dc, 1 ch and 1 dc, 1 ch, 1 sl st in next tr. Cut and fasten the thread. ROW 5: Start by working 1 sl st in tr from 3rd row (see 3rd row), 1 ch, in next dtr work as follows: 1 dc, 1 ch and 1 dc, 1 ch, 1 sl st in next tr. Cut and fasten the thread. BODY: Work as follows with double yarn: 6 ch, 2 dc in the 2nd ch from hook (= head). Cut and fasten the thread. Sew the body on to the wings with the head up between the big wings. Finish by working a row of sl sts along the edge of the big wings. Sew the butterfly to the left side of yoke. |
||||||||||
Diagram explanations |
||||||||||
|
||||||||||
 |
||||||||||
 |
||||||||||
Have you finished this pattern?Tag your pictures with #dropspattern #yasmintunic or submit them to the #dropsfan gallery. Do you need help with this pattern?You'll find 9 tutorial videos, a Comments/Questions area and more by visiting the pattern on garnstudio.com. © 1982-2026 DROPS Design A/S. We reserve all rights. This document, including all its sub-sections, has copyrights. Read more about what you can do with our patterns at the bottom of each pattern on our site. |
||||||||||






With over 40 years in knitting and crochet design, DROPS Design offers one of the most extensive collections of free patterns on the internet - translated to 17 languages. As of today we count 333 catalogues and 12525 patterns translated into English (UK/cm). 12525
We work hard to bring you the best knitting and crochet have to offer, inspiration and advice as well as great quality yarns at incredible prices! Would you like to use our patterns for other than personal use? You can read what you are allowed to do in the Copyright text at the bottom of all our patterns. Happy crafting!
Post a comment to pattern DROPS 148-9
We would love to hear what you have to say about this pattern!
If you want to leave a question, please make sure you select the correct category in the form below, to speed up the answering process. Required fields are marked *.