
Popular categories
Looking for a yarn?


Comments / Questions (118)
![]() Erica Bertilsson wrote:
Erica Bertilsson wrote:
Hej, Jag vill sticka 141-9 men i mohair, ev dubbla garn mohair+alpacka, är det möjligt? Är det ngt jag bör tänka på? Med vänlig hälsning,/ Erica
13.08.2017 - 09:54DROPS Design answered:
Hei Erica. garngruppe, men som er mye lettere, vil jakke veie kun ca 150 gram. Den vil da ikke falle/sitte så pent på. Om du velger og strikke med 1 tråd Alpaca og 1 tråd Kid-Silk, vil jakke veie ca 300 gram. Det er også viktig å overholde strikkefastheten som er oppgitt i oppskriften når man bytter kvalitet. Strikk en prøvelapp, da får du sjekket din strikkefasthet og se hvordan du syns Alpaca og Kid-Silk er sammen. God Fornøyelse!
14.08.2017 - 15:57
![]() Jeannet Hazelbag wrote:
Jeannet Hazelbag wrote:
Ik heb het ook gebreid, maar helaas erg kort, ik heb het verlengd, dat was beter, in maat XL, maar de schouders zijn zo smal geworden, ondanks dat de steekverhoudingen wel bleven kloppen, dat de kraag de functie van de schouders overneemt, de kraag ligt helemaal plat op de schouders :( jammer, het zag er zo leuk en eenvoudig uit.
04.08.2016 - 17:42DROPS Design answered:
Bedankt voor het melden en jammer dat het resultaat niet helemaal naar wens is. Iedere lichaamsvorm is anders en we kunnen op afstand helaas niet beoordelen hoe het komt dat de pasvorm niet naar wens is. Als u een Drops verkooppunt in de buurt heeft, kunt u het vest altijd even meenemen en er samen met iemand naar kijken.
05.08.2016 - 10:26
![]() Chris wrote:
Chris wrote:
Ich habe xl gestrickt, jedoch sind die Ärmel für mich ca. 8 cm zu lang und zu breit. Kann ich einfach kürzen überführt mit der Rundpasse beginnen?
01.05.2016 - 14:48
![]() Ursula Reynolds wrote:
Ursula Reynolds wrote:
I love this jacket but it it is a bit too short for my liking (and need). Can I make it longer without changing the "look"? I would start with the total number of stitches and keep the sides straight (no increases). Thanks!
15.04.2016 - 15:44DROPS Design answered:
Dear Mrs Reynolds, you can make it longer but the look will be automatically different with a longer body (under armhole) and no shape on the sides. Your DROPS store may help you with any individual assistance if required. Happy knitting!
15.04.2016 - 18:03
![]() Ann K. Vassdal wrote:
Ann K. Vassdal wrote:
Hei! Nydelig jakke! Jeg er usikker på hva str. S - XXXL tilsvarer i nr. størrelser?
16.02.2016 - 11:00DROPS Design answered:
Hej. Längst ner på oppskriften hittar du en mått-skiss, det bästa är att se på den och välja den storleken som ligger närmast dina mått. Lycka till!
16.02.2016 - 14:00
![]() Lene Sørensen wrote:
Lene Sørensen wrote:
Svarer man ikke på spørgsmål længere ?
28.01.2016 - 15:34DROPS Design answered:
Hej Lene. Jo, vi har meget travlt med den nye kollektion lige nu, men vi gör vores bedste for at naa saa meget som muligt :-)
29.01.2016 - 09:27
![]() Lene Sørensen wrote:
Lene Sørensen wrote:
Jeg er nået til halsen. Jeg strikker str. xxxl. Ærmer, ryg og forstykke i alt. 380 m (begyndelse på bærestykke) 20 indtagninger x 8 m 160 m i alt 220 m tilbage 8 indtagninger x 8 m 64 m i alt 156 m tilbage hvoraf de 50 m er dem der sidder på trådene. Så der er mange flere masker end de 120 m der står i opskriften. Så nu er jeg kørt fast så tæt ved målet :) Hjæææææææælp Hilsen Lene Sørensen
18.01.2016 - 20:14DROPS Design answered:
Hej Lene, Jo men når du til sidst strikker maskerne op fra trådene, kan du strikke 2 m sammen jævnt fordelt hele vejen rundt, så du har 120 m på pinden, på næste p justerer du igen ifølge opskriften. God fornøjelse!
08.03.2016 - 11:18
![]() PITSCHON MARTINE wrote:
PITSCHON MARTINE wrote:
Bonjour, je dois commencer à tricoter les manches : 38 mailles en rond ? n'est-ce pas un peu juste pour un poignet Taille M ? Merci de votre aide.
20.11.2015 - 16:53DROPS Design answered:
Bonjour Mme Pitschon, 38 m = 22 cm environ en taille M sur la base de l'échantillon - vous pouvez ajuster la largeur du bas des manches à votre convenance si vous la préférez plus large. Bon tricot!
23.11.2015 - 09:16
![]() Margareta Ljungdahl wrote:
Margareta Ljungdahl wrote:
Hej! Jag återkommer till min fråga. Hur många maskor skall det vara sammanlagt när man avslutat raglanhoptagningarna och skall börja sticka kragen. I mönstret står det - sticka upp m på trådarna lika med 80 - 120m längs hela halskanten ???. Jag har sammanlagt 144 m som sedan skall minskas till 100 maskor. Var god se tidigare fråga. Hälsningar Margareta
25.03.2015 - 19:09DROPS Design answered:
Hej margareta, jo men det skall gå att minska till 100 m. Om du behöver flera m, går det ju också att sticka kragen med flera maskor. Lycka till!
18.05.2015 - 10:39
![]() Maria Luisa Cevolani wrote:
Maria Luisa Cevolani wrote:
Thank you for this nice and feasible jacket that I enjoyed doing very much!
21.03.2015 - 15:17
|
|
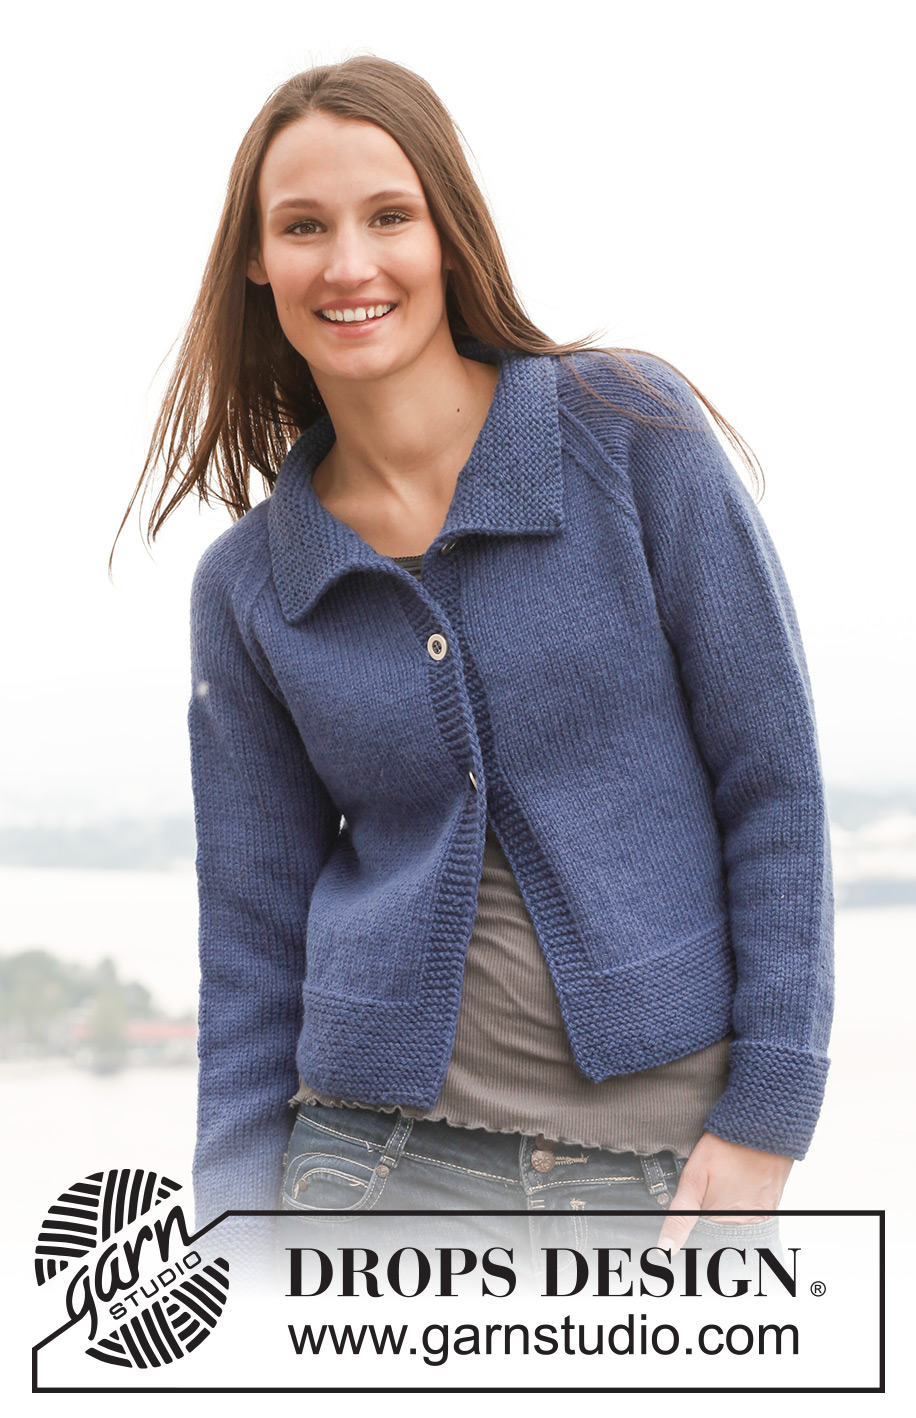
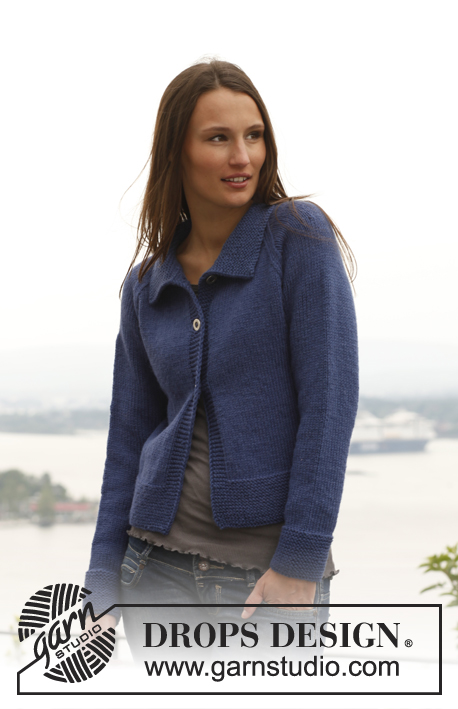
Winter Morning#wintermorningcardigan |
|
 |
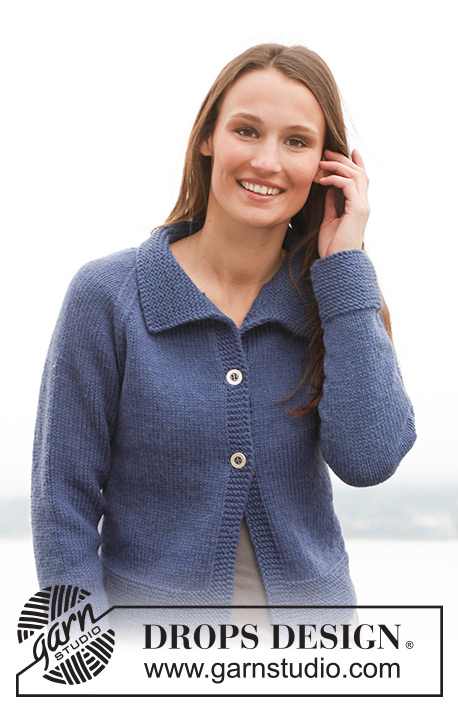 |
Knitted DROPS jacket with raglan sleeves in ”Alaska”. Size: S - XXXL.
DROPS 141-9 |
|
|
GARTER ST (back and forth on needle): K all rows. 1 ridge = 2 rows K. GARTER ST (in the round on needle): * K 1 round and P 1 round *, repeat from *-*. INCREASE TIP: Inc 1 st on each side of marker as follows: Work until 1 st remains before marker, make 1 YO, work 2 sts (marker is between these 2 sts), make 1 YO. On next row work YO twisted to avoid holes. RAGLAN: Dec as follows from RS: Work until 3 sts remain before marker, K 2 tog, K 2 (marker is between these 2 sts), slip 1 st as if to K, K 1, psso. Dec as follows from WS: Work until 3 sts remain before marker, P 2 twisted tog (i.e. work in back loop of sts instead of front), P 2 (marker is between these 2 sts), P 2 tog. BUTTONHOLES: Cast off from RS for 3 buttonholes on right band. 1 buttonhole = cast off 5th and 6th st from mid front and cast on 2 new sts on next row over these sts. Cast off for buttonholes when piece measures: SIZE S: 24, 32, 40 cm. SIZE M: 25, 33, 41 cm. SIZE L: 24, 33, 42 cm. SIZE XL: 25, 34, 43 cm. SIZE XXL: 24, 34, 44 cm. SIZE XXXL: 24, 34, 44 cm. -------------------------------------------------------- BODY: Worked back and forth on circular needle from mid front. Cast on 140-156-172-192-212-232 sts with Alaska on circular needle size 4.5 mm. Work in GARTER ST - see explanation above - for 8-8-8-9-9-9 cm. On next row from RS switch to circular needle size 5 mm, work in stocking st - but work the outermost 6-6-6-8-8-8 sts in each side in garter st (= band mid front). REMEMBER THE KNITTING TENSION! READ ALL OF THE FOLLOWING SECTION BEFORE CONTINUING. Continue in stocking st with 6-6-6-8-8-8 sts in garter st in each side until piece measures 9-9-9-10-10-10 cm. Insert a marker 38-42-46-52-57-62 sts in from each side (= 64-72-80-88-98-108 sts between markers on back piece). Move the markers upwards when working. Now inc 1 st on each side of every marker - Read INCREASE TIP above = 4 sts inc on row. Repeat inc every 4-4-4½-4½-4½-4½ cm 4 more times (a total of 5 times) = 160-176-192-212-232-252 sts (= 74-82-90-98-108-118 sts between markers on back piece) - AT THE SAME TIME when piece measures 24-25-24-25-24-24 cm cast off for 1st buttonhole on right band - READ BUTTONHOLES. Continue until piece measures 29-30-31-32-33-34 cm. Then cast off 3 sts on each side of every marker for armholes (i.e. 6 sts cast off in each side) = 148-164-180-200-220-240 sts remain on needle. Put piece aside and knit the sleeves. SLEEVE: Worked in the round on double pointed needles. Cast on 36-38-40-42-44-44 sts on double pointed needles size 4.5 mm with Alaska. Work in garter st for 8 cm. Then switch to double pointed needles size 5 mm and continue in stocking st. Insert a marker at beg of round (= mid under sleeve). When piece measures 9 cm, inc 1 st on each side of marker. Repeat inc 10-11-12-12-13-15 more times every 3½-3-3-3-2½-2 cm (= a total of 11-12-13-13-14-16 times) = 58-62-66-68-72-76 sts. When piece measures 48-48-47-47-46-46 cm (shorter measurements in the larger sizes because of longer sleeve cap), cast off 3 sts on each side of marker (= 6 sts cast off mid under sleeve) = 52-56-60-62-66-70 sts remain on needle. YOKE: Slip sleeves on to same circular needle as body where armholes were cast off = 252-276-300-324-352-380 sts. Insert 1 marker in every transition between body and sleeves (= 4 markers), move the markers upwards when working. Then work in stocking st with 6-6-6-8-8-8 sts in garter st in each side - AT THE SAME TIME on 1st row from RS, beg dec for RAGLAN - see explanation above. Dec every other row a total of 18-18-18-20-20-20 times, then every row 2-4-6-4-6-8 times. AT THE SAME TIME when piece measures 41-42-43-44-45-45 cm, slip the first sts at beg of every row from neck on a stitch holder as follows: 8-8-10-10-12-12 sts 1 time, 3 sts 1-1-1-2-2-2 times, 2 sts 2 times, then 1 st until raglan dec has been worked. NECK: When all raglan dec are done, switch to circular needle size 4.5 mm, work on sts from stitch holders = approx. 80 to 120 sts along the entire neck edge. K 1 row while AT THE SAME TIME adjusting no of sts to 84-88-92-96-100-108. Then work in garter st until collar measures 8-8-8-9-9-9 cm. Loosely cast off all sts. ASSEMBLY: Sew the openings under the sleeves tog. Sew the buttons on to left front piece. |
|
 |
|
Have you finished this pattern?Tag your pictures with #dropspattern #wintermorningcardigan or submit them to the #dropsfan gallery. Do you need help with this pattern?You'll find 16 tutorial videos, a Comments/Questions area and more by visiting the pattern on garnstudio.com. © 1982-2026 DROPS Design A/S. We reserve all rights. This document, including all its sub-sections, has copyrights. Read more about what you can do with our patterns at the bottom of each pattern on our site. |
|


With over 40 years in knitting and crochet design, DROPS Design offers one of the most extensive collections of free patterns on the internet - translated to 17 languages. As of today we count 324 catalogues and 12290 patterns translated into English (UK/cm). 12290
We work hard to bring you the best knitting and crochet have to offer, inspiration and advice as well as great quality yarns at incredible prices! Would you like to use our patterns for other than personal use? You can read what you are allowed to do in the Copyright text at the bottom of all our patterns. Happy crafting!
Post a comment to pattern DROPS 141-9
We would love to hear what you have to say about this pattern!
If you want to leave a question, please make sure you select the correct category in the form below, to speed up the answering process. Required fields are marked *.