
Popular categories
Looking for a yarn?


Comments / Questions (40)
![]() Julia wrote:
Julia wrote:
Decreasing for the arm holes.the pattern says dec on every row from rs .Does this mean dec only on the right side (which is every other row) or dec on the wrong side as well by knitting into the back of the stich?
05.02.2014 - 17:19DROPS Design answered:
Dear Julia, decrease for armholes are done every row from RS, i.e. every other row. Happy knitting!
05.02.2014 - 18:07
![]() Margaret wrote:
Margaret wrote:
Just finished this cardigan and I LOVE it! The lovely fitted shape, the sweet cable detail .. thank you Garnstudio for this great pattern.
27.10.2013 - 02:22
![]() Linda wrote:
Linda wrote:
I started this pattern and my "M.1" pattern did not come out right. I start the pattern from the bottom up and reversed the stitches on the right and wrong sides. Am I supposed to reverse the cable stitches also? Example: RS: sl 1 st on cable needle behind piece, K1, P1 from cable needle. On WS do I do the same or do I P1, K1? Thank you....:)
18.06.2013 - 20:41DROPS Design answered:
Dear Linda, diagram is worked starting from corner at the bottom right towards the left from RS, then from WS from the left towards the right. 1st row (RS) = P3,slip 1st on cable needle behind piece,K1,K1 from cable needle,P3. 2nd row (WS) = K3,P2,K3.etc.. Do not hesitate to work a swatch with just a few sts to get used with that pattern. Happy knitting!
18.06.2013 - 23:13
![]() Nathalie wrote:
Nathalie wrote:
Hallo, het rechter voorpant moet ik in spiegelbeeld breien van het linker. Ik weet niet hoe ik dit moet doen, kunnen jullie dit voor mij uitschrijven aub. Ik ben er zelf mee begonnen maar heb dit nog niet eerder gedaan en wens deze gilet mooi te kunnen afmaken. Met vriendelijke dank Nathalie
22.07.2012 - 12:01DROPS Design answered:
U heeft dit al een keer gebreid. Maar vervolgens breit u hetzelfde, maar deze keer in spiegelbeeld. Bij een rechter voorpand begint de nld middenvoor, dus na de eerste nld r breit u de 12 ribbelst, 8 st motief en de rest in tricotst. Vergeet ook niet om de kabel te spiegelen. Dwz, ipv kabel naar voren, dan naar achteren enzo. Voor verder persoonlijk ondersteuning verwijzen we u door naar uw verkooppunt.
23.07.2012 - 16:19
![]() Nathy302 wrote:
Nathy302 wrote:
Mooi model,gekozen om bij kleedje 132-1 te dragen,ik ga eraan beginnen sé...
16.07.2012 - 17:22
![]() Siggi wrote:
Siggi wrote:
Super gelungen
27.01.2011 - 12:09
![]() Hinke wrote:
Hinke wrote:
Heel leuk, maak ook een patroon met halslijn van patroon de-052
22.01.2011 - 17:45
![]() Bemu100 wrote:
Bemu100 wrote:
Todella upea jakku, klassinen ja kaiken kanssa yhteensopiva!
10.01.2011 - 18:39
![]() Elisabeth wrote:
Elisabeth wrote:
Elegant
10.01.2011 - 09:44
![]() LeneL wrote:
LeneL wrote:
Enkel og feminin
09.01.2011 - 23:15
|
||||||||||||||||
Lakeside Sunset#lakesidesunsetcardigan |
||||||||||||||||
 |
 |
|||||||||||||||
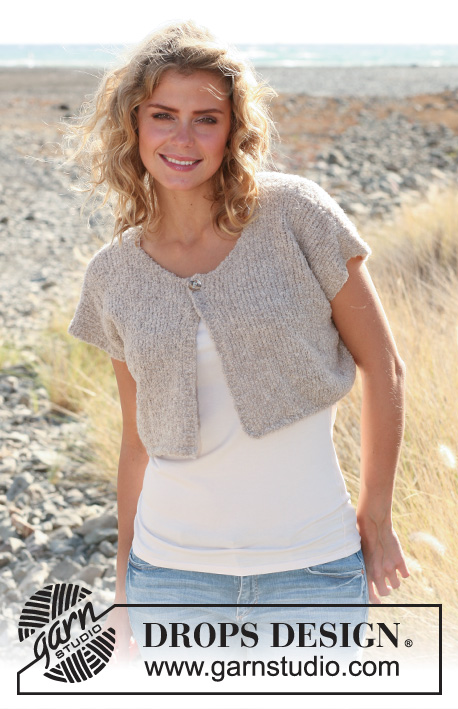
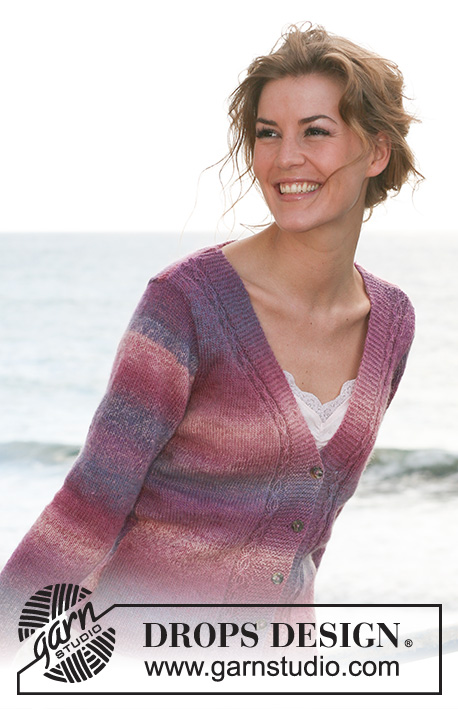
Knitted DROPS jacket with cables in "Delight". Size S-XXXL.
DROPS 130-21 |
||||||||||||||||
|
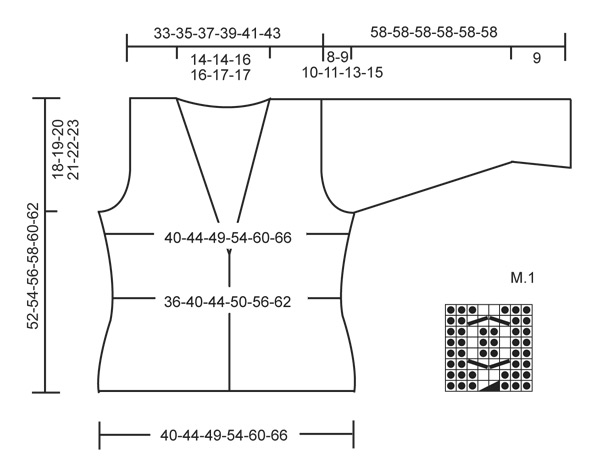
GARTER ST (back and forth on needle): K all rows. DECREASE TIP 1 (applies to waist): All dec are done from RS. Dec as follows after marker: K2 tog. Dec as follows before marker: Slip 1 st as if to K, K1, psso. DECREASE TIP 2: (applies to armholes and neckline): All dec are done from RS. Dec inside 3 sts in stocking st at armhole, inside 12 sts in garter st at neckline on back piece and inside 12 sts in garter st + M.1 (= 20 sts) at the neckline on the front piece. Dec as follows after 3/12/20 sts: Slip 1 st as if to K, K1, psso. Dec as follows before 3/12/20 sts: K2 tog. INCREASE TIP: Inc by knitting up 1 st between 2 sts from previous row and K this st twisted, i.e. work in the back loop of st instead of front to avoid holes. PATTERN: See diagram M.1 = 8 sts. The diagram shows the pattern from RS. BUTTON HOLES: Cast off for 4 button holes on right front band. 1 button hole = cast off 5th and 6th st from edge and cast on 2 new sts on next row over these sts. Cast off for button holes when piece measures: SIZE S: 9, 15, 21 and 27 cm. SIZE M: 10, 16, 22 and 28 cm. SIZE L: 11, 17, 23 and 29 cm. SIZE XL: 12, 18, 24 and 30 cm. SIZE XXL: 13, 19, 25 and 31 cm. SIZE XXXL: 14, 20, 26 and 32 cm. -------------------------------------------------------- BACK PIECE: Worked back and forth on needle. Cast on 94-104-114-126-140-154 sts (incl 1 edge st each side) on needle size 3.5 mm. K 1 row from WS, then continue working in stocking st. Insert 2 markers in the piece, after 24-26-29-32-35-39 sts each side (= 46-52-56-62-70-76 sts between markers). When piece measures 6-7-8-9-10-11 cm, dec at each marker for waist. Dec after 1st marker and before 2nd marker - READ DECREASE TIP 1! Repeat the dec on every 6th row a total of 5 times = 84-94-104-116-130-144 sts. REMEMBER THE KNITTING TENSION! When piece measures 17-18-19-20-21-22 cm, inc at markers - inc after 1st marker and before 2nd marker - READ INCREASE TIP! Repeat the inc on every 6th row a total of 5 times = 94-104-114-126-140-154 sts. When piece measures 34-35-36-37-38-39 cm, cast off 4-5-6-8-10-12 sts at beg of the next 2 rows for armholes. Continue to dec on every row from RS - READ DECREASE TIP 2 - 1 st 5-7-8-10-13-15 times = 76-80-86-90-94-100 sts. When piece measures 48-50-52-54-56-58 cm, work 4 rows in garter st over the middle 52-52-56-56-60-60 sts (work rest of sts as before) then cast off the middle 28-28-32-32-36-36 sts for neckline and finish each part separately. Continue in stocking st and 12 sts in garter st towards the neckline while AT THE SAME TIME dec for neckline on every row from RS inside the 12 sts in garter st - READ DECREASE TIP 2 - as follows: 1 st a total of 2 times = 22-24-25-27-27-30 sts remain on shoulder. Cast off when piece measures 52-54-56-58-60-62 cm. LEFT FRONT PIECE: Cast on 53-58-63-69-76-83 sts (incl 1 edge st in the side and 12 band sts towards mid front) on needle size 3.5 mm. K 1 row from WS. Work next row from RS as follows: 1 edge st, work in stocking st until 20 sts remain, PATTERN (= 8 sts) - see explanation above - and 12 sts in garter st. Continue in stocking st and M.1 + 12 band sts in garter st towards mid front until finished measurements. Insert a marker after 24-26-29-32-35-39 sts from side. When piece measures 6-7-8-9-10-11 cm, dec before marker for waist - SEE DECREASE TIP 1! Repeat the dec on every 6th row a total of 5 times = 48-53-58-64-71-78 sts. When piece measures 17-18-19-20-21-22 cm, inc before marker - SEE INCREASE TIP! Repeat the inc on every 6th row a total of 5 times = 53-58-63-69-76-83 sts. Read all of the following section before continuing! When piece measures 29-30-31-32-33-34 cm, work with short rows 1 time over the 12 band sts only, beg from WS as follows: Work 12 sts in garter st, turn and work back over the 12 sts in garter st. On next row from RS, dec for neckline inside 12 band sts + M.1 (= 20 sts) - READ DECREASE TIP 2: Dec on every other row: 1 st a total of 18 times and then on every 4th row: 1 st a total of 4-4-6-6-8-8 times. AT THE SAME TIME when piece measures 34-35-36-37-38-39 cm, cast off and dec for armhole in the side as on back piece. After all dec for neckline and armhole are done, 22-24-25-27-27-30 sts remain on shoulder. Continue as before until piece measures 52-54-56-58-60-62 cm - adjust after 1 whole repetition of M.1. Cast off. RIGHT FRONT PIECE: Cast on and work as left front piece but opposite. NOTE: Dec and inc for waist are done after marker and the short rows over band sts beg from RS. When piece measures 9-10-11-12-13-14 cm, cast off for first BUTTON HOLE - see explanation above! SLEEVE: Worked back and forth on needle. Cast on 56-58-62-64-68-70 sts (incl 1 edge st each side) on needle size 3.5 mm. K 1 row from WS. Continue in stocking st. When piece measures 9 cm, dec 10 sts evenly = 46-48-52-54-58-60 sts. When piece measures 15-15-15-15-12-11 cm, inc 1 st each side. Repeat inc every 2-2-2-1½-1½-1½ cm a total of 15-16-16-18-19-20 times = 76-80-84-90-96-100 sts. When piece measures 50-49-48-47-45-43 cm (NOTE! Shorter measurements in the larger sizes because of longer sleeve cap and broader shoulder width), cast off for sleeve cap at beg of row each side as follows: 4 sts 1 time, 3 sts 1 time, 2 sts 2 times, 1 st 5-6-8-9-12-15 times, then continue to cast off 2 sts each side until piece measures 57 cm, then cast off 3 sts 1 time each side. Cast off the remaining sts, the piece measures approx. 58 cm. ASSEMBLY: Sew shoulder seams, set in sleeves and sew under arm and side seams in one, inside 1 edge st. Sew the buttons on to left front piece. |
||||||||||||||||
Diagram explanations |
||||||||||||||||
|
||||||||||||||||
 |
||||||||||||||||
Have you finished this pattern?Tag your pictures with #dropspattern #lakesidesunsetcardigan or submit them to the #dropsfan gallery. Do you need help with this pattern?You'll find 19 tutorial videos, a Comments/Questions area and more by visiting the pattern on garnstudio.com. © 1982-2026 DROPS Design A/S. We reserve all rights. This document, including all its sub-sections, has copyrights. Read more about what you can do with our patterns at the bottom of each pattern on our site. |
||||||||||||||||


With over 40 years in knitting and crochet design, DROPS Design offers one of the most extensive collections of free patterns on the internet - translated to 17 languages. As of today we count 324 catalogues and 12290 patterns translated into English (UK/cm). 12290
We work hard to bring you the best knitting and crochet have to offer, inspiration and advice as well as great quality yarns at incredible prices! Would you like to use our patterns for other than personal use? You can read what you are allowed to do in the Copyright text at the bottom of all our patterns. Happy crafting!
Post a comment to pattern DROPS 130-21
We would love to hear what you have to say about this pattern!
If you want to leave a question, please make sure you select the correct category in the form below, to speed up the answering process. Required fields are marked *.