
Popular categories
Looking for a yarn?


Comments / Questions (9)
![]() Wilhelmina wrote:
Wilhelmina wrote:
Jag begriper inte hur och var man skall sticka muscher jag har fem maskor till förfogande, sticka m 1och 5 som vanligt mitterste maskan också med ett omslag på vardera sida men sen skall maskan som man sen sticker muschen i stickas innan eller efter muschen och likaså musch två innan eller efter m4?
29.03.2024 - 15:15DROPS Design answered:
Hej, de nederste 5 masker i diagrammet er raglanmasker, du strikker muschen på 3:e varv, i 2 og 4 maske, maske 1,3,5 strikkes rät :)
05.04.2024 - 11:27
![]() Bettina wrote:
Bettina wrote:
Es ist einfacher die Noppen mit der Häkelnadel zu "stricken".
20.12.2023 - 13:58
![]() Laura Kristensen wrote:
Laura Kristensen wrote:
Hej. Jeg er ved at strikke str xxl, og efter at have i delt og talt mange gange, er der ved inddelingen, efter halskant, 110 masker, men mønstret bliver kun til 100 masker. Tager jeg fejl?
11.11.2023 - 23:15
![]() Tineke wrote:
Tineke wrote:
Hé, nu ineens wordt het antwoord zichtbaar😳 al die tijd voor niets gewacht🤔 maar bedankt, ik ga het proberen!
05.01.2023 - 12:31
![]() Tineke wrote:
Tineke wrote:
Dag antwoord team, ik ben echt heel benieuwd naar het antwoord op mijn vraag hieronder, tot die tijd kan ik niet verder met breien😢 Klopt het dat het een fout in de beschrijving is of begrijp ik iets niet goed? Alvast bedankt!
05.01.2023 - 12:29DROPS Design answered:
Dag Tineke,
Fijn, en bedankt voor de terugkoppeling. Hopelijk kan je nu verder.
06.01.2023 - 19:30
![]() Tineke De Jong wrote:
Tineke De Jong wrote:
Excuus, ik had mijn vraag als opmerking geplaatst. Bij het breien van de pas meerder je tot 110 steken (L) Volgende naald: alle onderdelen opgeteld (17 +12+32+12+17)=90 steken. Waar gaat dit niet goed in de beschrijving.. Om verder te gaan met A1 mis ik 20 steken
15.12.2022 - 16:58DROPS Design answered:
Dag Tineke,
Je breit daartussen ook nog een aantal keren het telpatroon A.1, dus het is als volgt: 17+A.1 +12+A.1+32+A.1+12+A.1+17. Hierdoor kom je in totaal op 110 steken>
15.12.2022 - 21:40
![]() Tineke De Jong wrote:
Tineke De Jong wrote:
Bij het breien van de pas meerder je tot 110 steken (L) Volgende naald: alle onderdelen opgeteld (17 +12+32+12+17)=90 steken. Waar gaat dit niet goed in de beschrijving.. Om verder te gaan met A1 mis ik 20 steken
15.12.2022 - 15:58
![]() Anna wrote:
Anna wrote:
Winterberry
05.08.2022 - 08:27
![]() Ana Matei wrote:
Ana Matei wrote:
Sehr schön!
05.08.2022 - 00:12
|
|||||||||||||
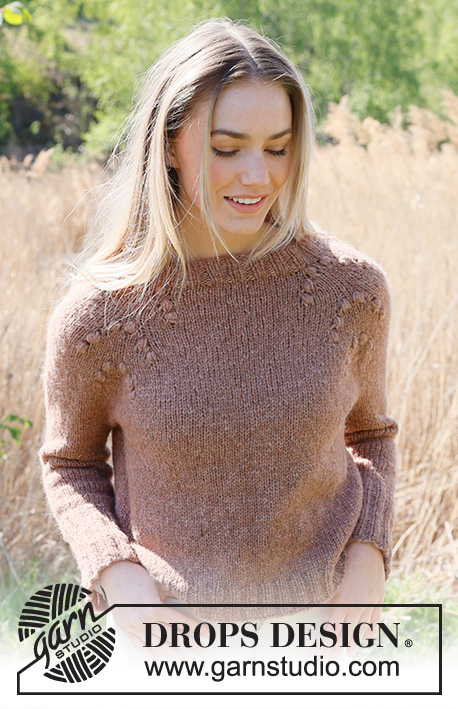
Winter Berry#winterberrysweater |
|||||||||||||
 |
 |
||||||||||||
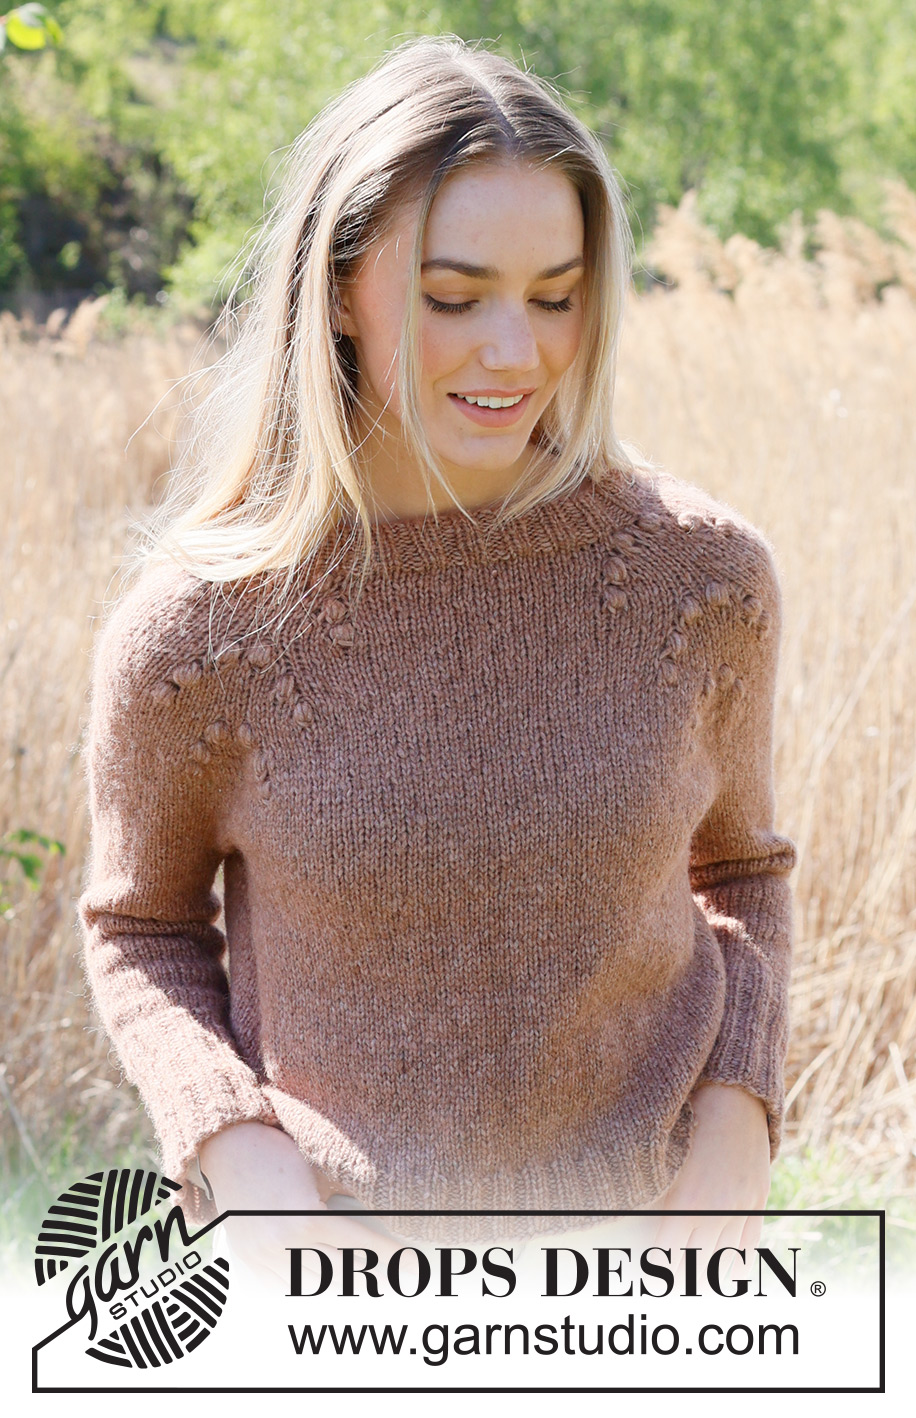
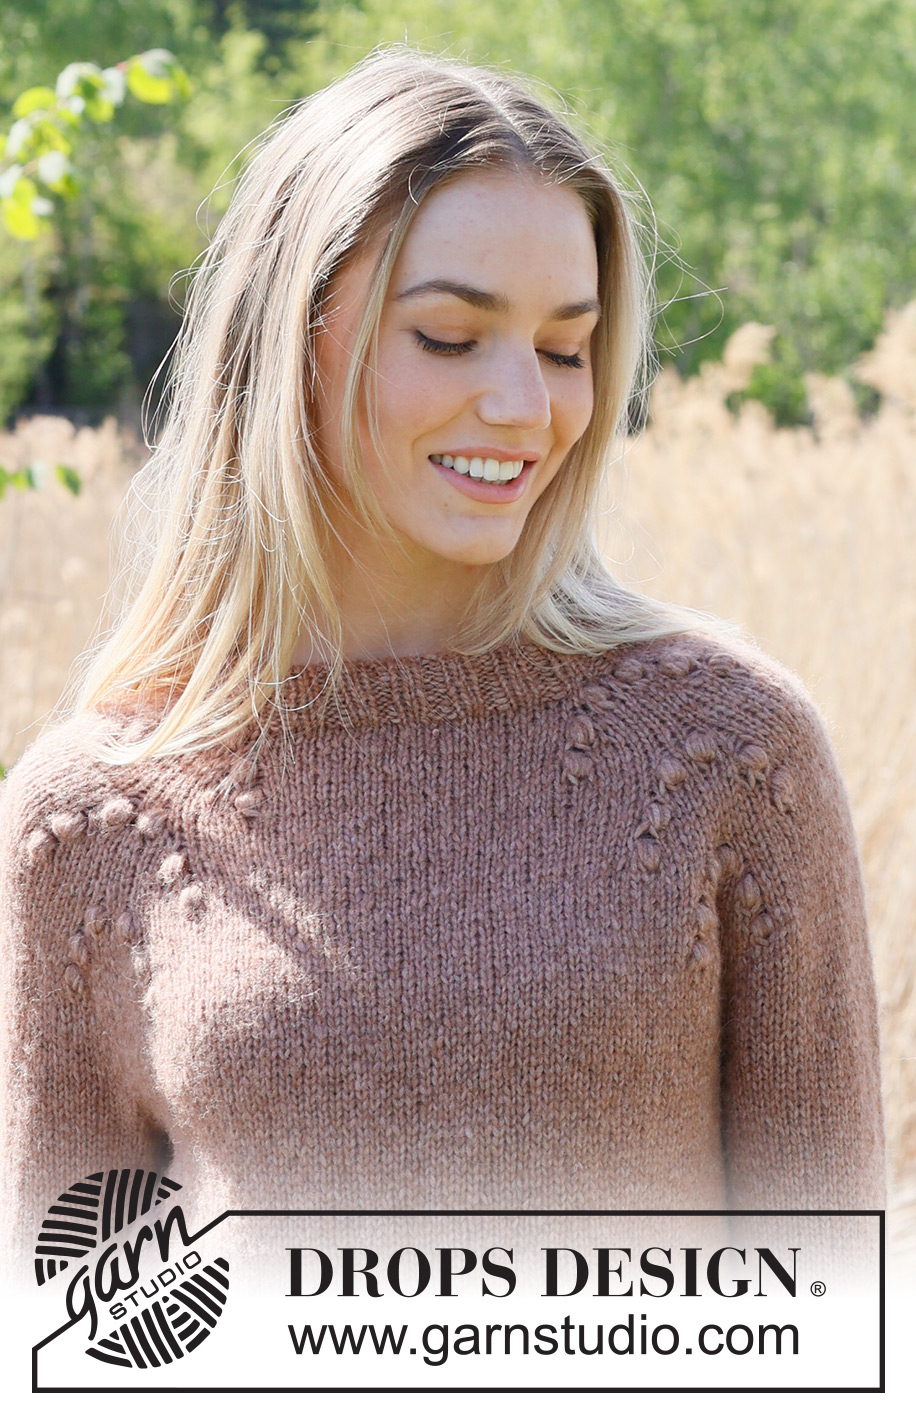
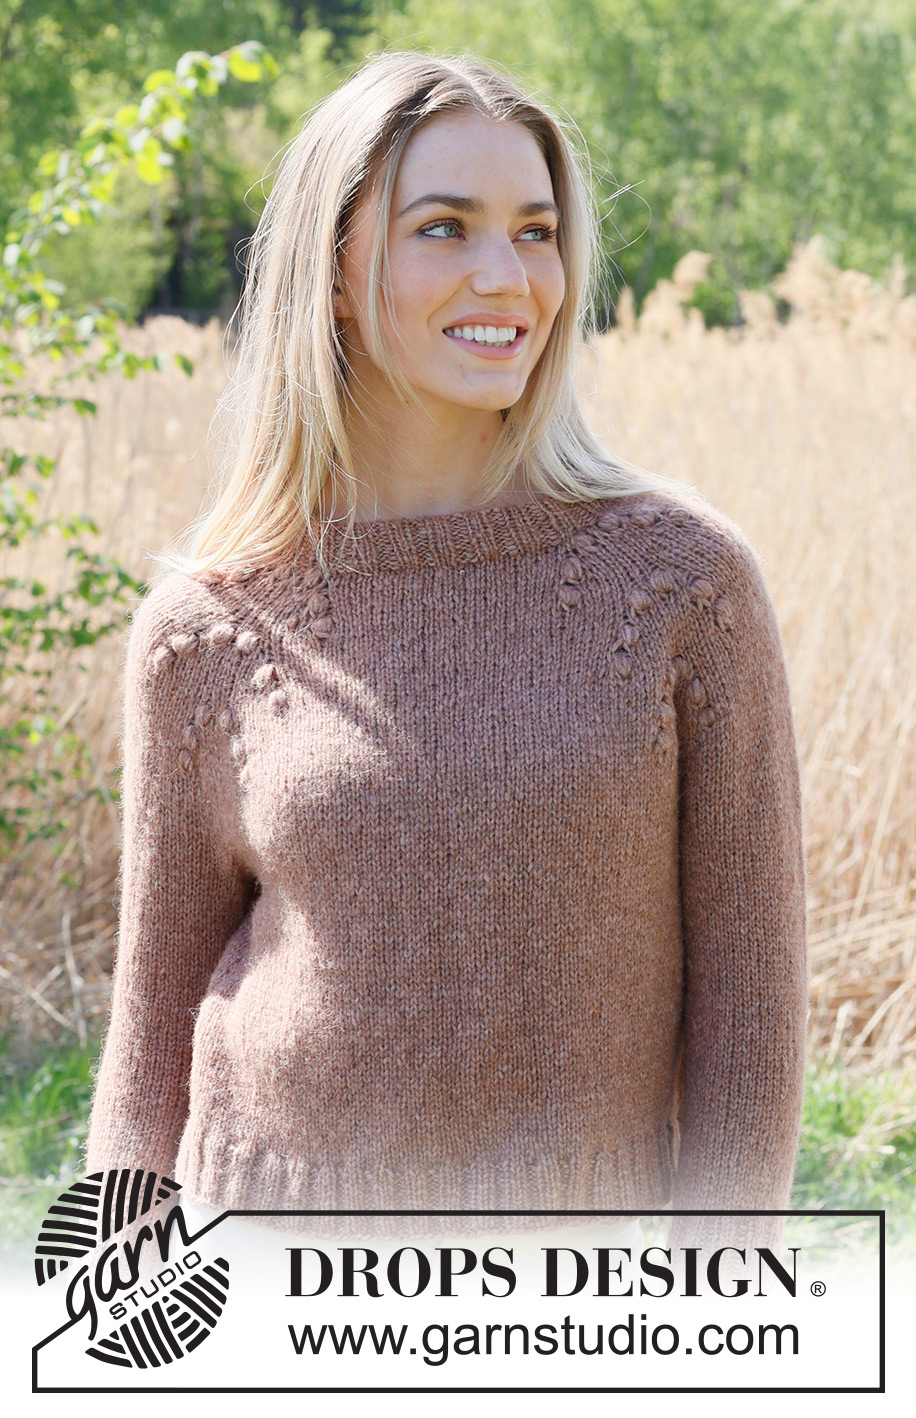
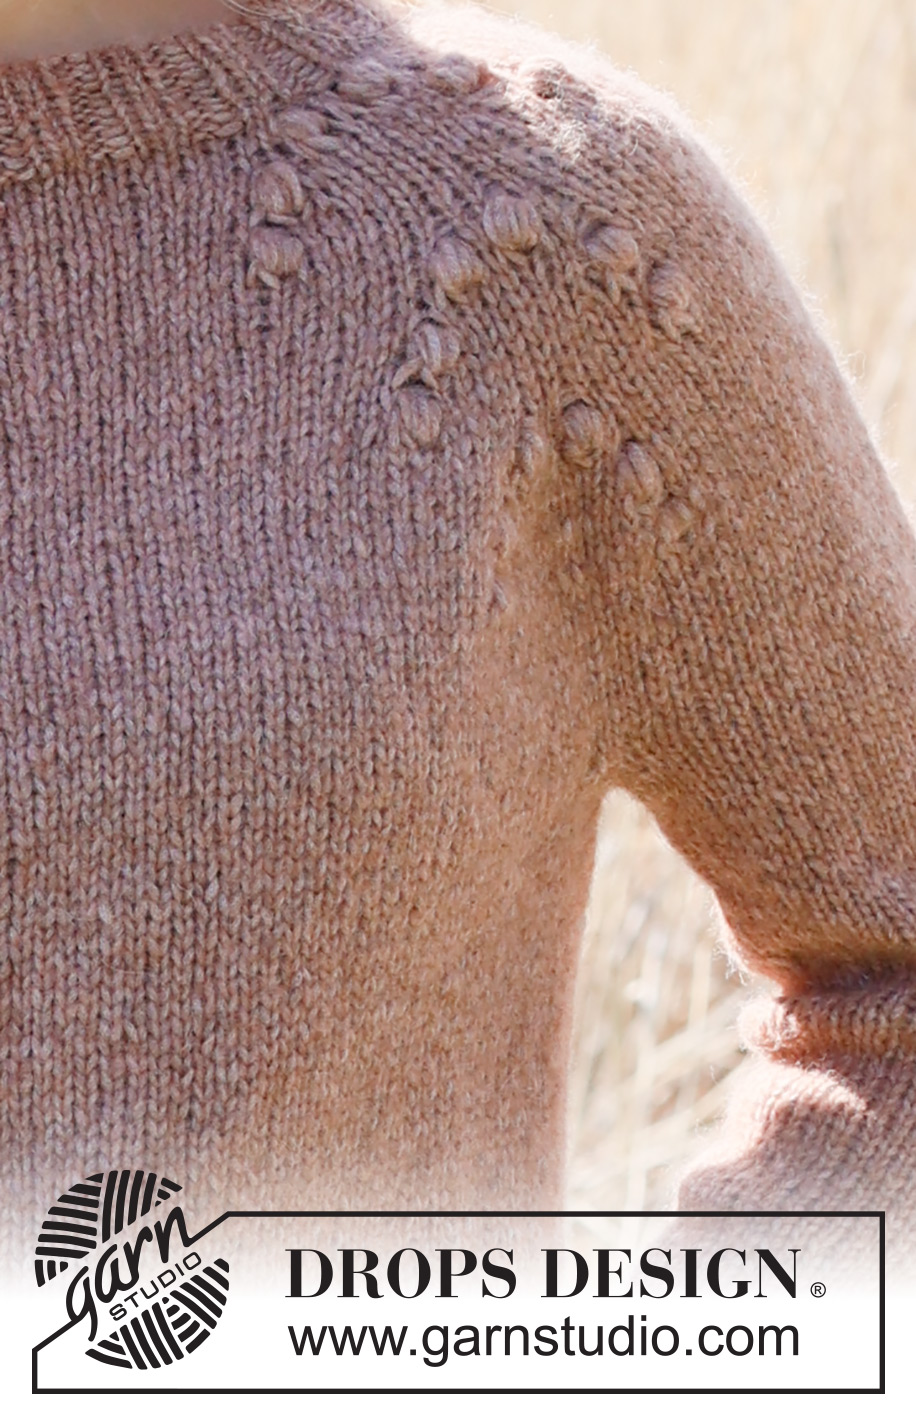
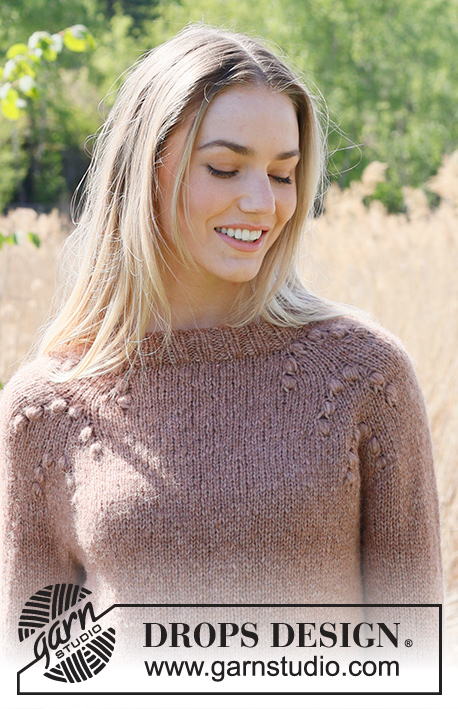
Knitted jumper in DROPS Air. The piece is worked top down, with raglan and bobbles. Sizes S - XXXL.
DROPS 235-30 |
|||||||||||||
|
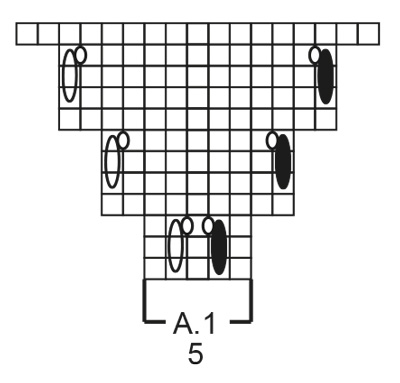
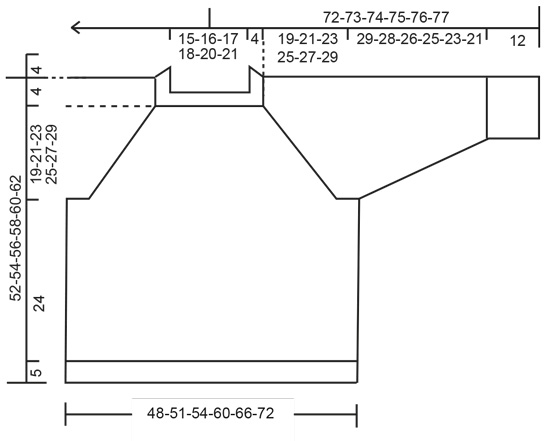
------------------------------------------------------- EXPLANATIONS FOR THE PATTERN: ------------------------------------------------------- PATTERN: See diagram A.1. DECREASE TIP (for sleeves): Decrease 1 stitch on either side of the marker as follows: Work until there are 3 stitches left before the marker, knit 2 together, knit 2 (marker sits between these 2 stitches), slip 1 stitch as if to knit, knit 1 and pass the slipped stitch over the knitted stitch. ------------------------------------------------------- START THE PIECE HERE: ------------------------------------------------------- JUMPER – SHORT OVERVIEW OF THE PIECE: The neck and yoke are worked in the round with circular needle, top down. The yoke is divided for body and sleeves and the body is continued in the round. The sleeves are worked in the round with double pointed needles, top down. DOUBLE NECK: Cast on 80-84-88-92-96-100 stitches with DROPS Air using 2 short circular needles size 4mm and 5.5 mm held together. Remove the needle size 5.5 mm and continue with needle size 4 mm (this gives you an elastic cast-on edge). Knit 1 round. Work rib in the round (purl 2, knit 2) for 9 cm. Fold the neck double to the inside and knit the next round AT THE SAME TIME as every 2nd stitch is knitted together with every 2nd stitch from the cast-on edge. You now have a double neck. Change to short circular needle size 5.5 mm. Insert a marker at the beginning of the round; the yoke is measured from this marker! YOKE: Knit 1 round and increase 0-10-22-0-14-38 stitches evenly spaced = 80-94-110-92-110-138 stitches. Work the next round as follows: Knit 9-13-17-12-17-24 (half back piece), work A.1, knit 12 (sleeve), A.1, knit 18-24-32-24-32-46 (front piece), A.1, knit 12 (sleeve), A.1, knit 9-13-17-12-17-24 (half back piece). Continue this pattern. REMEMBER THE KNITTING TENSION! When A.1 has been completed in height, repeat A.1 over the middle 5 stitches in previous A.1. All other stitches are knitted. When A.1 has been worked a total of 3-3-3-4-4-4 times in height there are 224-238-254-284-302-330 stitches. Continue with stocking stitch until the yoke measures 19-21-23-25-27-29 cm from the marker. Divide for the body and sleeves as follows: Work 34-37-39-43-47-52 stitches, place the next 44-46-50-56-58-62 stitches on a thread for the sleeve, cast on 8-8-10-10-12-12 stitches under the sleeve, work 68-72-76-86-92-102 stitches, place the next 44-46-50-56-58-62 stitches on a thread for the sleeve, cast on 8-8-10-10-12-12 stitches under the sleeve, work the last 34-37-39-43-47-52 stitches. BODY: = 152-162-174-192-210-230 stitches. Continue with stocking stitch in the round for a further 24 cm. Increase 20-22-22-24-26-30 stitches evenly spaced = 172-184-196-216-236-260 stitches. Change to circular needle size 4 mm and work rib (knit 2 purl 2) for 5 cm. Cast off. SLEEVES: Place the 44-46-50-56-58-62 stitches from the thread on the one side of the piece on double pointed needles size 5.5 mm and knit up 1 stitch in each of the 8-8-10-10-12-12 stitches cast on under the sleeve = 52-54-60-66-70-74 stitches. Insert a marker in the middle of the new stitches under the sleeve. Work stocking stitch in the round for 2 cm. Now decrease 2 stitches under the sleeve – read DECREASE TIP. Decrease like this every 6-6-3½-2-2-1½ cm a total of 5-5-7-9-11-12 times = 42-44-46-48-48-50 stitches. When the sleeve measures 29-28-26-25-23-21 cm from the division, increase 6-4-6-4-4-6 stitches evenly spaced = 48-48-52-52-52-56 stitches. Change to double pointed needles size 4 mm and work rib (knit 2, purl 2) for 12 cm. Cast off. Work the other sleeve in the same way. |
|||||||||||||
Diagram explanations |
|||||||||||||
|
|||||||||||||
 |
|||||||||||||
 |
|||||||||||||
Have you finished this pattern?Tag your pictures with #dropspattern #winterberrysweater or submit them to the #dropsfan gallery. Do you need help with this pattern?You'll find 26 tutorial videos, a Comments/Questions area and more by visiting the pattern on garnstudio.com. © 1982-2026 DROPS Design A/S. We reserve all rights. This document, including all its sub-sections, has copyrights. Read more about what you can do with our patterns at the bottom of each pattern on our site. |
|||||||||||||


With over 40 years in knitting and crochet design, DROPS Design offers one of the most extensive collections of free patterns on the internet - translated to 17 languages. As of today we count 324 catalogues and 12290 patterns translated into English (UK/cm). 12290
We work hard to bring you the best knitting and crochet have to offer, inspiration and advice as well as great quality yarns at incredible prices! Would you like to use our patterns for other than personal use? You can read what you are allowed to do in the Copyright text at the bottom of all our patterns. Happy crafting!
Post a comment to pattern DROPS 235-30
We would love to hear what you have to say about this pattern!
If you want to leave a question, please make sure you select the correct category in the form below, to speed up the answering process. Required fields are marked *.