
Popular categories
Looking for a yarn?


Comments / Questions (8)
![]() Clara wrote:
Clara wrote:
Non ho capito come mettere il segnapunti e da dove devo e gli aumenti della spalla a sella
26.01.2026 - 14:19DROPS Design answered:
Buonasera Clara, può spiegarci meglio il suo problema? Buon lavoro!
01.02.2026 - 20:33
![]() Valérie wrote:
Valérie wrote:
Je ne comprends pas les explications de la grille car pour les mailles mises sur l’aiguille auxiliaire, cela se fait quand on est sur le rang envers
30.11.2025 - 17:28DROPS Design answered:
Bonjour Valérie, le 1er rang des diagrammes ainsi que tous les rangs impairs doivent être des rangs sur l'endroit pour que les torsades soient faites sur l'endroit de l'ouvrage. Bon tricot!
01.12.2025 - 10:00
![]() Marthe wrote:
Marthe wrote:
Hei, skjønner faktisk ingen ting av denne oppskriften…😅får det ikke til å gå opp hvis jeg tenker logisk… skal i all hovedsak strikke halsen… hadde vært fint om dere kunne sett over den og eventuelt forenklet/forklart bedre…
02.03.2025 - 23:07DROPS Design answered:
Hej Marthe. Kanske en video där vi visar hur man ökar till sadelskulder som denna video kan vara till hjälp? Mvh DROPS Design
07.03.2025 - 09:08
![]() Karin Boholm wrote:
Karin Boholm wrote:
Jag försöker sticka halsvärmaren i den större storleken och då ska fram- och bakstycke bestå av 27 maskor, men det finns inget diagram för 27 maskor, bara till den mindre storleken (23 maskor). Jag får helt enkelt inte beskrivningen av hela första varvet efter resårstickningen att gå ihop. Tacksam för klargörande. (Pannbandet blev jättesnyggt!)
03.11.2022 - 16:50DROPS Design answered:
Hej Karin, har du talt de 2 masker glatstrik med på hver side af mønsteret? sticka 0-2 maskor slätstickning, A.3 (= 23 maskor), 0-2 maskor slätstickning = 27 m :)
04.11.2022 - 10:30
![]() Synnøve Aga wrote:
Synnøve Aga wrote:
Hals. Sadelskulderøkning:Hva menes med "strikk 1. masker A2 slik at mønsteret starter og slutter likt mellom 1. og andre merke" ? Det er 21 masker mellom 1. og andre merke, og 5 rapporter A2 blir jo 20 masker. Skal da den siste masken før merke nr 2 strikkes rett ? Mvh Synnøve Aga
15.02.2022 - 16:24DROPS Design answered:
Hei Synnøve, A.2 begynner med å strikke 1 rett maske i masken under denne masken og, for at mønsteret skal bli symmetrisk på forstykket, strikker du det samme før du begynner på ermet. God fornøyelse!
17.02.2022 - 06:53
![]() Henriette wrote:
Henriette wrote:
Hej! Tack för den fina mönster. Förlåt men jag förstår inte hur gör man PANNBAND. Börja med 21 maskor skriver osv. Är det möjligt istället att sticka A1 direkt och hur många maskor behöver jag då att lägga upp på en rundsticka när jag ska börjar sticka A1? Tänkte starta med bara reso det är kort tid till julen måste gå fast arebetet.Tack
15.12.2021 - 11:54DROPS Design answered:
Hej Henriette. Du börjar med 21 maskor, stickar 2 varv rätstickning och stickar sedan ett varv med räta maskor där du ökar 2 maskor. Du har nu 23 maskor och stickar A.1 som består av 23 maskor. Vill du inte ha de 2 rätstickade varven först så kan du lägga upp 23 maskor direkt. Mvh DROPS Design
15.12.2021 - 12:24
![]() Henriette wrote:
Henriette wrote:
Hej! Tack för den fina mönster. En fråga hur många maskor har på S/M när jag börjar sticka A1? Tack
15.12.2021 - 11:38DROPS Design answered:
Hej Henriette. Du har 23 maskor när du börjar sticka A.1 (pannbandet). Mvh DROPS Design
15.12.2021 - 12:25
![]() FINET wrote:
FINET wrote:
Bonjour, Est il possible d'avoir les explications pour aiguilles droites ? Merci +++🤗
11.11.2021 - 14:08DROPS Design answered:
Bonjour Mme Finet, nous ne sommes malheureusement pas en mesure de réécrire chacun de nos modèles, mais cette leçon devrait pouvoir vous aider à faire les ajustements; votre magasin DROPS saura vous aider si besoin, même par mail ou téléphone. Bon tricot!
11.11.2021 - 17:32
|
||||||||||||||||
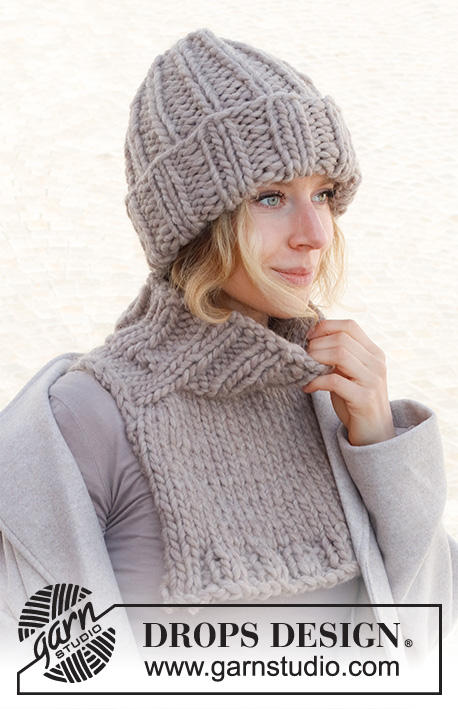
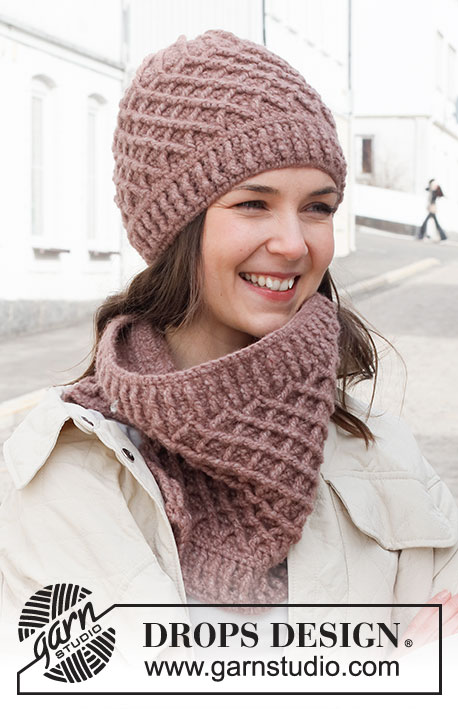
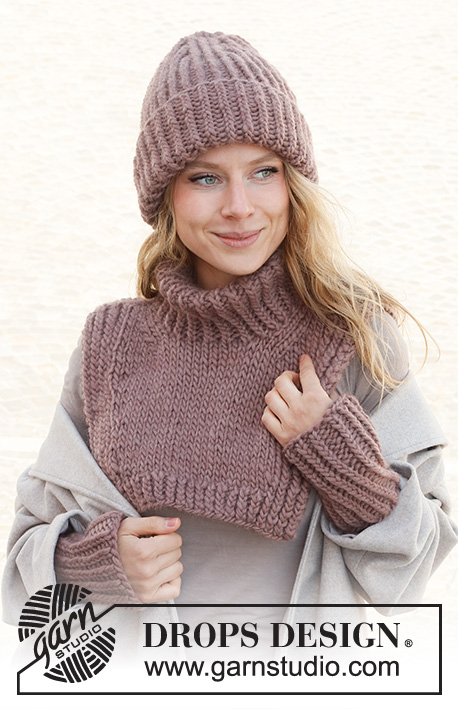
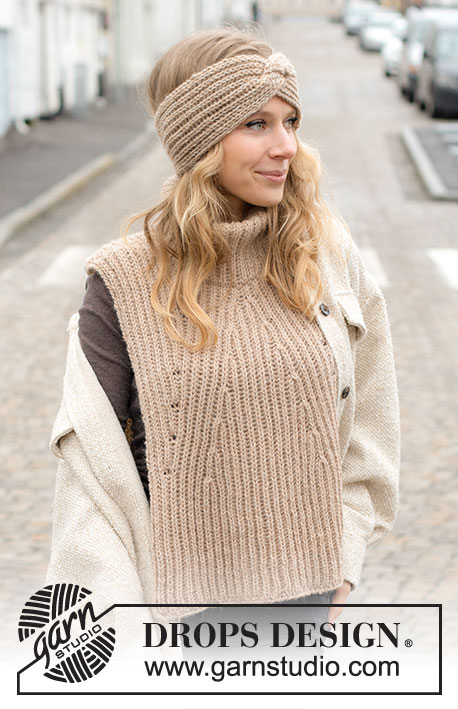
Icicles Set#iciclesset |
||||||||||||||||
 |
 |
|||||||||||||||
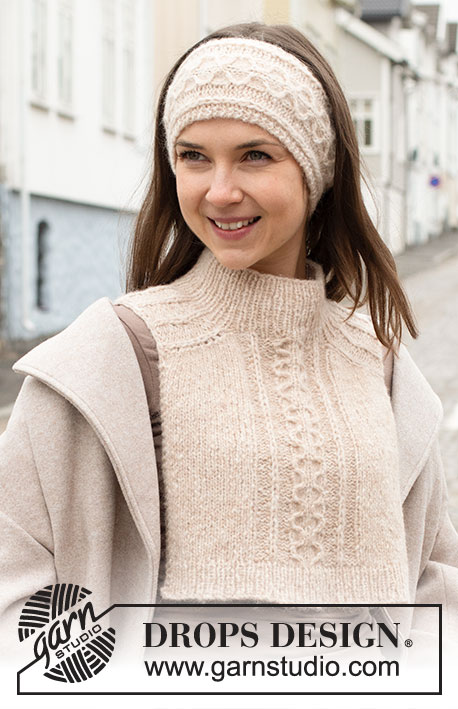
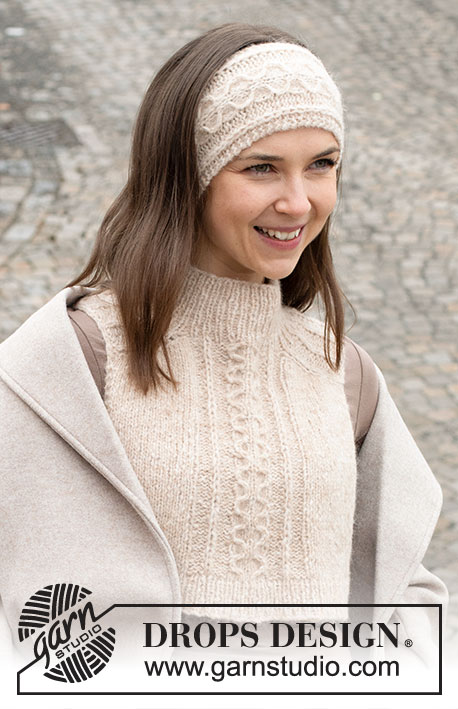
Knitted head band and neck warmer in DROPS Air. The piece is worked with cables, stitches in Fisherman’s rib and saddle shoulders.
DROPS 225-16 |
||||||||||||||||
|
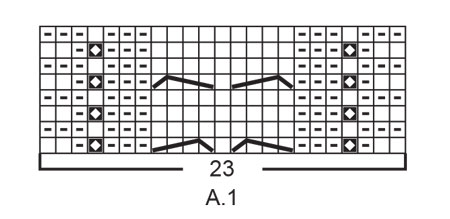
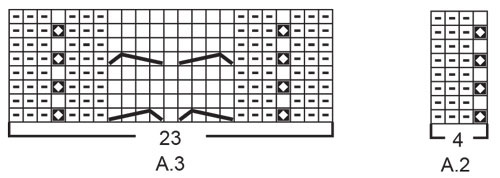
------------------------------------------------------- EXPLANATIONS FOR THE PATTERN: ------------------------------------------------------- RIDGE/GARTER STITCH (worked back and forth): Knit all rows. 1 ridge = knit 2 rows. PATTERN: Head band: See diagram A.1. Neck warmer: See diagrams A.2 and A.3. The diagrams show all rows in the pattern from the right side. INCREASE TIP-1 (increases for saddle shoulders on the neck warmer): BEFORE MARKER: The new stitch twists to the right. Use the left needle to pick up the strand between 2 stitches from the previous round, pick up the back strand and knit in the front loop. AFTER MARKER: The new stitch twists to the left. Use the left needle to pick up the strand between 2 stitches from the previous round, pick up the front strand and knit in the back loop. INCREASE TIP-2 (evenly spaced): To work out how to increase evenly, count the total number of stitches on the needle (e.g. 59 stitches) minus the edge stitches (e.g. 4 stitches) and divide the remaining stitches by the number of increases to be made (e.g. 12) = 4.6. In this example, increase by making 1 yarn over after alternately each 4th and 5th stitch (approx.). Do not increase over the edge stitches. On the next row work the yarn overs twisted to avoid holes. CASTING-OFF TIP: To avoid the cast-off edge being tight you can cast off with a larger size needle. If the edge is still tight, make 1 yarn over after approx. each 4th stitch at the same time as casting off; the yarn overs are cast off as normal stitches. ------------------------------------------------------- START THE PIECE HERE: ------------------------------------------------------- HEAD BAND – SHORT OVERVIEW OF THE PIECE: The piece is worked back and forth and sewn together at the back. HEAD BAND: Cast on 21 stitches with needle size 5 mm and DROPS Air. Work 1 RIDGE – read description above. Knit 1 row from the right side where you increase 2 stitches (by making 1 yarn over on each side of the middle stitch = 23 stitches. The next row is worked as follows from the wrong side: 2 edge stitches in garter stitch, purl until there are 2 stitches left (yarn overs purled twisted to avoid holes) and 2 edge stitches in garter stitch. Continue by working A.1 back and forth until the head band measures 48 cm – or to desired length, finishing after row 2 or 6 in A.1. REMEMBER THE KNITTING TENSION! Knit 1 row from the right side where you decrease 2 stitches by knitting twisted together the first 2 stitches and the last 2 stitches of the middle 9 stitches = 21 stitches. Knit 1 row from the wrong side. Cast off with knit from the right side. Cut the strand, leaving enough length to sew the head band together. ASSEMBLY: Sew the head band together inside the cast-on/cast-off edges. Cut and fasten the strand. ------------------------------------------------------- NECK WARMER – SHORT OVERVIEW OF THE PIECE: The piece is worked in the round with short circular needle, top down. The neck is worked first in rib, then stitches are increased for the saddle shoulders. Then the shoulder stitches are cast off and each part is finished separately, back and forth. NECK WARMER: Cast on 88-96 stitches with short circular needle size 4 mm and DROPS Air. Work rib in the round (from back of right shoulder when the garment is worn) as follows: * Knit 1, purl 1, *, work from *-* to end of round. Continue this rib for 7-8 cm. Insert 1 marker in the 33rd-35th stitch on the round (= mid-front). The piece will be measured from this marker! In addition insert 4 other markers as described below without working the stitches and each marker being inserted between 2 stitches. These markers are used when increasing for the saddle shoulders and should be of a different colour to the marker on the neck. Marker 1: Insert 1st marker at the beginning of the round (= back right shoulder). Marker 2: Count 21-21 stitches from marker 1 (= shoulder), insert marker before the next stitch. Marker 3: Count 23-27 stitches from marker 2 (= front piece), insert marker before the next stitch. Marker 4: Count 21-21 stitches from marker 3 (= shoulder), insert marker before the next stitch. There are 23-27 stitches left on the back piece after marker 4. Allow these 4 markers to follow your work onwards – you will increase at each marker. INCREASES TO SADDLE SHOULDERS: Change to circular needle size 5 mm. The first round is worked as follows: Work A.2 over the first 20 stitches (= 5 repeats of 4 stitches), work the first stitch in A.2 so the pattern is symmetrical between markers 1 and 2, work 0-2 stitches in stocking stitch, A.3 (= 23 stitches), 0-2 stitches in stocking stitch, A.2 over the next 20 stitches (= 5 repeats of 4 stitches), work the first stitch in A.2 so the pattern is symmetrical between markers 3 and 4, 0-2 stitches in stocking stitch, A.3 (= 23 stitches) and 0-2 stitches in stocking stitch. Continue this pattern. REMEMBER THE KNITTING TENSION! AT THE SAME TIME, on the next round, increase 4 stitches for the shoulders as follows: Increase BEFORE markers 1 and 3 and AFTER markers 2 and 4 – read INCREASE TIP-1. You are only increasing on the front and back pieces and the number of shoulder stitches remains the same. Increase like this every round a total of 18-20 times (the increased stitches are worked in stocking stitch) = 160-176 stitches. After the last increase the piece measures approx. 8-9 cm along the shoulder from the marker mid-front. Now cast off the shoulder stitches. Work as before until there is 0-1 stitch left before marker 1, cast off 21-23 stitches with knit – read CASTING-OFF TIP, work as before until there is 0-1 stitch left before marker 3, cast off 21-23 stitches with knit and work to the end of the round as before. Cut the strand. The back and front pieces are finished separately. BACK PIECE: = 59-65 stitches. Continue the pattern back and forth, with A.3 over the middle 23 stitches, stocking stitch and 2 edge stitches in garter stitch on each side until the piece measures approx. 25-27 cm from the marker on the neck. There is approx. 3 cm left to finished length; try the neck warmer on and work to desired length. Finish the pattern after row 2 or 6 in A.3. To avoid the following rib being tight, increase stitches as follows: Knit 1 row from the right side where you increase 12-14 stitches evenly spaced – read INCREASE TIP-2 = 71-79 stitches. Change to circular needle size 4 mm and work rib as follows, starting from the wrong side: 2 edge stitches in garter stitch, * purl 1, knit 1 *, work from *-* until there are 3 stitches left on the row, purl 1 and finish with 2 edge stitches in garter stitch. Continue this rib for 3 cm. Cast off with garter stitch over garter stitch, knit over knit and purl over purl – remember CASTING OFF TIP. The piece measures approx. 34-37 cm from the shoulder down. FRONT PIECE: = 59-65 stitches. Work in the same way as the back piece. |
||||||||||||||||
Diagram explanations |
||||||||||||||||
|
||||||||||||||||
 |
||||||||||||||||
 |
||||||||||||||||
Have you finished this pattern?Tag your pictures with #dropspattern #iciclesset or submit them to the #dropsfan gallery. Do you need help with this pattern?You'll find 27 tutorial videos, a Comments/Questions area and more by visiting the pattern on garnstudio.com. © 1982-2026 DROPS Design A/S. We reserve all rights. This document, including all its sub-sections, has copyrights. Read more about what you can do with our patterns at the bottom of each pattern on our site. |
||||||||||||||||


With over 40 years in knitting and crochet design, DROPS Design offers one of the most extensive collections of free patterns on the internet - translated to 17 languages. As of today we count 324 catalogues and 12290 patterns translated into English (UK/cm). 12290
We work hard to bring you the best knitting and crochet have to offer, inspiration and advice as well as great quality yarns at incredible prices! Would you like to use our patterns for other than personal use? You can read what you are allowed to do in the Copyright text at the bottom of all our patterns. Happy crafting!
Post a comment to pattern DROPS 225-16
We would love to hear what you have to say about this pattern!
If you want to leave a question, please make sure you select the correct category in the form below, to speed up the answering process. Required fields are marked *.