
Popular categories
Looking for a yarn?


Comments / Questions (45)
![]() Katharina wrote:
Katharina wrote:
Fertig - in apricot. Eigentlich wollte ich Größe XXXL machen, jedoch mit Nadel 5 kam ich bei der Maschenprobe zu Größe L/XL. Garnmenge für diese Größe stimmte genau. Eine tolle Jacke und sehr ausgefallen - ich habe sie auch sehr schnell fertig bekommen. Vielen Dank mal wieder für einen neuen Blickfang in meiner Garderobe. Herzliche Grüße aus Hamburg!
03.02.2016 - 22:58
![]() SIDERIUS wrote:
SIDERIUS wrote:
Très très joli, facile et vite fait. Allez je vais encore faire des jalouses au boulots.....
28.01.2016 - 14:31
![]() Eileen wrote:
Eileen wrote:
Is there a size chart for this pattern? I need measurements for the XXL and XXXL to determine which I need. Thank you.
27.01.2016 - 17:05DROPS Design answered:
Dear Eileen, you will find at the bottom of the pattern a measurement chart with all measurements for each size in cm, taken flat from side to side. Compare these to a similar garment you have and like the shape to find out the matching size. Happy crocheting!
28.01.2016 - 13:02
![]() Maia wrote:
Maia wrote:
Når kommer denne oppskriften? Jeg klør etter å starte på denne! :)
26.01.2016 - 20:56
![]() Eva wrote:
Eva wrote:
Sehr gut. Tolle Ergänzung für den Sommer.
22.01.2016 - 10:10
![]() Nancy Lo wrote:
Nancy Lo wrote:
What a beautiful color and newest style. When and how can I download this pattern? Pls advise
11.01.2016 - 05:39
![]() Virpi Teittinen wrote:
Virpi Teittinen wrote:
Kerrankin virkkaajia arvostetaan upeilla ohjeilla ja malleilla.
07.01.2016 - 22:26
![]() Geusens Nadia wrote:
Geusens Nadia wrote:
Ongelooflijk mooi, deze ga ik absloluut maken!
04.01.2016 - 19:56
![]() Geusens Nadia wrote:
Geusens Nadia wrote:
Ongeloofelijk mooi, deze ga ik absoluut maken!
04.01.2016 - 19:50
![]() Schwetta wrote:
Schwetta wrote:
Très joli modèle
02.01.2016 - 23:28
|
|||||||||||||||||||||||||||||||||||||
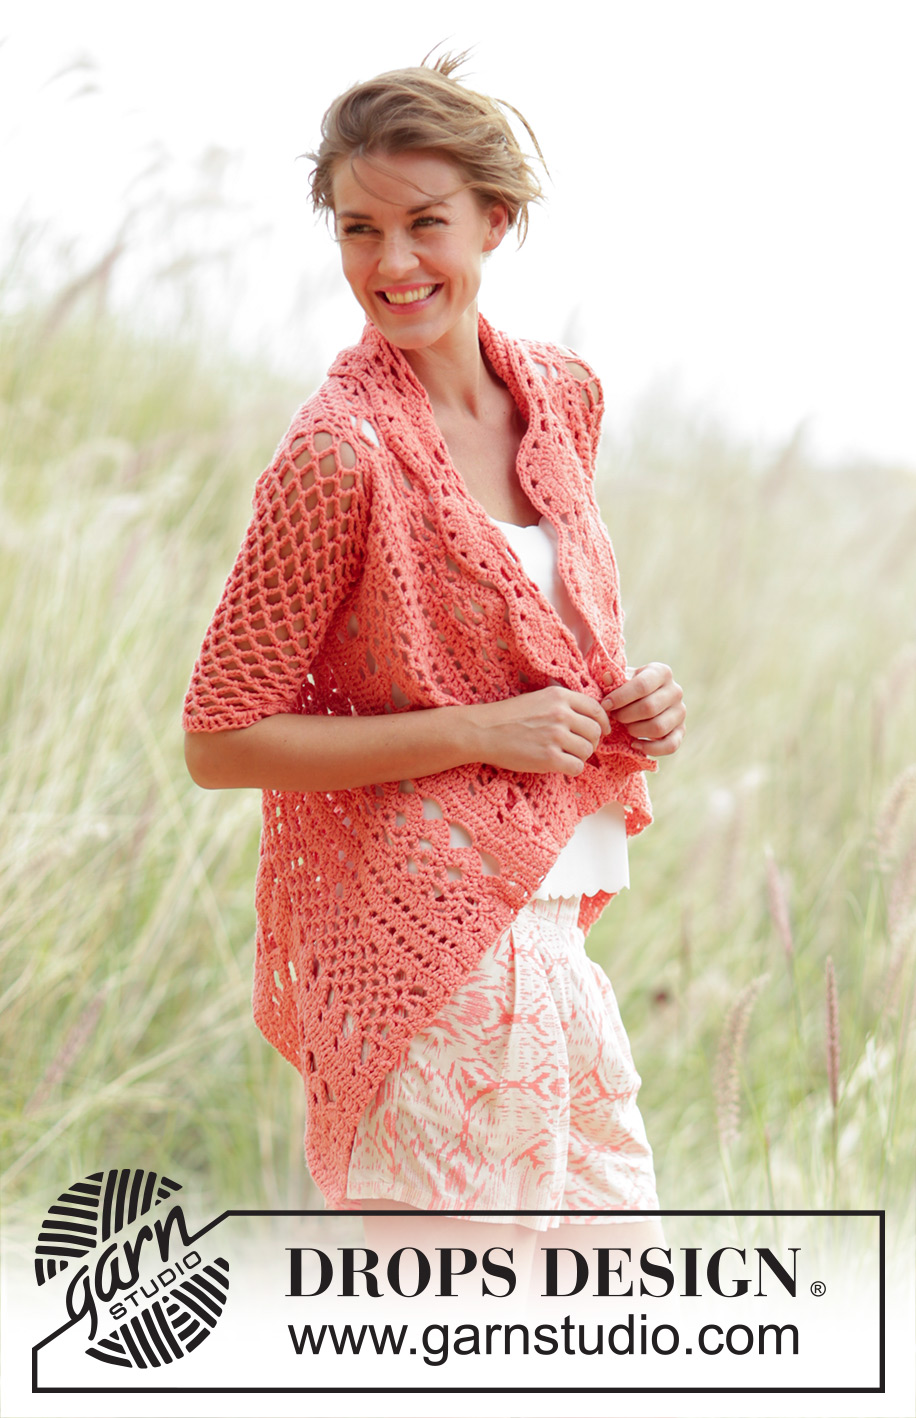
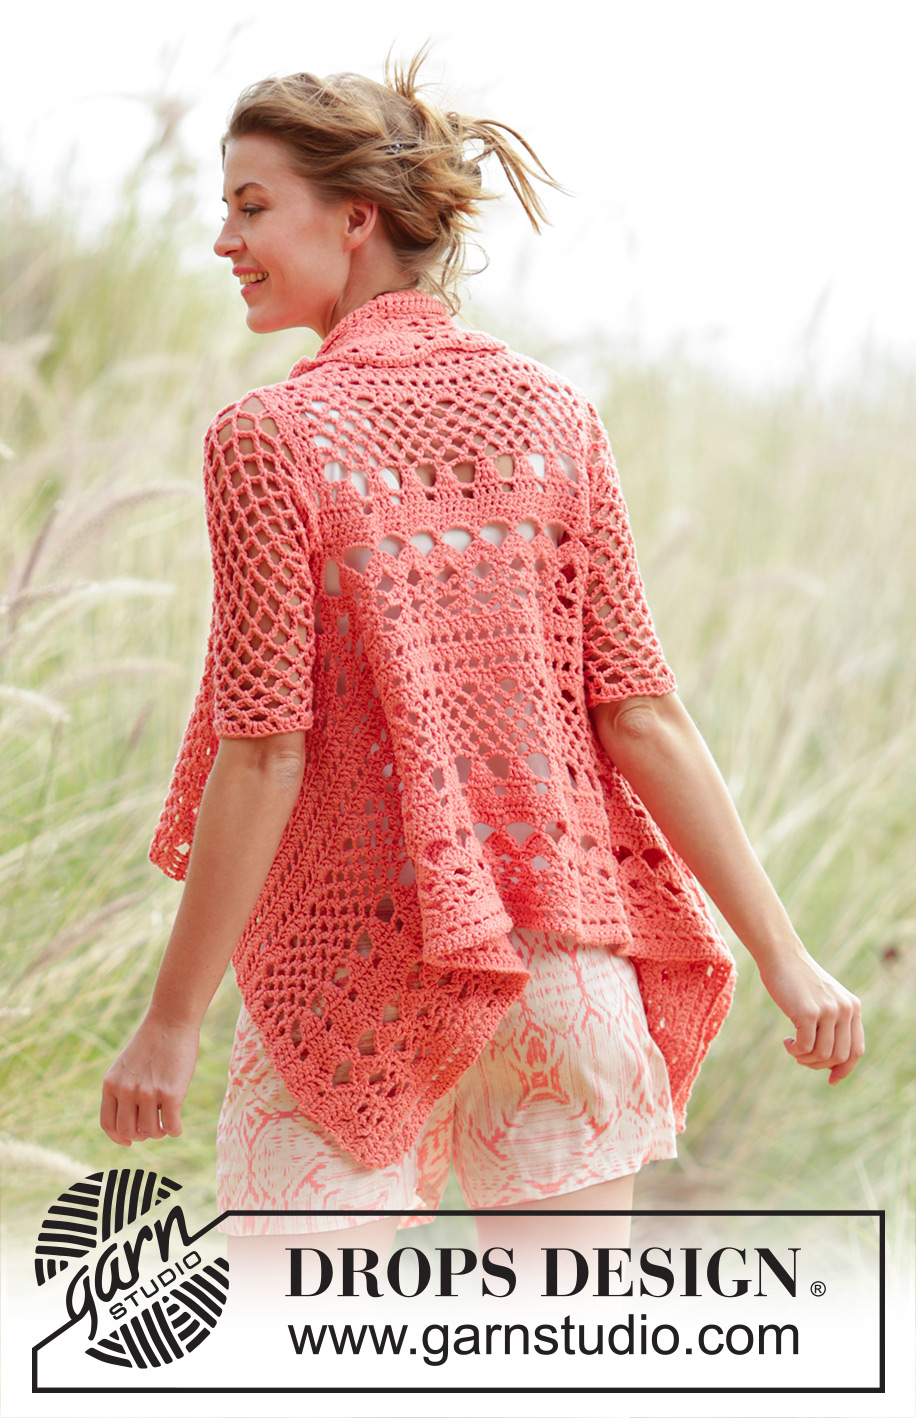
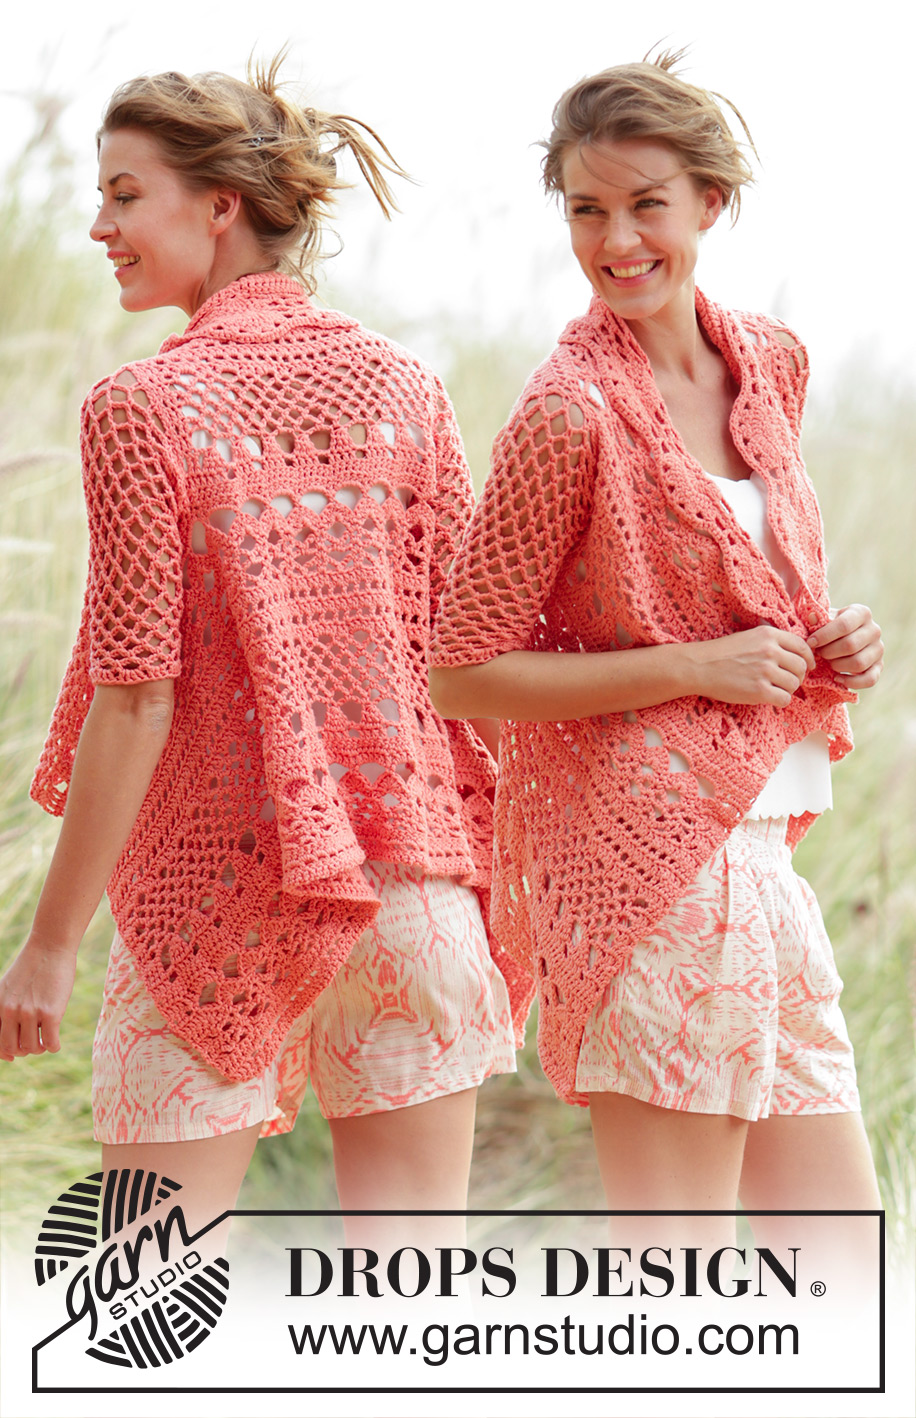
Peach Dream#peachdreamjacket |
|||||||||||||||||||||||||||||||||||||
 |
 |
||||||||||||||||||||||||||||||||||||
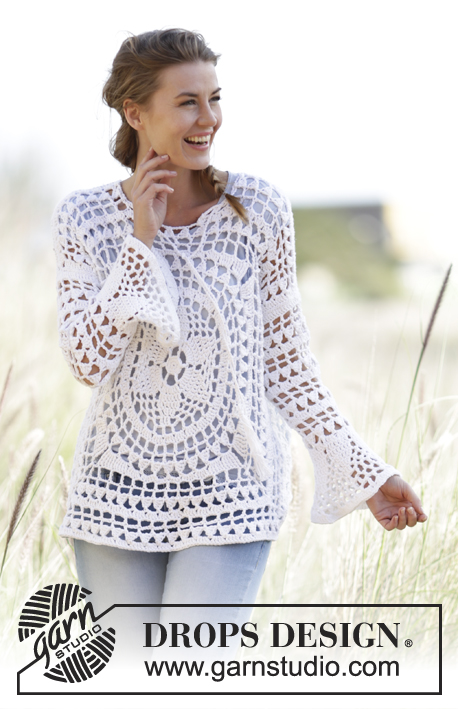
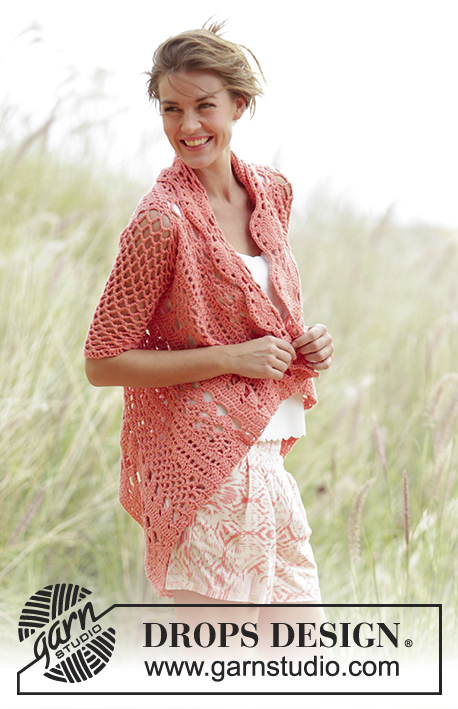
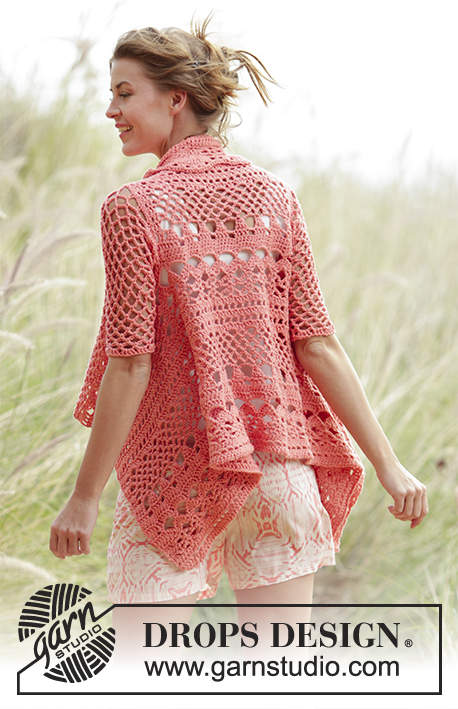
Crochet DROPS jacket worked in a square with lace pattern in ”Paris”. Size: S - XXXL.
DROPS 170-26 |
|||||||||||||||||||||||||||||||||||||
|
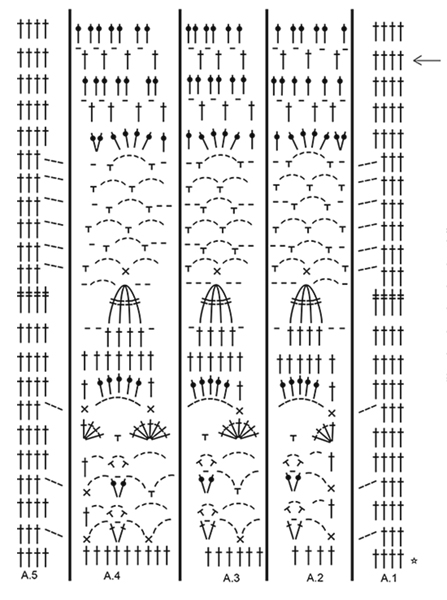
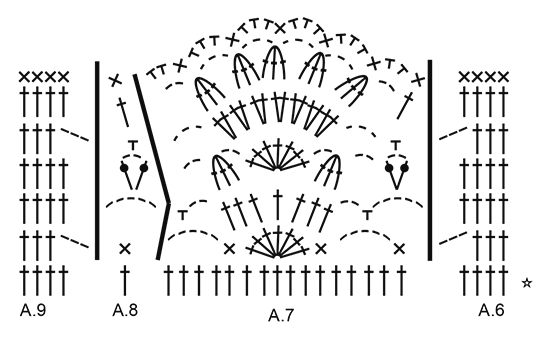
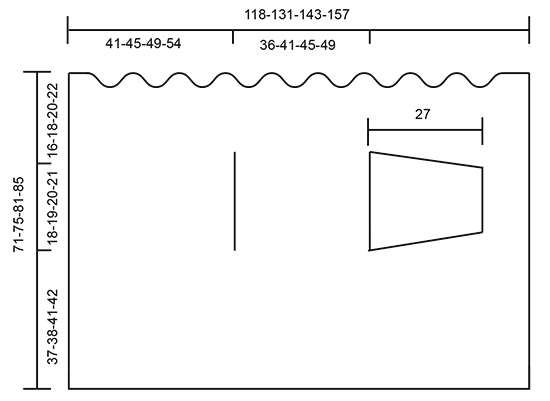
PATTERN: See diagrams A.1 to A.9. CROCHET INFO: Beg every dc row with 1 ch (replaces first dc). Beg every tr row with 3 ch (replaces first tr). Beg every dtr row with 4 ch (replaces first dtr). INCREASE TIP: Inc 1 tr by working 2 tr in/around same st. CROCHET TIP (applies to sleeves): After last dc on the round, continue to next round with 1 dc around next ch-space (= first ch-space on next round). NOTE: Insert a marker at the beg of round between last ch and first dc on the round, move the marker upwards. NOTE: BE CAREFUL NOT TO DISPLACE THE MARKER. DECREASE TIP: Work 1 dc around next ch-space but wait with last pull through, work next dc around next ch-space (do not work 5 ch between dc), on last pull through, pull yarn through all 3 loops on hook. ---------------------------------------------------------- JACKET: Work 207-229-252-275 ch on hook size 5 mm with Paris. Work 1 tr in 4th ch from hook (= 2 tr) - READ CROCHET INFO, 1 tr in each of the next 3-5-3-1 ch, * skip 1 ch, 1 tr in each of the next 4 ch *, repeat from *-* the entire row = 165-183-201-219 tr. Then work NEXT TO LAST row of diagram A.1 to A.5 - see arrow in chart - as follows: Work A.1 over the first 4 tr, work A.2 over the next 6 tr, repeat A.3 until 11 tr remain (= 24-27-30-33 times in total in width), work A.4 over the next 7 tr and finish with A.5. Work last row of A.1 to A.5. REMEMBER THE CROCHET TENSION! Then repeat A.1 to A.5 vertically. NOTE: Do not work first row in diagram, it shows how next row should be worked in sts from previous row. When piece measures 37-38-41-42 cm, adjust so that next row is with tr and from RS (cut the yarn if next row is from WS), divide the piece. RIGHT FRONT PIECE: Continue as follows from RS: Work A.1 and A.2 as before, repeat A.3 over the next 36-42-48-54 tr (= 6-7-8-9 times in total in width), work A.4 and then A.5, turn piece. Continue pattern like this over these sts until piece measures 18-19-20-21 cm from where it was divided, adjust so that next row is with tr and from WS (cut the yarn if next row is from RS). BACK PIECE: Work as follows from RS: Work A.1, A.2, repeat A.3 over the next 30-36-42-48 tr (= 5-6-7-8 times in total in width), A.4, finish with A.5. Continue pattern like this over these sts until piece measures 18-19-20-21 cm, adjust pattern according to right front piece. LEFT FRONT PIECE: Work as right front piece. FRONT AND BACK PIECE: Then work the parts tog from WS (i.e. work from left front piece, over back piece and to right front piece) with pattern as before, i.e. work as follows from WS: Work A.5 and A.4 as before, A.3 24-27-30-33 times in total in width, A.2, finish with A.1. Continue pattern like this. When piece measures 63-67-73-77 cm in total, adjust so that next row is with tr, inc 4-2-0-14 tr evenly – READ INCREASE TIP = 169-185-201-233 tr. Then work next row as follows: A.6 over the first 4 tr, repeat A.7 until 5 tr remain (= 10-11-12-14 times in width), A.8 over next tr, finish with A.9 over the last 4 tr. When A.6 to A.9 have been worked 1 time vertically, piece measures approx. 71-75-81-85 cm in total. Fasten off. SLEEVE: Sleeve is worked in the round, top down. Work 78-78-83-83 ch on hook size 5 mm with Paris. ROUND 1: Work 1 dc in 13th ch from hook, * 5 ch, skip 4 ch, 1 dc in next ch *, repeat from *-* over ch, work 1 dc around the first 3 ch = 14-14-15-15 ch-spaces - READ CROCHET TIP! Continue to work 5 ch and 1 dc around every ch-space. When piece measures 4 cm, dec 1 ch-space before marker - READ DECREASE TIP! Repeat dec alternately on each side of marker every 4 cm 4 more times = 9-9-10-10 ch-spaces. When piece measures 26 cm, finish round with 1 sl st in last ch mid under sleeve. Continue in the round as follows: ROUND 1: Work 3 ch, * 4 tr around first/next ch-space, 3 tr around next ch-space *, repeat from *-* the entire round, finish with 1 sl st in 3rd ch at beg of round = 32-32-35-35 tr. Fasten off. Work another sleeve the same way. ASSEMBLY: Fasten sleeve to jacket, sew in outer loops of edge sts, and make sure to avoid a tight seam. |
|||||||||||||||||||||||||||||||||||||
Diagram explanations |
|||||||||||||||||||||||||||||||||||||
|
|||||||||||||||||||||||||||||||||||||
 |
|||||||||||||||||||||||||||||||||||||
 |
|||||||||||||||||||||||||||||||||||||
 |
|||||||||||||||||||||||||||||||||||||
Have you finished this pattern?Tag your pictures with #dropspattern #peachdreamjacket or submit them to the #dropsfan gallery. Do you need help with this pattern?You'll find 8 tutorial videos, a Comments/Questions area and more by visiting the pattern on garnstudio.com. © 1982-2026 DROPS Design A/S. We reserve all rights. This document, including all its sub-sections, has copyrights. Read more about what you can do with our patterns at the bottom of each pattern on our site. |
|||||||||||||||||||||||||||||||||||||


With over 40 years in knitting and crochet design, DROPS Design offers one of the most extensive collections of free patterns on the internet - translated to 17 languages. As of today we count 324 catalogues and 12290 patterns translated into English (UK/cm). 12290
We work hard to bring you the best knitting and crochet have to offer, inspiration and advice as well as great quality yarns at incredible prices! Would you like to use our patterns for other than personal use? You can read what you are allowed to do in the Copyright text at the bottom of all our patterns. Happy crafting!
Post a comment to pattern DROPS 170-26
We would love to hear what you have to say about this pattern!
If you want to leave a question, please make sure you select the correct category in the form below, to speed up the answering process. Required fields are marked *.