
Popular categories
Looking for a yarn?


Comments / Questions (28)
![]() Anki wrote:
Anki wrote:
Hej igen! Har nu virkat den lilla korgen men 150 gr räcker inte? Utöver att den är platt som duk är stjärnmönstret endast endast 7,5 cm (botten 21,5). För att få till stora korgen behöver men minst 3 nystan till? Hänger detta ihop med att den är "platt" och inte som en korg?
25.05.2014 - 19:46
![]() Anki wrote:
Anki wrote:
Hej! Har också följt mönster till punkt o pricka men det känns som att den är för "platt" för att forma till en skål. Tveksamt om kanten kommer att 'stå upp'. Stämmer mönstret?
25.05.2014 - 14:07
![]() Elisabeth wrote:
Elisabeth wrote:
Hej drops. skal den ikke hækles rundt . jeg har lavet den lille og fulgt opskriften fuldtændig - den er flad og alt for stor til at bukke rundt. meget mærkelig kurv. alle andre kurve hækles da også rundt er det ikke korrekt.
24.05.2014 - 12:05DROPS Design answered:
Hej, Bunden hækles rundt først, og når du begynder at hækle lige op uden udtagninger, så skal der hækles frem og tilbage. Formen vil blive den samme men den skal syes sammen i siden inden du bukker kanten ned.
02.09.2014 - 10:56
![]() Birgitt wrote:
Birgitt wrote:
Diese Körbchen machen an einem Frühstückstisch sicher gleich gute Laune. Tolle Idee!!!
17.01.2014 - 09:42
![]() Hanna Björk Guðjónsdóttir wrote:
Hanna Björk Guðjónsdóttir wrote:
Sniðugar körfur sem er hægt að nýta í svo margt.
04.01.2014 - 00:19
![]() Joan wrote:
Joan wrote:
De er ret søde og vil klæde ethvert bord
29.12.2013 - 19:18Anna Beatriz Chladek Vieira wrote:
CLEAN AND CLASSIC
17.12.2013 - 13:08
![]() Edoarda wrote:
Edoarda wrote:
Bel punto che dà sostegno al cestino
17.12.2013 - 10:55
|
|
Summer Baskets#summerbaskets |
|
|
|
|
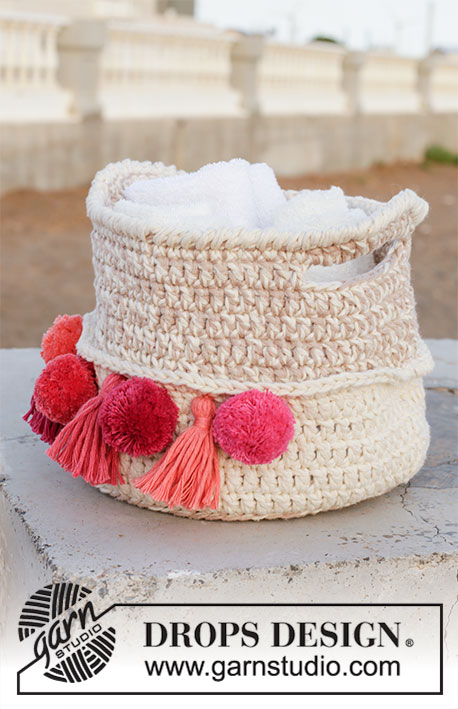
Crochet DROPS basket with star pattern in ”Paris”.
DROPS 152-34 |
|
|
CROCHET TIP: Beg every round with dc with 1 ch and finish with 1 sl st in 1st dc from beg of round. ---------------------------------------------------------- SMALL BASKET: Worked from bottom up. Crochet 4 ch on hook size 4 mm with light yellow and form a ring with 1 sl st in first ch. ROUND 1: Work 6 dc in ch-ring – see CROCHET TIP! ROUND 2: Work 2 dc in every dc = 12 dc. ROUND 3: Work 1 and 2 dc alternately in every dc the entire round = 18 dc. ROUND 4: Work 1 dc in every dc but work 2 dc in every 3rd dc = 24 dc. ROUND 5: Work 1 dc in every dc but work 2 dc in every 4th dc = 30 dc. Then work 1 dc more between inc until basket measures approx. 20 cm in diameter. NOW MEASURE PIECE FROM HERE! Now work star pattern back and forth, beg from RS as follows: ROW 1: Work 3 ch, pick up 1 st in 2nd and 3rd ch from hook, pick up 1 st in back loop of next dc, pick up 1 st in front loop of same dc, pick up 1 st in the next dc on row = 6 sts on hook, make a YO and pull through all 6 sts, work 1 ch, * pick up 1 st in the hole, pick up 1 st in the side on the last of the 6 sts, pick up 1 st in same st as the last of the 6 sts was picked up in, pick up 1 st in back loop of next dc, pick up 1 st in front loop of same st = 6 sts on hook, make a YO and pull through all 6 sts, 1 ch *, repeat from *-* until 1 dc remains on row, work 1 htr in last dc. Turn. ROW 2: 2 ch (replace 1 htr), work 2 htr in every "star hole", finish row with 1 htr in last st. Turn. ROW 3: Work 3 ch, pick up 1 st in 2nd and 3rd ch from hook, pick up 1 st in the first 3 htr on row = 6 sts on hook, make a YO and pull through all 6 sts, work 1 ch, * pick up 1 st in the hole, pick up 1 st in the side on the last of the 6 sts, pick up 1 st in same st as the last of the 6 sts was picked up in, pick up 1 st in each of the next 2 sts = 6 sts on hook, make a YO and pull through all 6 sts, 1 ch *, repeat from *-* until 1 dc remains on row, work 1 htr in last htr. Turn. Repeat row 2 and 3 until piece measures approx. 11 cm vertically (adjust after row 2). Finish and cut the yarn, leave approx. 25 cm for assembly. ASSEMBLY: Sew tog in the side and fasten off. Fold the edge double inwards. ---------------------------------------------------------- LARGE BASKET: Work the same way as SMALL BASKET with vanilla, but inc until bottom measures approx. 23 cm in diameter. Repeat star pattern until piece measures 17 cm vertically. |
|
Have you finished this pattern?Tag your pictures with #dropspattern #summerbaskets or submit them to the #dropsfan gallery. Do you need help with this pattern?You'll find 9 tutorial videos, a Comments/Questions area and more by visiting the pattern on garnstudio.com. © 1982-2026 DROPS Design A/S. We reserve all rights. This document, including all its sub-sections, has copyrights. Read more about what you can do with our patterns at the bottom of each pattern on our site. |


With over 40 years in knitting and crochet design, DROPS Design offers one of the most extensive collections of free patterns on the internet - translated to 17 languages. As of today we count 324 catalogues and 12290 patterns translated into English (UK/cm). 12290
We work hard to bring you the best knitting and crochet have to offer, inspiration and advice as well as great quality yarns at incredible prices! Would you like to use our patterns for other than personal use? You can read what you are allowed to do in the Copyright text at the bottom of all our patterns. Happy crafting!
Post a comment to pattern DROPS 152-34
We would love to hear what you have to say about this pattern!
If you want to leave a question, please make sure you select the correct category in the form below, to speed up the answering process. Required fields are marked *.