Comments / Questions (67)
![]() Anette wrote:
Anette wrote:
Flot model.Kan godt lide asymetriske detaljer.
15.12.2009 - 18:16
![]() Teresa wrote:
Teresa wrote:
This is beautiful. I love the detailing of the ribs. This style will accentuate women with smaller chests bringing them into a perfect balance with their hips.
15.12.2009 - 01:08
![]() Yvonne wrote:
Yvonne wrote:
Snygg,härlig skärning, härlig färg.
14.12.2009 - 13:08
![]() Claudia wrote:
Claudia wrote:
Th pattern has great appeal. The style will be flattering on almost any figure, and tle lines are clean and clear.
13.12.2009 - 23:51
![]() Monica wrote:
Monica wrote:
Spännande modell i inspirerande färg!
12.12.2009 - 18:14
![]() Helle wrote:
Helle wrote:
Elegant, super velsiddende og lidt anderledes model. Gerne med lange ærmer, så MÅ jeg have den.
12.12.2009 - 16:29
![]() Janet wrote:
Janet wrote:
Heel apart
12.12.2009 - 15:22
![]() Mona Gustafsson wrote:
Mona Gustafsson wrote:
Spännande och otroligt elegant.
10.12.2009 - 13:37
![]() Paula wrote:
Paula wrote:
Titta, det går att göra figurskapande ränder i annat garn än Fabel. Mycket elegant. Det vill jag se mer av.
10.12.2009 - 11:12
![]() Jenny wrote:
Jenny wrote:
Spännande, skulle nog korta av den lite om jag stickar den. Användbar!
10.12.2009 - 09:07
Back To Me#backtomecardigan |
|
 |
 |
DROPS jacket in rib with short sleeves in ”Alpaca”. Size S-XXXL
DROPS 119-3 |
|
|
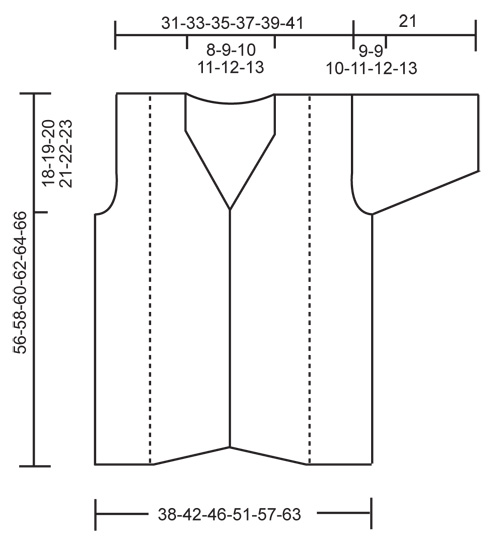
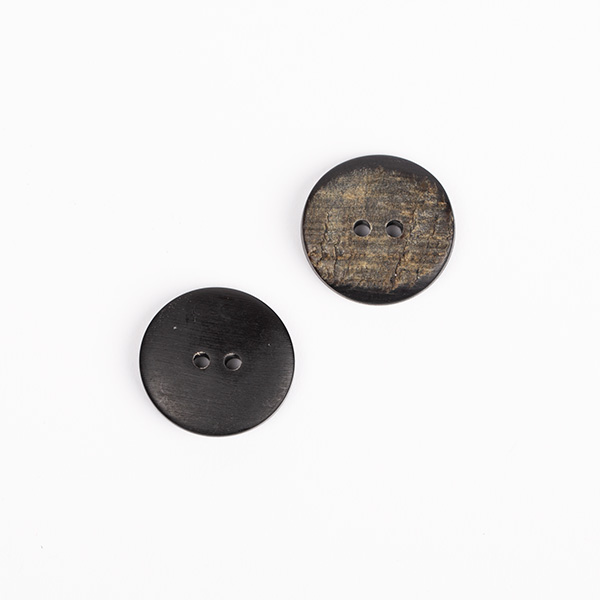
GARTER ST (back and forth on needle): K all rows. BUTTONHOLES: Make buttonholes on right front band. 1 buttonhole = cast off 4th and 5th st from mid front (= P2) and cast on 2 new sts on next row. Make buttonholes when piece measures: SIZE S + M: 6, 12, 18, 24, 30 and 36 cm. SIZE L + XL: 7, 13, 19, 25, 31 and 37 cm. SIZE XXL + XXXL: 7, 13, 20, 26, 33 and 39 cm. -------------------------------------------------------- -------------------------------------------------------- LEFT FRONT PIECE: Cast on 87-95-103-115-127-139 sts (includes 1 edge st at the side and 9 front band sts towards mid front) on needle size 3 mm with Alpaca. Work first row as follows from RS: 1 edge st, K1, * P2, K2 *, repeat from *-* and finish with 1 GARTER ST - see above. Work return row with K over K and P over P. On next row from RS insert 2 markers in piece: marker-1 after 30-34-38-46-54-62 sts and marker-2 after 78-86-94-106-118-130 sts (9 sts after marker-2 = front band). Continue in rib as before. AT THE SAME TIME dec 1 st on every row from RS by P2 tog after marker-1 and inc 1 st on every row from RS by making 1 YO before marker-2. Work YO into back of loop on return row and incorporate inc sts in rib as you go along. When piece measures 37-37-38-38-40-40 cm (measured at the side) shape the neck by continue dec as before but discontinue inc. Do this a total of 20-24-24-28-28-32 times. Now continue with dec and inc inside the 9 front band sts as before. AT THE SAME TIME when piece measures 38-39-40-41-42-43 cm (measured at the side) cast off 4 sts at beg of row from RS for armhole and cast off to shape the armhole at beg of every row from RS: 2 sts 5-7-9-13-17-21 times and 1 st 1 time. When dec are complete work st on armhole in garter st until finished measurements. When all dec for armhole and neck are complete there are 52-52-56-56-60-60 sts on needle. When piece measures 54-56-58-60-62-64 cm K 1 row from RS on all sts, AT THE SAME TIME dec 25-23-26-25-27-27 sts evenly = 27-29-30-31-33-33 sts. Continue in garter st on all sts until piece measures 56-58-60-62-64-66 cm. Cast off loosely. RIGHT FRONT PIECE: Like left front piece, but mirrored. i.e. work first row from RS as follows: 1 GARTER ST - see above, * K2, P2 *, repeat from *-* and finish with K1 and 1 edge st. Insert marker-1 after 9 sts (= front band), and marker-2 after 57-61-65-69-73-77 sts (= 48-52-56-60-64-68 sts between markers). Inc after marker-1 and dec before marker-2. REMEMBER BUTTONHOLES - see above. BACK PIECE: Cast on 190-206-222-246-270-294 sts (includes 1 edge st each side) on needle size 3 mm with Alpaca. Work first row from RS as follows: 1 edge st, K1, * P2, K2 *, repeat from *-* and finish with P2, K1 and 1 edge st. Work return row with K over K and P over P. Insert 4 markers in piece as follows: marker-1 after 30-34-38-46-54-62 sts, marker-2 after 92-100-108-120-132-144 sts, marker-3 after 98-106-114-126-138-150 sts and marker-4 after 160-172-184-200-216-232 sts (= 30-34-38-46-54-62 sts after marker-4) READ ALL OF THE FOLLOWING SECTION BEFORE CONTINUING! Continue in rib as before. AT THE SAME TIME dec 2 sts on every row from RS as follows: P2 tog before marker-2 and P2 tog after marker-3. Repeat this dec a total of 14 times = 162-178-194-218-242-266 sts on needle. Now continue in rib as before and continue dec as before, AT THE SAME TIME also inc 2 sts on every row from RS as follows: Make 1 YO after marker-1 and 1 YO before marker-4. Work YO into back of loop on return row and incorporate inc sts in rib as you go along. Continue like this until piece measures 38-39-40-41-42-43 cm (measured at the side and adjust to front piece). Now cast off 4 sts each side for armhole (NOTE! continue inc/dec as before). Cast off to shape the armhole each side at the beg of every row: 2 sts 5-7-9-13-17-21 times and 1 st 1 time = 132-140-148-156-164-172 sts. When dec are complete work st on armhole in garter st until finished measurements. Continue in rib and dec/inc as before. When piece measures 54-56-58-60-62-64 cm K 1 row from RS on all sts, AT THE SAME TIME dec 58-60-64-68-70-74 sts evenly = 74-80-84-88-94-98 sts. K 1 row from WS and now complete piece in garter st. AT THE SAME TIME on next row cast off the middle 18-20-22-24-26-30 sts for neck and complete each shoulder separately. Cast off 1 st on neckline on next row = 27-29-30-31-33-33 sts left on shoulder. Continue until piece measures 56-58-60-62-64-66 cm and cast off loosely. SLEEVE: Cast on 114-118-122-126-130-134 sts (includes 1 edge st each side) on needle size 3 mm with Alpaca. Work rib K2/ P2 with 1 edge st each side until piece measures 12-12-11-10-9-8 cm (less for the larger sizes because of longer sleeve cap and wider shoulder). Now cast off 5 sts each side and cast off to shape the sleeve cap each side at the beg of every row: 2 sts until piece measures 20 cm, now cast off 5 sts each side 1 time and cast off remaining sts. Piece measures approx 21 cm. ASSEMBLY: Sew shoulder seams. Set in sleeves inside 1 edge st. Sew sleeve and side seams inside 1 edge st. Sew on buttons. |
|
 |
|
Have you finished this pattern?Tag your pictures with #dropspattern #backtomecardigan or submit them to the #dropsfan gallery. Do you need help with this pattern?You'll find 18 tutorial videos, a Comments/Questions area and more by visiting the pattern on garnstudio.com. © 1982-2025 DROPS Design A/S. We reserve all rights. This document, including all its sub-sections, has copyrights. Read more about what you can do with our patterns at the bottom of each pattern on our site. |
|


Post a comment to pattern DROPS 119-3
We would love to hear what you have to say about this pattern!
If you want to leave a question, please make sure you select the correct category in the form below, to speed up the answering process. Required fields are marked *.