
Popular categories
Looking for a yarn?


Comments / Questions (51)
![]() Besset wrote:
Besset wrote:
Merci infiniment pour vos explications qui ont chassé mon découragement! c'est très clair
10.02.2020 - 11:31
![]() Besset wrote:
Besset wrote:
Merci pour votre réponse rapide. Je comprends le principe mais n'arrive pas à le réaliser. Pourriez vous me proposer le pas à pas de la procédure pour marquer l'encolure? D'avance un immense merci! Valérie Besset.
09.02.2020 - 23:39DROPS Design answered:
Bonjour Mme Besset, vous allez tricoter des rangs raccourcis sur les mailles des bordures des devants de chaque côté ainsi: tricotez les 8 premières mailles sur l'endroit, tournez et tricotez ces 8 m sur l'envers, tournez et tricotez toutes les mailles sur l'endroit (comme avant), tournez, tricotez les 8 premières m sur l'envers, tournez, tricotez ces 8 m sur l'endroit, tournez et tricotez toutes les mailles sur l'envers. Bon tricot!
10.02.2020 - 09:58
![]() Besset Valerie wrote:
Besset Valerie wrote:
Pour marquer l'encolure ,comment puis-je tricoter les 2 rangs endroit en allers retours sur les 8 mailles de bordures ? merci pour votre aide !
30.01.2020 - 22:08DROPS Design answered:
Bonjour Mme Besset, c'est tout à fait ce que l'on doit faire à 34-35-36-37-38-39 cm (juste avant de diviser l'ouvrage en 3 parties), avant de commencer les diminutions de l'encolure. Bon tricot!
31.01.2020 - 07:21
![]() Alyson James wrote:
Alyson James wrote:
Is the Rib part K2 P2?
13.08.2016 - 19:39DROPS Design answered:
Dear Mrs James, the rib part is K2/P4. Happy knitting!
13.08.2016 - 19:46
![]() Isabel wrote:
Isabel wrote:
Grüezi Gerne würde ich diese schöne Jacke mit längeren oder ganz langen Ärmeln stricken. Können Sie mir bitte mitteilen, wie ich vorgehen soll? Herzlichen Dank.
14.03.2016 - 14:29DROPS Design answered:
Liebe Isabel, da die Ärmel auch gemustert sind, ist das Ausrechnen nicht ganz einfach. Wir empfehlen Ihnen, aus unserer umfangreichen Musterdatenbank ein pasendes Modell auszuwählen.
14.03.2016 - 15:03
![]() LENOIR wrote:
LENOIR wrote:
J'ai réalisé ce modèle en LIMA,avec des boutons varies et strass,une petite merveille!
23.02.2012 - 19:10
![]() DROPS Deutsch wrote:
DROPS Deutsch wrote:
Ich bin nicht sicher ob ich Sie richtig verstehe? RÜCKENTEIL:..Bei jeder 2. R. total 3-5-10-12-20-26 Mal wiederholen......LINKES VORDERTEIL: Auf der Seite wie beim Rückenteil für das Armloch abk.
05.04.2011 - 09:32Madeleine V. Vogelsang wrote:
Frage: so wie die Anleitung geschrieben ist, macht es den Eindruck, als ob der Armausschnitt hinten grösser sein soll als vorne. Das ist für mich nicht nachvollziehbar.
04.04.2011 - 20:43
![]() Judith wrote:
Judith wrote:
Tolles Teil, wie die ganze Kollektion..Super
19.11.2009 - 17:55
![]() Drops Design wrote:
Drops Design wrote:
Bonjour Maria José, ce modèle se tricote en allers retours sur aiguille circulaire uniquement pour avoir la place nécessaire pour y loger toutes les mailles. Ainsi vous pouvez également le tricoter sur aiguilles droites.
19.10.2009 - 09:18
|
|
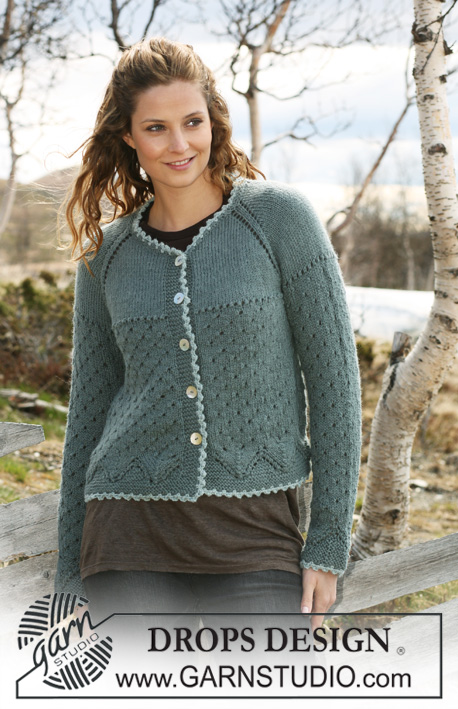
Rippling Rose Cardigan#ripplingrosecardigan |
|
|
|
|
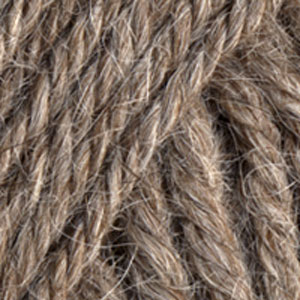
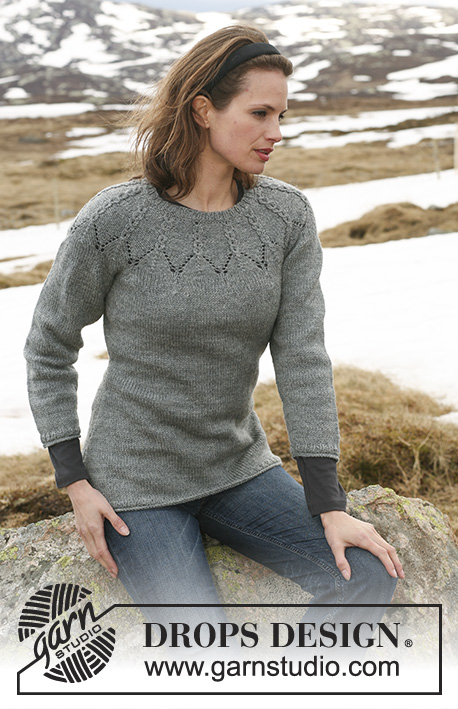
Knitted DROPS jacket in stocking st and rib with short sleeves in ”Classic Alpaca”. Size S-XXXL.
DROPS 114-14 |
|
|
GARTER ST (back and forth on needle): K all rows. BUTTONHOLES: Make buttonholes on right front band. 1 BUTTONHOLE = cast off 5th st from mid front and cast on 1 new st on return row. Make buttonholes when piece measures: Size S: 5, 12, 19, 26 and 33 cm. Size M: 6, 13, 20, 27 and 34 cm. Size L: 7, 14, 21, 28 and 35 cm. Size XL: 8, 15, 22, 29 and 36 cm. Size XXL: 5, 13, 21, 29 and 37 cm. Size XXXL: 6, 14, 22, 30 and 38 cm. DECREASING TIP-1 (neckline): Make all dec from RS. Dec on the inside of 8 garter sts. Dec as follows after 8 sts: Slip 1 st as if to K, K1, psso. Dec as follows before 8 sts: K2 tog. DECREASING TIP-2 (armhole): Make all dec from RS. Dec inside 2 garter sts each side. Dec as follows after 2 sts: Slip 1 st as if to K, K1, psso. Dec as follows before 2 sts: K2 tog. JACKET: Worked back and forth on circular needle from mid front. Cast on 228-240-264-288-324-348 sts on circular needle size 3.5 mm with Classic Alpaca. Work 4 rows GARTER ST – see above! Change to circular needle size 4 mm and continue in stocking st with 8 garter sts each side towards mid front (= front bands, worked in garter st throughout). REMEMBER THE KNITTING TENSION! When piece measures 5-6-7-8-5-6 cm make BUTTONHOLES on right front band – see above! When piece measures 26 cm for all sizes change to circular needle size 3.5 mm from RS and P 1 row from WS. Work next row from RS as follows: 8 garter sts, rib K2/P4 until 10 sts remain, finish with K2, 8 garter sts. Insert 2 markers in piece, 61-64-70-76-85-91 sts in from each side (back piece = 106-112-124-136-154-166 sts). Continue in rib K2/P4. READ ALL OF THE FOLLOWING SECTION BEFORE CONTINUING! When piece measures 34-35-36-37-38-39 cm K 2 rows back and forth on the 8 front band sts each side only (to make neckline neater). On next row from RS dec 1 st for neck inside front band each side – see DECREASING TIP-1! Repeat the dec on every 0.5 and 1 cm alternately a total of 21-21-21-24-24-24 times. AT THE SAME TIME when piece measures 36-37-38-39-40-41 cm cast off 6-8-10-12-14-14 sts for armhole each side (= 3-4-5-6-7-7 sts each side of marker). Now complete each piece separately. BACK PIECE: = 100-104-114-124-140-152 sts. Continue in rib with 2 garter sts each side. AT THE SAME TIME dec 1 st for armhole inside 2 garter sts each side – see DECREASING TIP-2! Repeat the dec on every other row a total of 3-5-10-12-20-26 times = 94-94-94-100-100-100 sts. When piece measures 54-56-58-60-62-64 cm work 4 rows garter st on the middle 42-42-42-48-48-48 sts with remaining sts as before. Now cast off the middle 24-24-24-30-30-30 sts for neck and complete each shoulder separately. Cast off 1 st on neckline on next row = 34 sts left on shoulder for all sizes. Continue in rib with 8 garter sts towards neckline and 2 garter sts towards armhole. Cast off when piece measures 56-58-60-62-64-66 cm. LEFT FRONT PIECE: Dec for armhole at the side as described for back piece, AT THE SAME TIME continue to dec for neck inside front band. When all dec are complete there are 34 sts left on shoulder. Cast off when piece measures 56-58-60-62-64-66 cm. RIGHT FRONT PIECE: Like left front piece, but mirrored. SLEEVE: Worked in the round on double pointed needles. Cast on 90-96-102-108-114-120 sts on double pointed needles size 3.5 mm. Work 1 round stocking st and continue in rib K2/P4. Insert a marker at beg of round. When piece measures 7 cm cast off 12 sts mid under sleeve (= 6 sts each side of marker) and cast off for sleeve cap each side at the beg of every row (cast off with K over K and P over P) : 2 sts 4-4-6-6-6-6 times, 1 st 0-1-0-1-6-8 times, then 2 sts each side until piece measures 13-14-16-17-20-22 cm, now cast off 3 sts 1 time each side, and cast off remaining sts. Piece measures approx 14-15-17-18-21-23 cm. ASSEMBLY: Sew shoulder seams, make sure rib from front and back piece meets in the seam. Set in sleeves. Sew on buttons. |
|
 |
|
Have you finished this pattern?Tag your pictures with #dropspattern #ripplingrosecardigan or submit them to the #dropsfan gallery. Do you need help with this pattern?You'll find 17 tutorial videos, a Comments/Questions area and more by visiting the pattern on garnstudio.com. © 1982-2026 DROPS Design A/S. We reserve all rights. This document, including all its sub-sections, has copyrights. Read more about what you can do with our patterns at the bottom of each pattern on our site. |


With over 40 years in knitting and crochet design, DROPS Design offers one of the most extensive collections of free patterns on the internet - translated to 17 languages. As of today we count 324 catalogues and 12290 patterns translated into English (UK/cm). 12290
We work hard to bring you the best knitting and crochet have to offer, inspiration and advice as well as great quality yarns at incredible prices! Would you like to use our patterns for other than personal use? You can read what you are allowed to do in the Copyright text at the bottom of all our patterns. Happy crafting!
Post a comment to pattern DROPS 114-14
We would love to hear what you have to say about this pattern!
If you want to leave a question, please make sure you select the correct category in the form below, to speed up the answering process. Required fields are marked *.