
Popular categories
Looking for a yarn?































Comments / Questions (5)
 Tone wrote:
Venstre skrå skulder starter med 1. pinne = (vrangen), 2. pinne = (retten). Videre står det i oppskriften at 3. pinne strikkes fra retten og 4. pinne skal strikkes som 2. pinne; dvs fra retten, osv - 11. pinne fra retten og 12 pinne = retten, i hht oppskriften. Er det en feil i oppskriften? Og skal venstre skulder før dette avsluttes fra retten eller vrangen? Avhenger av hva man skal starte den skrå skulderen med. Takk for svar.
21.10.2026 - 22:27DROPS Design answered:
Hei Tone, Alle oddetalls pinner på venstre skrå-skulder strikkes fra vrangen (så de er skrevet feil i teksten). Hilsen Drops Team
22.10.2026 - 05:44
 Jane wrote:
Right diagonal shoulder short row help. Working on the right side I work 19 stitches then turn . I assume that I am turning before the band . At what point do I knit the band do I knit the band on the even rows? Or do I pick up the band after row 12
20.10.2026 - 17:57DROPS Design answered:
Dear Jane, on right shoulder front the band stitches are worked at the beginning of a row from WS / end of row from RS - short rows start from RS so when you work the first 19sts from RS you won't work the remaining sts (incl. the band sts), just turn and work these 19 sts back from WS and continue short rows as explained. Happy knitting!
21.10.2026 - 10:05
 Siguoirt Josiane wrote:
Je ne comprends pas les rangs raccourcis Est ce obligatoire ?
02.10.2026 - 14:26
Siguoirt Josiane wrote:
Je ne comprends pas les rangs raccourcis Est ce obligatoire ?
02.10.2026 - 14:16
Josiane wrote:
Les rangs raccourcis sont ils obligatoires car je n y arrive pas
02.10.2026 - 14:13DROPS Design answered:
Bonjour Josiane, pour ce modèle, il est conseillé de les faire pour avoir les bonnes mesures finales, mais vous pouvez opter pour une autre technique - retrouvez en différentes ici, en vidéo. Bon tricot!
02.10.2026 - 16:12
|
|
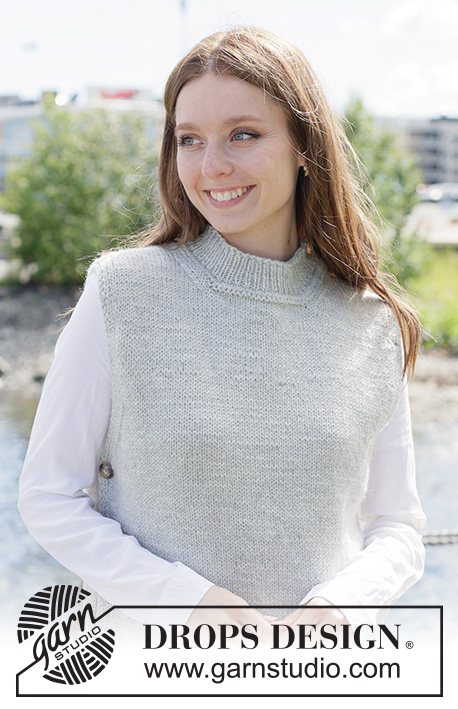
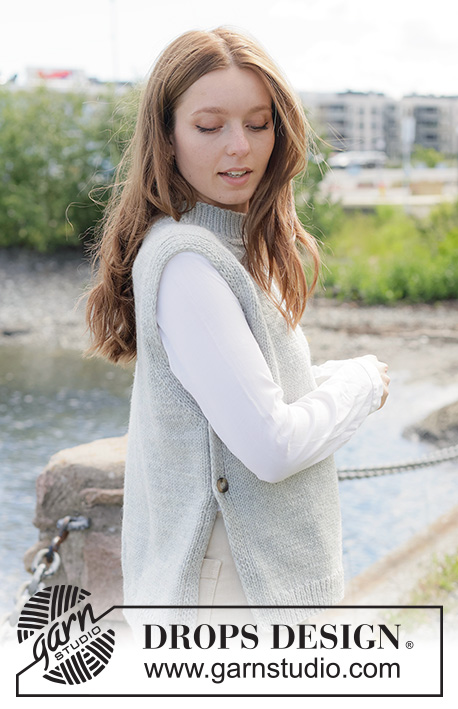
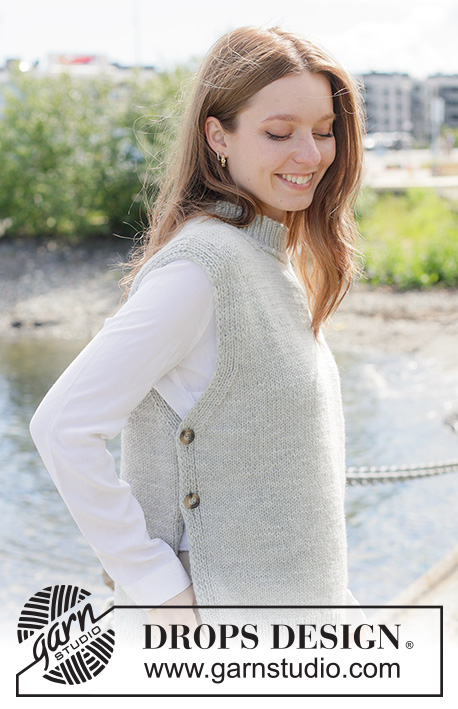
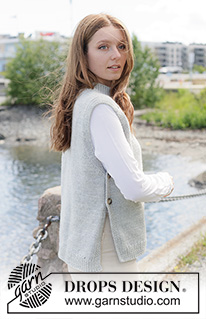
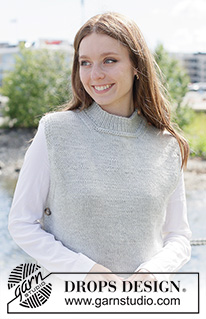
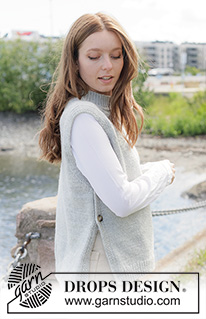
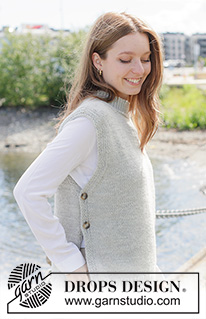
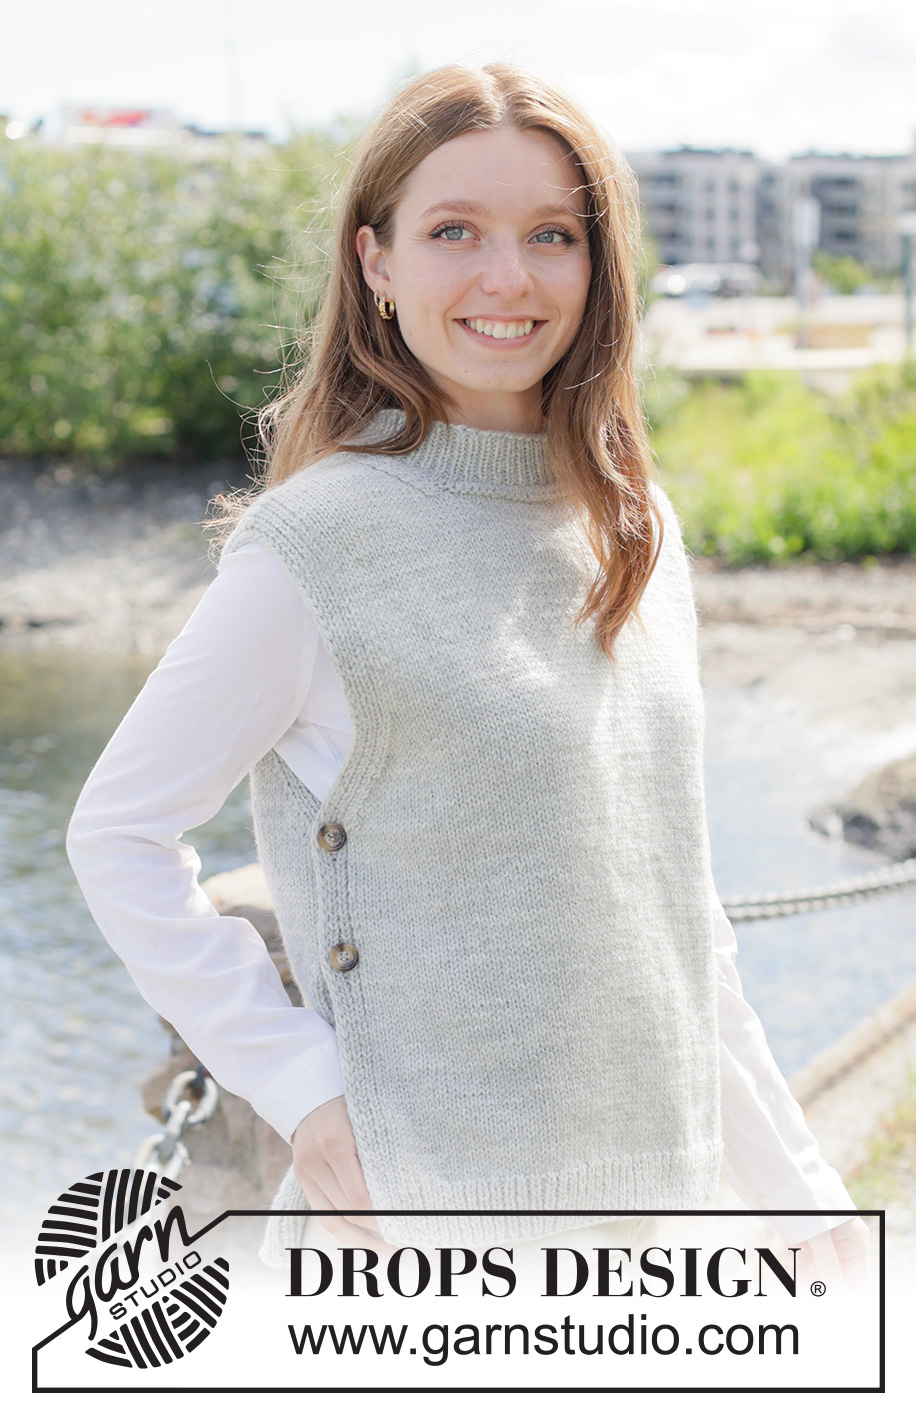
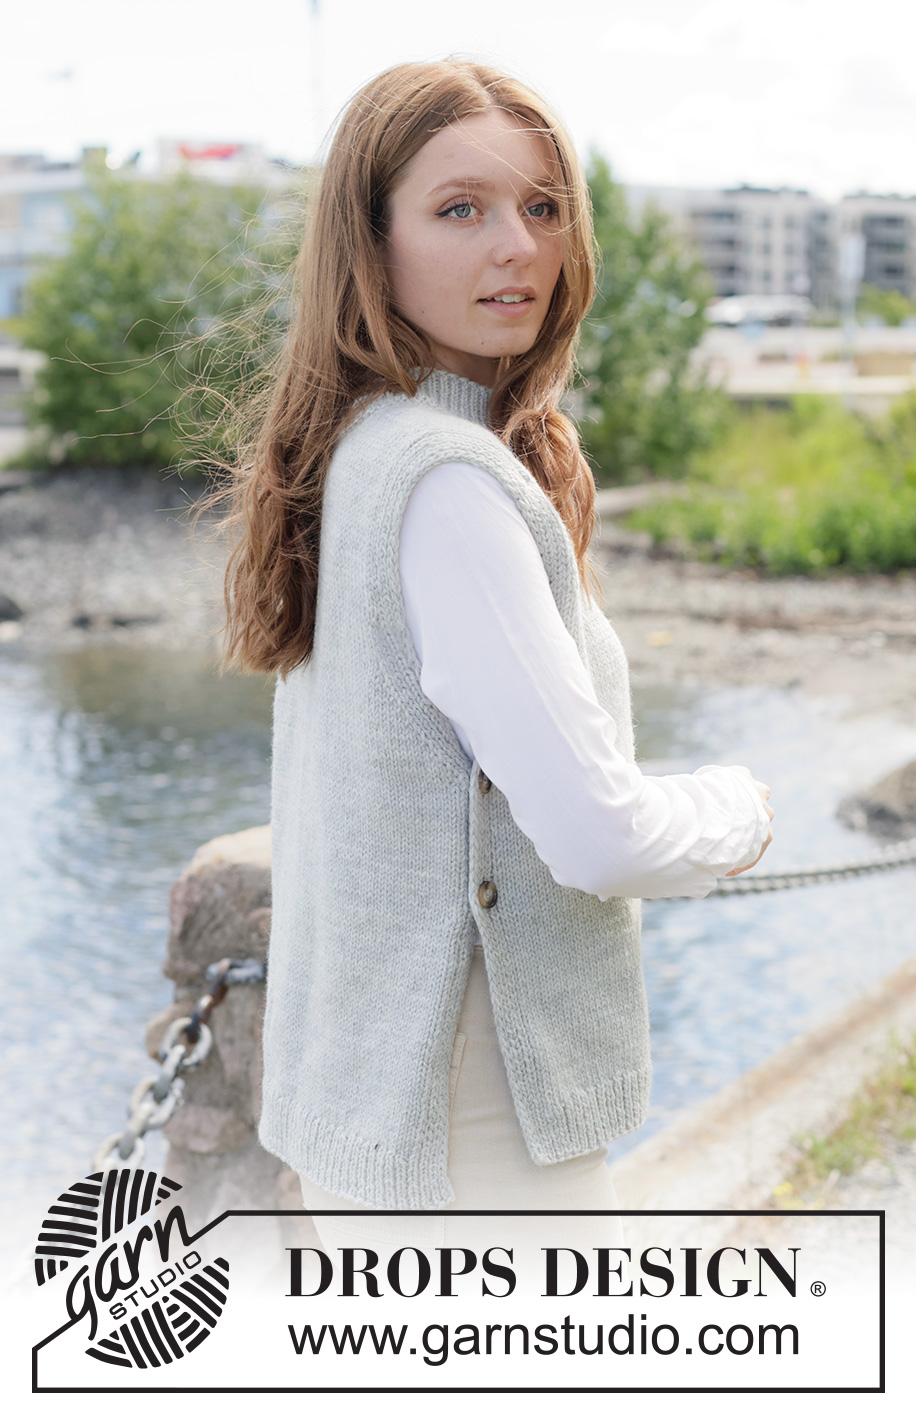
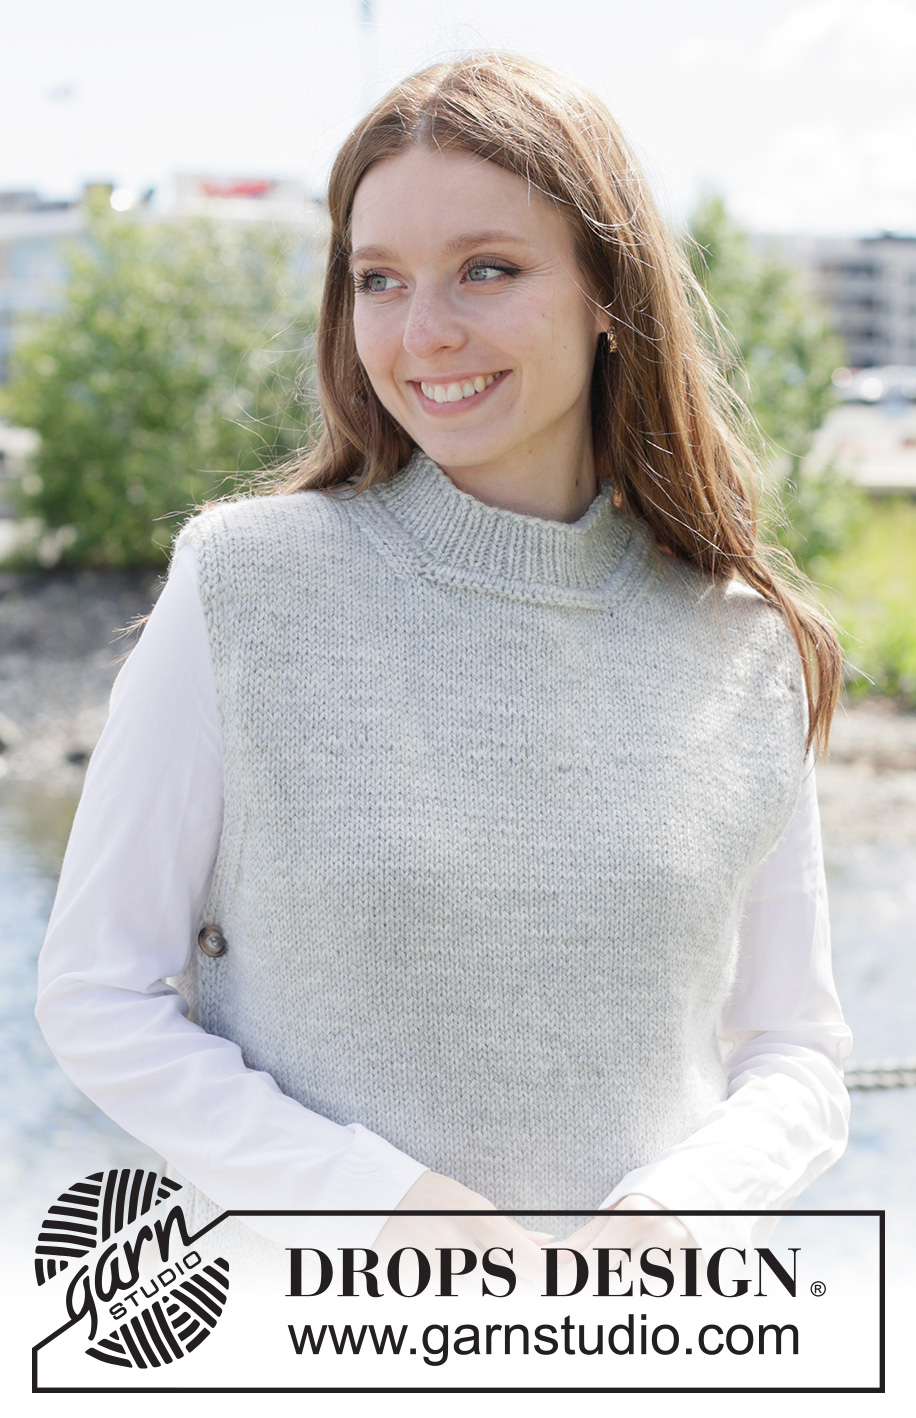
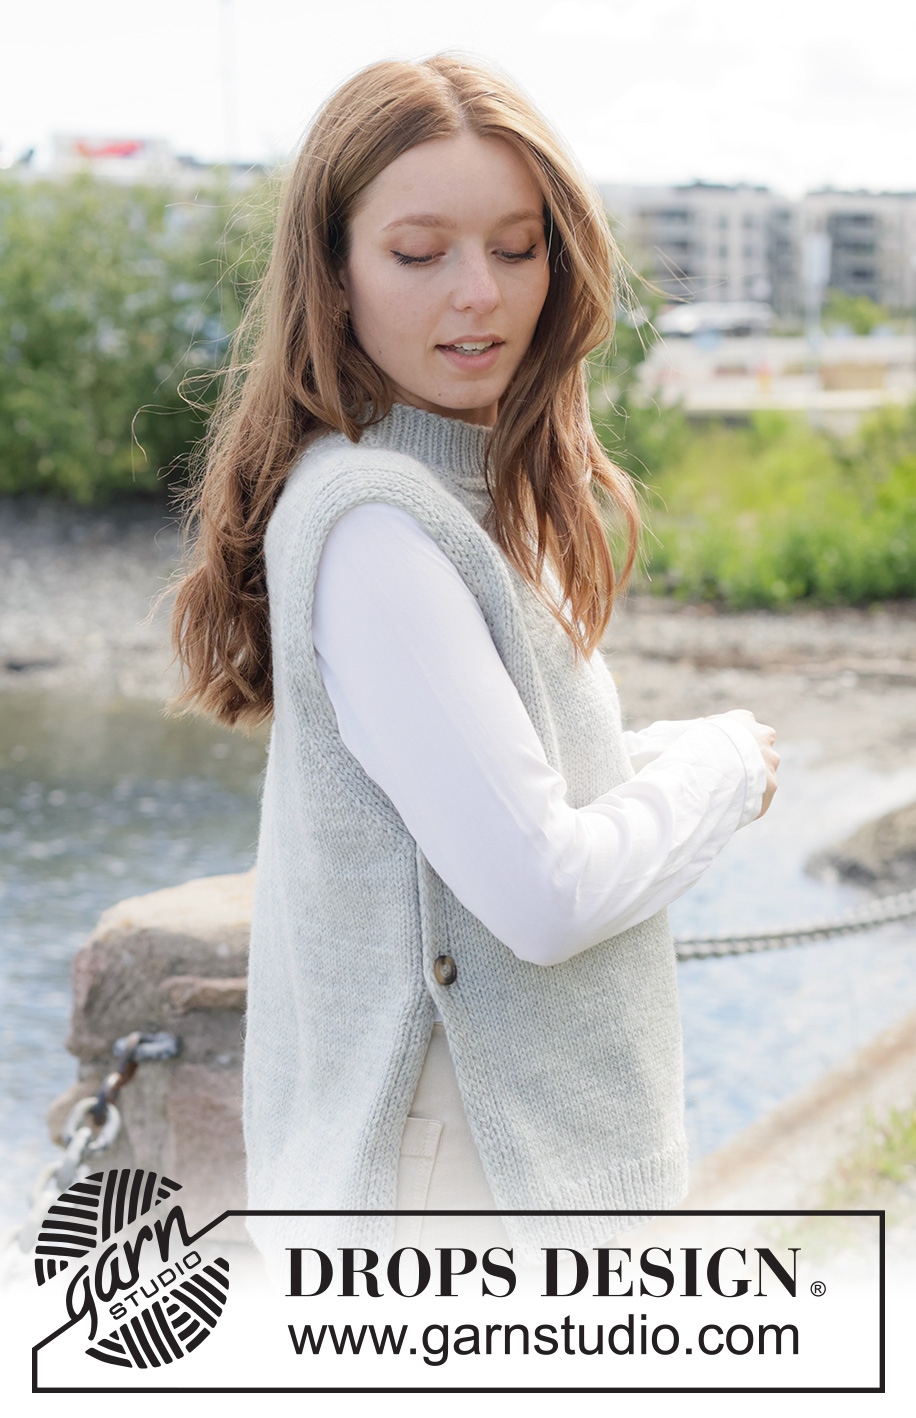
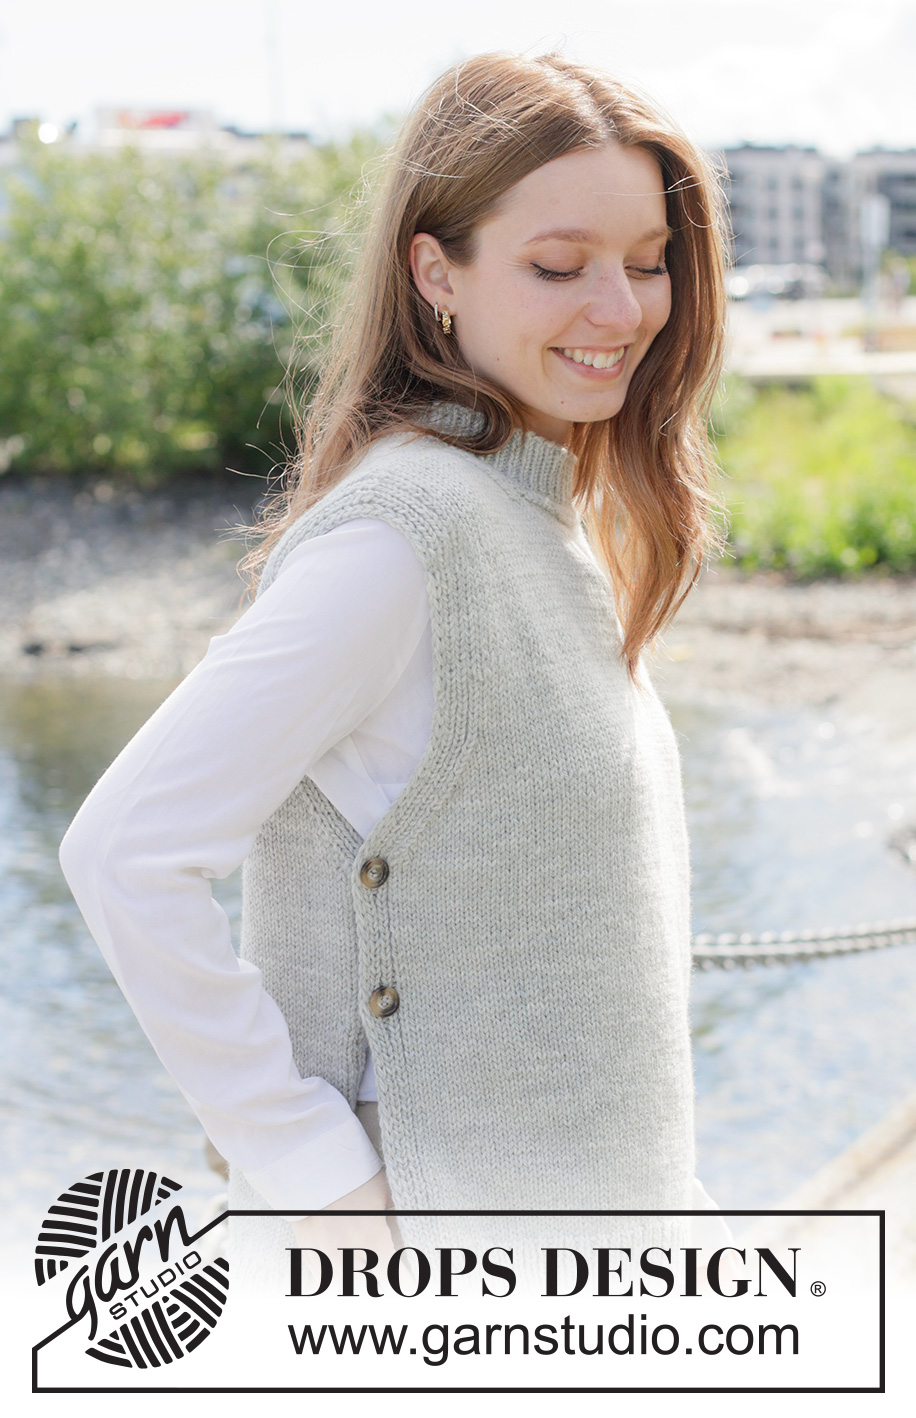
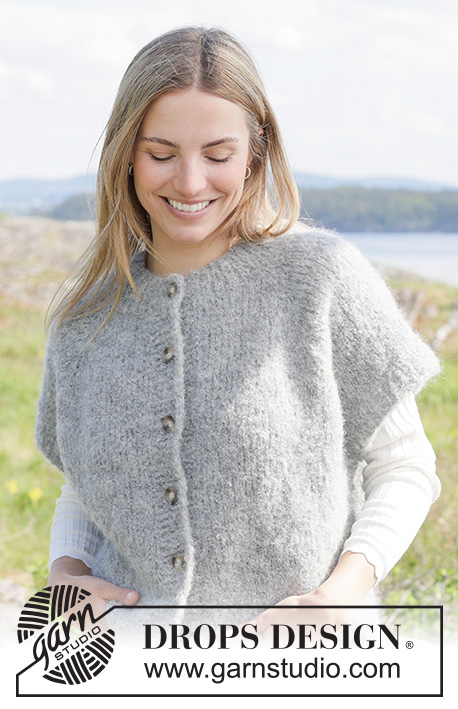
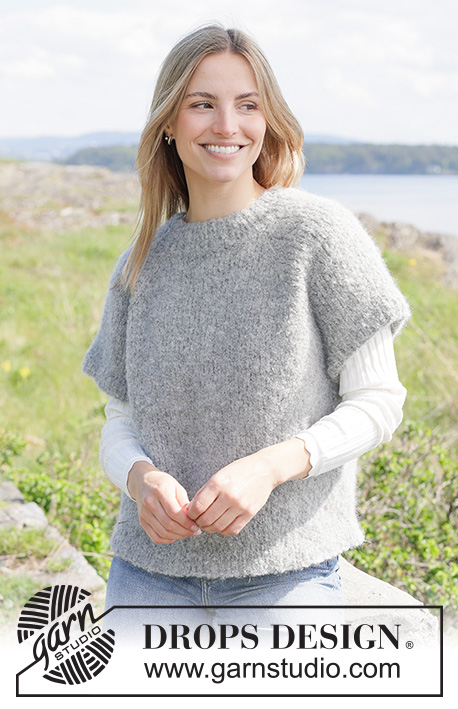
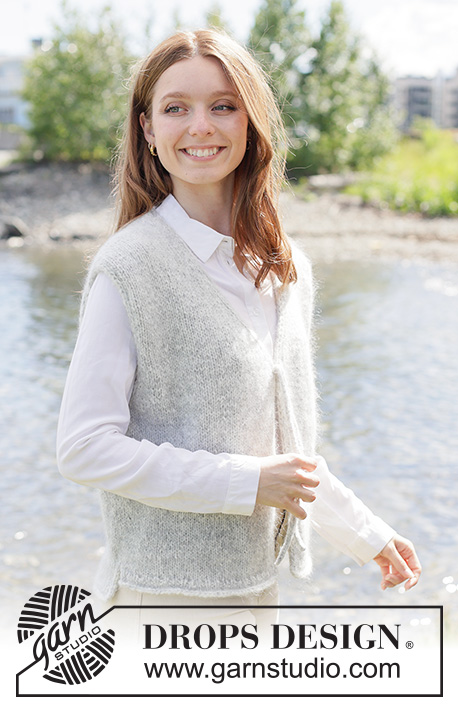
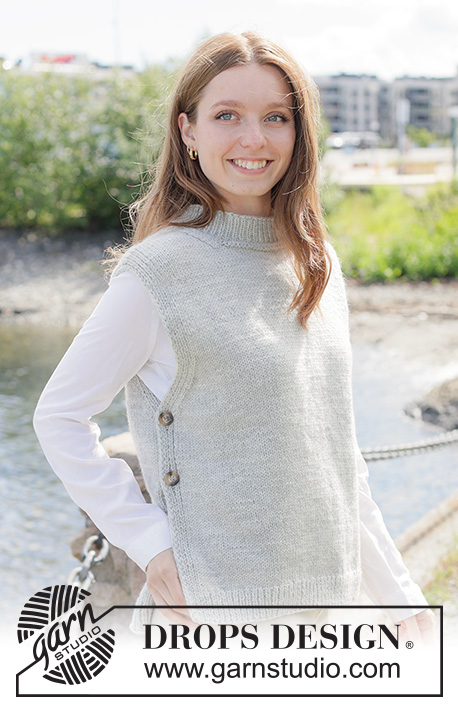
Silver Cove Vest#silvercovevest |
|
 |
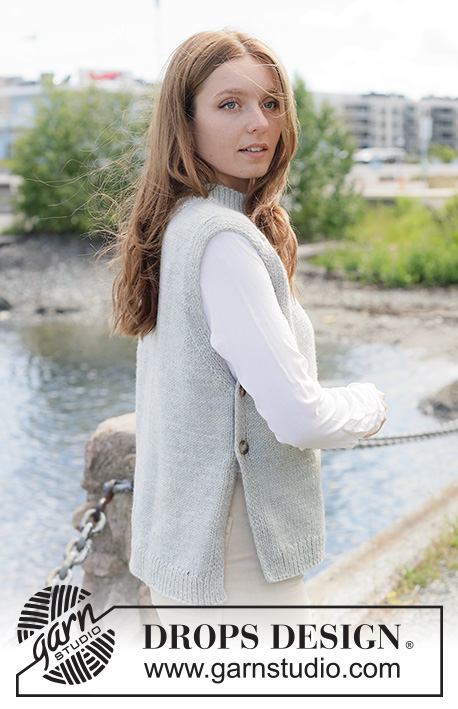 |
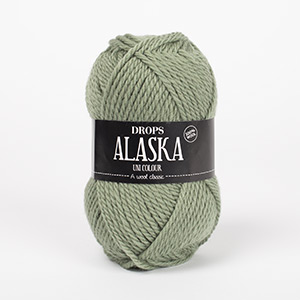
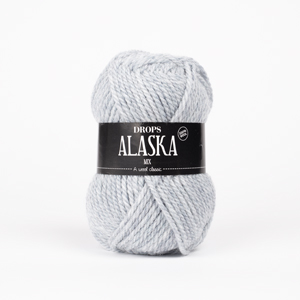
Knitted vest in DROPS Alaska. The piece is worked with diagonal shoulders, I-cord and neck-border. Sizes XS - XXXL.
DROPS 271-37 |
|
|
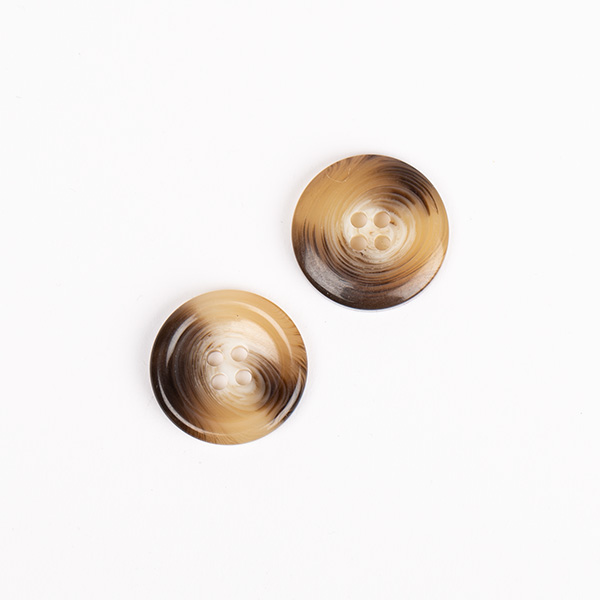
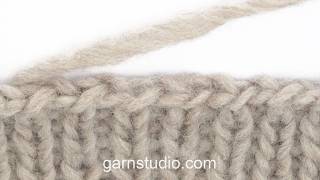
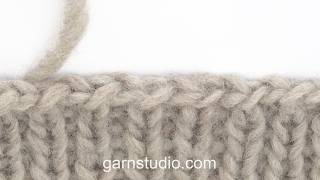
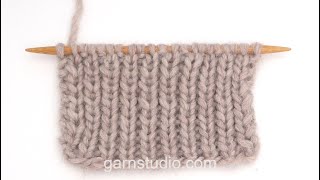
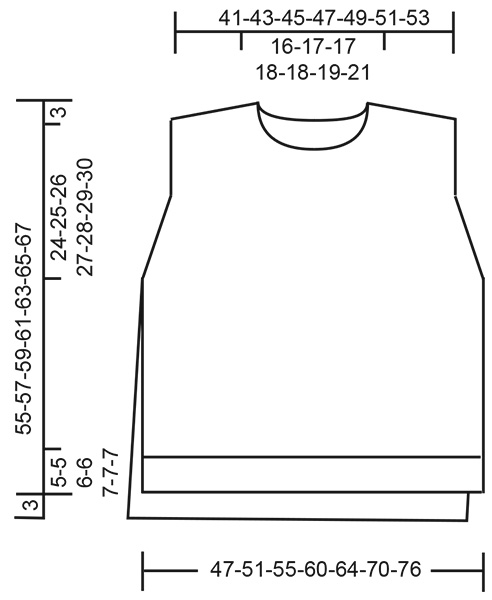
EXPLANATIONS FOR THE PATTERN: ------------------------------------------------------- 2 STITCHES I-CORD: BEGINNING OF ROW: Slip 1 stitch purl-wise with the strand in front, knit 1. END OF ROW: Work until there are 2 stitches left on the row, slip 1 stitch purl-wise with the strand in front, knit 1. Work in the same way from both the right and wrong side. KNITTING TIP: When working short rows, there will be a small hole after each turn. This hole can be closed by using the technique German Short Rows as follows: Slip the first stitch purl-wise with the strand in front, take the strand over the right needle and tighten well from the back (2 loops on the needle). These loops are worked together on the next row. INCREASE TIP-1: All increases are worked from the right side. Increase 1 stitch by making 1 yarn over which is worked as follows on the next row (wrong side): BEGINNING OF ROW (the yarn over twists to the right): Slip the yarn over purl-wise from the left to the right needle, then replace it by inserting the left needle through the back (the yarn over is the other way round). Purl through the stitch loop that lies on the front of the needle (avoids a hole). END OF ROW (the yarn over twists to the left): Purl through the stitch loop that lies on the back of the needle (avoids a hole). BUTTONHOLES: Work the buttonholes on both bands from the right side as follows: ROW 1 (right side): Work 4 stitches as before, make 1 yarn over, work until there are 4 stitches left on the row, make 1 yarn over, work to end of row. ROW 2 (wrong side): Work the bands as before, knitting the yarn overs together with the knitted stitch before/after, creating buttonholes. INCREASE TIP-2 for transition to rib: When increasing evenly on the first round of rib, it is important to increase in the stitches that will subsequently be purled, so the knitted stitches continue neatly from the stocking stitch. ------------------------------------------------------- START THE PIECE HERE: ------------------------------------------------------- VEST – SHORT OVERVIEW OF THE PIECE: The piece is worked back and forth. The front piece is worked bottom up as far as the neckline, then the shoulders are finished separately with short rows. The shoulders are joined and the back piece is worked top down. The back piece is longer than the front piece. Stitches are knitted up around the neckline and the neck is worked to finish. FRONT PIECE: Work back and forth with circular needle. Cast on 113-121-129-139-149-161-173 stitches with circular needle size 3 mm and DROPS Alaska. ROW 1 (wrong side): Work 2 STITCHES I-CORD – read explanation above, rib (knit 1 and purl 1) until there are 3 stitches left, knit 1 and 2 stitches I-cord. ROW 2 (right side): Work 2 stitches I-cord, rib (purl 1 and knit 1) until there are 3 stitches left, purl 1 and 2 stitches I-cord. Work this rib for 5-5-6-6-7-7-7 cm, with the last row from the wrong side. The outermost 7 stitches are continued as before, i.e., 2 stitches I-cord and 5 ribbed stitches. Change to circular needle size 4.5 mm. Work stocking stitch with 7 band-stitches on each side. AT THE SAME TIME, decrease 24-26-26-28-30-32-32 stitches evenly on the first row (do not decrease across the bands) = 89-95-103-111-119-129-141 stitches. Remember to maintain the knitting tension. When the piece measures 17-18-19-20-21-22-23 cm, work BUTTONHOLES on each band – read explanation above. Continue working until the piece measures 26-27-28-29-30-31-32 cm, then work 2 more buttonholes in the same way (2 buttonholes on each side). When the piece measures 27-28-29-30-31-32-33 cm, work short rows across the bands in each side as follows – read KNITTING TIP: ROW 1 (right side): Work 7 band-stitches as before, knit 1, turn. ROW 2 (wrong side): Slip the first stitch purl-wise with the strand in front and tighten the strand so it looks like there are 2 loops on the needle, work to end of row as before. ROW 3 (right side): Work 7 band-stitches as before, knit 2, turn. ROW 4 (wrong side): Slip the first stitch purl-wise with the strand in front and tighten the strand so it looks like there are 2 loops on the needle, purl 1, work to end of row as before. ROW 5 (right side): Work 7 band-stitches as before, knit until there are 7 stitches left on the row, work the band as before. ROW 6 (wrong side): Work 7 band-stitches as before, purl 1, turn. ROW 7 (right side): Slip the first stitch purl-wise with the strand in front and tighten the strand so it looks like there are 2 loops on the needle, work the band as before. ROW 8 (wrong side): Work 7 band-stitches as before, purl 2, turn. ROW 9 (right side): Slip the first stitch purl-wise with the strand in front and tighten the strand so it looks like there are 2 loops on the needle, knit 1, work the band as before. ROW 10 (wrong side): Work 7 band-stitches as before, purl until there are 7 stitches left on the row, work the band as before. The piece measures approx. 28-29-30-31-32-33-34 cm. Now decrease in each side for the armholes as follows: ROW 1 (right side): Work 7 band-stitches as before, slip 1 stitch knit-wise, knit 1 and pass the slipped stitch over the knitted stitch (1 decreased stitch), knit until there are 9 stitches left, knit 2 together, work the 7 band-stitches as before. ROW 2 (wrong side): Purl with 7 band-stitches on each side as before. Work ROWS 1 and 2 a total of 8-9-11-13-15-19-23 times (16-18-22-26-30-38-46 rows worked) = 73-77-81-85-89-91-95 stitches. Continue stocking stitch and the bands as before until the piece measures 49-50-52-53-54-55-56 cm, with the last row from the wrong side. From the right side: Work 26-28-30-32-34-35-36 stitches as before (= left shoulder), knit 21-21-21-21-21-21-23 stitches and place them on a stitch holder for the neckline, work the last 26-28-30-32-34-35-36 stitches as before. The shoulders are finished separately. Do not cut the strand. Continue working the right shoulder as follows. RIGHT SHOULDER (when garment is worn): = 26-28-30-32-34-35-36 stitches. Continue stocking stitch and the band as before while decreasing for the neckline as follows: ROW 1 (wrong side): Work the band as before, purl to end of row. ROW 2 (right side): Knit 2, slip 1 stitch knit-wise, knit 1 and pass the slipped stitch over the knitted stitch (1 stitch decreased), knit until there are 7 stitches left, work the band as before. Work ROWS 1 and 2 a total of 4-5-5-6-6-7-7 times (8-10-10-12-12-14-14 rows worked) = 22-23-25-26-28-28-29 shoulder-stitches. Continue stocking stitch and the band as before until the piece measures 52-54-56-58-60-62-64 cm, with the last row from the wrong side. Now work the diagonal shoulder as follows. RIGHT DIAGONAL SHOULDER: Work the diagonal shoulder with short rows as follows – remember KNITTING TIP: ROW 1 (right side): Work 15-16-18-19-21-21-22 stitches as before, turn. ROW 2 (wrong side): Slip the first stitch purl-wise with the strand in front and tighten the strand so it looks like there are 2 loops on the needle, work to end of row as before. Continue like this but across fewer stitches each time. ROW 3 (right side): Work 13-14-16-17-19-19-20 stitches as before, turn. ROW 4 (wrong side): Work in the same way as ROW 2. ROW 5 (right side): Work 11-12-14-15-16-16-17 stitches as before, turn. ROW 6 (wrong side): Work in the same way as ROW 2. ROW 7 (right side): Work 9-10-11-12-13-13-14 stitches as before, turn. ROW 8 (wrong side): Work in the same way as ROW 2. ROW 9 (right side): Work 7-7-8-9-9-10-10 stitches as before, turn. ROW 10 (wrong side): Work in the same way as ROW 2. ROW 11 (right side): Work 4-4-4-5-5-5-5 stitches as before, turn ROW 12 (wrong side): Work in the same way as ROW 2. Continue stocking stitch and the band as before while increasing for the neckline: ROW 1 (right side): Knit until there are 7 stitches left, work the band as before. ROW 2 (wrong side): Work the band as before, purl to end of row and cast on 1 stitch (1 increased stitch). ROW 3 (right side): Knit until there are 7 stitches left, work the band as before. ROW 4 (wrong side): Work the band as before, purl to end of row and cast on 1 stitch (1 increased stitch). ROW 5 (right side): Knit until there are 7 stitches left, work the band as before ROW 6 (wrong side): Work the band as before, purl to end of row and cast on 2 stitches (2 increased stitches) = 26-27-29-30-32-32-33 shoulder-stitches. Cut the strand and work the left shoulder. LEFT SHOULDER (when garment is worn): = 26-28-30-32-34-35-36 stitches. Continue stocking stitch and the band as before while decreasing for the neckline as follows: ROW 1 (wrong side): Purl until there are 7 stitches left, work the band as before. ROW 2 (right side): Work the band as before and knit until there are 4 stitches left, knit 2 together, knit 2 (1 decreased stitch). Work ROWS 1 and 2 a total of 4-5-5-6-6-7-7 times (8-10-10-12-12-14-14 rows worked) = 22-23-25-26-28-28-29 shoulder-stitches. Continue stocking stitch and the band as before until the piece measures 52-54-56-58-60-62-64 cm, with the last row from the right side. Insert 1 marker outermost on the shoulder (= top of shoulder), the piece is now measured from here. Now work the diagonal shoulder as follows. LEFT DIAGONAL SHOULDER: Work the diagonal shoulder with short rows as follows – remember KNITTING TIP: ROW 1 (wrong side): Work 15-16-18-19-21-21-22 stitches as before, turn. ROW 2 (right side): Slip the first stitch purl-wise with the strand in front and tighten the strand so it looks like there are 2 loops on the needle, work to end of row as before. Continue like this but across fewer stitches each time. ROW 3 (wrong side): Work 13-14-16-17-19-19-20 stitches as before, turn. ROW 4 (right side): Work in the same way as ROW 2. ROW 5 (wrong side): Work 11-12-14-15-16-16-17 stitches as before, turn. ROW 6 (right side): Work in the same way as ROW 2. ROW 7 (wrong side): Work 9-10-11-12-13-13-14 stitches as before, turn. ROW 8 (right side): Work in the same way as ROW 2. ROW 9 (wrong side): Work 7-7-8-9-9-10-10 stitches as before, turn. ROW 10 (right side): Work in the same way as ROW 2. ROW 11 (wrong side): Work 4-4-4-5-5-5-5 stitches as before, turn ROW 12 (right side): Work in the same way as ROW 2. Continue stocking stitch and the band as before while increasing for the neckline: ROW 1 (wrong side): Purl until there are 7 stitches left, work the band as before. ROW 2 (right side): Work the band as before, knit to end of row and cast on 1 stitch (1 increased stitch). ROW 3 (wrong side): Purl until there are 7 stitches left, work the band as before. ROW 4 (right side): Work the band as before, knit to end of row and cast on 1 stitch (1 increased stitch). ROW 5 (wrong side): Purl until there are 7 stitches left, work the band as before. ROW 6 (right side): Work the band as before, knit to end of row and cast on 2 stitches (2 increased stitches) = 26-27-29-30-32-32-33 shoulder-stitches. Do not cut the strand. The shoulders are now joined for the back piece. ROW 1 (wrong side): Purl until there are 7 stitches left, work the band as before. ROW 2 (right side): Work the band as before, knit to end of row and cast on 21-23-23-25-25-27-29 stitches, then work across the right shoulder from the right side as follows: Knit until there are 7 stitches left, work the band as before = 73-77-81-85-89-91-95 stitches. The piece measures approx. 3 cm from the marker on top of the shoulder. Now work the back piece as follows. BACK PIECE: = 73-77-81-85-89-91-95 stitches. Continue stocking stitch and the bands as before, back and forth until the piece measures 17-17-17-16-15-13-11 cm from the marker on the shoulder. Now increase in each side for the armholes – read INCREASE TIP-1, as follows: ROW 1 (right side): Work the band as before, knit 1, make 1 yarn over, knit until there are 8 stitches left, make 1 yarn over, knit 1 and work the band as before (2 increased stitches). ROW 2 (wrong side): Purl and work the bands as before; remember to work the yarn overs as described under INCREASE TIP-1. Work ROWS 1 and 2 a total of 8-9-11-13-15-19-23 times (16-18-22-26-30-38-46 rows worked) = 89-95-103-111-119-129-141 stitches. Now work short rows across the bands in each side as follows – remember KNITTING TIP: ROW 1 (right side): Work 7 band-stitches as before, knit 1, turn. ROW 2 (wrong side): Slip the first stitch purl-wise with the strand in front and tighten the strand so it looks like there are 2 loops on the needle, work to end of row as before. ROW 3 (right side): Work 7 band-stitches as before, knit 2, turn. ROW 4 (wrong side): Slip the first stitch purl-wise with the strand in front and tighten the strand so it looks like there are 2 loops on the needle, purl 1, work to end of row as before. ROW 5 (right side): Work 7 band-stitches as before, knit until there are 7 stitches left on the row, work the band as before. ROW 6 (wrong side): Work 7 band-stitches as before, purl 1, turn. ROW 7 (right side): Slip the first stitch purl-wise with the strand in front and tighten the strand so it looks like there are 2 loops on the needle, work the band as before. ROW 8 (wrong side): Work 7 band-stitches as before, purl 2, turn. ROW 9 (right side): Slip the first stitch purl-wise with the strand in front and tighten the strand so it looks like there are 2 loops on the needle, knit 1, work the band as before. ROW 10 (wrong side): Work 7 band-stitches as before, purl until there are 7 stitches left on the row, work the band as before. Continue stocking stitch and the bands as before until the piece measures 50-52-53-55-56-58-60 cm from the marker on the shoulder, with the last row from the wrong side. Change to circular needle size 3 mm and work rib, starting from the right side as follows: 7 band-stitches as before, work rib (knit 1 and purl 1) until there are 8 stitches left, AT THE SAME TIME increase 24-26-26-28-30-32-32 stitches evenly across these ribbed stitches - read INCREASE TIP-2, knit 1 and work 7 band-stitches as before = 113-121-129-139-149-161-173 stitches. When the rib measures 5-5-6-6-7-7-7 cm, cast off with knit above knit and purl above purl. The back piece measures approx. 55-57-59-61-63-65-67 cm from the marker on the shoulder. Because the shoulders are diagonal, the back piece measures approx. 58-60-62-64-66-68-70 cm from the top of the shoulder. The front piece is approx. 3 cm shorter than the back piece. NECK: Use circular needle size 3 mm. Start from the right side on the right back shoulder and knit up 88-94-94-102-104-110-112 stitches around the neckline, inside 1 stitch (the stitch count includes the stitches on the stitch holder, and should be divisible by 2). Purl 1 round. Work the neck-border as follows: ROUND 1: The stitch count is doubled: * Make 1 yarn over, knit 1 *, work from *-* to end of round = 176-188-188-204-208-220-224 stitches. ROUND 2: * Purl the yarn over, slip the next stitch on to the right needle without working it, when slipping stitch insert the right needle in the stitch as to purl it with yarn behind piece *, work from *-* to end of round. ROUND 3: * Slip the next stitch on to the right needle without working it, when slipping stitch insert the right needle in the stitch as to purl it with yarn in front of piece, knit 1 *, work from *-* to end of round. ROUND 4: * Purl 1, slip the next stitch on to the right needle without working it, when slipping stitch insert the right needle in the stitch as to purl it with yarn behind piece *, work from *-* to end of round. ROUND 5: The stitch count is halved: * Knit 2 together*, work from *-* to end of round = 88-94-94-102-104-110-112 stitches Work rib in the round (knit 1 and purl 1) for 3½-3½-4-4-4-4½-4½ cm. Cast off with rib. ASSEMBLY: Sew 2 buttons onto each of the back bands, corresponding to the 2 buttonholes on each of the front bands. |
|
 |
|
Have you finished this pattern?Tag your pictures with #dropspattern #silvercovevest or submit them to the #dropsfan gallery. Do you need help with this pattern?You'll find 23 tutorial videos, a Comments/Questions area and more by visiting the pattern on garnstudio.com. © 1982-2026 DROPS Design A/S. We reserve all rights. This document, including all its sub-sections, has copyrights. Read more about what you can do with our patterns at the bottom of each pattern on our site. |
|






With over 40 years in knitting and crochet design, DROPS Design offers one of the most extensive collections of free patterns on the internet - translated to 17 languages. As of today we count 333 catalogues and 12525 patterns translated into English (UK/cm). 12525
We work hard to bring you the best knitting and crochet have to offer, inspiration and advice as well as great quality yarns at incredible prices! Would you like to use our patterns for other than personal use? You can read what you are allowed to do in the Copyright text at the bottom of all our patterns. Happy crafting!
Post a comment to pattern DROPS 271-37
We would love to hear what you have to say about this pattern!
If you want to leave a question, please make sure you select the correct category in the form below, to speed up the answering process. Required fields are marked *.