
Popular categories
Looking for a yarn?


Comments / Questions (10)
![]() Bi wrote:
Bi wrote:
Dårlig beskrevet ang. Mønster a1, a2 og a3. Er det hele a1 osv der skal strikkes, derefter a2 osv, eller er det 1 række ad gangen fra hver. Pinde og rækker stemmer ikke overens i beskrivelsen.
26.02.2026 - 14:58
![]() Sjoukje Zijlstra wrote:
Sjoukje Zijlstra wrote:
Onder de mouw kwam ik niet uit, met paar steken extra liep het patroon van het lijf wel rondom door.
16.02.2026 - 21:16
![]() EvaJulia wrote:
EvaJulia wrote:
Har problem med mönstret. Vill se hur man gör när man skall upprepa varv 2 och 3 Jg för inte det att stämma med maskantalet
14.02.2026 - 11:02
![]() Ann Birgitte Lysø wrote:
Ann Birgitte Lysø wrote:
Har begynt på bakstykket å ser de tre ytterste masker er i natur farge, jeg lurer på om økemasker også skal være i naturfarge eller er de med i mønsteret fra A1-A4.
13.02.2026 - 12:49DROPS Design answered:
Hei Ann Birgitte. De 3 ytterste maskene i hver side strikkes med fargen Natur til ermehullet er strikket ferdig og de økte maskene strikkes inn i mønster A.2. mvh DROPS Design
16.02.2026 - 08:53
![]() Felicia wrote:
Felicia wrote:
Hej har broblem. Har nu skikat på bakstycket och gör storlek S och ökat totalt 32 varv. Man har 107 maskor istället för 103. Gör det nånting. Eller var är det som kan vara problemet och hur ska jag gå tillväga. Mvh Felicia
20.01.2026 - 15:20DROPS Design answered:
Hei Felicia. Det er viktig å ha det maskeantallet som står i oppskriften, spesielt når det strikkes mønster, ellers så vil ikke oppskriften/mønstret stemme senere i oppskriften. Har du strikket 2 pinner for mye med økninger? mvh DROPS Design
30.01.2026 - 09:42
![]() Renate wrote:
Renate wrote:
På forstykkene står det at HELE diagrammet skal strikkes 3 ganger (str XL). Men økningene starter etter 7 cm og det felles etter disse. Ved 7cm har jeg trikket diagrammet bare 1 gang.
25.10.2025 - 11:26DROPS Design answered:
Hei Renate. Du strikker 3 masker glattstrikk i fargen Natur, så strikkes de 4 siste maskene i A.2, deretter strikkes hele A.2 (hele = i bredden) totalt 3 ganger, avslutt med 3 masker glattstrikk i fargen Natur. Når du har strikket A.1 1 gang i høyden har du strikket ca 4,5-5 cm. mvh DROPS Design
03.11.2025 - 09:42
![]() Nancy Lindahl wrote:
Nancy Lindahl wrote:
När diagrammet är stickat en gång hur fortsätter man på nästa varv.
20.10.2025 - 11:34DROPS Design answered:
Hei Nancy. Da starter du på nytt igjen (på rad 1). mvh DROPS Design
27.10.2025 - 12:52
![]() Kerstin wrote:
Kerstin wrote:
Hallo, mit wieviel Bewegungsspielraum wurde der Diamond Love Sweater entworfen? Vielen Dank
26.09.2025 - 14:51DROPS Design answered:
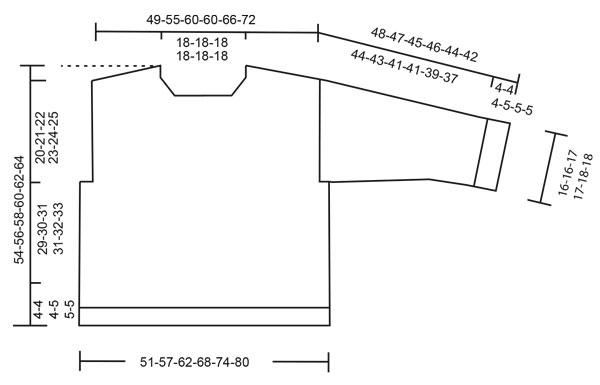
Hi, Kerstin, you can find the measurements for this garment in the diagram below tha pattern. Happy knitting!
24.10.2025 - 10:10
![]() Isabelle wrote:
Isabelle wrote:
J’aimerais le tricoter avec des aiguilles simples car je ne maitrise absolument pas les aiguilles circulaires 😞 Pourriez-vous vous me dire comment puis-je procéder pour le tricoter ? Merci 🙏 d’avance Isa
26.09.2025 - 14:01DROPS Design answered:
Bonjour Isabelle, les explications de ce modèle sont seulement disponibles à tricoter en rond, vous trouverez ici quelques astuces pour adapter un modèle sur aiguilles droites, et dans l'onglet "vidéos" vous trouverez différentes vidéos montrant comment tricoter en rond sur aiguille circulaire, pour vous aider. Bon tricot!
26.09.2025 - 17:00
![]() Cassie wrote:
Cassie wrote:
How can I make narrower sleeves while making size S?
16.09.2025 - 11:54DROPS Design answered:
Hi Cassie, you have to make the front and the back shorter in order to have narrower arm opening. Then you will cast on less stitches around armhole and your sleeves will be narrower as well. For more information please contact the store where you bought the yarn, even per mail or telephone. Happy knitting!
17.09.2025 - 09:05
|
||||||||||
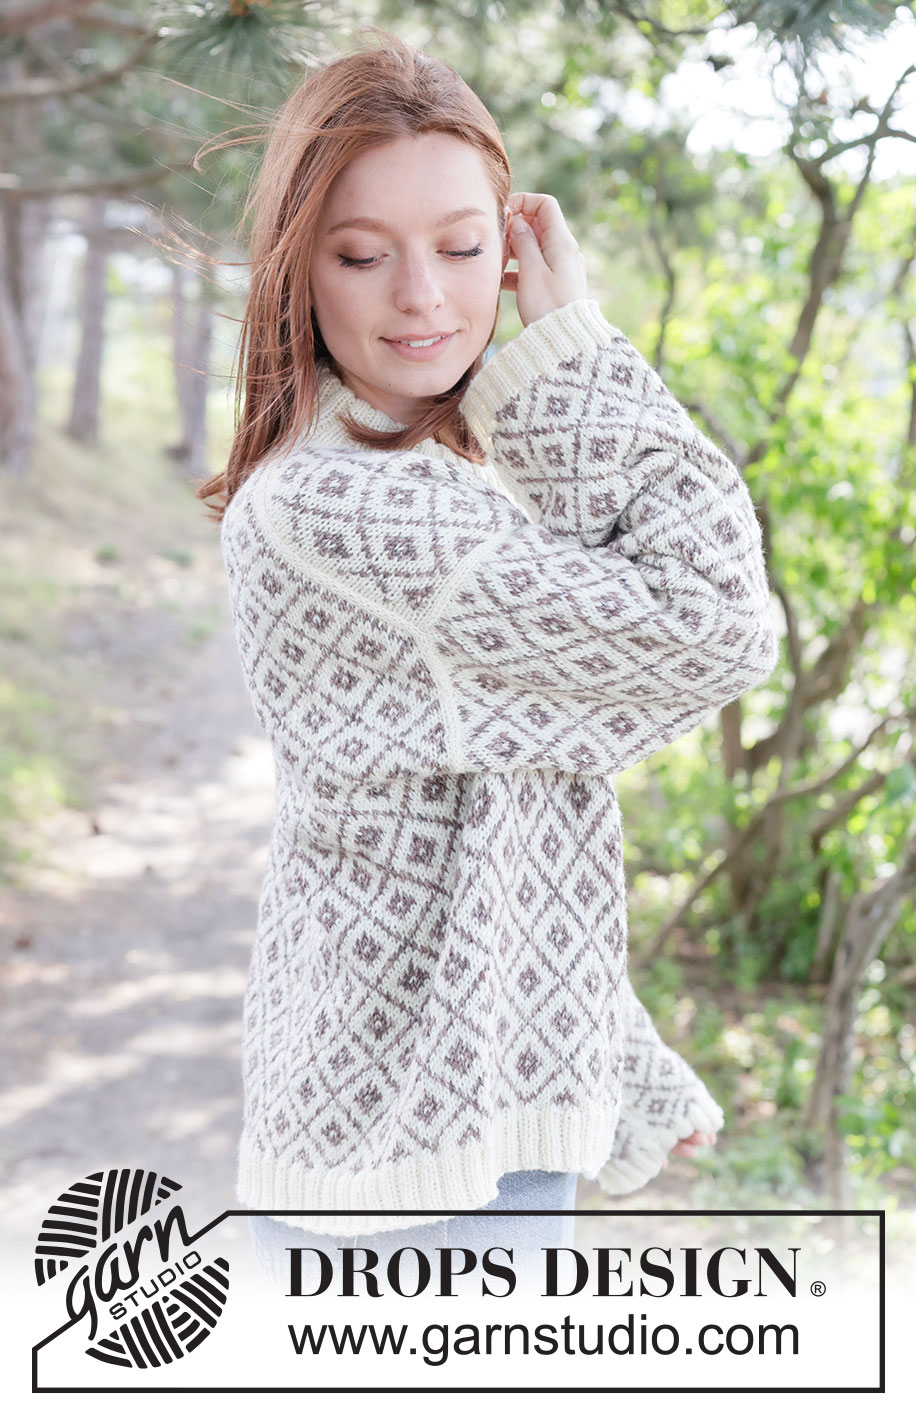
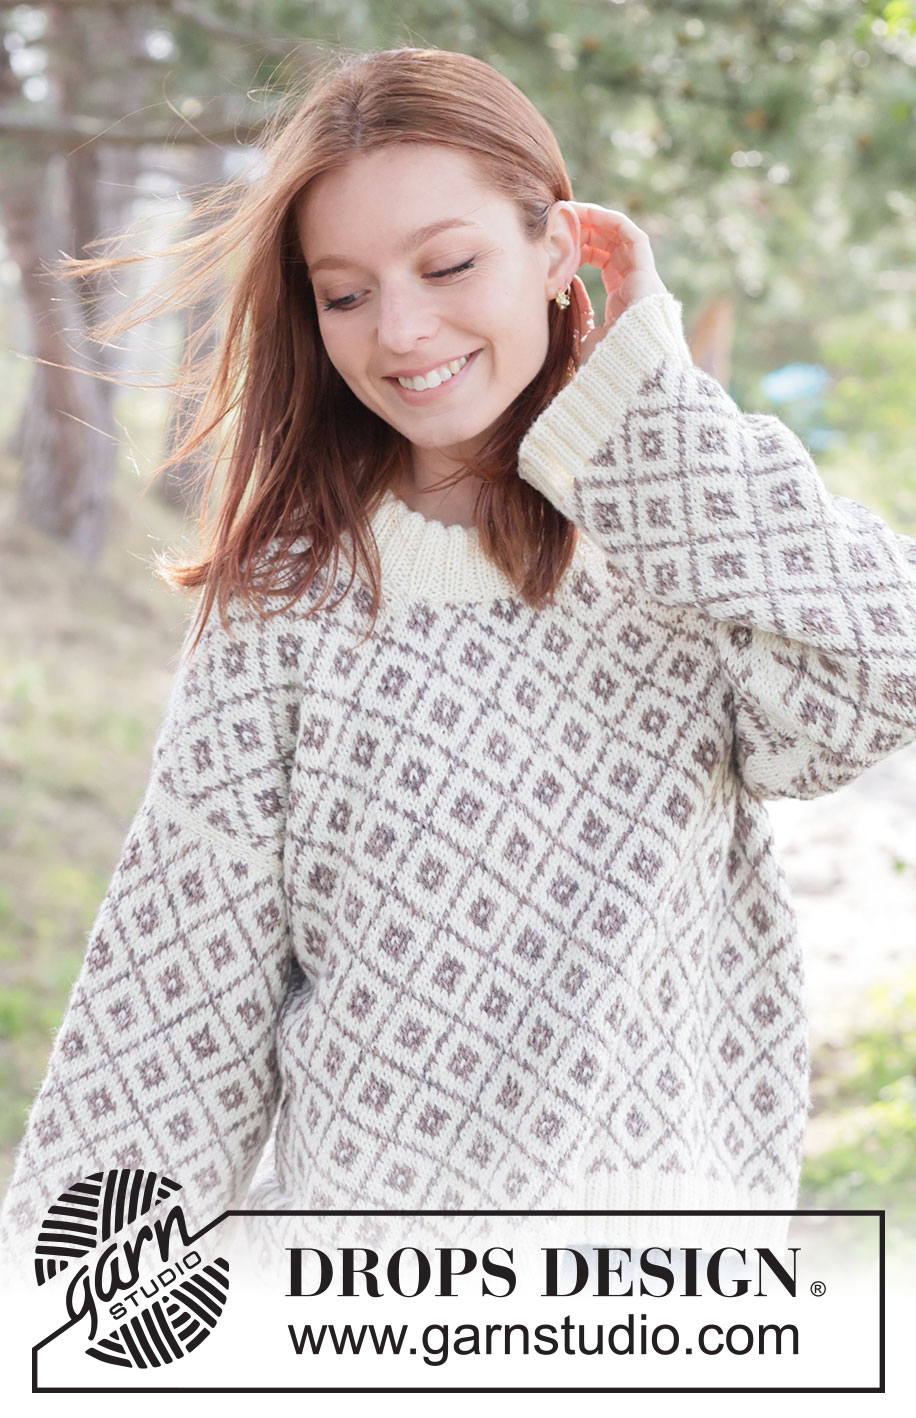
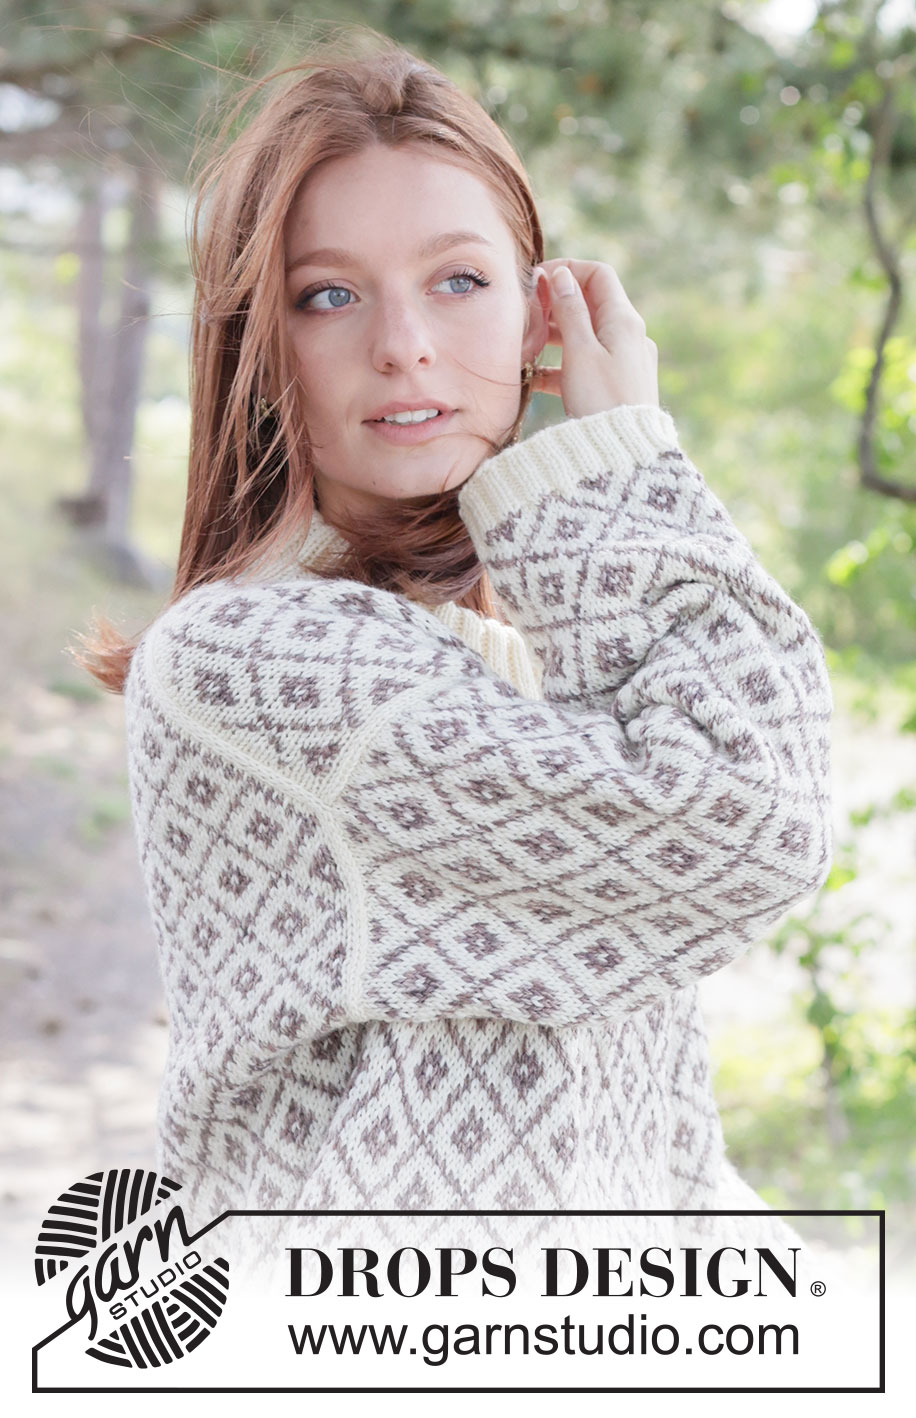
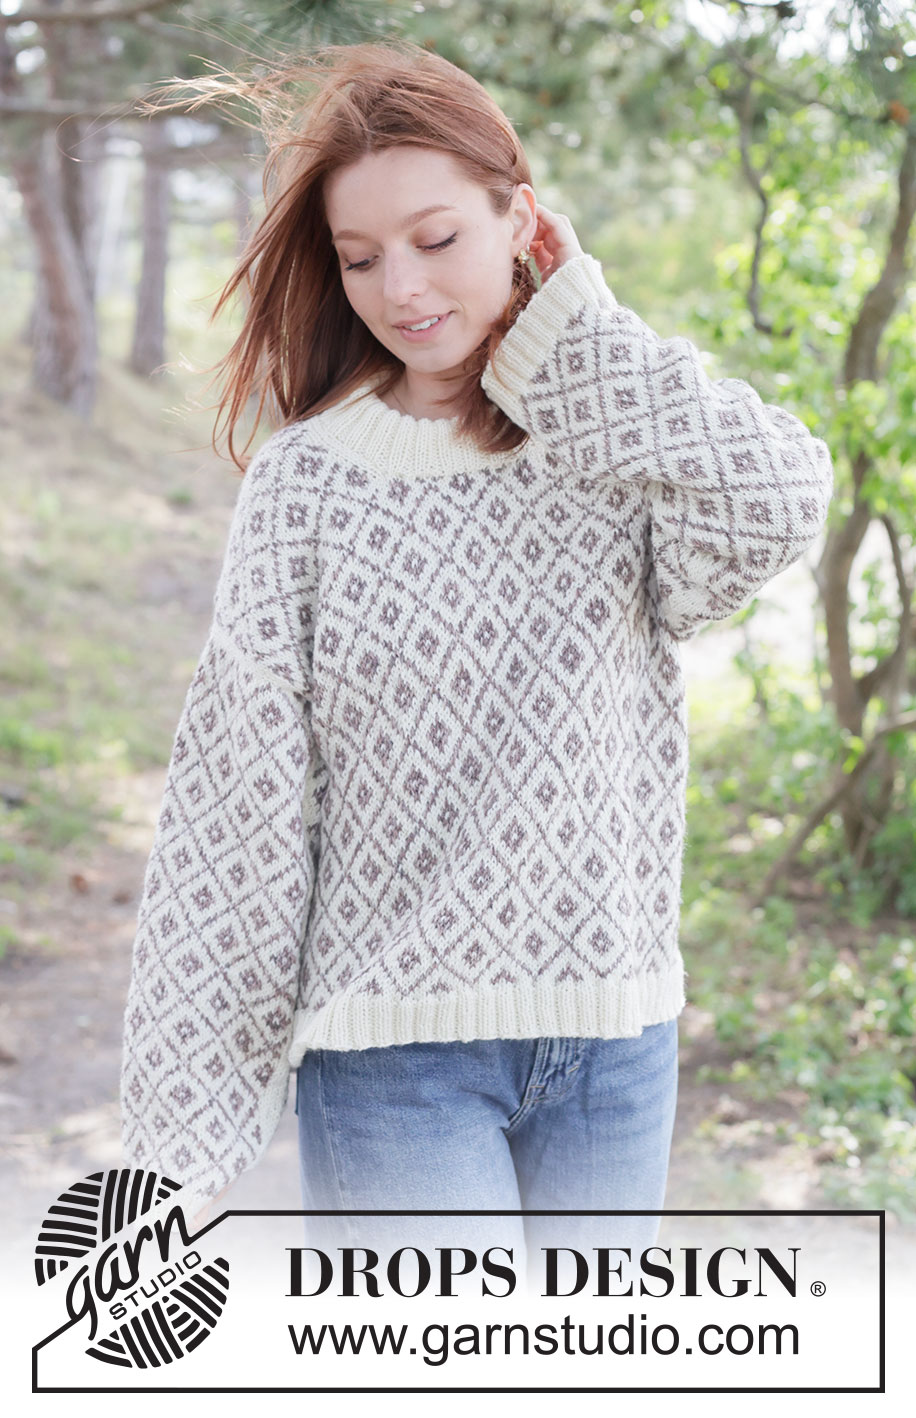
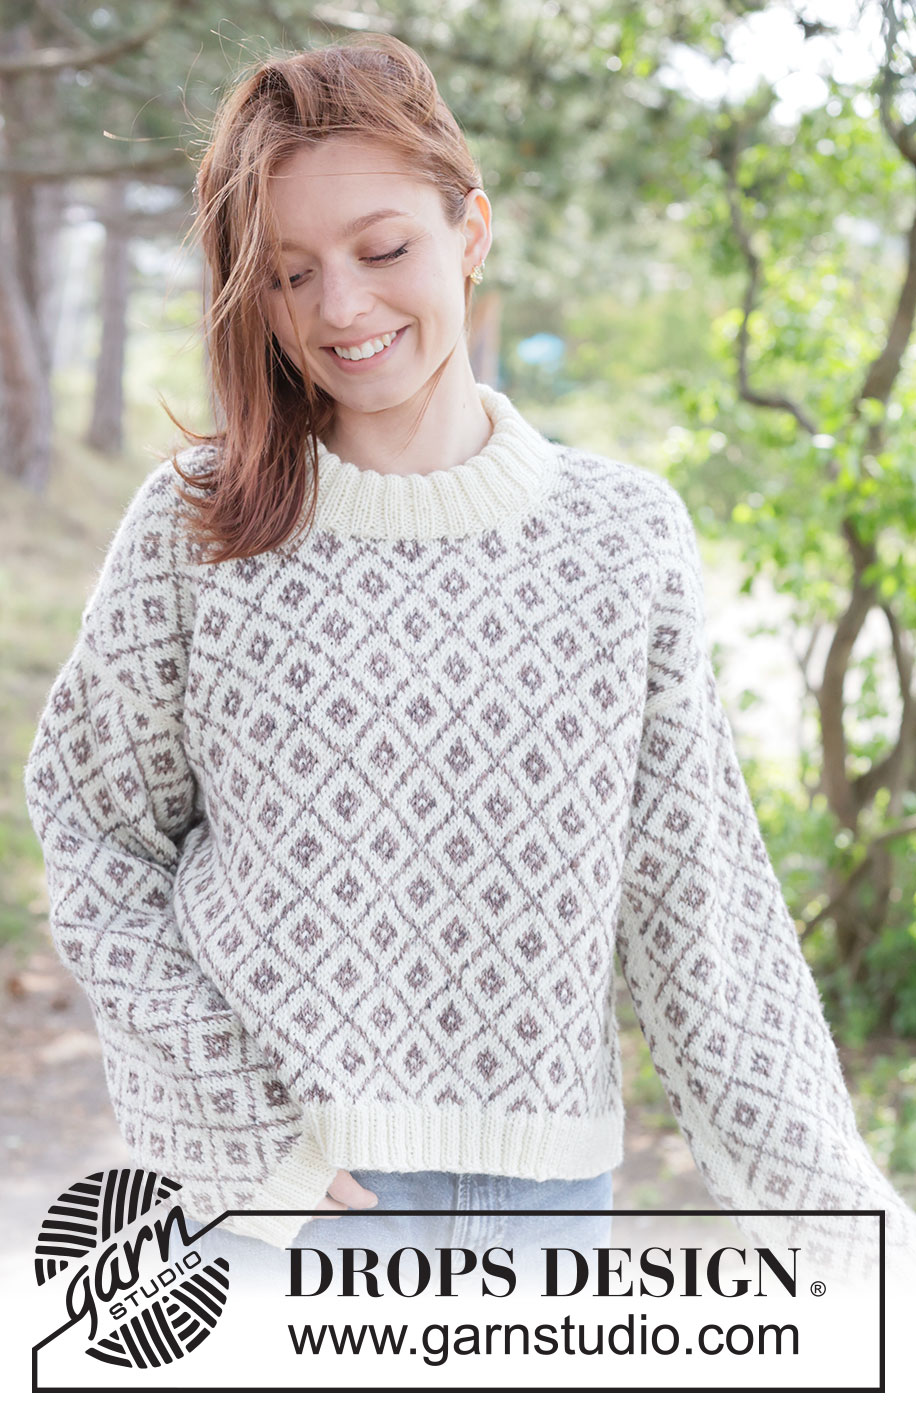
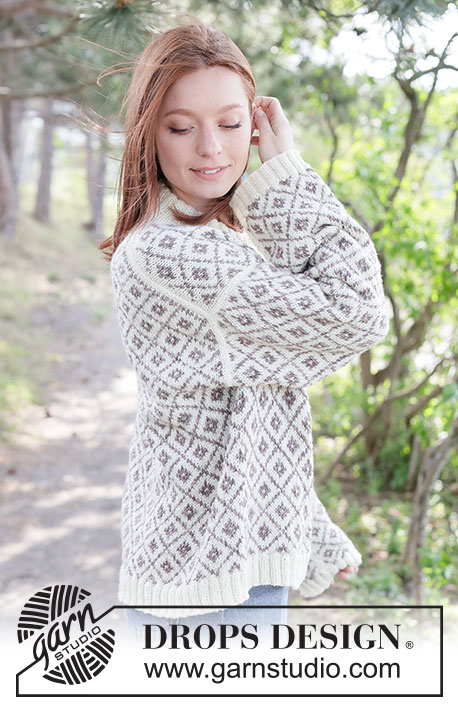
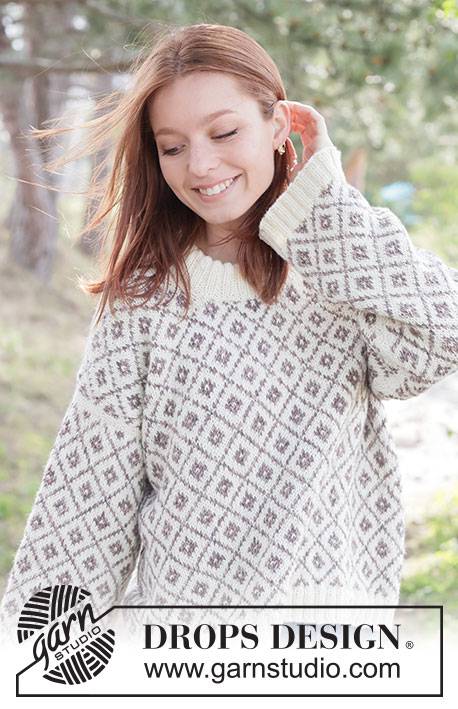
Diamond Love Sweater#diamondlovesweater |
||||||||||
 |
 |
|||||||||
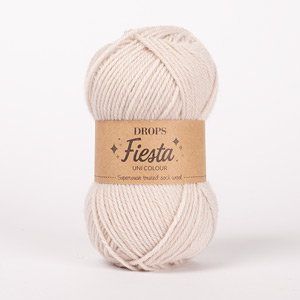
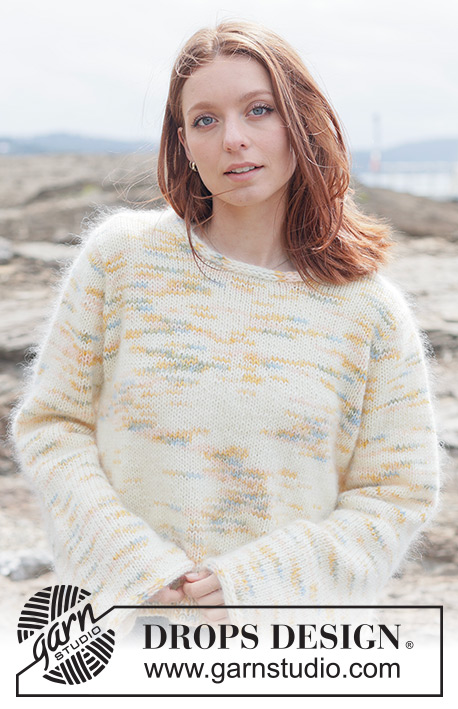
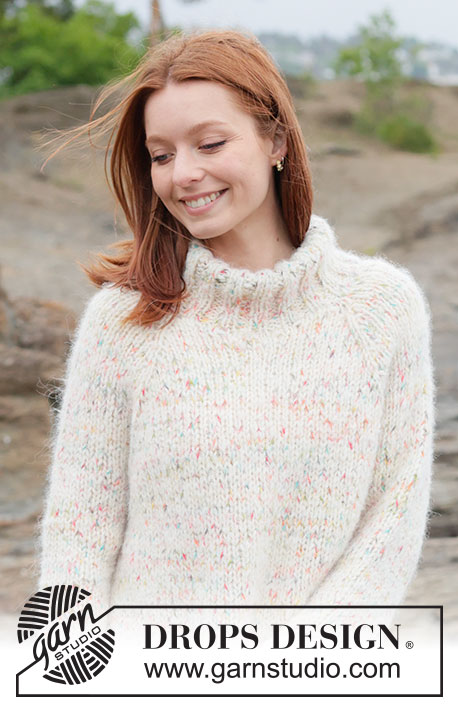
Knitted jumper in DROPS Fiesta. The piece is worked top down with European/diagonal shoulders, Nordic pattern and double neck. Sizes S - XXXL.
DROPS 262-1 |
||||||||||
|
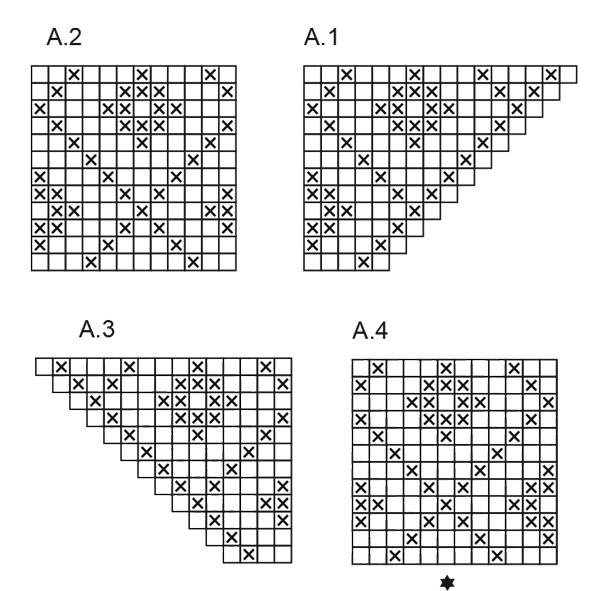
------------------------------------------------------- EXPLANATIONS FOR THE PATTERN: ------------------------------------------------------- PATTERN: See diagrams A.1 to A.4. The diagrams show the pattern from the right side. The pattern is worked in stocking stitch. INCREASE TIP-1: INCREASE 1 STITCH TOWARDS THE LEFT - from RIGHT SIDE: Use left needle to pick up yarn between 2 stitches from row below, pick up yarn from the front and knit in the stitch loop that is on the back of the needle. INCREASE 1 STITCH TOWARDS THE RIGHT - from RIGHT SIDE: Use left needle to pick up yarn between 2 stitches from row below, pick up yarn from the back and knit in the stitch loop that is on the front side of the needle. . INCREASE TIP-2: INCREASE 1 STITCH TOWARDS THE RIGHT - from WRONG SIDE: Use left needle to pick up yarn between 2 stitches from row below, pick up yarn from the back and purl in the stitch loop that is on the front side of the needle. INCREASE 1 STITCH TOWARDS THE LEFT - from WRONG SIDE: Use left needle to pick up yarn between 2 stitches from row below, pick up yarn from the front and purl in the stitch loop that is on the back side of the needle. KNITTING TIP: Make a note of the row in the diagram the back piece finishes on so you can match this to the front piece later. DECREASE TIP: Decrease 1 stitch on each side of the marker thread as follows: Work until there are 2 stitches left before the marker-stitch, knit 2 together with colour Off White, knit 1 (marker-stitch), knit 2 twisted together with colour Off White (= 2 stitches decreased). ------------------------------------------------------- START THE PIECE HERE: ------------------------------------------------------- JUMPER – SHORT OVERVIEW OF THE PIECE: The pattern uses both long and short needles; start with the length which fits the number of stitches and change when necessary. The piece is started back and forth, casting on stitches at the back of the neck and working the back piece top down, while increasing stitches on each side for the shoulders, which become slightly diagonal. The back piece is worked as far as the armholes. The front piece is then worked in 2 sections, knitting up stitches along 1 back shoulder, working pattern and increasing for the neckline. This is repeated on the other shoulder. The 2 front sections are joined when the neckline is finished and worked as far as the armholes. The front and back pieces are joined on the same circular needle and the body worked in the round. Stitches are knitted up around the armholes for the sleeves, which are worked in the round. Stitches are knitted up around the neckline and the neck worked in the round to finish. BACK PIECE: The piece is worked back and forth. Cast on 39-39-39-39-39-39 stitches with circular needle size 4 mm and colour Off White DROPS FIESTA. Work PATTERN – read explanation above, as described below. NOTE: The 3 outermost stitches on each side are worked with colour Off White until the armholes are finished. ROW 1 (wrong side): Purl. ROW 2 (right side): Read INCREASE TIP-1. Knit 3, increase 1 stitch towards the left, work A.1, then A.2 2 times, work A.3, increase 1 stitch towards the right, knit 3. ROW 3 (wrong side): Read INCREASE TIP-2. Purl 3, increase 1 stitch towards the right, work A.3, A.2 2 times, then A.1, increase 1 stitch towards the left, Purl 3. Work ROWS 2 and 3 a total of 16-19-22-22-25-28 times (32-38-44-44-50-56 rows worked) = 103-115-127-127-139-151 stitches. Insert 1 marker outermost on one side. The piece is now measured from here! Work the next row as follows from the right side: 3 stocking stitches with colour Off White, work A.4 8-9-10-10-11-12 times (start on row 9 in A.4 so the pattern matches the stitches from A.1, A.2 and A.3), work until there are 4 stitches left on the row, work the first stitch in A.4, then 3 stocking stitches with colour Off White. Continue this pattern. Remember to maintain the knitting tension. When the piece measures 13-14-15-16-16-17 cm from the marker, measured down the armhole, work a row from the wrong side and cast off 1 edge stitch on each side = 101-113-125-125-137-149 stitches – read KNITTING TIP. Cut the strand and place the stitches on a stitch holder/thread. Work the left front shoulder along the left back shoulder. LEFT FRONT SHOULDER: Find the left back shoulder as follows: Lay the back piece flat, right side up, with the stitch holder/thread towards you; left side of piece = left shoulder. From the right side on the left back shoulder and using colour Off White, start by the neck and knit up 1 stitch in each row worked, inside the outermost stitch, as far as the armhole, then 1 stitch in the next 2 rows down the armhole = 34-40-46-46-52-58 stitches. All length-measurements on the front piece are taken from this knitted-up row. Purl 1 row from the wrong side, then work as follows from the right side: 3 stocking stitches with colour Off White, work the last 4-10-4-4-10-4 stitches in A.2, then all of A.2 2-2-3-3-3-4 times and 3 stocking stitches with colour Off White. Continue this pattern back and forth. When the piece measures 6-6-7-7-8-8 cm, increase as follows, making a note of which row you are on: ROW 1 (right side): Remember INCREASE TIP-1, Knit 3 with colour Off White, increase 1 stitch towards the left (with colour Off White), continue A.2, knit 3 with colour Off White. ROW 2 (wrong side): Purl 3 with colour Off White, work A.2 until there are 3 stitches left, purl 3 with colour Off White. The increased stitch is worked into A.2. Work ROWS 1 and 2 a total of 6 times (12 rows worked) = 40-46-52-52-58-64 stitches. Finish after a row from the right side without increasing. Cut the strand and place the stitches on a stitch holder/thread. Work the right front shoulder along the right back shoulder. RIGHT FRONT SHOULDER: From the right side on the right back shoulder, using colour Off White, start at the armhole and knit up 1 stitch in each of the top 2 rows on the armhole (inside the outermost stitch), then 1 stitch in each row worked as far as the neckline = 34-40-46-46-52-58 stitches. All length-measurements on the front piece are taken from this knitted-up row. Purl 1 row from the wrong side, then work as follows from the right side: 3 stocking stitches with colour Off White, work A.4 2-3-3-3-3-4 times, then the first 4-10-4-4-10-4 stitches in A.4 and 3 stocking stitches with colour Off White. Continue this pattern back and forth. When the piece measures 6-6-7-7-8-8 cm, increase as follows, starting on the same row as on the left shoulder: ROW 1 (right side): Knit 3 with colour Off White, work A.4 until there are 3 stitches left, increase 1 stitch towards the right with colour Off White, knit 3 with colour Off White - remember INCREASE TIP-1, ROW 2 (wrong side): Purl 3 with colour Off White, work A.4 from the wrong side until there are 3 stitches left, purl 3 with colour Off White. Work ROWS 1 and 2 a total of 6 times (12 rows worked) = 40-46-52-52-58-64 stitches. Finish after a row from the right side, without increasing. Cut the yarn. Now join the 2 shoulders for the front piece. FRONT PIECE: From the wrong side on the left shoulder, purl 3 with colour Off White, continue the pattern across the next 37-43-49-49-55-61 stitches, cast on 23-23-23-23-23 stitches with colour Off White, continue the pattern across 37-43-49-49-55-61 stitches on the right shoulder and purl 3 with colour Off White = 103-115-127-127-139-151 stitches. Work as follows from the right side: 3 stocking stitches with colour Off White, A.4 8-9-10-10-11-12 times, work until there are 4 stitches left, work the first stitch in A.4 and 3 stocking stitches with colour Off White. Continue this pattern until the piece measures 27-28-29-30-32-33 cm from the knitted-up row, finishing after a row from the wrong side (the same row in the diagram as on the back piece) and casting off/decreasing 1 edge stitch on each side of this row (to avoid cutting the strand at the end of the row, the last 2 stitches can be purled together) = 101-113-125-125-137-149 stitches. The front and back pieces are now joined for the body. The piece is measured from here! BODY: Continue the pattern across the 101-113-125-125-137-149 stitches on the front piece, cast on 7-7-7-19-19-19 stitches (mid-under the sleeve), continue the pattern across the 101-113-125-125-137-149 stitches on the back piece, cast on 7-7-7-19-19-19 stitches (mid-under the sleeve) = 216-240-264-288-312-336 stitches. Continue the pattern in the round, starting in the middle of the cast-on stitches under the sleeve and the front piece. Work until the piece measures approx. 29-30-31-31-32-33 cm from the join, finishing after round 4 or 10 in the diagram. Change to circular needle size 3 mm. Work rib (knit 2, purl 2), AT THE SAME TIME increase 24-24-28-28-32-36 stitches evenly on the round = 240-264-292-316-344-372 stitches. When the rib measures 4-4-4-5-5-5 cm, cast off slightly loosely with rib. The jumper measures approx. 54-56-58-60-62-64 cm, measured from by the neckline. SLEEVES: The sleeve is worked top down. Lay the piece flat and insert 1 marker at the top of the armhole. (NOTE! This is not the same place as the knitted-up row on the front piece but approx. 7-8 cm down the front piece). Use circular needle size 3 mm and colour Off White. Start in the middle of the cast-on stitches under the sleeve, insert 1 marker in this stitch, then knit up 91-95-99-115-119-125 stitches inside 1 stitch around the armhole. Adjust so you knit up 1 stitch in the marker-stitch under the sleeve 1 stitch in the marker-stitch on top of the sleeve, with equal numbers of stitches on both sides of the shoulder-marker. Count out from the shoulder-marker to determine where to begin the pattern under the sleeve – the shoulder-marker should match the middle-stitch in diagram A.4 (marked). Change to circular needle size 4 mm. Work stocking stitch and A.4 in the round; the 3 stitches mid-under the sleeve knitted with colour Off White. AT THE SAME TIME, when the sleeve measures 1 cm from the division, decrease mid-under the sleeve – read DECREASE TIP as follows: Decrease 2 stitches every 2nd round 3 times, then decrease 2 stitches every 3-3-2½-2-2-1½ cm a total of 9-10-11-18-19-21 times = 67-69-71-73-75-77 stitches. Continue the pattern with 3 knitted stitches in colour Off White under the sleeve until the sleeve measures 44-43-41-41-39-37 cm from the shoulder-marker. Change to double pointed needles size 3 mm. Work rib (knit 2, purl 2), AT THE SAME TIME increase 9-7-9-7-9-7 stitches evenly on the first round = 76-76-80-80-84-84 stitches. When the rib measures 4 cm, cast off with rib. The sleeve measures approx. 48-47-45-46-43-42 cm from the shoulder. NECK Use circular needle size 3 mm and colour Off White. Start from the right side on one shoulder-line and knit up 108 to 116 inside 1 stitch around the neckline. The stitch count should be divisible by 4. Work rib in the round (knit 2, purl 2) for 9-9-9-11-11-11 cm. Change to circular needle size 4 mm and cast off a little loosely. Fold the neck double to the inside and sew down. To avoid the neck being tight and rolling outwards, it is important that the seam is elastic. |
||||||||||
Diagram explanations |
||||||||||
|
||||||||||
 |
||||||||||
 |
||||||||||
Have you finished this pattern?Tag your pictures with #dropspattern #diamondlovesweater or submit them to the #dropsfan gallery. Do you need help with this pattern?You'll find 36 tutorial videos, a Comments/Questions area and more by visiting the pattern on garnstudio.com. © 1982-2026 DROPS Design A/S. We reserve all rights. This document, including all its sub-sections, has copyrights. Read more about what you can do with our patterns at the bottom of each pattern on our site. |
||||||||||


With over 40 years in knitting and crochet design, DROPS Design offers one of the most extensive collections of free patterns on the internet - translated to 17 languages. As of today we count 325 catalogues and 12298 patterns translated into English (UK/cm). 12298
We work hard to bring you the best knitting and crochet have to offer, inspiration and advice as well as great quality yarns at incredible prices! Would you like to use our patterns for other than personal use? You can read what you are allowed to do in the Copyright text at the bottom of all our patterns. Happy crafting!
Post a comment to pattern DROPS 262-1
We would love to hear what you have to say about this pattern!
If you want to leave a question, please make sure you select the correct category in the form below, to speed up the answering process. Required fields are marked *.