
Popular categories
Looking for a yarn?


































Comments / Questions (224)
 Sylvie wrote:
Super! Merci de la réponse très rapide!
20.10.2026 - 09:30
Sylvie wrote:
Bonjour Comme d\'autres personnes, j\'ai des soucis pour le raglan. Pour le tour 1, on suit vos explications. Pour la suite, on ne relève pas de maille avant ou après les m env du raglan. Les augmentations correspondent à la goutte noire du diagramme. Ai je bien compris?
19.10.2026 - 19:00DROPS Design answered:
Bonjour Sylvie, on relève les mailes du raglan uniquement au 1er tour, vous avez alors désormais 3 m pour chaque raglan que vous tricotez 1 m env, 1 m end, 1 m env et vous augmentez avant/après ces mailles comme le montrent les diagrammes A.2 et A.4 (ovale noir = dernier symbole de la légende) - vous augmenterez soit 1 seule maille soit 2 mailles au début de A.2/à la fin de A.4. Bon tricot!
20.10.2026 - 09:21
 Claire wrote:
Further to my last question, I realised that the raglan increases are shown on the diagram (doh!) so I now have the correct amount of increases. For a size XL I need 176 stitches by the end of the round, I have 168. If I include the stitches decreased (as they will be picked up again) that is 178 so 2 more than I should have. Help! I am about to give up on this project.
28.09.2026 - 22:33DROPS Design answered:
Dear Claire, note that you will decrease 1 stitch in each A.3 but you should still count each A.3 with 8 sts - so on the first round you will increase 2 sts at each raglan (raglan sts/lines) x 4 raglan line = 8 sts increased + you will increase 8 stitches for the raglan as shown in diagrams A.1 and A.4 = 8 sts increased, so you had 160+8 sts increased at each raglan line + 8 sts increased for raglan = 176 sts. Happy knitting!
29.09.2026 - 09:35
Claire wrote:
I have knitted the collar and done the first row with 4.5mm needles. I have 160 stitches for size XL. I end the row with 156 stitches and no matter how I read the instructions, I can't make sense of them. Why do I have 4 fewer stitches than I should have? I decrease a total of 20 stitches for the repeats of A3 on the first pattern row.
28.09.2026 - 06:18DROPS Design answered:
Dear Claire, in the last row of A.1 you have to repeat (K1, P2, YO, K1, YO, P2) all the round, ie 20 times in total, so that you will increase 40 sts and get 120+40=160 sts. Happy knitting!
29.09.2026 - 08:29
 Nele wrote:
Hallo, ik ben bezig met maat M, en start nu aan de ragland. Ik heb al 160 steken maar als ik a2 en a4, 4 keer herhaal kom ik 64 steken te kort. Je meerdere toch enkel bij a2 en a4 wanneer het aangegeven is in het telpatroon toch? In totaal heb je aan elke raglan kant 46 steken dat je meerdere. Dit maal 4 zoals beschreven in de tekst, kom ik 184 uit. 160 + 184 nieuwe steken is 344 steken. En dus 64 steken te kort.
10.09.2026 - 18:32DROPS Design answered:
Dag Nele,
Je meerdert inderdaad zoals aangegeven in de telpatronen, dus de meerderingen zijn al aangegeven in de telpatronen. Bij elke herhaling in de hoogte van A.2 of A.4 komen er 8 steken bij en dit 8 keer op de naald dus, 64 steken erbij op 1 herhaling in de hoogte. Als je dit 4 keer hebt gedaan heb je er dus 256 steken erbij. Hierdoor kom je op 416 steken (vermoedelijk klopt 408 steken trouwens niet, nu ik het bereken). Als je daarna nog 2 herhalingen in de hoogte maakt van de meerderingen alleen op de panden, dan kom je precies op 472 steken.
03.10.2026 - 20:18
 Anna N wrote:
Hello! Is there a way to finish the sleeve's ribbing to be like a balloon sleeve? I see that one of the fans @naoczko_, Poland did that to the sleeve. Do you have any suggestions to do that? Or any pattern would help too ! thank you!
06.09.2026 - 04:22DROPS Design answered:
Hi Anna, Here is a link to a jumper with balloon sleeves in a different yarn but which is a yarn from yarn group C (so same thickness as Drops Alpaca), so the number of increases should be transferable to this pattern. : https://www.garnstudio.com/pattern.php?id=10059&cid=19. You will possibly have to work the complete sleeve in this pattern (not just the ribbing) to get the full effect. Regards, Drops Team.
06.09.2026 - 06:41
 Beata wrote:
Finishing the first row of the yolk with A4 ,do I do yarn over as per A4 diagram at the end?Hiw do is start the second row of the yolk,I have part of the raglan line next with purl knitting purl
28.08.2026 - 02:14DROPS Design answered:
Hi Beata, You are working in the round so the yarn over at the end of the first round is knitted at the end of the next round to leave a hole. The first stitch on the next round is the picked up stitch from the beginning of the first round, which is purled twisted (through the back loop), then knit 1, purl the picked up stitch twisted and continue working A.2, A.3, etc.. Regards, Drops Team.
28.08.2026 - 05:35
Beata wrote:
My tension sample is 9 by 9 cm on 4,5 needles.I prefer tighter knit and sort of worked out that instead size xxl and I can follow xxxl amount of stitches and that seems to result in the desired size Am I missing something?
25.08.2026 - 05:52DROPS Design answered:
Hi Beata, That sounds fine. Regards, Drops Team.
25.08.2026 - 06:21
 Maryam wrote:
Good morning, I am still confused about the yoke. Could you please clarify how the stitches are divided for the sleeves, front and back at the beginning of the yoke? Also, in the first round, how should A.2, A.3 and A.4 be worked together? Which diagrams are repeated, and how many times? I am having difficulty understanding the stitch distribution and diagram repeats. Thank you very much.
31.07.2026 - 06:50DROPS Design answered:
Dear Maryam, on the very first round on yoke you should increase 2 sts at each raglan (= 1 purl stitch on each side of the knitted raglan stitch), then work A.2 at the beg of front/back pieces and sleeve, you repeat A.3 over the next stitches until there are 2 sts left before next raglan stitch and work A.4 (remember to increase on each side of the raglan stitches) - the raglan increases are drawn in the diagrams. Happy knitting!
11.08.2026 - 13:09
Chantal M wrote:
Bonjour, je suis arrivée à la division du dos/devant et manches. Sachant que les dos et devant commencent et se terminent par 3 m torses, 3 m envers et 1 m endroit, comment faut-il tricoter les 13 mailles relevées, en respectant le point fantaisie ? Merci
06.06.2026 - 18:11DROPS Design answered:
Bonjour Chantal, après la division, on va tricoter le point fantaisie A.3 tout le tour, par conséquent, les 13 m sous les manches vont être également tricotées en point fantaisie. Bon tricot!
08.06.2026 - 09:06
|
|||||||||||||||||||
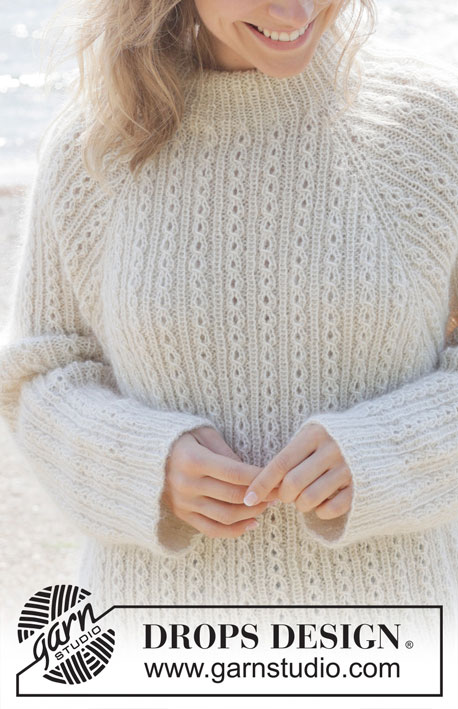
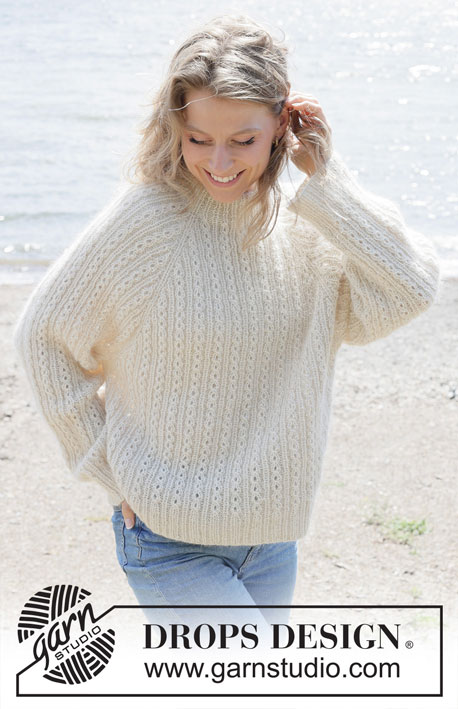
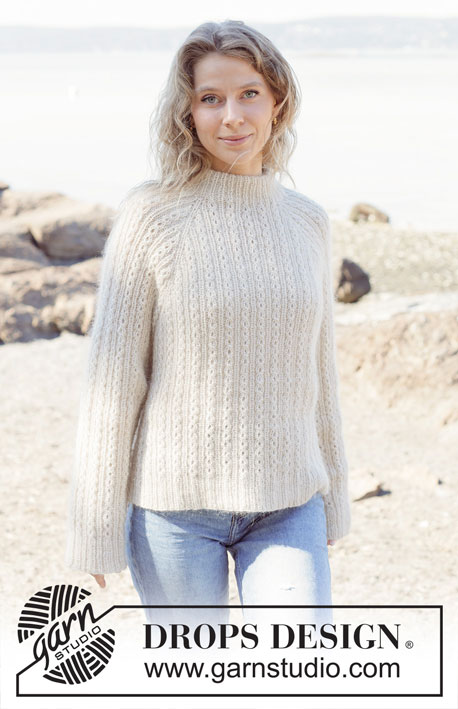
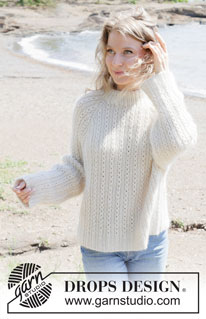
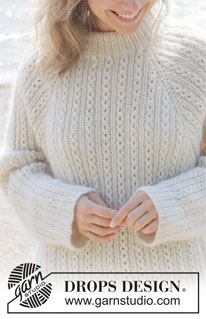
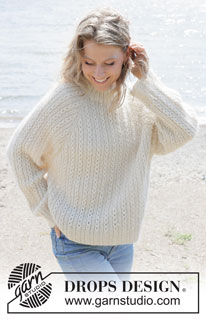
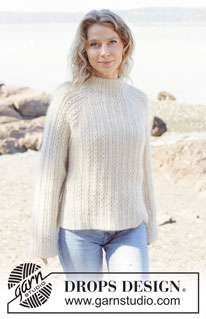
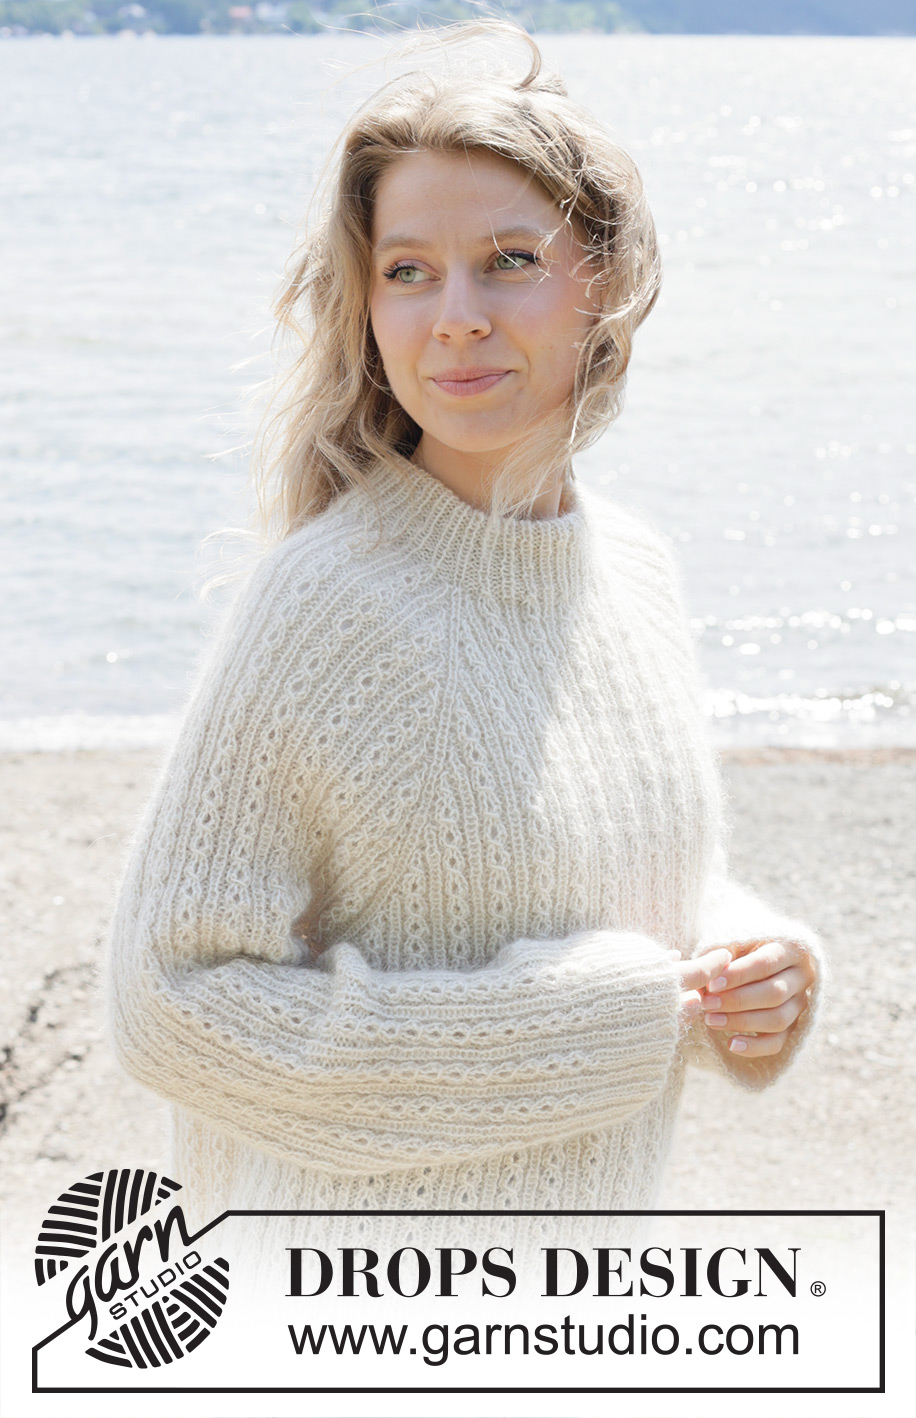
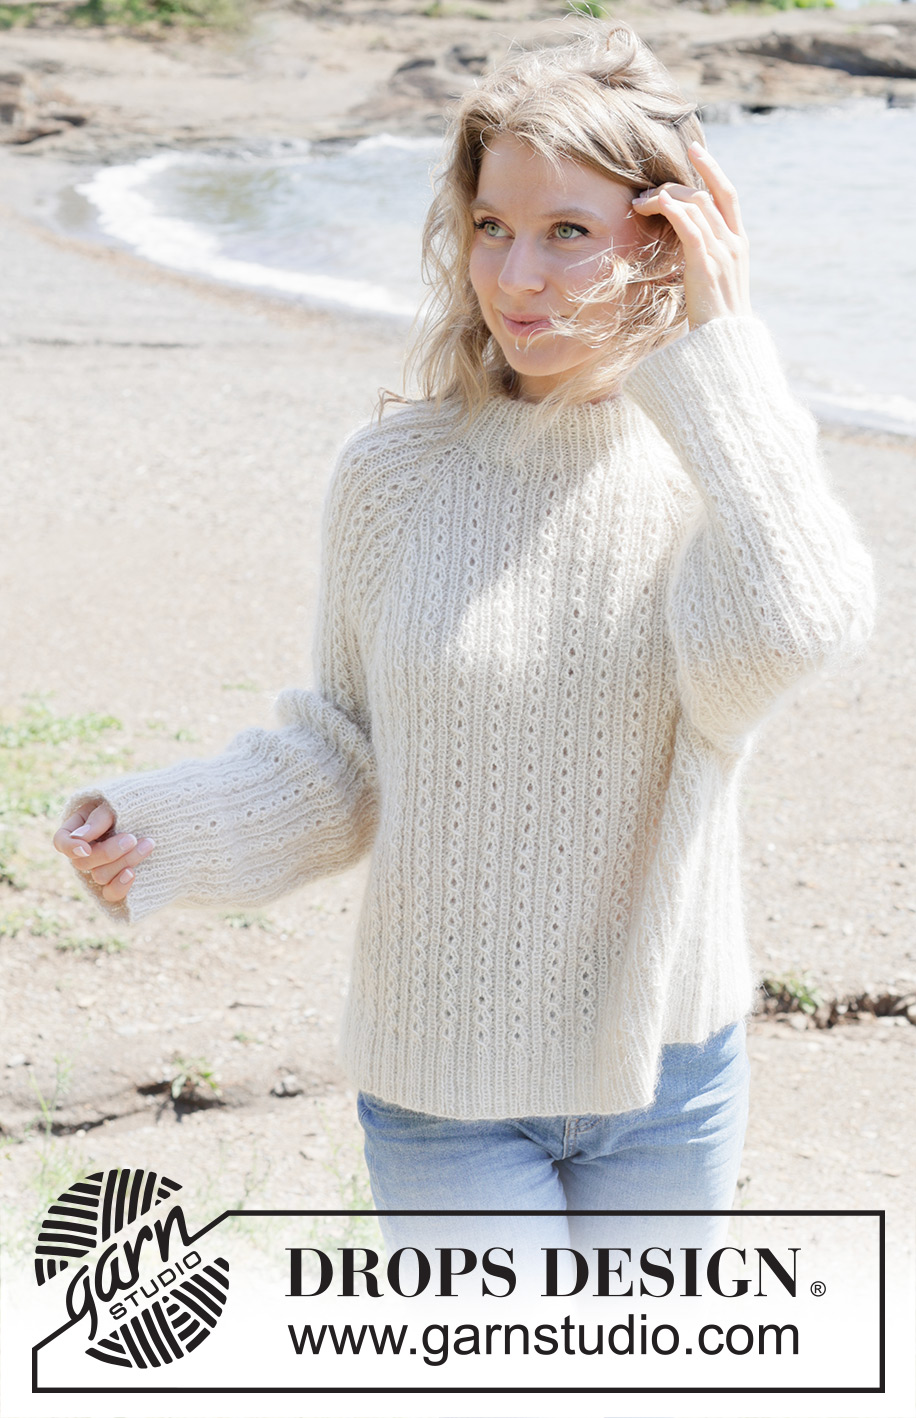
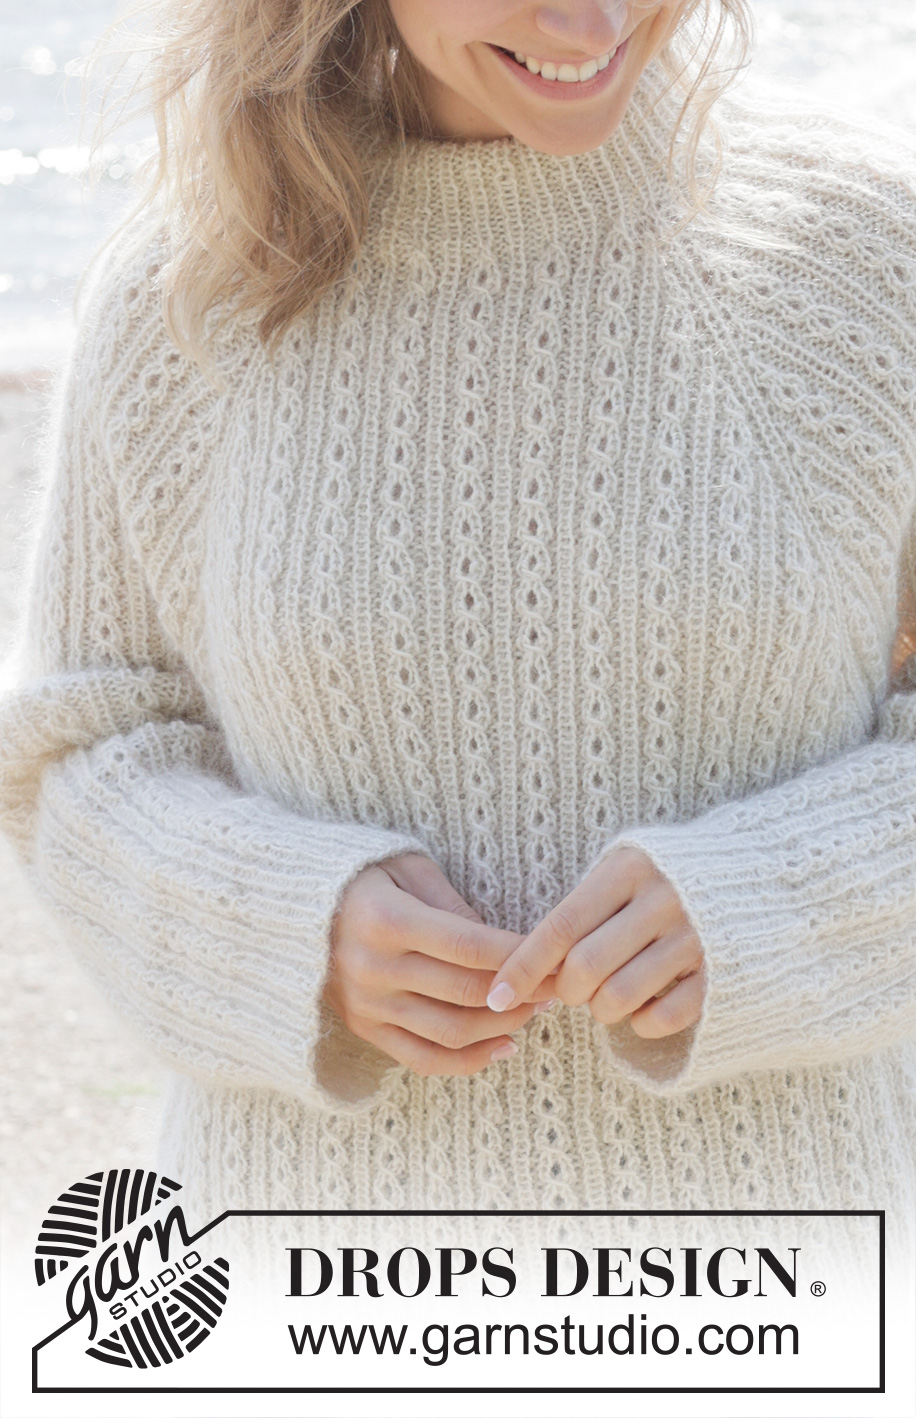
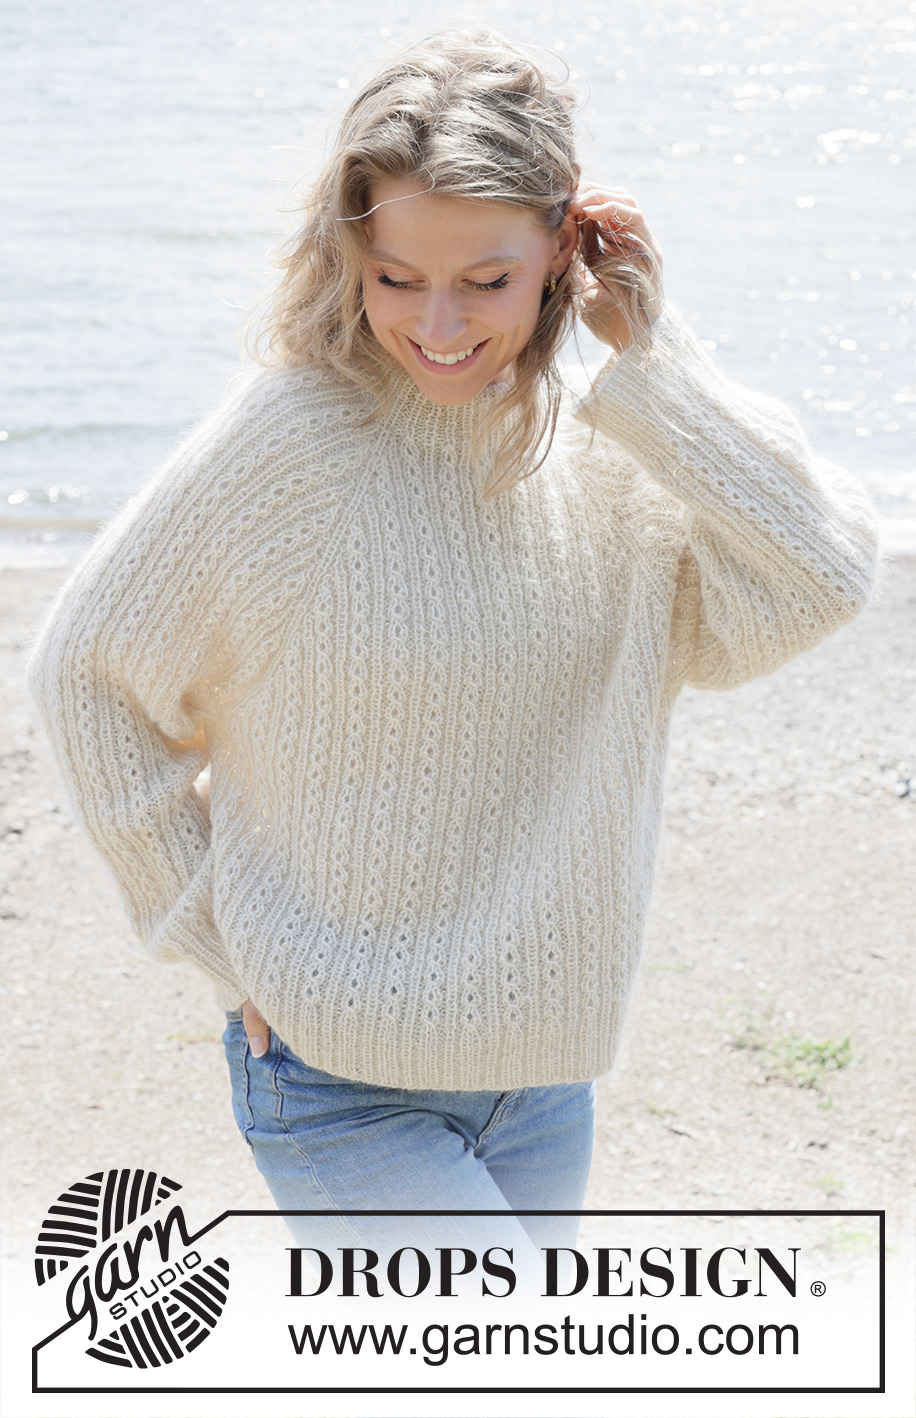
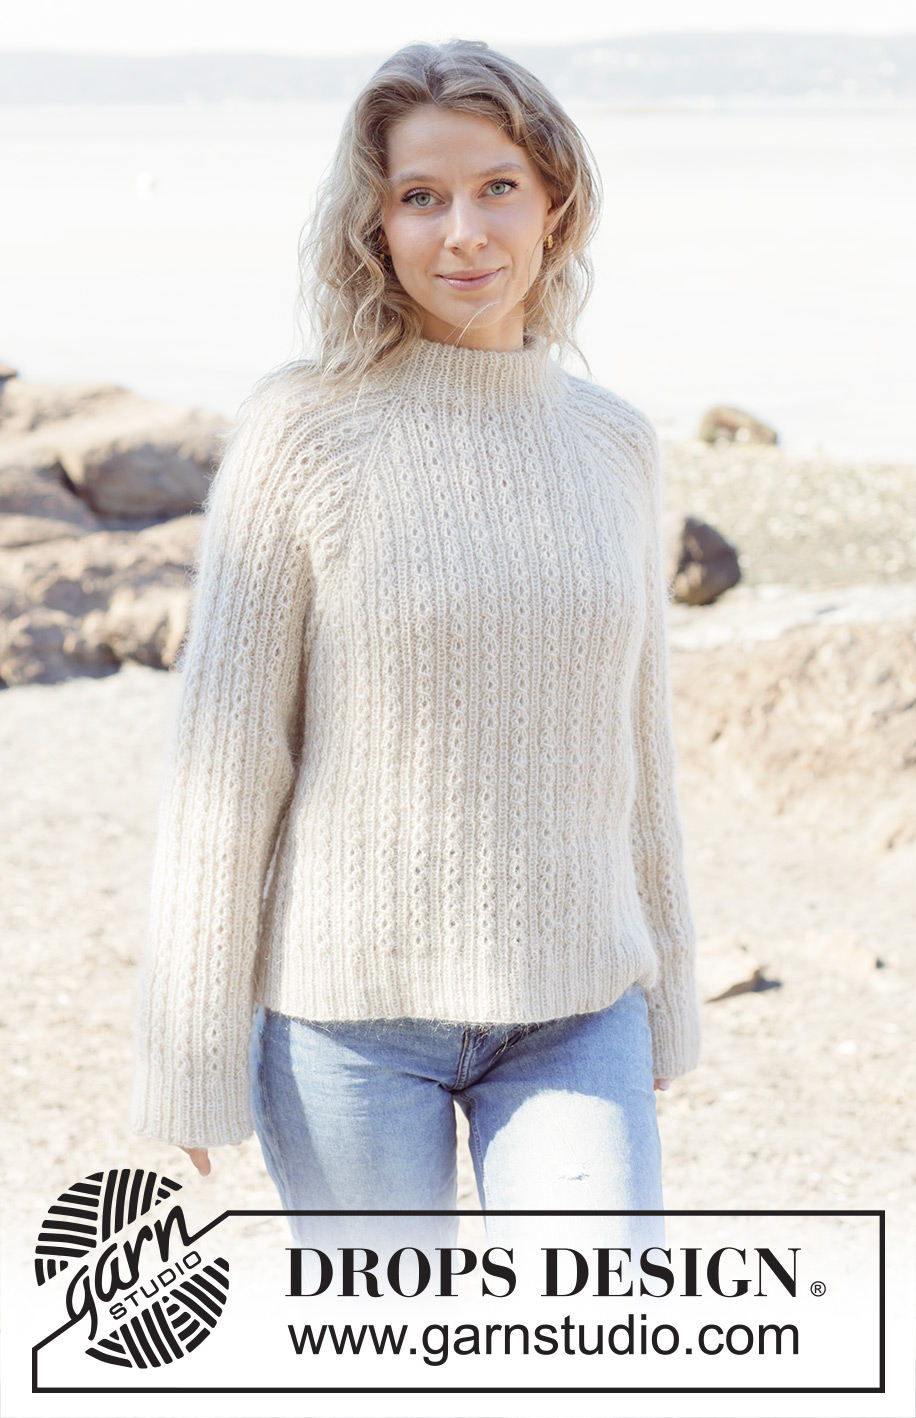
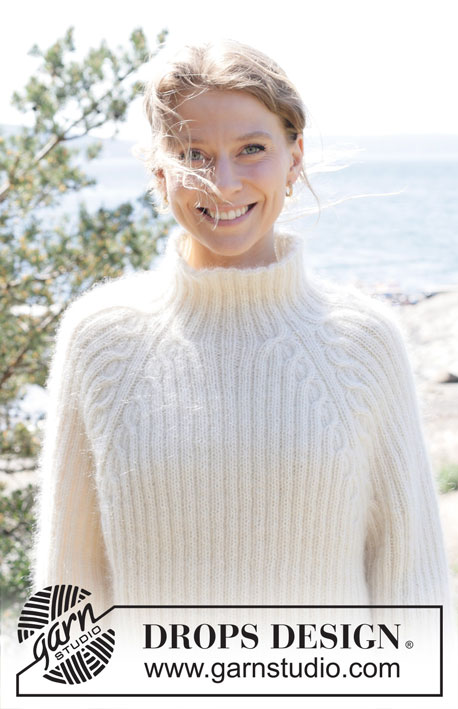
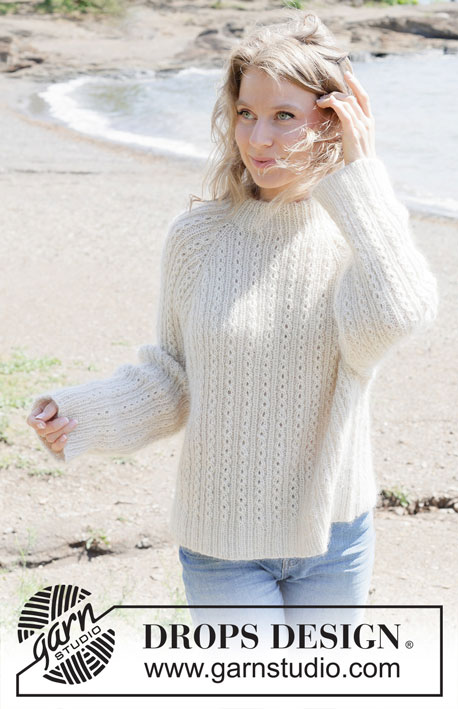
Winter Pearl Sweater#winterpearlsweater |
|||||||||||||||||||
 |
 |
||||||||||||||||||
Knitted jumper in DROPS Alpaca and DROPS Kid-Silk. The piece is worked top down with double neck, raglan and cables. Sizes S - XXXL.
DROPS 255-1 |
|||||||||||||||||||
|
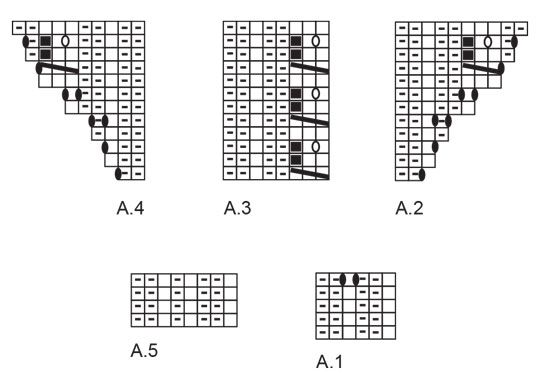
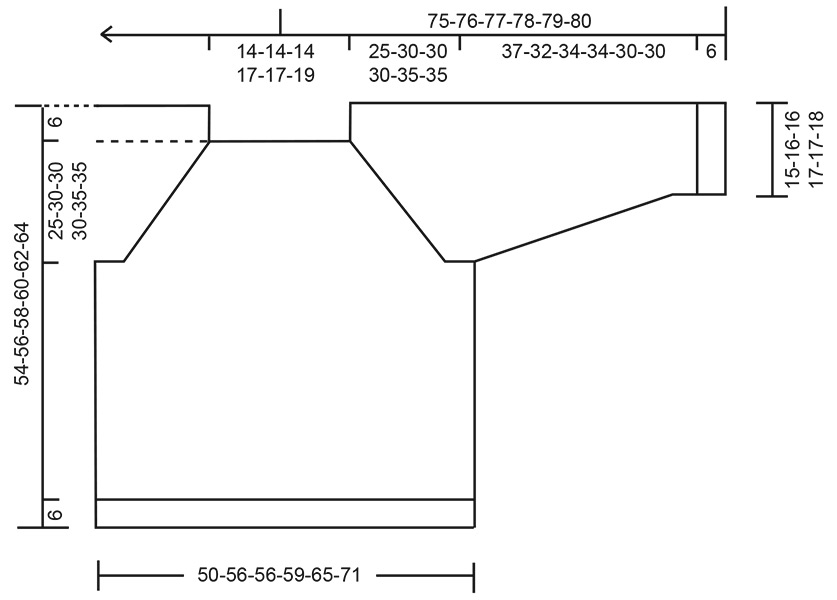
------------------------------------------------------- EXPLANATIONS FOR THE PATTERN: ------------------------------------------------------- PATTERN: See diagrams A.1 to A.5. A.3 is always counted as 8 stitches. RAGLAN: Increase for raglan before/after 1 purled + 1 knitted + 1 purled stitch (= raglan-line). The increased stitches are worked into the pattern. The increases are marked in the diagrams. DECREASE TIP (for sleeves): Decrease by purling 2 together on each side of 1 knitted stitch (= 2 decreased stitches). The stitches which do not fit into a complete cable are knitted. ----------------------------------------------------- START THE PIECE HERE: ------------------------------------------------------- JUMPER – SHORT OVERVIEW OF THE PIECE: The pattern uses both long and short needles; start with the length which fits the number of stitches and change when necessary. The neck and yoke are worked in the round with circular needle, top down and from the right back shoulder. When the yoke is finished, it is divided for the body and sleeves and the body continued in the round, while the sleeves wait. The sleeves are worked top down, in the round. The neck is folded double and fastened to the inside. DOUBLE NECK: Cast on 108-108-108-120-120-132 stitches with circular needle size 3 mm and 1 strand of each quality (= 2 strands). Work rib according to A.1 in the round. Repeat the first 4 rounds of A.1 until the rib measures 9-9-9-11-11-11 cm; the neck is later folded double. Change to circular needle size 4.5 mm and work the last round in A.1 (yarn overs knitted twisted on the next round) = 144-144-144-160-160-176 stitches. Insert 1 marker after the first 52-52-52-57-57-61 stitches (approx. mid-front); the piece is measured from here. YOKE: Continue in the round as follows: Pick up 1 stitch from the previous round (all picked-up stitches are purled twisted), knit 1 ( = raglan-line), pick up 1 stitch from the previous round, work A.2, A.3 across the next 24 stitches, work the first 3 stitches in A.3, A.4 (= sleeve), pick up 1 stitch from the previous round, knit 1 (= raglan-line), pick up 1 stitch from the previous round, work A.2, A.3 across the next 32-32-32-40-40-48 stitches, work the first 3 stitches in A.3, A.4 (= front piece), pick up 1 stitch from the previous round, knit 1 (= raglan-line), pick up 1 stitch from the previous round, work A.2, A.3 across the next 24 stitches, work the first 3 stitches in A.3, work A.4 (= sleeve) pick up 1 stitch from the previous round, knit 1 (= raglan-line), pick up 1 stitch from the previous round, work A.2, A.3 across the next 32-32-32-40-40-48 stitches, work the first 3 stitches in A.3, A.4 (= back piece). NOTE! Make sure the pattern matches the rib. The increases for raglan are marked in the diagrams, you have picked up 8 extra stitches = 160-160-160-176-176-192 stitches. RAGLAN: Increase as shown in the diagrams, increasing on each side of 1 purled + 1 knitted + 1 purled stitch in each raglan-line. Each time A.2 and A.4 are finished in height, there is room for 2 more repeats of A.3 in width. Continue with pattern and increases until A.2, A.3 and A.4 have been worked a total of 3-4-4-4-5-5 times in height. There are 344-408-408-424-488-504 stitches. Now increase only on the front and back pieces; the increases on the sleeves are finished. Work 2 more repeats in height with increases as shown in A.2 and A.4 on the front and back pieces, continuing the pattern on the sleeves without further increases. There are 408-472-472-488-552-568 stitches. Continue working without further increases until the yoke measures 25-30-30-30-35-35 cm from the marker mid-front. DIVIDE FOR BODY AND SLEEVES: Work the next round as follows: Work the first 2 stitches (belong to back piece), place the next 81-97-97-97-113-113 stitches on a thread for the sleeve, cast on 13-13-13-13-13-21 stitches (in side under sleeve), work 123-139-139-147-163-171 stitches (front piece), place the next 81-97-97-97-113-113 stitches on a thread for the sleeve, cast on 13-13-13-13-13-21 stitches (in side under sleeve), work the remaining 121-137-137-145-161-169 stitches (back piece). BODY: = 272-304-304-320-352-384 stitches. Continue the pattern in the round until the piece measures 42-44-46-48-50-52 cm from the marker mid-front. Change to circular needle size 3 mm and work rib according to A.5 for 6 cm, make sure you have knit 1, purl 1, knit 1 across the cables and knit over knit and purl over purl otherwise. Cast off. The jumper measures approx. 48-50-52-54-56-58 cm from the marker and 54-56-58-60-62-64 cm from the shoulder. SLEEVES: Place the 81-97-97-97-113-113 sleeve-stitches from the thread on one side of the piece on circular needle size 4.5 mm and knit up 1 stitch in each of the 13-13-13-13-13-21 stitches cast on under the sleeve + 1 extra stitch on each side = 96-112-112-112-128-136 stitches. Insert a marker-thread mid-under sleeve. Continue the pattern from the yoke, in the round. When the sleeve measures 4 cm, decrease 2 stitches under the sleeve – read DECREASE TIP. Decrease like this every 4-2-2-2½-1-1 cm a total of 8-14-13-11-18-20 times = 80-84-86-90-92-96 stitches. Continue working until the sleeve measures 37-32-34-34-30-30 cm. Change to double pointed needles size 3 mm. Work rib as shown in A.5 for 6 cm, make sure you have knit 1, purl 1, knit 1 across the cables and knit over knit and purl over purl otherwise. Cast off. The sleeve measures approx. 43-38-40-40-36-36 cm from the division. ASSEMBLY: Fold the neck double to the inside and sew down. Make sure the seam is elastic to avoid the neck being tight. |
|||||||||||||||||||
Diagram explanations |
|||||||||||||||||||
|
|||||||||||||||||||
 |
|||||||||||||||||||
 |
|||||||||||||||||||
Have you finished this pattern?Tag your pictures with #dropspattern #winterpearlsweater or submit them to the #dropsfan gallery. Do you need help with this pattern?You'll find 16 tutorial videos, a Comments/Questions area and more by visiting the pattern on garnstudio.com. © 1982-2026 DROPS Design A/S. We reserve all rights. This document, including all its sub-sections, has copyrights. Read more about what you can do with our patterns at the bottom of each pattern on our site. |
|||||||||||||||||||






With over 40 years in knitting and crochet design, DROPS Design offers one of the most extensive collections of free patterns on the internet - translated to 17 languages. As of today we count 333 catalogues and 12525 patterns translated into English (UK/cm). 12525
We work hard to bring you the best knitting and crochet have to offer, inspiration and advice as well as great quality yarns at incredible prices! Would you like to use our patterns for other than personal use? You can read what you are allowed to do in the Copyright text at the bottom of all our patterns. Happy crafting!
Post a comment to pattern DROPS 255-1
We would love to hear what you have to say about this pattern!
If you want to leave a question, please make sure you select the correct category in the form below, to speed up the answering process. Required fields are marked *.