
Popular categories
Looking for a yarn?


Comments / Questions (53)
![]() Kicki Tjäder wrote:
Kicki Tjäder wrote:
VIRKINFORMATION: ”Varje varv med stolpar börjar med 3 luftmaskor, de ersätter inte första stolpen.” När jag börjar med bakstycket så står det att jag ska göra en stolpe i den 4:e luftmaskan. Innebär det att jag först ska göra de 3 luftmaskorna enligt virkinformationen och sen en stolpe i den 4:e luftmassan?
24.08.2024 - 20:59DROPS Design answered:
Hej Kicki, nej 3 af de 4 første luftmasker er dem som erstatter første stolpen :)
28.08.2024 - 08:06
![]() Regina Jansen wrote:
Regina Jansen wrote:
Ik neem aan het patroon deelbaar is door 3
22.08.2024 - 15:36DROPS Design answered:
Dag Regina,
Ja dat klopt; patroon A.1 is een herhaling van steeds 3 steken.
28.08.2024 - 20:58
![]() Martine Dewindt wrote:
Martine Dewindt wrote:
Bonsoir,combien de rgs de brides entre les dessins,merci
26.06.2024 - 20:57DROPS Design answered:
Bonjour Mme Dewindt, vous répétez les 6 rangs encadrés dans le diagramme A.1, vous aurez ainsi 4 rangs de brides entre les 2 rangs du motif. Bon crochet!
27.06.2024 - 08:30
![]() Trish Brooks wrote:
Trish Brooks wrote:
I am very confused about reading the schematic drawing and putting it into practice. Is this pattern worked sideways?
07.05.2024 - 03:58
![]() Casazza Isabelle wrote:
Casazza Isabelle wrote:
Bonjour, Je ne comprends pas sur le modèle du top DROPS 230-46, comment crocheter les rangs 3 et 4 du diagramme A. 1. Merci de votre aide. Cordialement
05.05.2024 - 18:19DROPS Design answered:
Bonjour Mme Casazza, crochetez le 3ème rang ainsi: *sautez 1 bride, dans la bride suivante, crochetez: 1 bride, 1 maille en l'air, 1 bride, sautez 1 bride*, répétez de *à*. Crochetez le 4ème tour ainsi: 3 brides autour de chaque arceau (- de la maille en l'air entre les 2 brides du rang précédent). Bon crochet!
06.05.2024 - 08:41
![]() Birgitte Neerup Danielsen wrote:
Birgitte Neerup Danielsen wrote:
Når jeg tager ind til ærmegab så bliver det hakkende og ikke en glidende kant. Hvad gør jeg forkert? Hilsen Birgitte
23.03.2024 - 11:55DROPS Design answered:
Hej Birgitte, øverst i opskriften klikker du på Videoer, her finder du en video: Hvordan får jeg lige hæklede kanter :)
03.04.2024 - 14:26
![]() Amber wrote:
Amber wrote:
I'm lost at what to do with A.1. Is it worked next to each other in one row or is it worked up? I'm also lost at what 'double crochet around chain stitch' means?
16.03.2024 - 13:26DROPS Design answered:
Dear Amber, when working in the same row, you will work many repeats of the same row of A.1. Then, on the next rows you will work the chart upwards. You can read more information on our charts here: https://www.garnstudio.com/lesson.php?id=69&cid=19. Working around a stitch means that you don't insert the hook inside a stitch but rather in the space (for example, chain space formed). You can see the difference between working in and around stitches in the following video: https://www.garnstudio.com/video.php?id=690&lang=en. Happy crochetting!
17.03.2024 - 21:43
![]() Mary wrote:
Mary wrote:
In the diagram A1, I do not understand what to do where it says, \"treble crochet between 2 treble crochets\". Please could you explain. From the photo, it just looks like another row of trebles. Thank you.
26.07.2023 - 19:20DROPS Design answered:
Dear Mary, yes, it's a row of trebles but the treble crochet is worked in the space between 2 treble crochets instead of inside the treble crochet. In the end, you will have the same amount of treble crochets at the end of the round. Happy crocheting!
27.07.2023 - 09:53
![]() Marjon Zwirs wrote:
Marjon Zwirs wrote:
Green Island heeft geen tel patroon . Tel patroon A1 mist bij beschrijving
12.07.2023 - 23:32DROPS Design answered:
Dag Marjon,
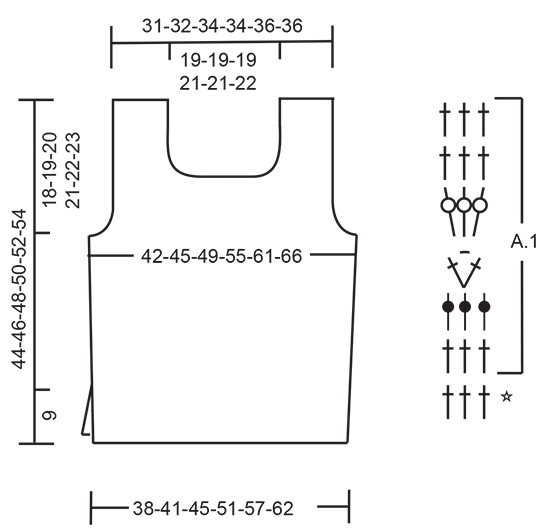
Het telpatroon vind je rechts naast de maattekening.
13.07.2023 - 19:41
![]() Marie-Thérèse Vollemaere wrote:
Marie-Thérèse Vollemaere wrote:
Ik zie nergens aangeduid hoeveel ik nodig heb voor dit model ??
28.06.2023 - 18:45DROPS Design answered:
Dag Marie-Thérèse,
Bovenaan bij de materialen staat aan gegeven hoeveel gram je nodig hebt (1 bol weegt 50 gram). De reeks getallen slaan op de maten, dus het eerste getal geldt voor maat S, het tweede getal voor maat M, enzovoorts.
29.06.2023 - 07:09
|
||||||||||||||||
Green Island#greenislandtop |
||||||||||||||||
 |
 |
|||||||||||||||
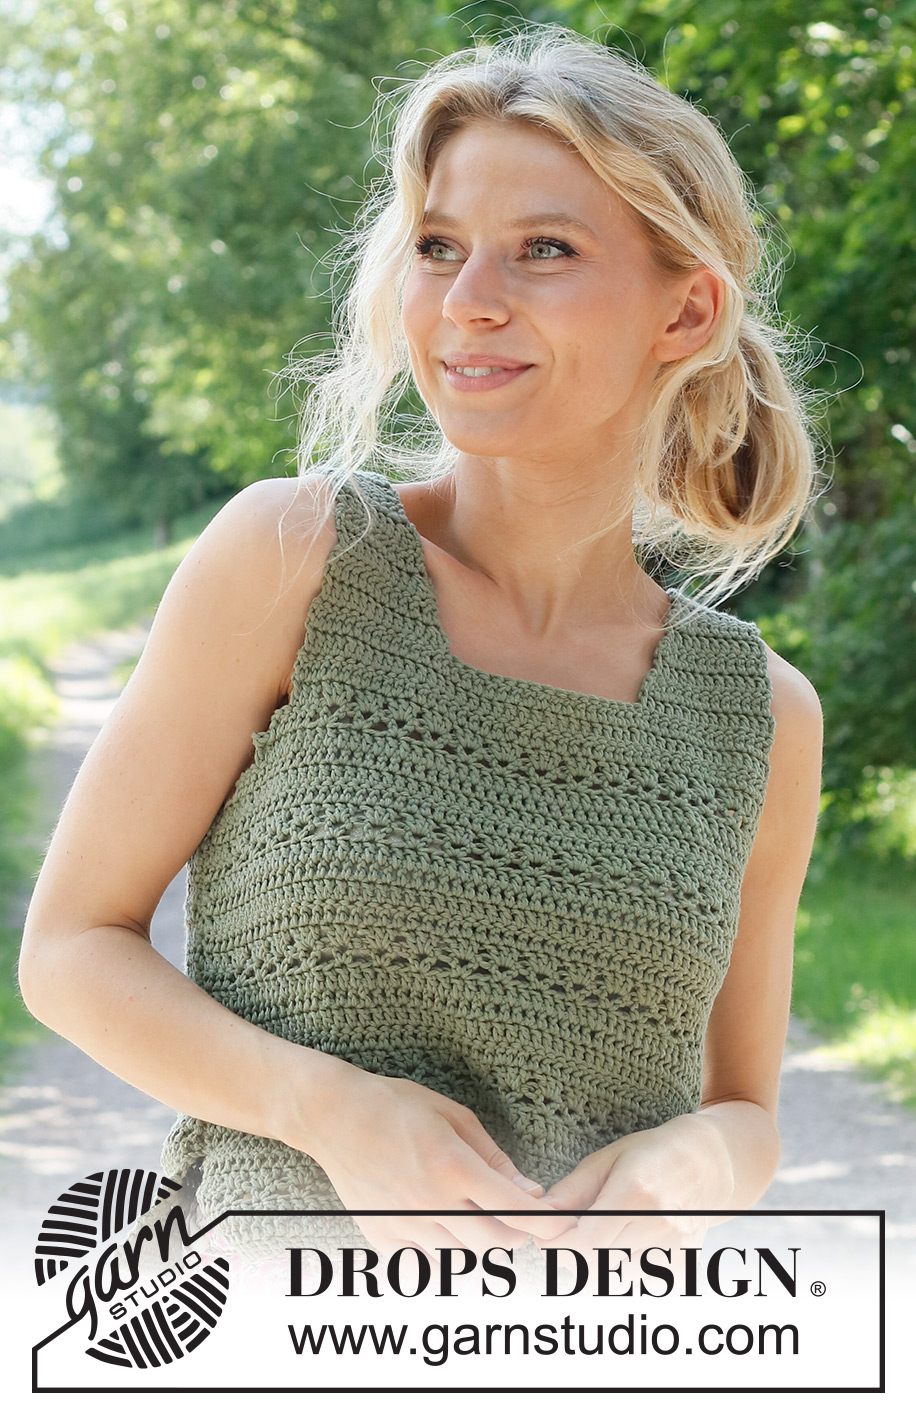
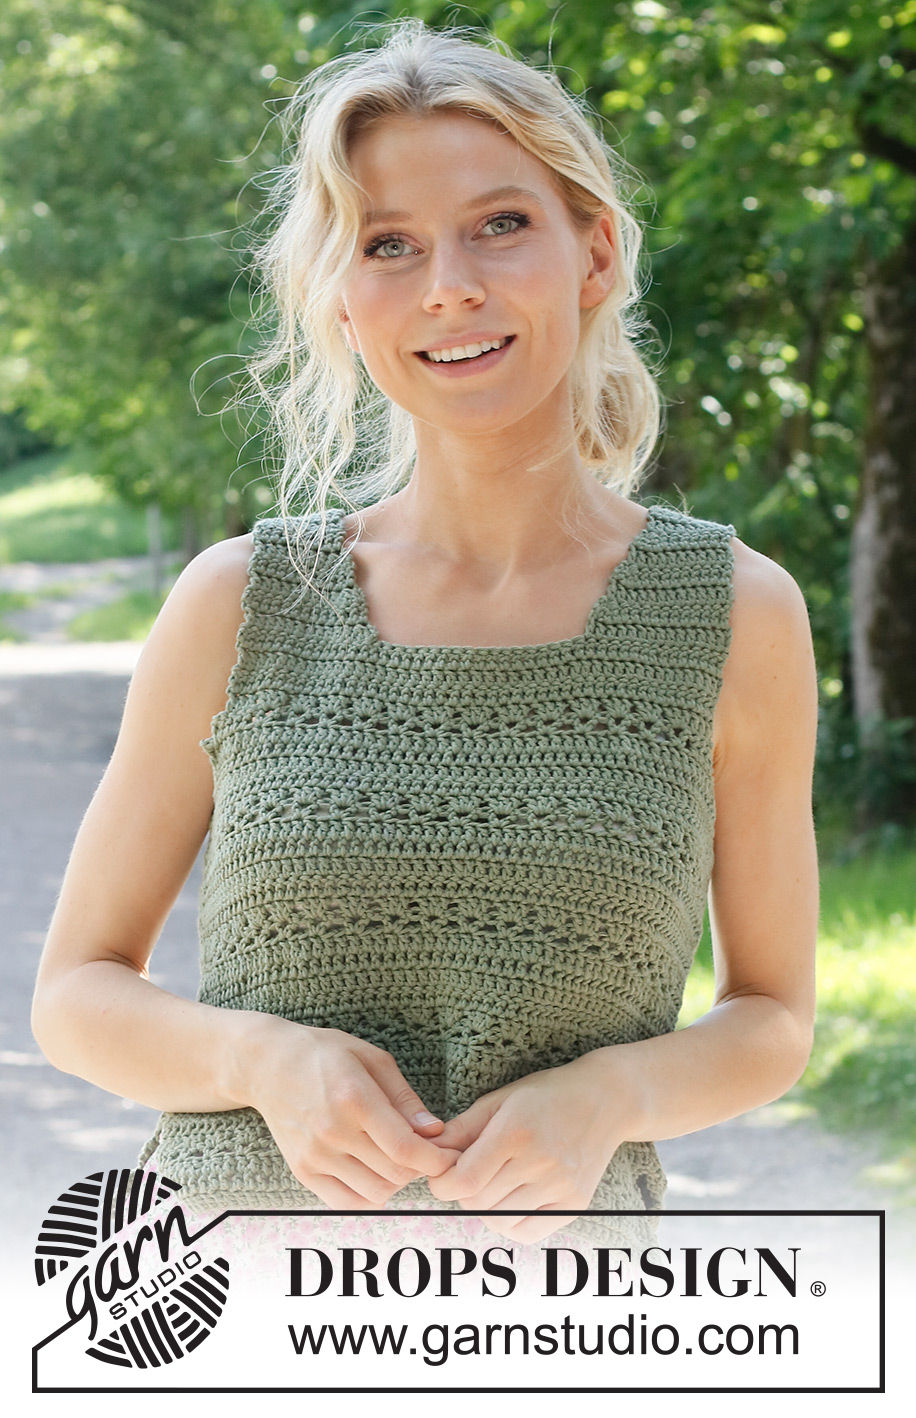
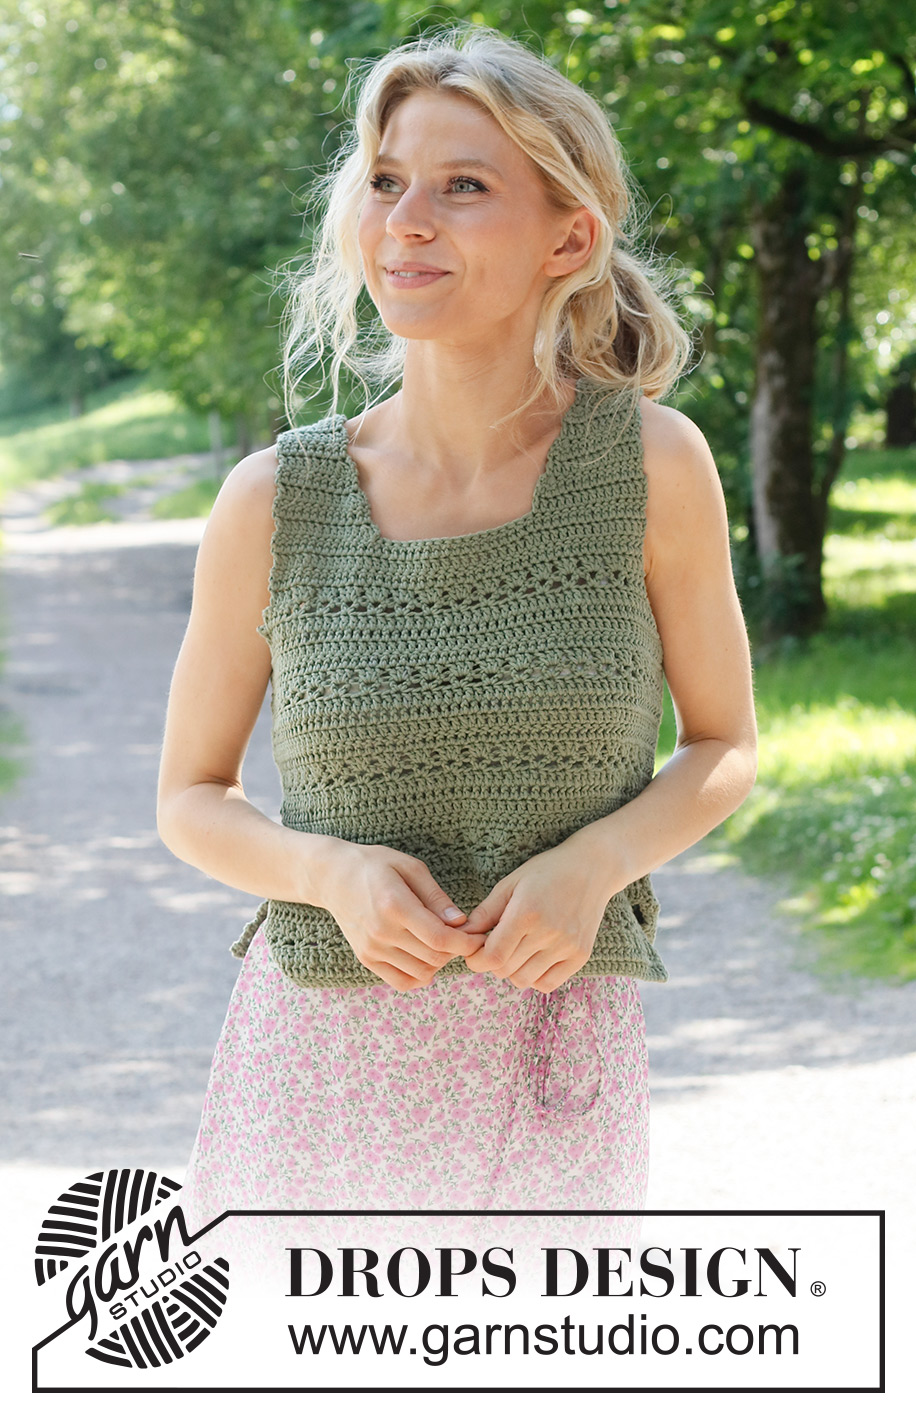
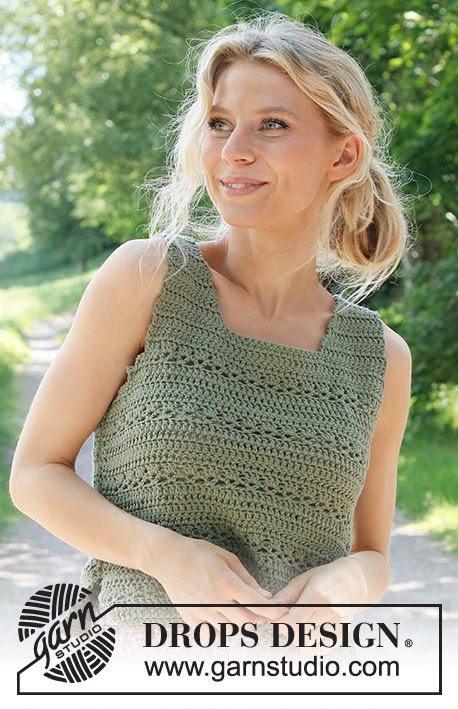
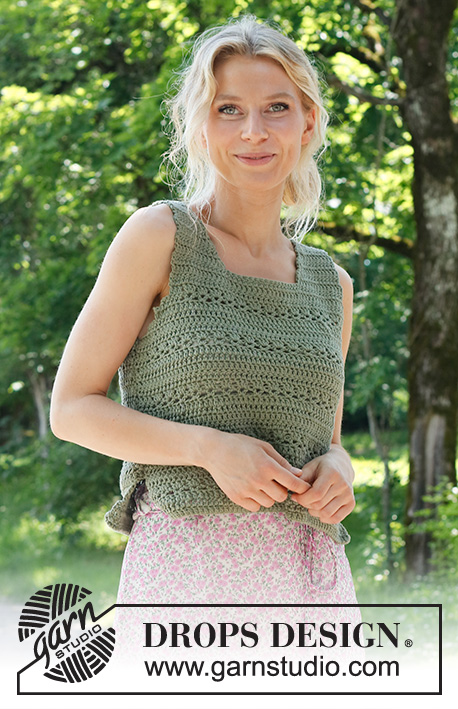
Crocheted top in DROPS Paris. Piece is crocheted top down with lace pattern and vents in the side. Size: S - XXXL
DROPS 230-46 |
||||||||||||||||
|
---------------------------------------------------------- EXPLANATION FOR THE PATTERN: ---------------------------------------------------------- CROCHET INFORMATION: Begin every treble crochet row with 3 chain stitches, they do not replace first treble crochet. CHAIN STITCHES: If you work at the end of crochet hook the chain stitch will often be too tight. 1 chain stitch should be just as long as 1 treble crochet is wide. PATTERN: See diagram A.1. DECREASE TIP-1 (applies to armholes): At the beginning of row: Replace each treble crochet to decrease with 1 slip stitch. At end of row: Do not work over stitches to be decreased. DECREASE TIP-2 (applies to neck): Decrease 2 treble crochets by working 3 treble crochets together as follows: * Make 1 yarn over, insert hook in next stitch, get yarn, make 1 yarn over and pull yarn through the 2 first loops on hook *, repeat from *-* 3 times in total, make 1 yarn over and pull yarn through all 4 loops on hook. ---------------------------------------------------------- START THE PIECE HERE: ---------------------------------------------------------- TOP - SHORT OVERVIEW OF THE PIECE: Work piece back and forth in parts, bottom up and sewn together when finished. BACK PIECE: Work 56-60-66-74-83-90 CHAIN STITCHES - read explanation above, on hook size 5 mm with DROPS Paris. Work 1 treble crochet in 4th chain stitch, work 1 treble crochet in each of the next 52-56-62-70-79-86 chain stitches – read CROCHET INFO = 53-57-63-71-80-87 treble crochets. Work 1 treble crochet in each of the first 1-3-3-1-1-3 treble crochet, work A.1 until 1-3-3-1-1-3 treble crochets remain and finish with 1 treble crochet in each of the last treble crochets. Continue pattern like this. REMEMBER THE CROCHET TENSION! When piece measures approx. 10 cm, adjust so that next row is 1st, 5th or 6th row, increase 3 treble crochets evenly = 56-60-66-74-83-90 treble crochets. Work next row as follows: Work 1 treble crochet in each of the first 1-3-3-1-1-3 treble crochet, work A.1 until 1-3-3-1-1-3 treble crochets remain and finish with 1 treble crochet in each of the last treble crochets. When piece measures approx. 18 cm, adjust so that next row is 1st, 5th or 6th row, increase 3 treble crochets evenly = 59-63-69-77-86-93 treble crochets. Work next row as follows: Work 1 treble crochet in each of the first 1-3-3-1-1-3 treble crochet, work A.1 until 1-3-3-1-1-3 treble crochets remain and finish with 1 treble crochet in each of the last treble crochets. Cut the yarn when piece measures 26-27-28-29-30-31 cm. Now work over the middle 53-57-61-67-74-79 treble crochets (do not work over 3-3-4-5-6-7 treble crochets in each side for armholes). Work next row as follows: Work 1 treble crochet in each of the first 7-9-8-11-13-17 stitches, work A.1 until 7-9-8-11-13-17 stitches remain and finish with 1 treble crochet in each of the last stitches. Then decrease for armholes in each side on every row as follows: Decrease 3 treble crochets 1-1-1-2-2-3 times – read DECREASE TIP-1, 2 treble crochets 0-1-1-1-2-2 times and 1 treble crochet 2-1-2-2-2-1 time = 43-45-47-47-50-51 treble crochets. Work until piece measures 31-33-34-36-37-38 cm, adjust so that last row is a row with treble crochets. Now work with 1 treble crochet in every treble crochet. When piece measures 39-41-42-44-45-47 cm, work shoulder over the first 10-11-12-11-12-12 treble crochets. Work the 3 treble crochet closest to the neck together on next row – read DECREASE TIP-2 = 8-9-10-9-10-10 treble crochets. Continue to work until piece measures 44-46-48-50-52-54 cm. Cut and fasten the yarn. Work the other shoulder the same way over the last 10-11-12-11-12-12 treble crochets. FRONT PIECE: Work as back piece until piece measures 33-35-36-38-39-40 cm. Now work shoulder over the first 14-15-16-15-16-16 stitches as follows: Work the 3 treble crochets closest to the neck together on next row. Decrease like this on every 2nd row 3 times in total = 8-9-10-9-10-10 treble crochets. Work 1 treble in every treble crochet until piece measures 44-46-48-50-52-54 cm. Cut and fasten the yarn. Work the other shoulder the same way over the last 14-15-16-15-16-16 treble crochets. ASSEMBLY: Sew the shoulder seams. Sew side seams but leave approx. 9 cm for vents at the bottom in each side. |
||||||||||||||||
Diagram explanations |
||||||||||||||||
|
||||||||||||||||
 |
||||||||||||||||
Have you finished this pattern?Tag your pictures with #dropspattern #greenislandtop or submit them to the #dropsfan gallery. Do you need help with this pattern?You'll find 11 tutorial videos, a Comments/Questions area and more by visiting the pattern on garnstudio.com. © 1982-2026 DROPS Design A/S. We reserve all rights. This document, including all its sub-sections, has copyrights. Read more about what you can do with our patterns at the bottom of each pattern on our site. |
||||||||||||||||


With over 40 years in knitting and crochet design, DROPS Design offers one of the most extensive collections of free patterns on the internet - translated to 17 languages. As of today we count 325 catalogues and 12298 patterns translated into English (UK/cm). 12298
We work hard to bring you the best knitting and crochet have to offer, inspiration and advice as well as great quality yarns at incredible prices! Would you like to use our patterns for other than personal use? You can read what you are allowed to do in the Copyright text at the bottom of all our patterns. Happy crafting!
Post a comment to pattern DROPS 230-46
We would love to hear what you have to say about this pattern!
If you want to leave a question, please make sure you select the correct category in the form below, to speed up the answering process. Required fields are marked *.