
Popular categories
Looking for a yarn?


Comments / Questions (3)
![]() Fatiha wrote:
Fatiha wrote:
Beste drops-team, het alternatieve wol voor dit vest is onder andere Snow; maar voor Snow wordt pen 9 gegeven en, dit vest in UllFlame is met pen 6. Met welke pen moet ik breien als ik Snow zou gebruiken? Ik zou graag met Snow willen breien maar ben nu niet zeker welke pen te gebruieken. Hoop dat jullie uitkomst kunnen bieden. vr. groet
28.05.2021 - 13:24DROPS Design answered:
Dag Fatiha,
Je kunt Ull-Flame inderdaad vervangen door DROPS Snow. In het patroon staat een stekenverhouding aangegeven van 12 steken in de breedte en 16 naalden in de hoogte is 10 cm. Voor Snow denk ik dat je een iets dikkere pen nodig hebt om dezelfde stekenverhouding te krijgen; 7 of 8 mm. Maar dat hangt ook af hoe strak of los je breit, dus maak altijd even een proeflapje en pas eventueel de pendikte aan totdat je de juiste stekenverhouding hebt.
31.05.2021 - 10:27
![]() Hanne Kjær wrote:
Hanne Kjær wrote:
Hey🤗 Jeg hat blot et ønske som egentlig er generelt for alle opskrifter. Da mange af opskrifter er lavet i undgået garn, savner jeg i opskrifterne, at der ud over garneforbrug i vægt også står en løbende på garnet. Dette ville gøre det væsentligt nemmere for os strikkere at beregne forbrug i et andet garn. Det er ofte svært at finde løbelængde på undgået garn. Håber i vil tage det op til overvejelse 🤞 Vh Hanne
19.05.2021 - 19:02
![]() Marjan wrote:
Marjan wrote:
Bij het voor-en achterpand moet je binnen de 2 ribbelst. 6 x 1 st. meerderen. Moet je die gemeerderde steken alle in ribbelst. breien?
30.01.2017 - 10:43DROPS Design answered:
Hoi Marjan. Zoals ik het lees, dan moeten zij in tricotsteek worden gebreid Alleen de 2 kantsteken worden in ribbelst gebreid.
30.01.2017 - 15:19
|
|||||||||||||
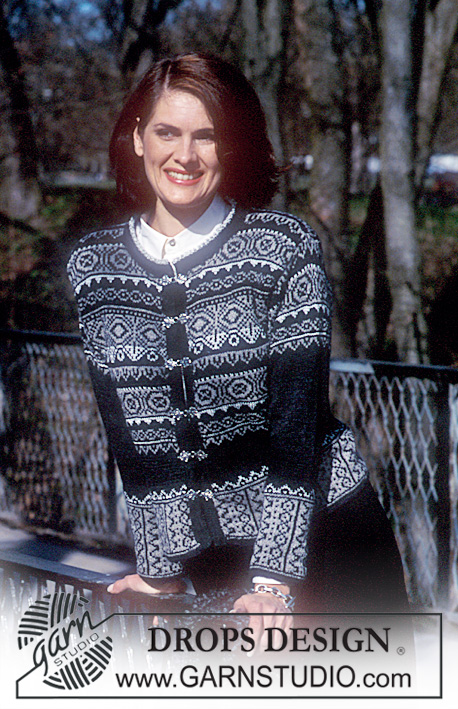
DROPS 62-14 |
|||||||||||||
|
|
|||||||||||||
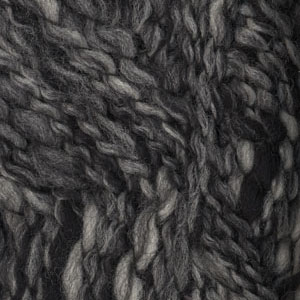
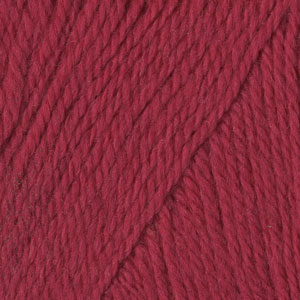
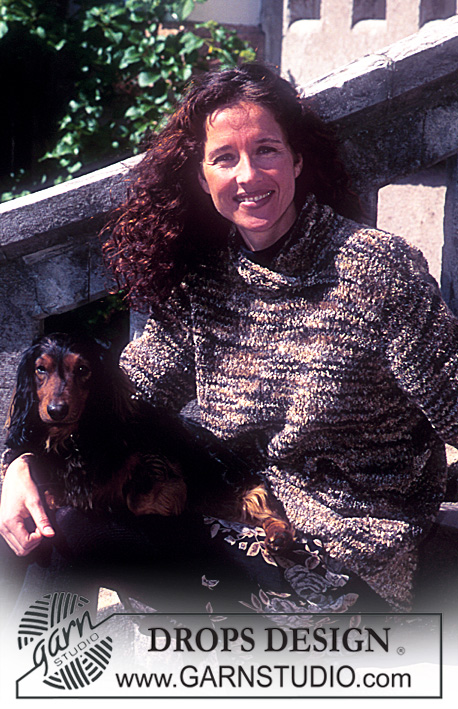
DROPS Long cardigan in Ull Flamé. Gloves in Alpaca.
DROPS 62-14 |
|||||||||||||
|
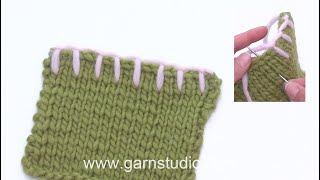
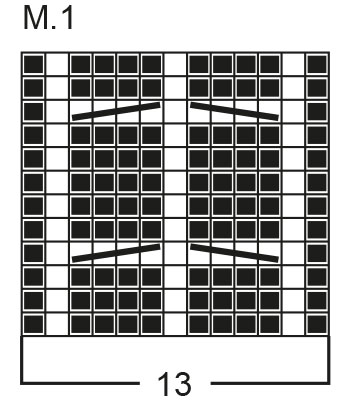
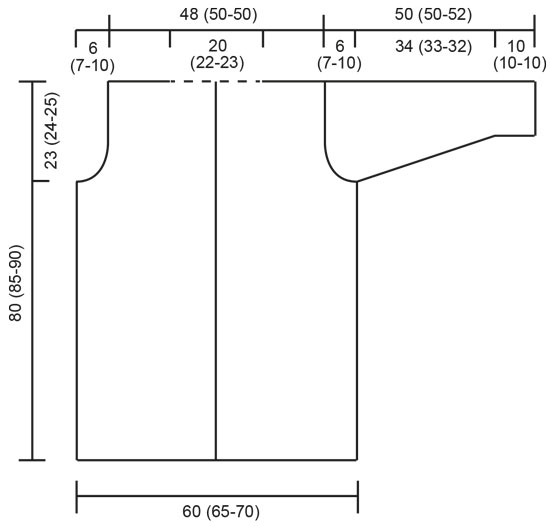
Gauge: 12 sts x 16 rows in stockinette st = 10 x 10 cm. Garter Stitch, when knitting flat: Knit all sts, all rows. Garter Stitch, when knitting in the round: *Rnd 1, knit. Rnd 2, purl *. Repeat from * - *. Buttonholes: Bind off the 4th st on the right front for buttonhole and cast on 1 new st over the bound-off st on the next row, bind off when the work measures: 9 cm 18 (19-19.5) cm 27 (29-30) cm 36 (39-40.5) cm 45 (49-51) cm 54 (59-61.5) cm 63 (69-72) cm and 72 (79-82.5) cm Left Front: Cast on 34 (37-40) sts and knit 4 rows garter st. Change to stockinette st, but keep the 2 sts at the center front in garter st throughout. Inc 1 st inside the 2 garter sts at the center front every other row 6 times = 40 (43-46) sts. When the work measures 57 (61-65) cm bind off for armholes every other row: 3 sts 1 (1-2) times, 2 sts 1 (2-2) times, 1 st 3 (3-3) times = 32 (33-33) sts. When the work measures 80 (85-90) cm put 15 (16-17) sts at the center front on a st holder for the neck and bind off the remaining sts. Right front: Cast on and knit as for the left, reversing all shaping. Make buttonholes on the front edge (see instructions above). Back: Cast on 74 (80-86) sts and knit 4 rows garter st. Change to stockinette st. When the work measures 57 (61-65) cm bind off for armholes on each side as on the front = 58 (60-60) sts. When the work measures 80 (85-90) cm bind off all sts. Sleeve: Cast on 35 (37-38) sts and knit 4 rows garter st. Change to stockinette st. When the work measures 10 cm inc 1 st on each side 11 (11-12) times every 3 (3-2.5) cm = 57 (59-62) sts. When the work measures approx. 44 (43-42) cm bind off on each side for the sleeve cap every other row: 3 sts 3 (3-2) times, 2 sts 1 (2-5) times, then 3 sts on each side until the work measures 50 (50-52) cm. Bind off. Pockets: Cast on 26 sts and knit 4 rows garter st. Change to stockinette st but keep 2 sts in garter st at each side. When the work measures 19 cm knit 4 rows garter st over all sts. Bind off. Neck: Sew the shoulder seams. Put sts from the right front st holder onto needles, then pick up 26 (28-30) sts over the back, and put sts from the st holder on the left front on the needles = 56 (60-64) sts. Knit stockinette st keeping 2 sts in garter st at each side - and make buttonholes on the right side of the collar (as on the front) when the collar measures 1 (2-1) cm and 9 (10-10) cm. On the same row as the last buttonhole, dec 1 st on each side inside the two garter sts every other row 5 times. On the row after the last dec knit garter st over all sts. The collar measures approx. 16 (17-17) cm, bind off. Assembly: Sew in the sleeves, sew sleeve- and side seams in one. Sew buttonhole sts with gray Alaska over 2 sts and 2 rows: over the garter st rows at the bottom of the sleeves, around the lower edge of the body, up along the front edges and around the entire collar and the pockets. Sew buttonhole sts over the right side of the sleeve seam edge toward the body, sew over 2 rows on the sleeve and 2 sts on the body. Sew the pockets onto the cardigan approx. 12 cm from the lower edge and 13 cm from the front edge. Sew on the buttons. GLOVES: Sizes: Ladies’ Medium Materials: DROPS ALPACA from Garnstudio 100 g color no. 517, gray DROPS 3 mm double pointed needles, or size needed to obtain correct gauge. Gauge: 24 sts x 30 rows in rib = 10 x 10 cm. Rib: * K 2, P 2 *. Repeat from * - *. Pattern: See chart (1 chart = 1 repeat). The pattern is seen from the right side. Gloves: Cast on 83 sts on double pointed needles; join and place a marker at the join. Knit pattern as follows: 18 sts rib - start the row with 2 purl sts and attach a marker between these 2 purl sts, Pattern 1 (= center of the glove), 52 sts rib (begin with 2 purl sts). When the work measures 24 cm dec 24 sts evenly distributed across rib sts, but not in Pattern 1 = 59 sts. Start rib pattern anew so that there are 2 P sts on each side of Pattern 1. Measure the work from here. When the work measures 2 cm inc for a «wedge» for the thumb as follows: inc 1 st on each side of the marker, these 2 sts = «wedge» for the thumb. Then inc 1 st on each side of these 2 sts every other row 6 times = 14 sts in the «wedge» (knit the increased sts into the «wedge» in rib as you go along). Now put these 14 sts + 1 st on each side (= 16 sts) on a st holder and cast on 2 new sts behind the «wedge» = 59 sts on the dp needles. When the work measures 11 cm inc 1 st in Pattern 1 = 60 sts, and knit Pattern 1 sts in rib. Then knit the next row as follows: 2 sts over the «wedge», 21 sts, put 13 sts on a st holder for the little finger, cast on 1 new st and knit the remaining 24 sts. Knit 4 rows over these 48 sts. Then put the new sts and 16 sts on each side of this on a st holder. Index finger: Knit 15 sts and pick up 1 new st = 16 sts. Join and knit 4 cm over these 16 sts, bind off. Center finger: Knit 8 sts from the underside of the hand, inc 1 new st, knit 8 sts from the upper side of the hand and inc 3 sts at the index finger = 20 sts. Join and knit 4 cm over these 20 sts, bind off. Ring finger: Knit 8 sts from the underside of the hand, inc 1 new st, knit 8 sts from the upper side of the hand and inc 3 sts at the center finger = 20 sts. Join and knit 4 cm over these 20 sts, bind off. Little finger: Knit 13 sts from the st holder and inc 3 sts at the ring finger = 16 sts. Join and knit 4 cm over these 16 sts, bind off. Thumb: Knit 16 sts from the st holder, inc 4 sts in the sts behind the «thumb-wedge» = 20 sts. Join and knit 5 rows, bind off. Knit the other glove in the same fashion, but reverse all shaping. |
|||||||||||||
Diagram explanations |
|||||||||||||
|
|||||||||||||
 |
|||||||||||||
 |
|||||||||||||
Have you finished this pattern?Tag your pictures with #dropspattern or submit them to the #dropsfan gallery. Do you need help with this pattern?You'll find 24 tutorial videos, a Comments/Questions area and more by visiting the pattern on garnstudio.com. © 1982-2026 DROPS Design A/S. We reserve all rights. This document, including all its sub-sections, has copyrights. Read more about what you can do with our patterns at the bottom of each pattern on our site. |
|||||||||||||


With over 40 years in knitting and crochet design, DROPS Design offers one of the most extensive collections of free patterns on the internet - translated to 17 languages. As of today we count 324 catalogues and 12290 patterns translated into English (UK/cm). 12290
We work hard to bring you the best knitting and crochet have to offer, inspiration and advice as well as great quality yarns at incredible prices! Would you like to use our patterns for other than personal use? You can read what you are allowed to do in the Copyright text at the bottom of all our patterns. Happy crafting!
Post a comment to pattern DROPS 62-14
We would love to hear what you have to say about this pattern!
If you want to leave a question, please make sure you select the correct category in the form below, to speed up the answering process. Required fields are marked *.