
Popular categories
Looking for a yarn?


Comments / Questions (13)
SILVIA wrote:
Muy lindo modelo, lo estoy tejiendo.
30.01.2016 - 19:45
![]() Schwetta wrote:
Schwetta wrote:
J'aime beaucoup ce modèle !
02.01.2016 - 23:23
![]() Weimer Sandra wrote:
Weimer Sandra wrote:
Très beau model simple et pure, pour les femmes rondes cache bien les rondeurs :)) , vivement les explications !!
20.12.2015 - 12:47
|
|||||||||||||
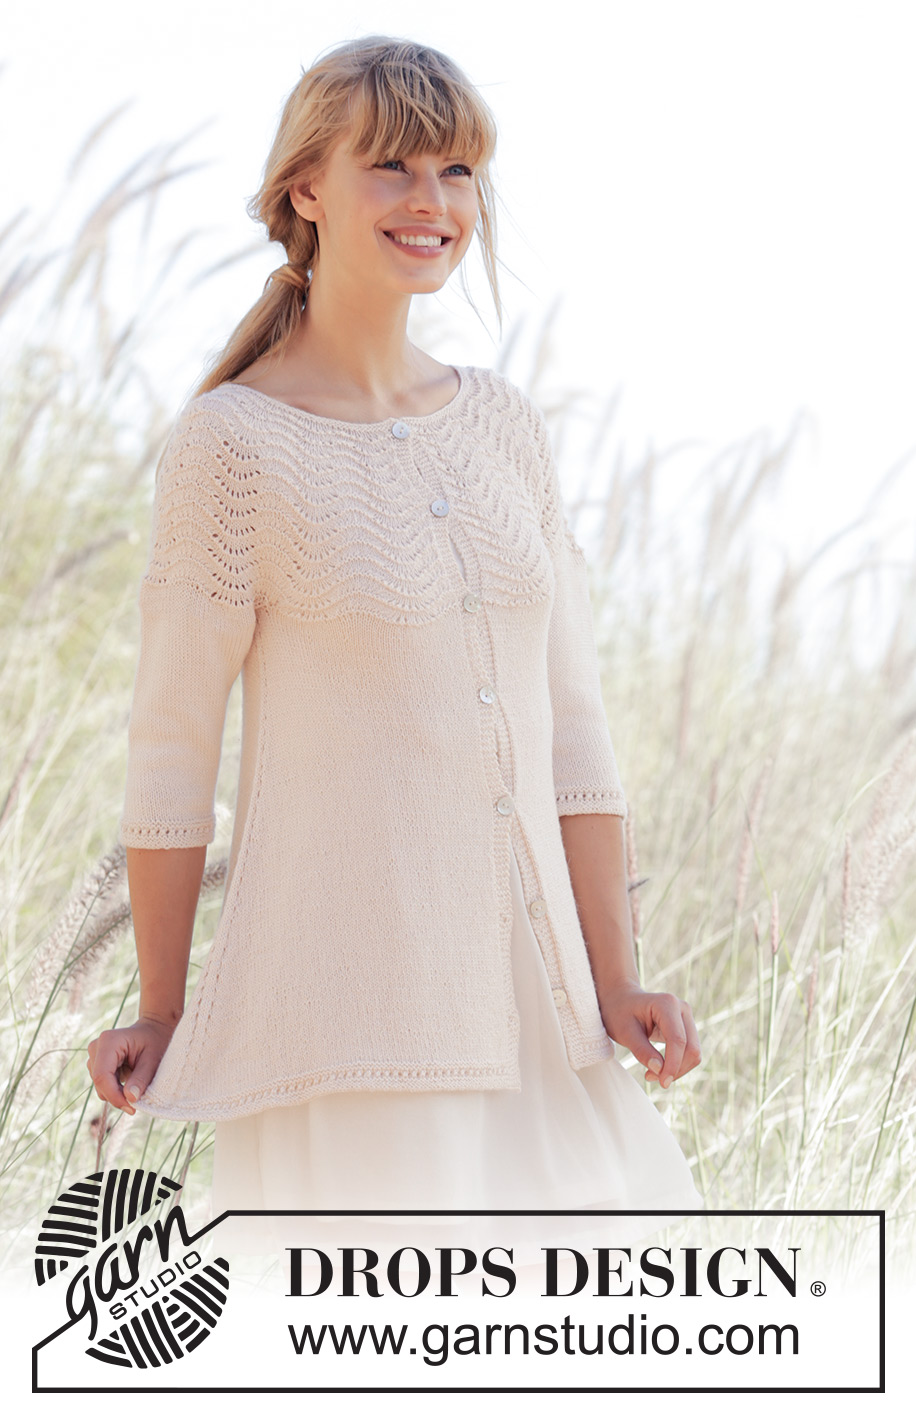
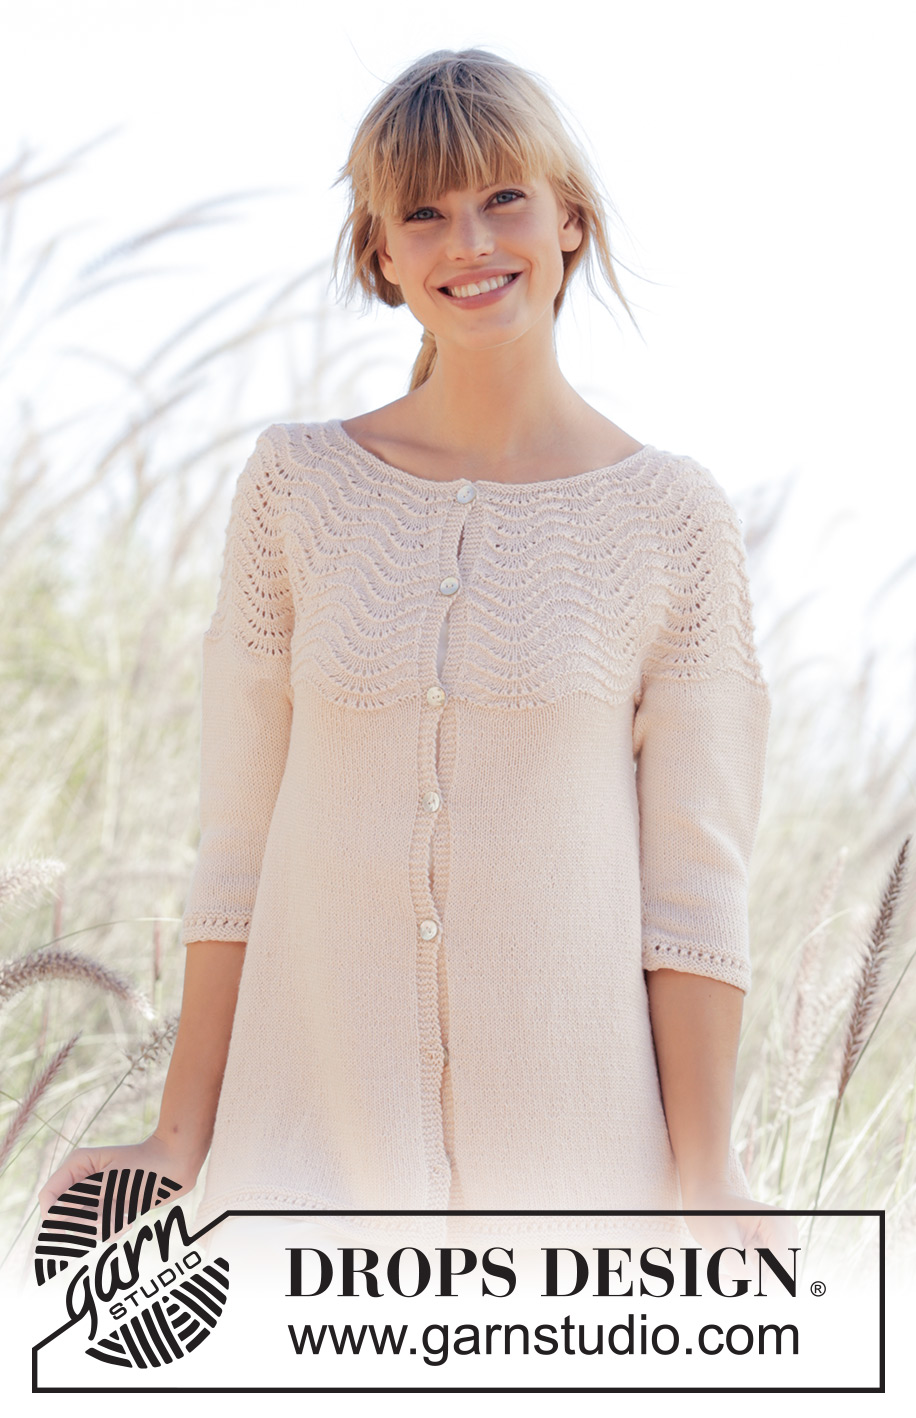
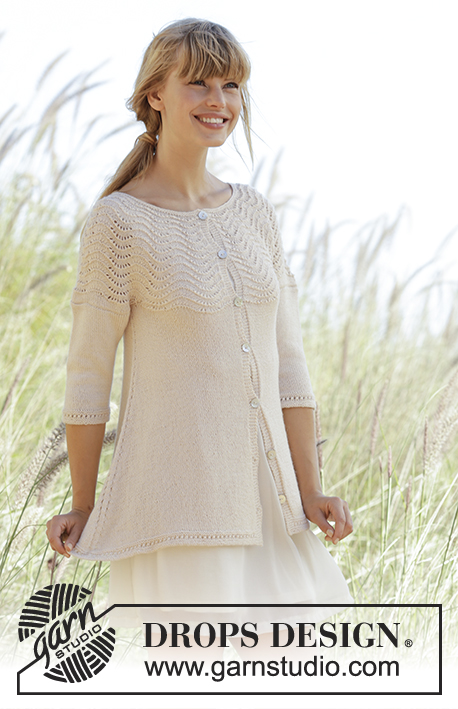
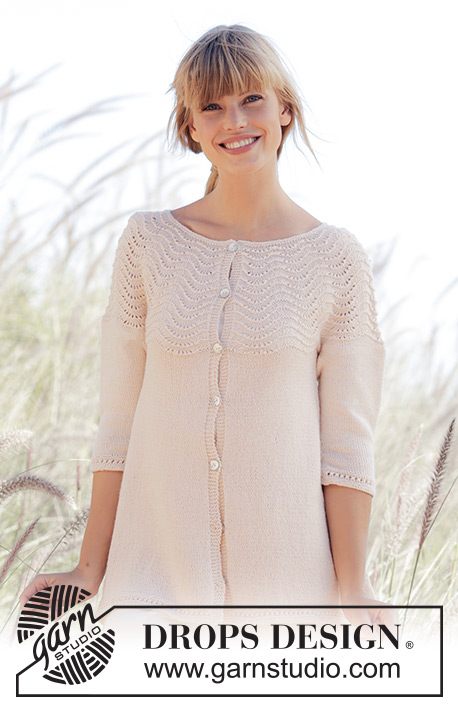
Dune Cardigan#dunecardigan |
|||||||||||||
 |
 |
||||||||||||
Knitted DROPS jacket with round yoke and wave pattern in ”BabyAlpaca Silk”. Worked top down. Size: S - XXXL.
DROPS 169-17 |
|||||||||||||
|
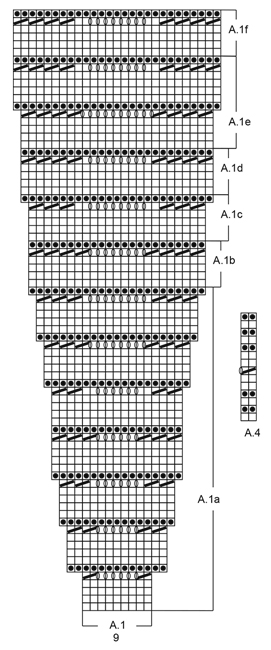
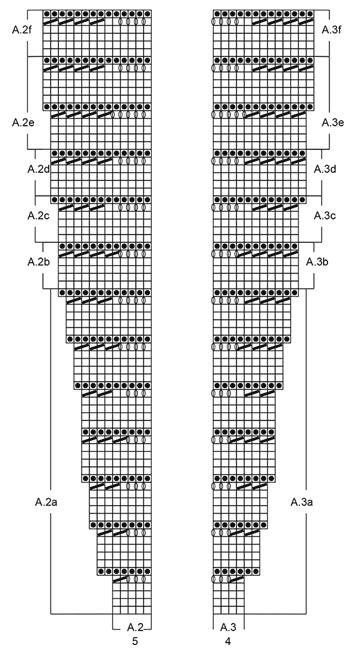
GARTER ST (back and forth): K all rows. 1 ridge = 2 rows K. PATTERN: See diagrams A.1 to A.4. The diagrams show the pattern seen from RS. PATTERN: When working A.1a to A.1f, A.2a to A.2f and A.3a to A.3f in height, work A.1a to A.1f over diagram A.1, A.2a to A.2f over diagram A.2 and A.3a to A.3f over diagram A.3. I.e. In size S and XL use only diagram A.1a to A.1f. INCREASE TIP-1: Inc 1 st by making 1 YO. On next row P YO twisted to avoid holes. INCREASE TIP-2: Always inc from RS. Work until 1 st remains before marker, 1 YO, K 3 (marker is in the middle of these sts), 1 YO (= 2 sts inc), work until 2 sts remain before next marker, 1 YO, K 3, 1 YO (= 4 sts inc in total on row). Do not work YOs twisted on next row, they should make holes. DECREASE TIP: Work until 3 sts remain before marker, K the next 2 sts tog, K 2 (marker is in the middle of these sts), slip 1 st as if to K, K 1, psso (= 2 sts dec). BUTTONHOLES: Dec for buttonholes on right band. 1 buttonhole = K tog third and fourth st from edge and make 1 YO. Dec for buttonholes when piece measures: SIZE S: 2, 10, 18, 26, 34, 42 and 50 cm SIZE M: 2, 11, 20, 29, 34, 43 and 52 cm SIZE L: 2, 10, 18, 26, 35, 44 and 53 cm SIZE XL: 2, 9, 16, 24, 32, 40, 48 and 56 cm SIZE XXL: 2, 10, 18, 26, 34, 42, 50 and 58 cm SIZE XXXL: 2, 10, 18, 26, 34, 43, 52 and 61 cm ---------------------------------------------------------- YOKE: Worked back and forth, top down. Cast on 136-140-148-148-158-166 sts (incl 5 band sts in each side of piece) on circular needle size 2.5 mm with BabyAlpaca Silk. Work 2 ridges in GARTER ST - see explanation above, AT THE SAME TIME inc 0-6-16-24-24-34 sts evenly on last row from RS - READ INCREASE TIP-1 = 136-146-164-172-182-200 sts. Switch to circular needle size 3 mm. Work as follows from RS: 5 band sts in garter st, A.2 (= 5 sts) over the next 0-5-5-0-5-5 sts (= 0-1-1-0-1-1 time in total), repeat A.1 (= 9 sts) over the next 126-126-144-162-162-180 sts (= 14-14-16-18-18-20 times in width), A.3 (= 4 sts) over the next 0-4-4-0-4-4 sts (= 0-1-1-0-1-1 time in total), work 0-1-1-0-1-1 sts as first st in diagram A.2, finish with 5 band sts in garter st. Work band in garter st until finished measurements. Remember BUTTONHOLES - see explanation above. REMEMBER THE KNITTING TENSION When A.1a has been worked 1 time vertically, there are 332-356-402-424-448-494 sts on needle. Then work pattern vertically - READ PATTERN as follows: Repeat A.1b to A.3b 1-1-1-1-2-2 times in total, then repeat A.1c to A.3c 1 time in total, repeat A.1d to A.3d 1-1-1-2-2-2 times in total, repeat A.1e to A.3e 1 time in total, repeat A.1f to A.3f 0-0-1-1-1-2 times in total = 388-416-470-496-524-578 sts on needle. Piece measures approx. 18-18-20-21-23-24 cm vertically. Then work as follows on next row from RS: Work 5 band sts in garter st, stocking st over the next 51-57-67-71-76-86 sts AT THE SAME TIME dec 7-7-10-10-9-12 sts evenly (= left front piece), slip the next 87-89-96-101-104-111 sts on a stitch holder (= sleeve), cast on 10 sts under sleeve, insert 1 marker in the middle of the new sts, stocking st over the next 102-113-133-142-153-173 sts AT THE SAME TIME dec 14-13-19-20-19-25 sts evenly (= back piece), slip the next 87-89-96-101-104-111 sts on a stitch holder (= sleeve), cast on 10 sts under sleeve, insert 1 marker in the middle of the new sts, stocking st over the next 51-58-68-71-77-87 sts AT THE SAME TIME dec 7-8-11-10-10-13 sts evenly, finish with 5 band sts in garter st (= right front piece) = 206-230-258-274-298-326 sts (= 98-110-124-132-144-158 sts between markers on back piece). BODY: Insert 1 marker in piece, NOW MEASURE PIECE FROM HERE. Work in stocking st. When 3 row in stocking st have been worked, inc 1 st on each side of each marker - READ INCREASE TIP-2. Repeat inc every 4th row until piece measures 37-39-39-40-40-41 cm from marker = approx. 322-355-383-402-427-459 sts in total (= approx. 156-172-186-196-208-224 sts on back piece), adjust so that next row is from RS. Switch to circular needle size 2.5 mm. Work 5 band sts in garter st, repeat A.4 until 5 sts remain, finish with 5 band sts in garter st. Cast off. Piece measures approx. 58-60-62-64-66-68 cm in total. SLEEVE: Worked in the round on double pointed needles. Slip the 87-89-96-101-104-111 sts from stitch holder in one side of piece back on double pointed needles size 3 mm and cast in addition on 10 new sts mid under sleeve = 97-99-106-111-114-121 sts. Insert 1 marker in the middle of the new sts. Work stocking st and on first round dec 15-13-14-15-14-15 sts evenly = 82-86-92-96-100-106 sts. When piece measures 3 cm, dec 1 st on each side of marker - READ DECREASE TIP, repeat dec every 1½ cm 10-11-13-12-12-12 more times = 60-62-64-70-74-80 sts. When piece measures 26-26-25-25-24-23 cm (NOTE: Shorter measurements in the larger sizes because of longer yoke) switch to double pointed needles size 2.5 mm. Work A.4 over all sts. Cast off. Piece measures 29-29-28-28-27-26 cm in total. Work the other sleeve the same way. ASSEMBLY: Sew the opening under the sleeves. Sew the buttons on to left front piece. |
|||||||||||||
Diagram explanations |
|||||||||||||
|
|||||||||||||
 |
|||||||||||||
 |
|||||||||||||
 |
|||||||||||||
Have you finished this pattern?Tag your pictures with #dropspattern #dunecardigan or submit them to the #dropsfan gallery. Do you need help with this pattern?You'll find 24 tutorial videos, a Comments/Questions area and more by visiting the pattern on garnstudio.com. © 1982-2026 DROPS Design A/S. We reserve all rights. This document, including all its sub-sections, has copyrights. Read more about what you can do with our patterns at the bottom of each pattern on our site. |
|||||||||||||


With over 40 years in knitting and crochet design, DROPS Design offers one of the most extensive collections of free patterns on the internet - translated to 17 languages. As of today we count 324 catalogues and 12290 patterns translated into English (UK/cm). 12290
We work hard to bring you the best knitting and crochet have to offer, inspiration and advice as well as great quality yarns at incredible prices! Would you like to use our patterns for other than personal use? You can read what you are allowed to do in the Copyright text at the bottom of all our patterns. Happy crafting!
Post a comment to pattern DROPS 169-17
We would love to hear what you have to say about this pattern!
If you want to leave a question, please make sure you select the correct category in the form below, to speed up the answering process. Required fields are marked *.