
Popular categories
Looking for a yarn?






























Comments / Questions (10)
 Carine wrote:
Hallo, ik zou graag deze trui willen breien de Snow Funfetti Sweater voor mijn kleindochtertje, ik kan breien maar geen grote ervaren breidster, ik heb nooit met rondbreinaalden gebreid alleen eens een kraag, gaat dit lukken voor mij of is dit niveau al iets te hoog Alvast bedankt
02.11.2026 - 17:42DROPS Design answered:
Dag Carine,
Als je geduld hebt dan zou het moeten lukken. Het kan wel heel erg wennen zijn om met rondbreinaalden te breien, dus daar kan wel wat doorzettingsvermogen voor nodig zijn. Als je er eenmaal aan gewend bent is het heel handig omdat je het werk niet in elkaar hoeft te naaien. Bekijk eventueel de lessen en video's goed en lees het patroon goed door van te voren. Maak een proeflapje en zorg dat de stekenverhouding klopt. Mocht je vragen hebben, dan kun je altijd een bericht bij het patroon posten.
04.11.2026 - 17:59
 Judesbois wrote:
Bonjour, J'aimerais avoir une précision : Une fois les augmentations terminées nous devons tricoter jusqu'à atteindre 15cm. Est ce 15cm incluant le col ou non ? J'ai du mal à comprendre le patron , l'empiècement doit mesurer 18 cm avec le col ou 15 sans le col ? Merci
09.10.2026 - 06:45DROPS Design answered:
Bonjour Mme Judesbois, vous devez mesurer les 15 cm (2ème et 3ème taille) à partir du marqueur que vous avez mis au milieu du devant, juste après les côtes du col, autrement dit, les 15 cm sont sans le col. Les 3 cm à droite dans le schéma correspondent à la hauteur de l'épaule quand on plie l'ouvrage en double, ainsi 3 cm d'épaule + 15 cm d'empiècement (sans le col) = 18 cm de l'épaule jusqu'en bas de l'emmanchure. Bon tricot!
09.10.2026 - 15:52
 Ann-Britt wrote:
Jag förstår inte hur jag ska lägga upp maskorna efter halsen alltså efter resåren. Hur placerar jag markören
29.09.2026 - 12:03DROPS Design answered:
Hej Ann-Britt, den første markør du sætter, skal være midt foran til at måle fra. Omgangen starter ved raglanovergang 1 som er bagpå lige før højre ærme, her sætter du raglan-markør 1 og så fortsætter du at sætte de andre ifølge opskriften :)
01.10.2026 - 09:50
 Lene wrote:
Der er en fejl i inddeling til raglan i størrelse 5/6 år inddeling 15m 31 m 15 m 31 m =94 m og der er 96 m i halskanten.
25.09.2026 - 16:10DROPS Design answered:
Hei Lene. Nei, ingen feil. Du har glemt å telle maskene merkene sitter i. 1+15+1+31+1+15+1+31 =96 masker. Dessuten er 15m 31 m 15 m 31 m =92 m, ikke 94 m. Og legger du til de 4 maskene med merket blir det 92 + 4 = 96 masker. mvh DROPS Design
28.09.2026 - 14:23
Hanne wrote:
Model bm-045-bn Når arbejdet skal deles til ryg/forstykke og ærmer står der at det skal måle 15 cm fra mærket er det incl ribkant eller efter ribkant
14.09.2026 - 13:57DROPS Design answered:
Hei Hanne. Under HALSKANT står det: Sett 1 merke etter de første 31-32-33-34-35-36-37 maskene på omgangen (= ca midt foran), arbeidet skal måles fra dette merket. Og når det står slik: strik videre i glatstrik uden at tage ud, til arbejdet måler 14-15-15-16-17-18-19 cm fra mærket midt foran, altså det måles fra mærket midt foran, mvh DROPS Design
14.09.2026 - 15:04
 Jeanette wrote:
Dere skriver i FAQ at eet står oppgitt antall gram som trengs til hver oppskrift, men det jeg ser det ikke. Hvilke tall indikerer dette? Det er for kryptisk for meg.
11.09.2026 - 04:24DROPS Design answered:
Hei Jeanette, Under GARN på toppen av oppskriften, står antall gram for hver størrelse. Tallrekken begynner med den minste størrelsen og går til den største. Hilsen Drops Team.
11.09.2026 - 06:16
 Sigrid wrote:
Hallo! Is it possible to knit the neck as a rolled-neck-edge with same number of stitches? Thank you
05.09.2026 - 09:40
 Alicja wrote:
Gdzie najlepiej dodać oczka w dolnym ściągaczu przód/tył? Czy pomiędzy dwoma oczkami prawymi, tak żeby w następnym okrążeniu przerobić narzut na lewo?
04.09.2026 - 08:07DROPS Design answered:
Witaj Alicjo, gdy równomiernie dodajemy oczka w pierwszym okrążeniu ściągacza, należy je dodawać w miejscach, gdzie będą później przerabiane na lewo. Pozdrawiamy!
04.09.2026 - 10:03
Rechte Schulter?! wrote:
Hallo, ich habe die Anleitung auf deutsch gelesen. Dort stand, das der Rundenanfang an der rechten Schulter hinten ist. Von der Aufteilung der Raglanmaschen eine Zeile weiter unten geht aber hervor, dass der Rundenanfang wohl an der linken Schulter hinten ist? Sonst würde die Aufteilung Schulter - Vorn - Schulter - Hinten doch keinen Sinn machen. Das hat mir am anfang etwas Kopfzerbrechen bereitet…
26.08.2026 - 15:07DROPS Design answered:
Hallo, die Runden beginnen mit der rechten Schulter (von oben nach unten gestrickt), bei der Verteilung wird die 1. Masche der Masche gestrickt, da sie jetzt zum Rückenteil gehört, die Maschen vom rechten Ärmel legt man still, dann neuen Maschen anschlagen, Maschen vom Vorderteil stricken, die Maschen vom linken Ärmel legt man still, dann neuen Maschen anschlagen, dann strickt man die Maschen vom Rückenteil. Viel Spaß beim Stricken!
26.08.2026 - 16:53
 Pamela wrote:
This Snow Funfetti Sweater pattern, child age 3-4, has me casting on 92 stitches and after the ribbing it has me separating marker 1 -15, marker 2 -29, marker 3 - 15 s, marker 4 - 29 st for a total of 88 stitches, however I have 92 stitches for the ribbing. The markers show 88 stitches which is for a size 2 sweater. Can you clarify please. Fondly, Pam
22.08.2026 - 06:18DROPS Design answered:
Dear Pamela, note that the markers should be each inserted in one stitch (and not between stitches), so that you will have: 1+15+1+29+1+15+1+29=92. Happy knitting!
24.08.2026 - 08:00
|
|
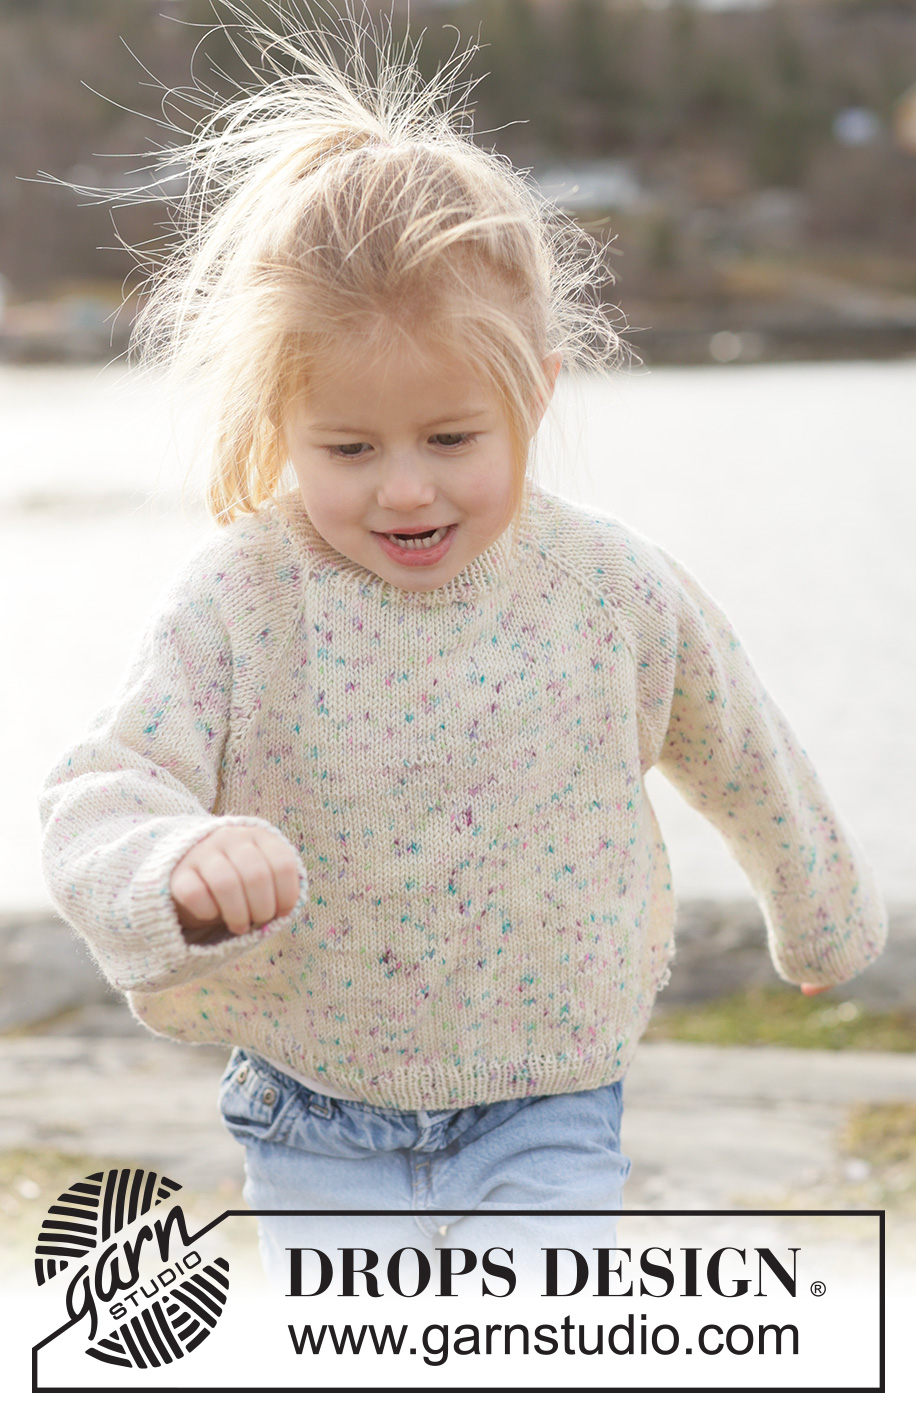
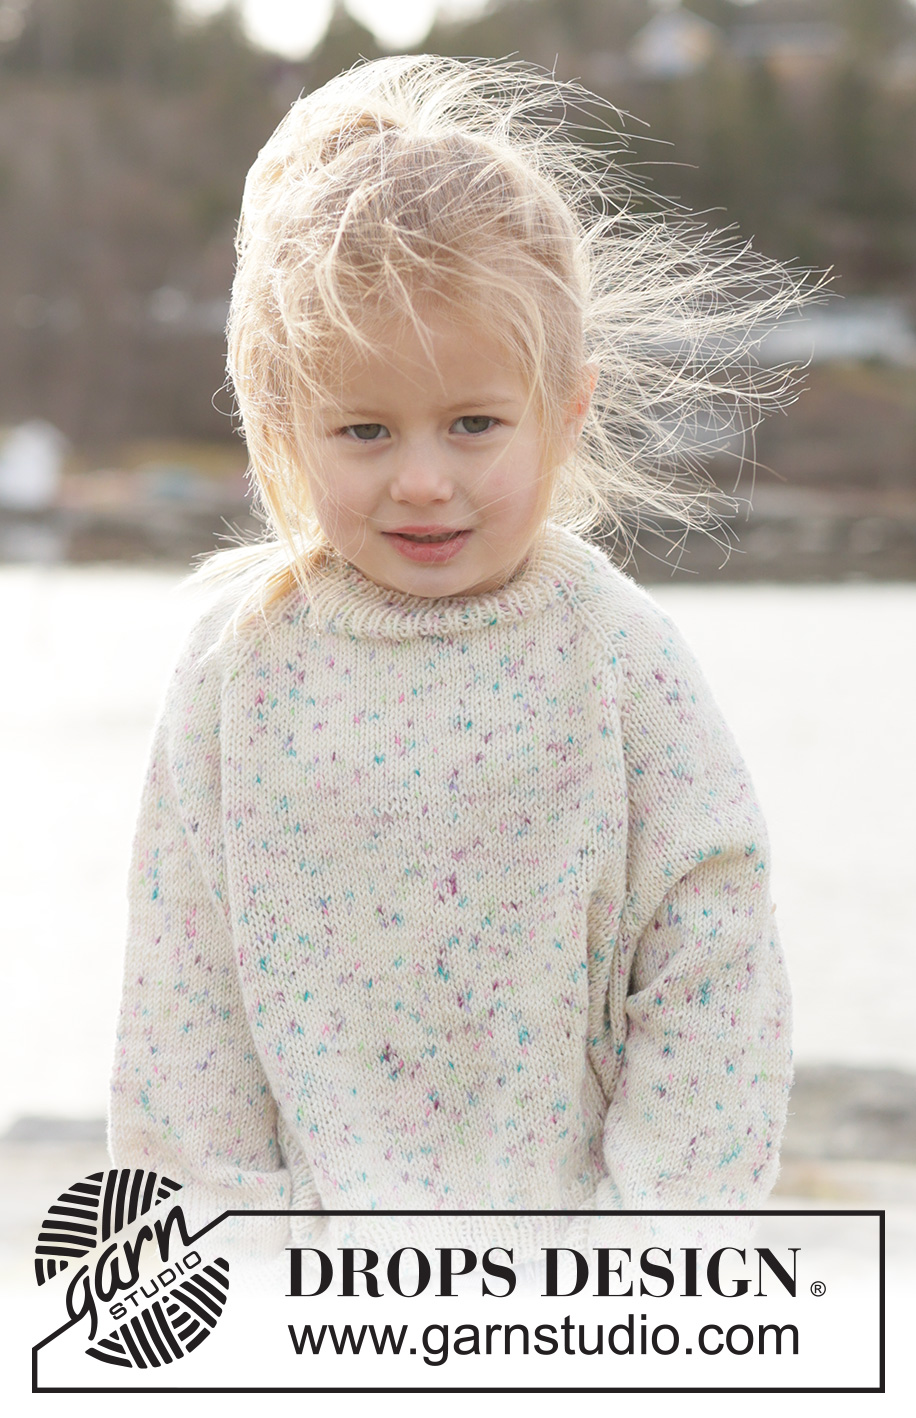
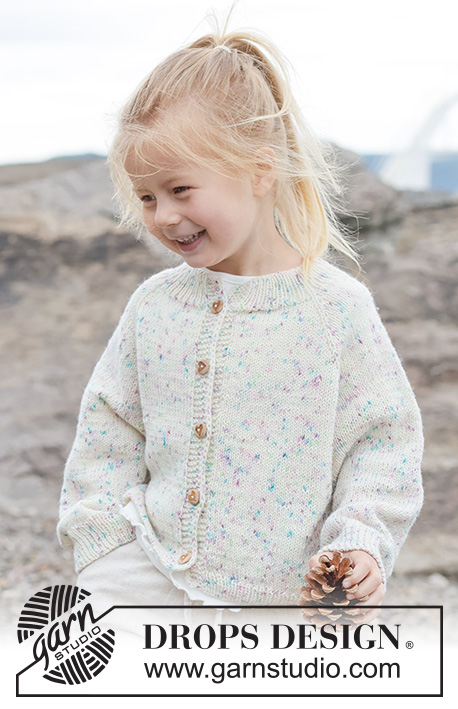
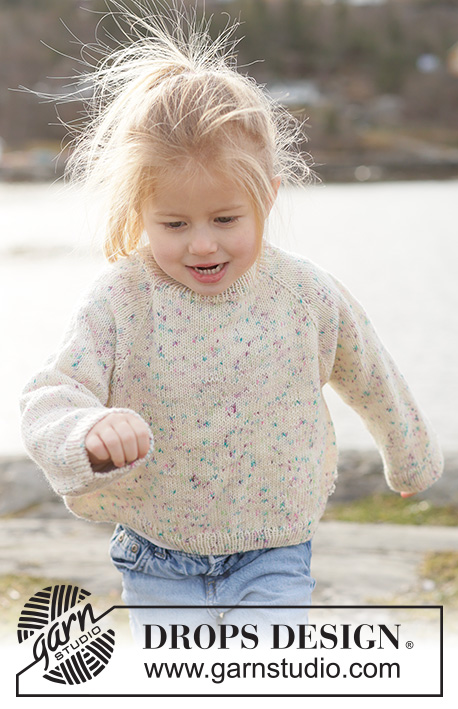
Snow Funfetti Sweater#snowfunfettisweater |
|
 |
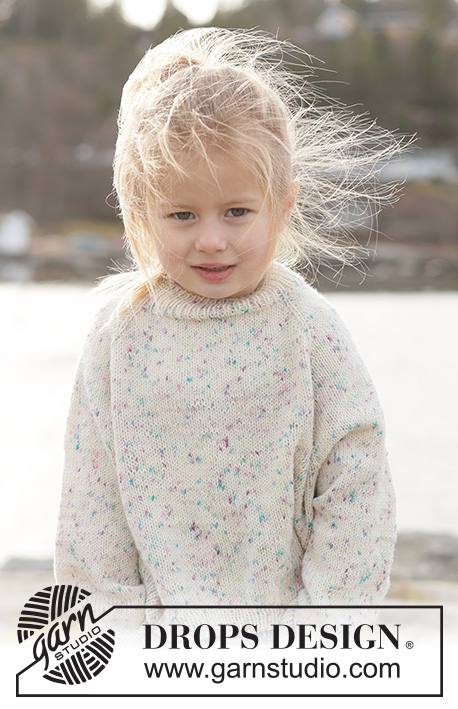 |
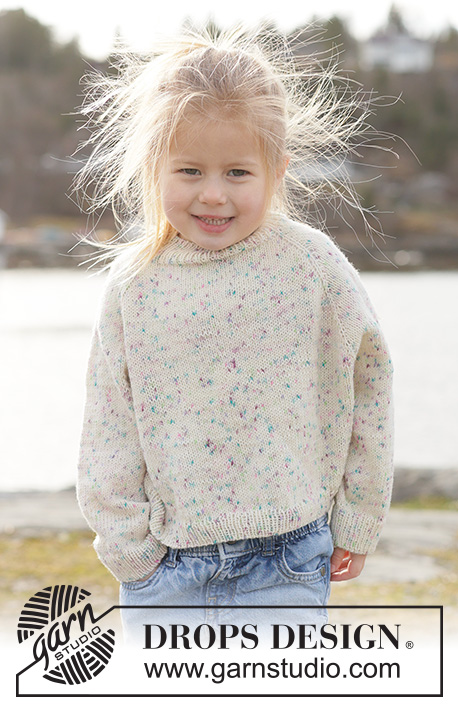
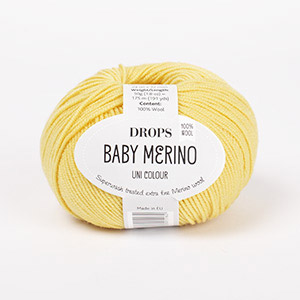
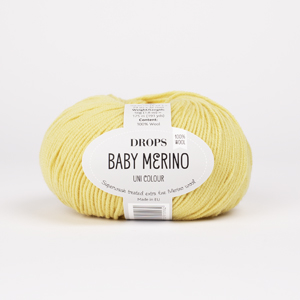
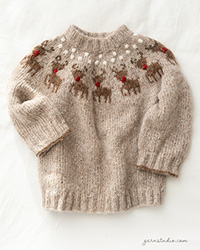
Knitted jumper for children in DROPS BabyMerino. The piece is worked top down in stocking stitch, with raglan. Sizes 2 - 14 years.
DROPS Children 50-29 |
|
|
------------------------------------------------------- EXPLANATIONS FOR THE PATTERN: ------------------------------------------------------- RAGLAN: Increase 1 stitch by making 1 yarn over, which is worked as follows on the next round: BEFORE MARKER-STITCH (yarn over twists to the right): Slip the yarn-over purl-wise from the left to the right needle, place it back onto the left needle by inserting the left needle through the back (the yarn over is now the other way round). Knit through the stitch loop that lies on the front of the needle (avoids a hole). AFTER MARKER-STITCH (yarn over twists to the left): Knit through the stitch loop that lies on the back of the needle (avoids a hole). INCREASE TIP: When increasing evenly on the first round of rib, it is important to increase in the stitches that will subsequently be purled, so the knitted stitches continue neatly from the stocking stitch. SLEEVE TIP: When knitting up stitches under the sleeve, you can get a small hole in the transition between stitches on the body and sleeve. This hole can be closed by picking up the strand between 2 stitches and working this strand twisted together with the first stitch between body and sleeve. DECREASE TIP: Decrease 1 stitch on each side of the marker-thread as follows: Work until there are 3 stitches left before the marker-thread, knit 2 together, knit 2 (marker-thread sits between these 2 stitches), slip 1 stitch knit-wise, knit 1 and pass the slipped stitch over the knitted stitch (2 stitches decreased). ------------------------------------------------------- START THE PIECE HERE: ------------------------------------------------------- JUMPER – SHORT OVERVIEW OF THE PIECE: The pattern uses both long and short needles; start with the length which fits the number of stitches and change when necessary. The neck and yoke are worked in the round with circular needle, top down and from the right back shoulder. When the yoke is finished, it is divided for the body and sleeves and the body is continued in the round, while the sleeves wait. The sleeves are worked top down, in the round. NECK: Cast on 88-92-96-100-104-108-112 stitches with circular needle size 2.5 mm and DROPS Baby Merino. Work rib in the round (knit 1 and purl 1) for 4-4-4-5-5-5-5 cm. The round begins on the right back shoulder. Insert 1 marker after the first 31-32-33-34-35-36-37 stitches (approx. mid-front). The piece is now measured from here. YOKE: Change to circular needle size 3 mm. Insert 4 markers as follows, without working the stitches and each marker inserted in a knitted stitch (raglan-stitch); you increase for raglan on each side of these raglan-stitches. Insert marker-1 in the first stitch, count 15 stitches (= sleeve), Insert marker-2 in the next stitch, count 27-29-31-33-35-37-39 stitches (= front piece), Insert marker-3 in the next stitch, count 15 stitches (= sleeve), Insert marker-4 in the next stitch. There are 27-29-31-33-35-37-39 stitches left after the last marker (= back piece). Now work stocking stitch in the round and increase for RAGLAN on each side of the raglan-stitches – read explanation above for how to increase and subsequently work the yarn overs: ROUND 1: Knit and increase for raglan on each side of the raglan-stitches (8 increased stitches). NOTE: At the beginning of the round, increase after marker-stitch-1, at the end of the round increase before marker-stitch-1. ROUND 2: Knit (remember to work the yarn overs as described under RAGLAN). Work ROUNDS 1 and 2, 17-19-21-22-23-24-24 times (34-38-42-44-46-48-48 rounds worked) = 224-244-264-276-288-300-304 stitches. Remember to maintain the knitting tension. Now only increase on the front and back pieces as follows: ROUND 1: Knit and increase for raglan after markers 2 and 4 and before markers 3 and 1; do not increase on the sleeves (4 increased stitches). ROUND 2: Knit (remember to work the yarn overs as described under RAGLAN). Work ROUNDS 1 and 2, 6-6-5-6-6-6-7 times (12-12-10-12-12-12-14 rounds worked) = 248-268-284-300-312-324-332 stitches. The increases for raglan are finished. A total of 23-25-26-28-29-30-31 increases in height on the front and back pieces and 17-19-21-22-23-24-24 increases in height on the sleeves. Continue stocking stitch (without further increases) until the yoke measures 14-15-15-16-17-18-19 cm from the marker mid-front. Now divide for the body and sleeves. DIVIDE FOR BODY AND SLEEVES: Knit the first stitch (belongs to the back piece), place the next 49-53-57-59-61-63-63 stitches on a thread/stitch holder for the sleeve, cast on 8-8-8-8-10-10-12 stitches (mid-under the sleeve), knit 75-81-85-91-95-99-103 (= front piece), place the next 49-53-57-59-61-63-63 stitches on a thread/stitch holder for the sleeve, cast on 8-8-8-8-10-10-12 stitches (mid-under the sleeve), knit the last 74-80-84-90-94-98-102 stitches (= back piece). The body and sleeves are finished separately. BODY: = 166-178-186-198-210-218-230 stitches. Insert 1 marker in the middle of the 8-8-8-8-10-10-12 cast-on stitches under 1 sleeve. Work to the marker. The round now begins here. Work stocking stitch in the round until the piece measures 26-28-30-32-33-35-41 cm from the marker mid-front. Change to circular needle size 2.5 mm. Work rib (knit 1 and purl 1), AT THE SAME TIME increase 38-40-44-44-46-50-52 stitches evenly on the first round - read INCREASE TIP = 204-218-230-242-256-268-282 stitches. When the rib measures 3-3-3-3-4-4-4 cm, cast off with rib. The jumper measures approx. 29-31-33-35-37-39-45 cm from the marker mid-front and 32-34-36-38-40-42-48 cm from the shoulder. SLEEVES: Place the 49-53-57-59-61-63-63 sleeve-stitches from one thread/stitch holder onto circular needle size 3 mm and knit up 1 stitch in each of the 8-8-8-8-10-10-12 cast-on stitches under the sleeve – read SLEEVE TIP = 57-61-65-67-71-73-75 stitches. Insert a marker-thread in the middle of the 8-8-8-8-10-10-12 new stitches under the sleeve. The round starts by the marker-thread. Work stocking stitch in the round. AT THE SAME TIME, when the sleeve measures 1 cm from the division, decrease mid-under the sleeve – read DECREASE TIP as follows: Decrease 2 stitches every 4-4-5-5-5½-6-8 cm a total of 4-5-5-5-6-6-5 times = 49-51-55-57-59-61-65 stitches. Continue working until the sleeve measures 18-23-27-31-33-37-41 cm from the division. Change to double pointed needles size 2.5 mm. Work rib (knit 1 and purl 1), AT THE SAME TIME increase 11-11-11-13-15-15-15 stitches evenly on the first round – remember INCREASE TIP = 60-62-66-70-74-76-80 stitches. When the rib measures 3-3-3-3-4-4-4 cm, cast off with rib. The sleeve measures approx. 21-26-30-34-37-41-45 cm from the division. |
|
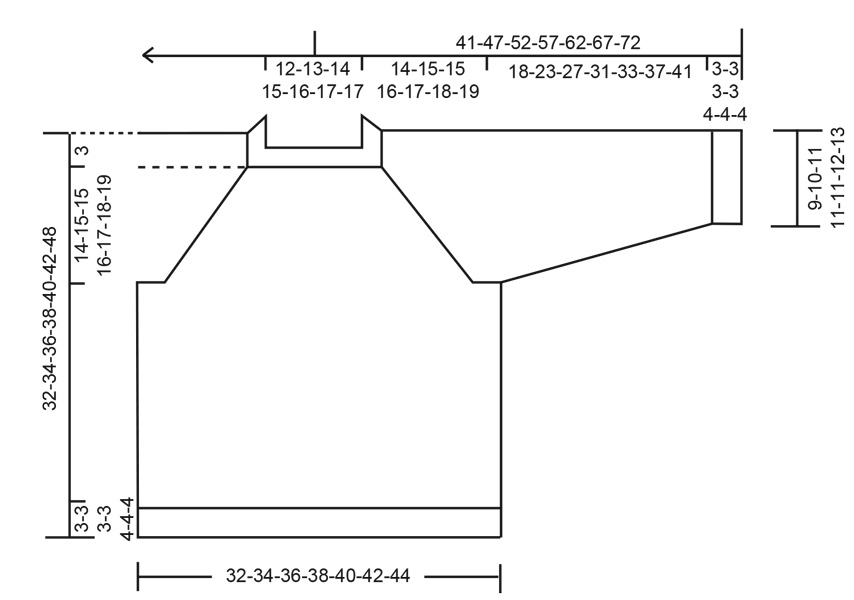 |
|
Have you finished this pattern?Tag your pictures with #dropspattern #snowfunfettisweater or submit them to the #dropsfan gallery. Do you need help with this pattern?You'll find 17 tutorial videos, a Comments/Questions area and more by visiting the pattern on garnstudio.com. © 1982-2026 DROPS Design A/S. We reserve all rights. This document, including all its sub-sections, has copyrights. Read more about what you can do with our patterns at the bottom of each pattern on our site. |
|




With over 40 years in knitting and crochet design, DROPS Design offers one of the most extensive collections of free patterns on the internet - translated to 17 languages. As of today we count 333 catalogues and 12536 patterns translated into English (UK/cm). 12536
We work hard to bring you the best knitting and crochet have to offer, inspiration and advice as well as great quality yarns at incredible prices! Would you like to use our patterns for other than personal use? You can read what you are allowed to do in the Copyright text at the bottom of all our patterns. Happy crafting!
Post a comment to pattern DROPS Children 50-29
We would love to hear what you have to say about this pattern!
If you want to leave a question, please make sure you select the correct category in the form below, to speed up the answering process. Required fields are marked *.