
Popular categories
Looking for a yarn?


Comments / Questions (22)
![]() Kelly wrote:
Kelly wrote:
Ik begrijp niet hoe je de mouwkop breit
13.03.2026 - 11:23DROPS Design answered:
Dag Kelly,
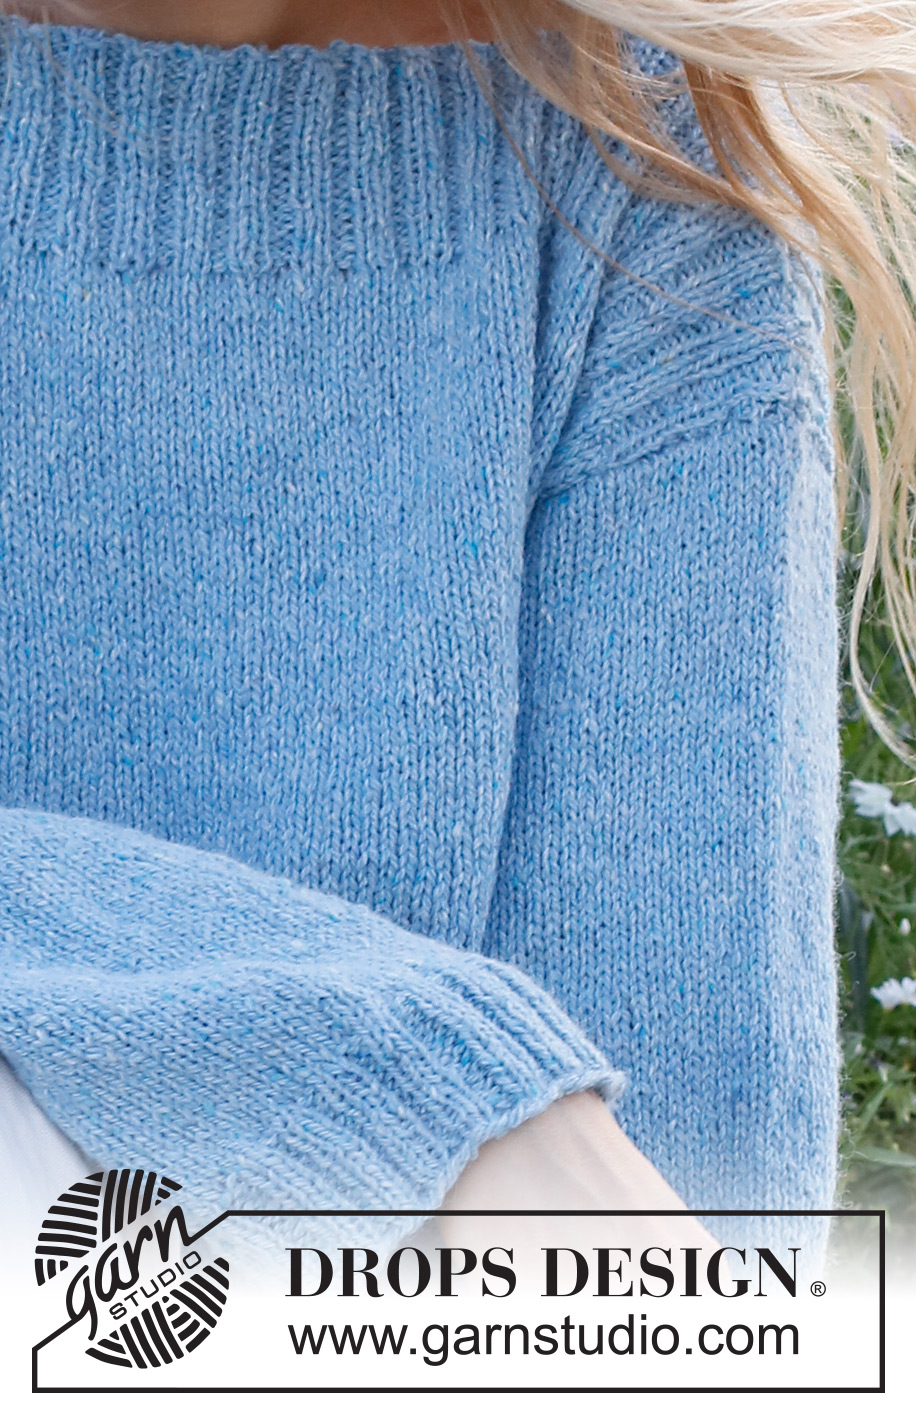
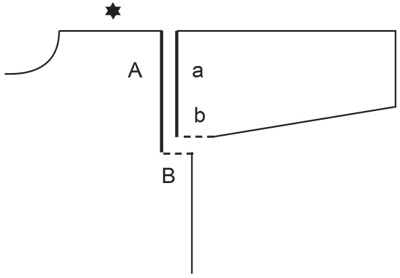
Het bovenste stukje van de mouw brei je heen en weer, zodat het laatste stukje van de onderkant van de mouw niet tegen elkaar komt, maar er komt dan een split. In de onderste tekening is te zien hoe de mouw vervolgens tegen het pand wordt genaaid (a tegen A en b tegen B).
15.03.2026 - 09:50
![]() Corrie wrote:
Corrie wrote:
Kun je de mouw ook direct aan de trui breien?
14.01.2026 - 19:46DROPS Design answered:
Dag Corrie,
Ja, dat zou kunnen, alleen staat de mouw van onder naar boven beschreven. Dus je zou alles dan andersom moeten doen.
15.01.2026 - 20:03
![]() Corrie wrote:
Corrie wrote:
Op welke wijze zet ik de schouders aan elkaar: met de matrassteek of de stiksteek? Of is er nog een andere manier?
13.01.2026 - 16:25DROPS Design answered:
Dag Corrie,
Deze kun je met onzichtbare maassteken in elkaar zetten.
14.01.2026 - 19:16
![]() Lena wrote:
Lena wrote:
I mönstret står flera gånger "När arbetet mäter..." Varifrån mäter man? Från upplägget, dvs hela stickningen? Eller bara den del man just stickat, t ex framstycket.
08.01.2026 - 09:32DROPS Design answered:
Hej Lena. Ja om inget annat uppges så menas det från upplägget. Mvh DROPS Design
08.01.2026 - 13:24
![]() Ann-Charlotte wrote:
Ann-Charlotte wrote:
Det gäller modell Blue Shore 230-52. Den "operation" som är i början av "framstycke" (sätta de mittersta maskorna på tråd för halsringning + minska och sen öka lika många??) verkar helt meningslös och jag har ju inte ens börjat med resårstickningen än. Det ser ju inte ut att vara någon särskild halsringning överhuvudtaget. Mvh Ann-Charlotte
04.01.2026 - 09:42DROPS Design answered:
Hei Ann-Charlotte. Er gjort for å få en liten "høyde forskjell" (se målskissen). Ønsker du det ikke, kan du tilpasse arbeidet og kutte det ut. mvh DROPS Design
23.01.2026 - 14:21
![]() Judy wrote:
Judy wrote:
The instructions for the front piece (& laterthe back) are to purl the 1st 2 stitches together on the 2nd row of the left side (after slipping the middle stitches on to a stitch holder for the neck) and then to purl the last 2 stitches together on the 2nd row of the right side. However after slipping all the stitches back on the needle we are told to pick up 2 stitches on each side. Can we ignore the purl together instructions and only pick up one stitch on each side? Hope this makes sense!
10.11.2025 - 20:32
![]() Marie Christine Riant wrote:
Marie Christine Riant wrote:
Bonjour Pouvez vous me donner les explications avec eguilles à tricoter droite merci
24.02.2025 - 08:56
![]() Christine wrote:
Christine wrote:
Je n'arrive à comprendre la façon de faire l'encolure avant les côtes 2/2 . Merci de me répondre.
24.10.2024 - 18:17DROPS Design answered:
Bonjour Christine, pour former l'encolure bateau, vous tricotez d'abord les 22-41 (cf taille) premières m sur l'end, tournez, diminuez 1 m et terminez le rang, mettez ces m en attente et tricotez les 22-41 dernières m sur l'end de la même façon (en commençant sur l'end puis en diminuant cette fois à la fin du rang sur l'env). Tricotez ensuite sur l'endroit: les 20-40 premières m, relevez 2 m entre ces mailles et les m centrales non tricotées, tricotez les m centrales, relevez 2 m entre ces mailles et celles de l'autre épaule et tricotez les 21-40 dernières m. Augmentez au rang suivant sur l'env et tricotez en côtes 2/2 à partir du rang suivant sur l'endroit. Bon tricot!
25.10.2024 - 07:45
![]() Greanecia Jyrwa wrote:
Greanecia Jyrwa wrote:
The pattern mentions working the sleeve cap back and forth on a circular needle.. does that mean i have to knit short rows for the sleeve cap at 1cm?
02.06.2024 - 21:22DROPS Design answered:
Dear Greanecia, simply work back and forth for 1cm, no need to make short rows; you just need to make sure there will be a 1cm vent left under the sleeve. This will later help you shape the top of the sleeve when assembling the piece. Happy knitting!
03.06.2024 - 00:46
![]() Kath wrote:
Kath wrote:
What does this mean? "Sew sleeve cap to armhole. Then sew vent at the top of sleeve to bottom of armhole - see chart." The chart does not explain how to "sew a vent". Please provide an explanation or a link to a demonstration.
19.02.2024 - 19:35DROPS Design answered:
Hi Kath, The sleeve cap is sewn to the main body of the armhole, leaving a gap at the bottom. This is the "vent", which is then sewn together. The sketch showing how this is done is at the bottom of the pattern, under the size chart. Here is a link to a video on how to sew the sleeve to the armhole : https://www.garnstudio.com/video.php?id=1685&lang=en Happy knitting!
20.02.2024 - 07:06
|
||||
Blue Shore#blueshoresweater |
||||
 |
 |
|||
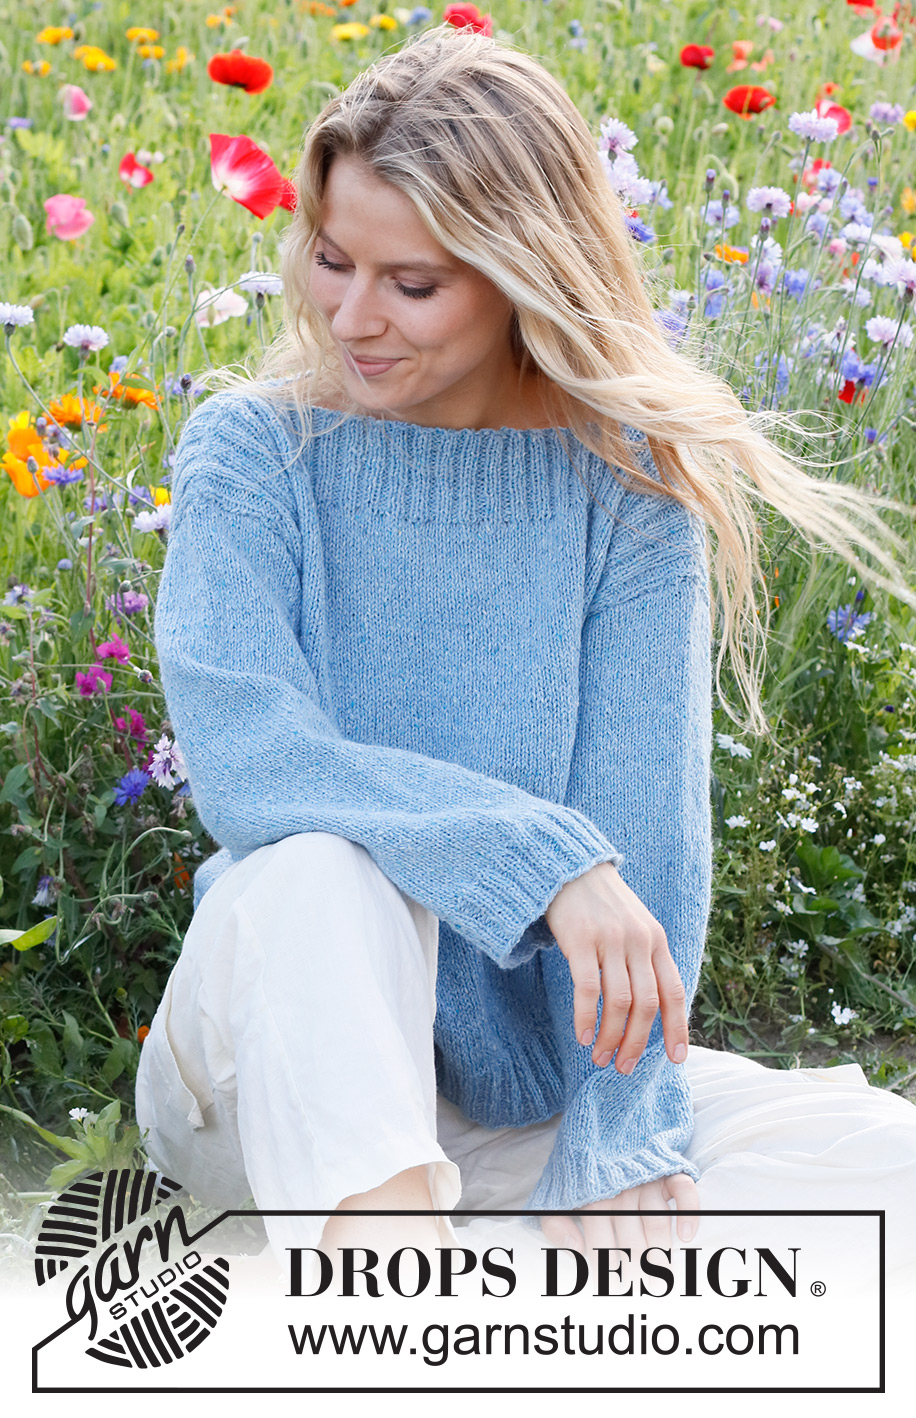
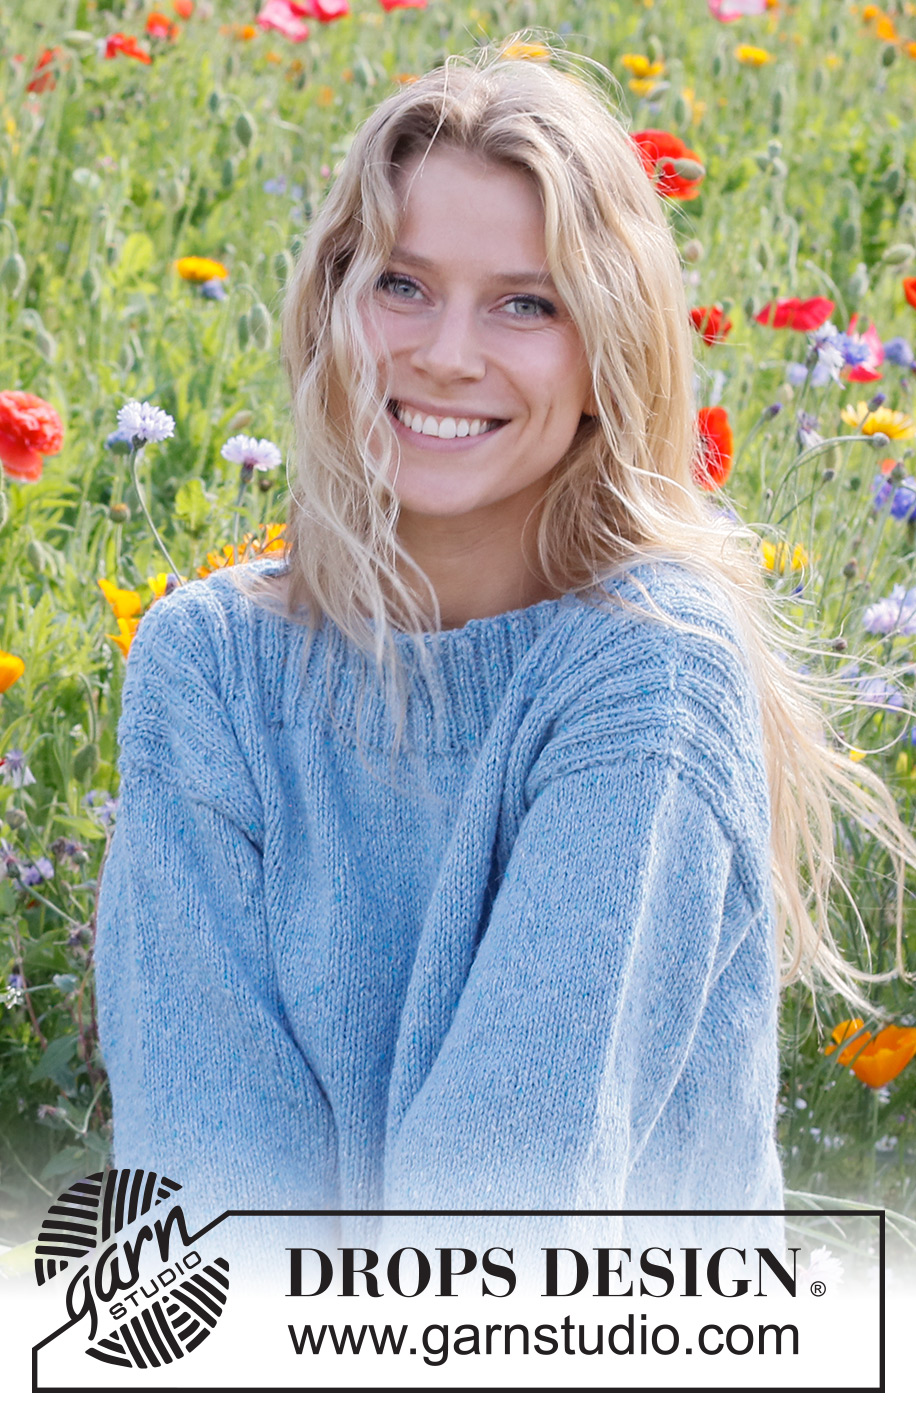
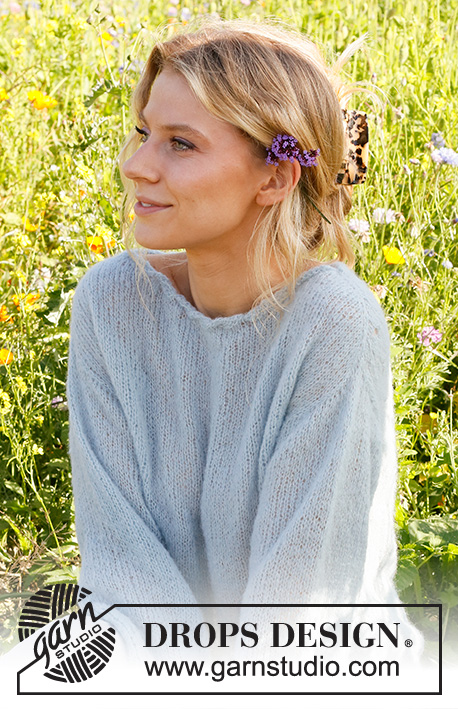
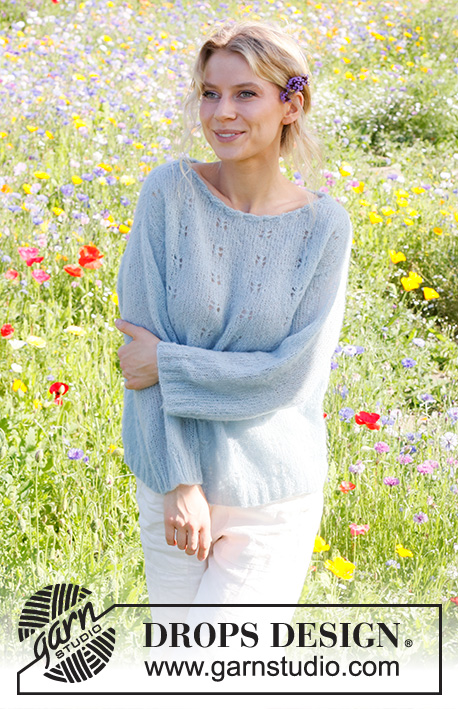
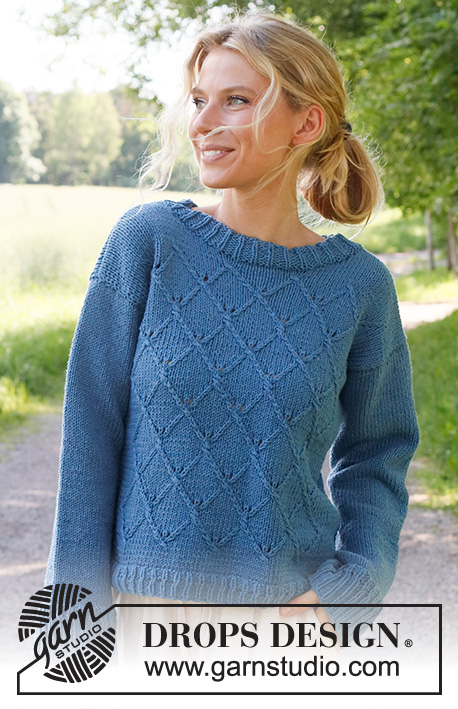
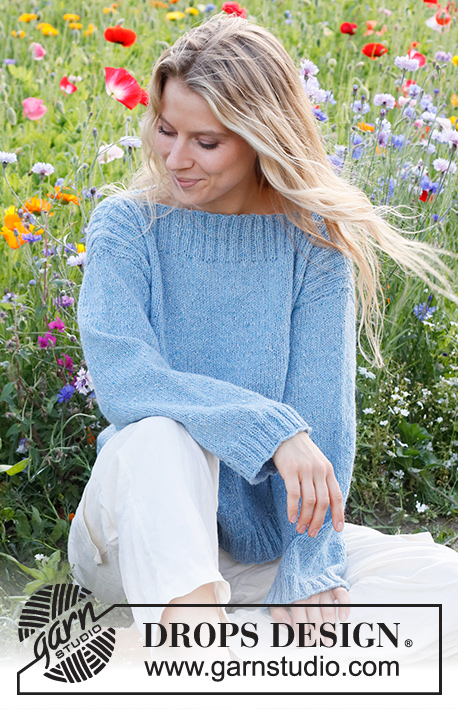
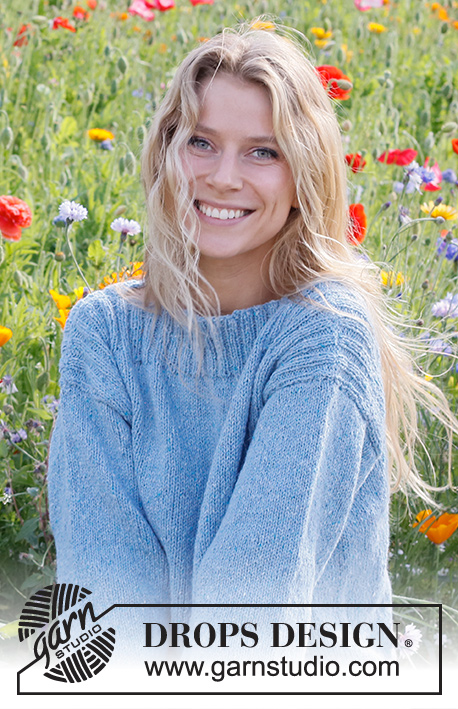
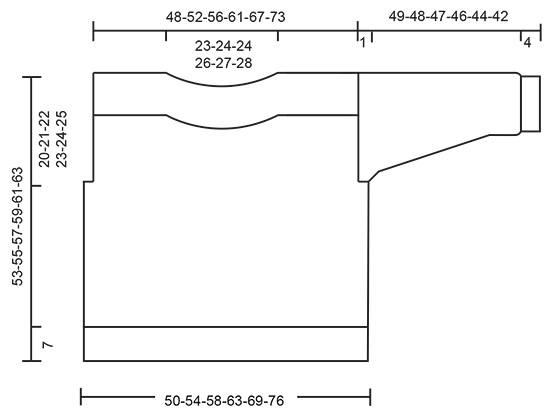
Knitted jumper in DROPS Soft Tweed. Piece is knitted bottom up with stocking stitch and rib. Size: S - XXXL
DROPS 230-52 |
||||
|
---------------------------------------------------------- EXPLANATION FOR THE PATTERN: ---------------------------------------------------------- INCREASE TIP: Increase as follows mid under sleeve - beg 1 stitch before marker: Make 1 yarn-over, knit 2 (marker is between these 2 stitches), 1 yarn over. On next round knit yarn overs twisted to avoid holes. ---------------------------------------------------------- START THE PIECE HERE: ---------------------------------------------------------- JUMPER: Worked in the round on circular needle up to armhole, then work front and back piece back and forth separately. Work sleeves in the round on double pointed needles/circular needle. BODY: Cast on 200-216-228-248-272-300 stitches on circular needle size 4.5 mm with DROPS Soft Tweed. Knit 1 round, then work rib = knit 2/purl 2. Work rib for 7 cm. Switch to circular needle size 5.5 mm, knit 1 round while decreasing 20-20-20-20-24-28 stitches evenly = 180-196-208-228-248-272 stitches. Insert 1 marker thread at beginning of round, use it when dividing piece for front and back piece. Continue in stocking stitch. When piece measures 33-34-35-36-37-38 cm, work next round as follows – begin 2 stitches before marker at the beginning of round, cast off 4 stitches, work the next 86-94-100-110-120-132 stitches, cast off the next 4 stitches, work the last 86-94-100-110-120-132 stitches. Now finish each part separately. FRONT PIECE: = 86-94-100-110-120-132 stitches. Continue in stocking stitch. When piece measures 44-46-47-49-50-51 cm, slip the middle 42-44-44-46-48-50 stitches on a stitch holder for neck. Knit 1 row from right side over the first 22-25-28-32-36-41 stitches (until stitch holder), turn, purl the first 2 stitches together and purl the rest of row. Slip stitches on a stitch holder. Knit 1 row from right side over the last 22-25-28-32-36-41 stitches on row, turn and purl 1 row from wrong side, at the end of row purl the last 2 stitches together. Slip all stitches back on needle, and knit 1 row from right side and pick up 2 stitches in each side (between stitches for neck and stitches for shoulder) towards the neck = 88-96-102-112-122-134 stitches. Purl 1 row from wrong side while increasing 10-10-12-14-12-12 stitches evenly = 98-106-114-126-134-146 stitches. Switch to circular needle size 4.5 mm and work as follows - from right side: Knit 2, * purl 2, knit 2 *, work from *-* the entire row. Work rib like this for 7-7-8-8-9-9 cm. Cast off. Piece measures 53-55-57-59-61-63 cm. BACK PIECE: Cast on and work as front piece. SLEEVE: Worked in the round on double pointed needles. Switch to a short circular needle when increasing. Cast on 60-60-64-64-68-68 stitches on double pointed needles size 4.5 mm with DROPS Soft Tweed. Knit 1 round, then work rib (knit 2/purl 2). Work rib for 4 cm. Switch to double pointed needles size 5.5 mm, knit 1 round while decreasing 4 stitches evenly = 56-56-60-60-64-64 stitches. Insert 1 marker thread at beginning of round = mid under sleeve. Work in stocking stitch, when piece measures 7 cm, increase 1 stitch on each side of marker thread– read INCREASE TIP. Increase on every 8-5½-5-4-4-3 cm 6-8-8-10-9-11 times in total = 68-72-76-80-82-86 stitches. When sleeve measures 48-47-46-45-43-41 cm, work sleeve cap back and forth on circular needle until finished measurements. Work until sleeve measures approx. 49-48-47-46-44-42 cm, i.e. there is a vent of 1 cm at the top of sleeve. Cast off. Work the other sleeve the same way. ASSEMBLY: Sew shoulder seams, leave approx. 23-24-25-26-27-28 cm for neck. Sew sleeve cap to armhole. Then sew vent at the top of sleeve to bottom of armhole - see chart. |
||||
Diagram explanations |
||||
|
||||
 |
||||
 |
||||
Have you finished this pattern?Tag your pictures with #dropspattern #blueshoresweater or submit them to the #dropsfan gallery. Do you need help with this pattern?You'll find 26 tutorial videos, a Comments/Questions area and more by visiting the pattern on garnstudio.com. © 1982-2026 DROPS Design A/S. We reserve all rights. This document, including all its sub-sections, has copyrights. Read more about what you can do with our patterns at the bottom of each pattern on our site. |
||||


With over 40 years in knitting and crochet design, DROPS Design offers one of the most extensive collections of free patterns on the internet - translated to 17 languages. As of today we count 324 catalogues and 12291 patterns translated into English (UK/cm). 12291
We work hard to bring you the best knitting and crochet have to offer, inspiration and advice as well as great quality yarns at incredible prices! Would you like to use our patterns for other than personal use? You can read what you are allowed to do in the Copyright text at the bottom of all our patterns. Happy crafting!
Post a comment to pattern DROPS 230-52
We would love to hear what you have to say about this pattern!
If you want to leave a question, please make sure you select the correct category in the form below, to speed up the answering process. Required fields are marked *.