
Popular categories
Looking for a yarn?


Comments / Questions (5)
![]() Colleen McMillan wrote:
Colleen McMillan wrote:
Thank you for your reply but I still cannot see in my head where the snout is to be added to the hat, I find it confusing where it says once I have the 41 stitches on, at the end of the row from RS, cast on 5 sts mid front, work snout on to same needle, cast on 5 sts. How can it be the end of the row but also mid front ? can you do a video tutorial showing this step ?
28.02.2023 - 17:41DROPS Design answered:
Dear Mrs McMillan, you get it right, that's exactly how to do, after you have cast on the 5 sts, worked the snout and cast on the 5 sts join in the round and continue working in stocking stitch - the beg of round will be there but since you are working in the round (like as on a spiral), it won't be visible, and at the very end, you will crochet an edge around the whole bottom of hat, that will then hide the "join". Happy knitting!
28.02.2023 - 18:01
![]() Colleen McMillan wrote:
Colleen McMillan wrote:
I am knitting the Fawn hat by Drops Design and am having trouble with understanding when and where to work the snout onto the pattern ? Is there a tutorial video for this pattern?
27.02.2023 - 19:21DROPS Design answered:
Dear Mrs McMillan, you first work the both ear flaps and the snout separately laying pieces aside, then work the HAT putting both earf flaps together with new stitches for back on hat; increasing new stitches on each side (for front piece) inserting snout at the same time, then join in the round and work all stitches in the round. Happy knitting!
28.02.2023 - 10:41
![]() Karin wrote:
Karin wrote:
Får man virka dessa o sälja?
13.01.2014 - 15:00
![]() Chris Nys wrote:
Chris Nys wrote:
Ik druk dit patroon af en dat is meteen 4 bladzijden terwijl dit ook op 2 pagina's zou kunnen! Dit vind ik heel spijtig vanwege de inkt en papierverspilling! Er is dan ook nog een blad bij met een grote gekleurde foto van de opruiming, waar ik helemaal niets kan mee doen!Kan het niet zo dat als je kiest om af te drukken dat dit automatisch zo zuinig mogelijk gebeurt?
24.11.2013 - 10:50DROPS Design answered:
Hoi Chris. Om de patronen gratis aan te bieden zijn we afhankelijk van de verkoop van de garens - daarom zijn advertenties een vaste en zeer belangrijke onderdeel van onze website. Maar je kan natuurlijk altijd kiezen in de print instellingen welke en hoeveel pagina's je wilt printen.
25.11.2013 - 10:07
![]() Arja wrote:
Arja wrote:
Oikein ihastuttava ja veikeä malli. Lapset tykkää!
04.11.2013 - 09:15
|
|
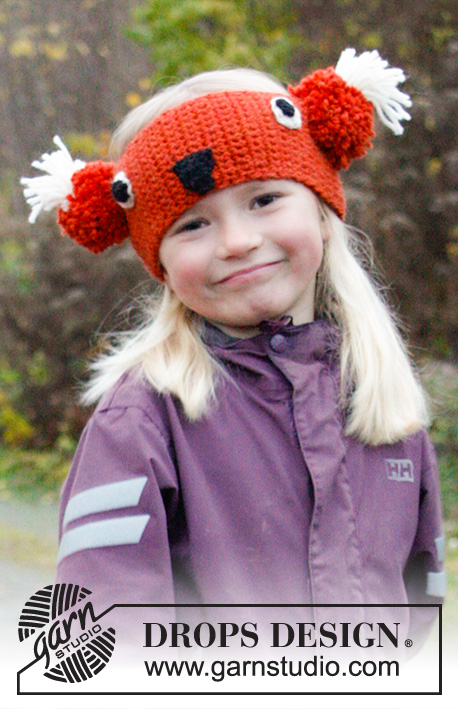
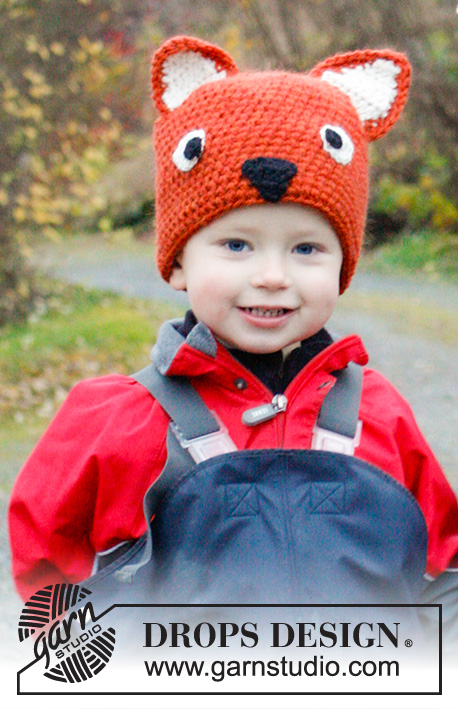
Fawn |
|
|
|
|
Knitted hat for children in DROPS Andes. Piece is worked as a fox hat with ear flaps and crochet edge. Size 3 - 12 years.
DROPS Extra 0-981 |
|
|
EAR FLAP: Cast on 4-4-5 sts on double pointed needles size 8 mm with orange. Work in stocking st back and forth with 1 edge st K in each side (1st row = WS). On next row from RS inc 1 st in each side by making 1 YO inside 1 edge st, on next row P YO twisted to avoid hole. Inc like this every row from RS 3 more times = 12-12-13 sts in total on row. REMEMBER THE KNITTING TENSION! Continue in stocking st until flap measures 6-7-8 cm, finish with a row from WS. Put piece aside and knit another ear flap. SNOUT: Cast on 3 sts on double pointed needles size 8 mm with orange. Work in stocking st back and forth. On first row (= RS) inc 2 sts by making 1 YO inside 1 st in each side = 5 sts on row. P YOs twisted on next row to avoid holes. Inc 1 more time the same way = 7 sts in total on row, finish with a row from WS. Put piece aside. HAT: Work one ear flap on to circular needle size 8 mm with orange, cast on 8-10-11 new sts (= back) and work the other ear flap on to same needle = 32-34-37 sts turn. P next row from WS, turn. Continue with stocking st back and forth with 1 edge st in garter st - AT THE SAME TIME on next row from RS, inc 1 st in each side inside edge st. Repeat inc 1 more time = 36-38-41 sts, at the end of row from RS, cast on 3-4-5 sts mid front, work snout (= 7 sts) on to same needle, cast on 3-4-5 sts = 49-53-58 sts. NOW MEASURE PIECE FROM HERE! Join and work hat in stocking st in the round until piece measures 10-12-13 cm. Now insert 6 markers in the piece as follows: 3/5 years: 8-8-8-8-8-9 sts between each. 6/9 years: 8-9-9-9-9-9 sts between each. 10/12 years: 10-9-10-10-9-10 sts between each. Then dec 1 st by K 2 tog after every marker every other round 4-4-5 times in total and then every round 3 more times = 7-11-10 sts remain on needle. Cut the yarn and pull it through the remaining sts, tighten tog and fasten. Hat measures approx. 17-19-22 cm from mid front and up to top. CROCHET EDGE: Crochet with hook size 7 mm with off white. Beg where snout has been worked on and work as follows down the left side: 1 dc, * 2 ch, skip approx. 1 cm, 1 dc *, repeat from *-* around one ear flap, along edge at the back of neck, around the last ear flap and to snout. Switch to black and work 1 ch, * 1 dc, skip approx. 1 cm, 1 ch *, repeat from *-* until beg of round. Finish with 1 dc and 1 sl st in first dc. Fasten off. EAR: Worked back and forth bottom up. ROW 1: Work 11 ch on hook size 7 mm with off white. ROW 2: Beg in 2nd ch from hook and work 1 dc in each of the next 10 ch. Turn piece. ROW 3: Skip first dc, then work 9 dc, turn piece. ROW 4: Skip first dc, then work 8 dc, turn piece. ROW 5: Skip first dc, then work 7 dc, turn piece. ROW 6: Skip first dc, then work 6 dc, turn piece. ROW 7: Skip first dc, then work 5 dc, turn piece. ROW 8: Skip first dc, then work 4 dc, turn piece. ROW 9: Skip first dc, then work 3 dc, turn piece. ROW 10: Skip first dc, then work 2 dc. Fasten off. Work 1 more ear in off white and work 2 pieces in orange. EYES 1: Worked in the round in a circle. Work 4 ch on hook size 7 mm with off white and form a ring with 1 sl st in first ch. ROUND 1: Work 6 dc in ch-ring. ROUND 2: Work 2 dc in every dc the entire round = 12 dc. Fasten off. Work another eye. EYES 2: Worked in the round in a circle. Work 3 ch on hook size 7 mm with black and form a ring with 1 sl st in first ch. ROUND 1: Work 4 dc in ch-ring. Fasten off. Work another eye. ASSEMBLY: Fasten eye 2 on eye 1, fasten eyes at the front of hat. Place one white and one orange ear tog and work them tog with orange as follows: Hold the off white ear towards you and beg at the bottom of ear. Work dc through both layers up towards top and down on the other side (approx. 16 dc). Leave the bottom open and place ears with off white at the front approx. 2 cm from the top on each side of hat. Fasten it so that the 2 sides of ear are approx. 1 cm apart (so that ear is fuller). Repeat on the other ear. |
|
Have you finished this pattern?Tag your pictures with #dropspattern or submit them to the #dropsfan gallery. Do you need help with this pattern?You'll find 16 tutorial videos, a Comments/Questions area and more by visiting the pattern on garnstudio.com. © 1982-2026 DROPS Design A/S. We reserve all rights. This document, including all its sub-sections, has copyrights. Read more about what you can do with our patterns at the bottom of each pattern on our site. |


With over 40 years in knitting and crochet design, DROPS Design offers one of the most extensive collections of free patterns on the internet - translated to 17 languages. As of today we count 324 catalogues and 12290 patterns translated into English (UK/cm). 12290
We work hard to bring you the best knitting and crochet have to offer, inspiration and advice as well as great quality yarns at incredible prices! Would you like to use our patterns for other than personal use? You can read what you are allowed to do in the Copyright text at the bottom of all our patterns. Happy crafting!
Post a comment to pattern DROPS Extra 0-981
We would love to hear what you have to say about this pattern!
If you want to leave a question, please make sure you select the correct category in the form below, to speed up the answering process. Required fields are marked *.