
Popular categories
Looking for a yarn?


Comments / Questions (38)
![]() Sandy wrote:
Sandy wrote:
Is there a video to go with this pattern? It would be helpful to see what you mean with working the head part of the pattern. Thank you.
16.03.2023 - 04:29DROPS Design answered:
Dear Sandy, you work bottom up starting from the bottom of piece, then you will when the basket is done, you will continue in the round over 24 sts only for the head of chicken. Can this help or did I misunderstand your question?
16.03.2023 - 09:14
![]() Azé Marie wrote:
Azé Marie wrote:
Bonsoir ; j'ai besoin d'aide : je n'arrive pas à comprendre , pour le tuto de Henny Penny , la corbeille poule , comment on arrive , pour l'aile , à partir d'un rond magique à 96 ms ; En fait , je ne sais pas comment faire cette aile !!! Merci pour votre réponse dont je sais qu'elle est rapide et aimable ; svp
31.01.2022 - 20:22DROPS Design answered:
Bonjour Mme Azé, pour réaliser l'aile, crochetez comme pour les tours 1 à 17 du panier en commençant par un rond magique et en beige clair. Crochetez ensuite le 18ème tour en rouge comme indiqué. Bon crochet!
01.02.2022 - 08:55
![]() Elis wrote:
Elis wrote:
Hallo liebes Drops Team, ich habe die Henny-Penny nachgehäkelt und sie tut am Frühstückstisch gute Dienste. Ich war allerdings doch überrascht, wie lange ich dafür gebraucht habe (Henne und Flügel häkeln, Blümchen häkeln, vernähen, aufnähen), es zieht sich doch. Vielen Dank für die tolle Anleitung.
07.04.2021 - 09:38
![]() Irmgard Grave wrote:
Irmgard Grave wrote:
Freue ich mich dieses huhn nachzuhäkeln. vielen dank für die anleitung. werde bei tina lausch in wermelskirchen die wolle kaufen. herzliche grüße irmgard
02.03.2021 - 20:43
![]() Teresa wrote:
Teresa wrote:
Mi potresti mandare lo schema del gallo porta pane? Grazie mille
01.03.2021 - 18:04DROPS Design answered:
Buonasera Teresa, le spiegazioni del gallo sono quelle indicate. Buon lavoro!
01.03.2021 - 21:23
![]() Kim wrote:
Kim wrote:
Hello! what are the full dimensions of this piece? Length is what I am looking for.
18.12.2019 - 23:35DROPS Design answered:
Dear Kim, there are 120 sc for the basket at the largest, with 18 sc = 10 cm, piece should measure approx. 66 cm around, ie approx. 33 cm (but might be somewhat less since the body is not folded double). Happy crocheting!
19.12.2019 - 08:10
![]() Sandi wrote:
Sandi wrote:
Can I use worsted weight 4 ply or cotton 4 ply? I can't wait to try this pattern as a purse for a friend who raises chickens. Thank you
25.02.2019 - 01:05DROPS Design answered:
Hi Sandi, When using a different yarn from the one suggested, make sure you adjust the number of stitches and rows so you get the right measurements. Happy crocheting!
25.02.2019 - 06:40
![]() Nagy Lászlóné wrote:
Nagy Lászlóné wrote:
Üdvözlöm! Az lenne a kérdésem, hogy ez a kosár hányadik körtől kezd fölfelé növekedni? Mikor kell a hátsó szálba ölteni? Mert így szabályos kört kaptam.. Köszönöm válaszát! Nagyné Timi
14.03.2018 - 23:11DROPS Design answered:
Kedves Nagy Lászlóné! A kosár a 21. körtől növekszik fölfelé, és egészen addig kör alakú marad, amíg az egyik oldalán el nem készíti a fejet. A fej hozzáadásával "nyomódik" össze az ovális formára. Sikeres Kézimunkázást és Boldog Húsvéti Ünnepet!
17.03.2018 - 12:54
![]() Angelique wrote:
Angelique wrote:
Hoe groot wordt de kip? en hoe groot is de cirkel dan voordat je omhoog gaat haken?
08.03.2018 - 12:05DROPS Design answered:
Hallo Angelique, Je haakt in de rondte tot de mand 16 cm is (zie onderaan bij het 'MAND' in het patroon), daarna haak je de kip erop. De hoogte van het werk in totaal is ongeveer 22 cm.
09.03.2018 - 15:05
![]() Sylvie Lamarre wrote:
Sylvie Lamarre wrote:
Comment doit-on coudre la queue de la poule ? Une photo sera utile. Merci
01.04.2017 - 19:10DROPS Design answered:
Bonjour Mme Lamarre, la queue se coud verticalement sur le côté opposé à la tête. Bon assemblage!
03.04.2017 - 10:17
|
|
Henny Penny#hennypennybasket |
|
 |
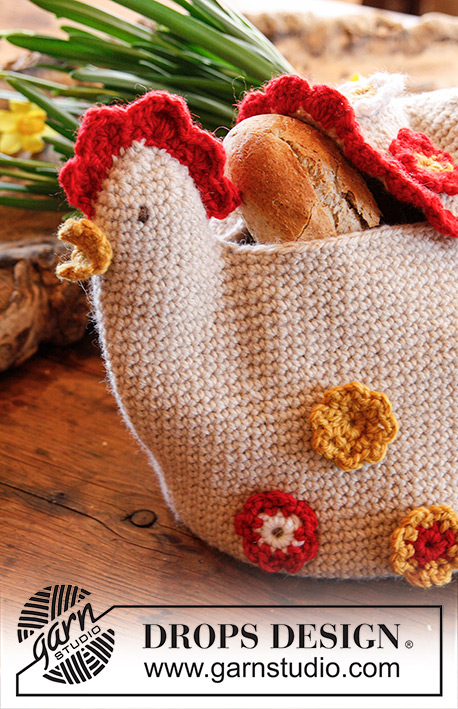 |
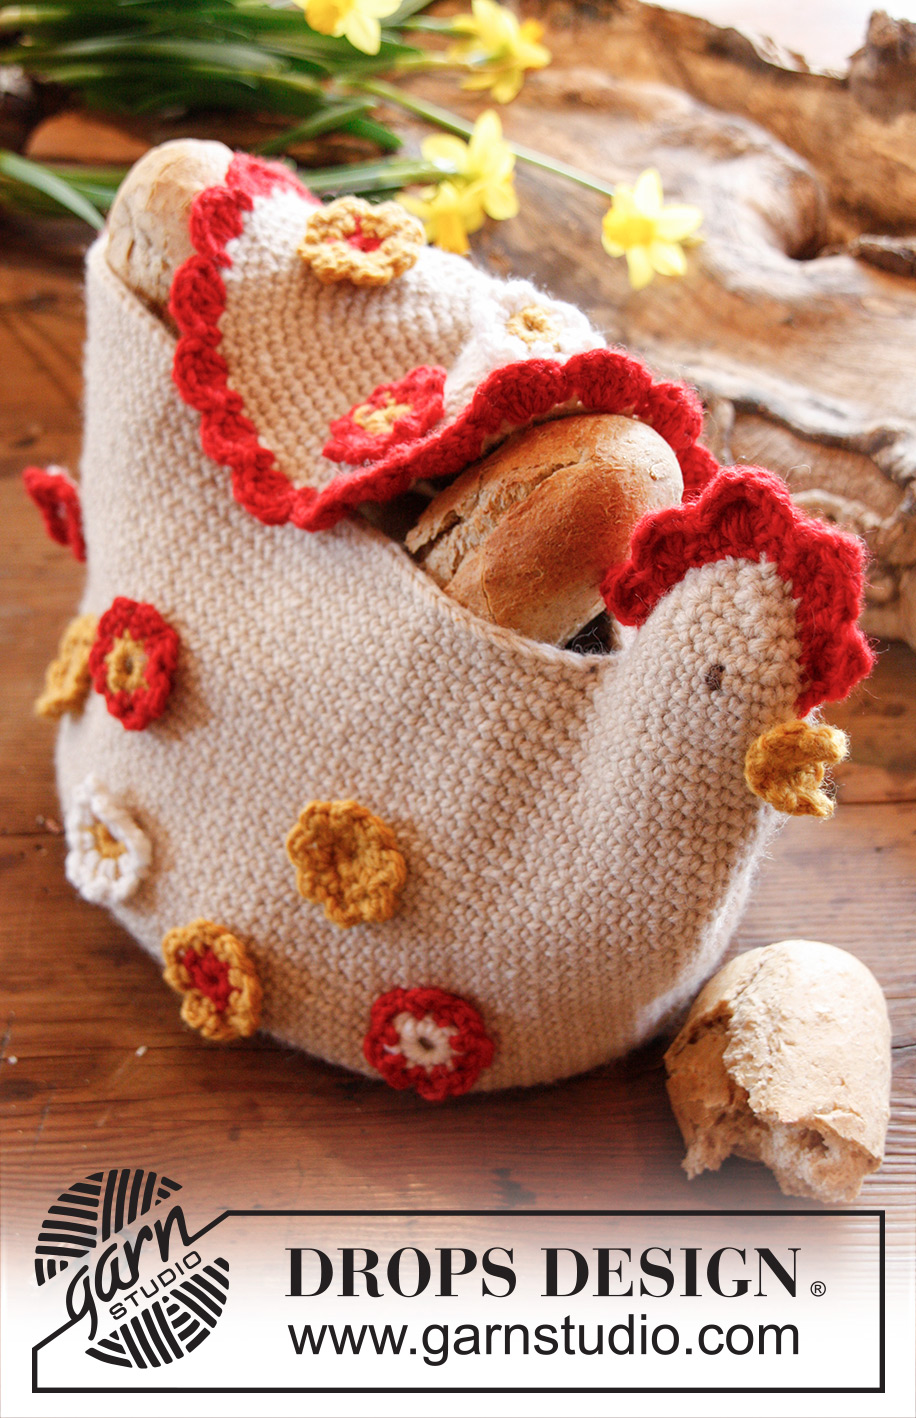
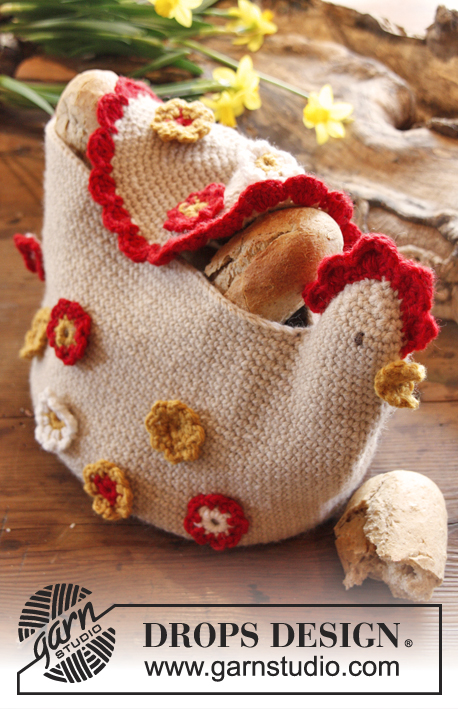
DROPS Easter: Crochet DROPS chicken basket in "Nepal".
DROPS Extra 0-908 |
|
|
MAGIC CIRCLE: When piece is worked in the round, start with this technique to avoid holes in the middle (instead of ch-ring): Hold the yarn end and wind the yarn one time around the index finger to make a loop. Hold the loop with left thumb and middle finger, place the yarn over left index finger. Insert hook through the loop, make a YO and pull yarn through loop, work 1 ch, then work dc around the loop. When the desired no of dc have been reached, pull the yarn end to tighten the loop. Fasten the yarn end at the back. Continue to work in the round in a circle. WORK IN THE ROUND IN A CIRCLE: After last dc on the round, continue to next round with 1 dc in next dc (= first dc from previous round). NOTE: Insert a marker at the beg of round between last dc and 1st dc on round, move the marker upwards when working. INCREASE TIP: Inc 1 st by working 2 dc in next dc. DECREASE TIP: Dec 1 dc by working 2 dc tog as follows: * Insert hook in next dc, get yarn *, repeat from *-* one more time, make 1 YO and pull yarn through all 3 sts on hook. -------------------------------------------------------- BASKET: Worked in the round in a circle. Start by making a MAGIC CIRCLE - read explanation above - at the bottom of basket with light beige on hook size 4 mm. ROUND 1: Work 8 dc in the magic circle. Read WORK IN THE ROUND IN A CIRCLE above. ROUND 2: Inc 1 dc in every dc - Read INCREASE TIP above = 16 dc. ROUND 3: * 1 dc in next dc, inc 1 dc *, repeat from *-* the entire round = 24 dc. ROUND 4: * 1 dc in each of the next 2 dc, inc 1 dc *, repeat from *-* the entire round = 32 dc. ROUND 5: * 1 dc in each of the next 3 dc, inc 1 dc *, repeat from *-* the entire round = 40 dc. ROUND 6 (and then on every even numbered round): Work 1 dc in every dc. ROUND 7: * 1 dc in each of the next 4 dc, inc 1 dc *, repeat from *-* the entire round = 48 dc. ROUND 9: * 1 dc in each of the next 5 dc, inc 1 dc *, repeat from *-* the entire round = 56 dc. ROUND 11: * 1 dc in each of the next 6 dc, inc 1 dc *, repeat from *-* the entire round = 64 dc. ROUND 13: * 1 dc in each of the next 7 dc, inc 1 dc *, repeat from *-* the entire round = 72 dc. ROUND 15: * 1 dc in each of the next 5 dc, inc 1 dc *, repeat from *-* the entire round = 84 dc. ROUND 17: * 1 dc in each of the next 6 dc, inc 1 dc *, repeat from *-* the entire round = 96 dc. ROUND 19: * 1 dc in each of the next 7 dc, inc 1 dc *, repeat from *-* the entire round = 108 dc. ROUND 21: * 1 dc in each of the next 8 dc, inc 1 dc *, repeat from *-* the entire round = 120 dc. Then work 1 dc in every dc until basket measures approx. 16 cm vertically. When the last dc on the last round has been worked, move the marker to the 12th dc from hook (on the right side of the last dc, end of round = mid front of head). Do not cut the yarn. HEAD: Continue working 1 dc in each of the next 12 dc, there are now 24 dc in total counted from the st with marker. Now work the head in the round over these 24 sts as follows: Turn the basket so that st with marker is towards you, work 1 dc in this dc (this st is now 1st dc on round, move the marker upwards), continue with 1 dc in each of the next 23 dc = 24 dc on round. Move the marker upwards when working. Then work 1 dc in every dc for 5 more rounds (= 6 rounds in total). Then dec as follows: ROUND 1: * 1 dc in each of the next 4 dc, dec 1 dc - READ DECREASE TIP above *, repeat from *-* the entire round = 20 dc. ROUND 2: * 1 dc in each of the next 3 dc, dec 1 dc *, repeat from *-* the entire round = 16 dc. ROUND 3: * 1 dc in each of the next 2 dc, dec 1 dc *, repeat from *-* the entire round = 12 dc. ROUND 4: * 1 dc in next dc, dec 1 dc *, repeat from *-* the entire round = 8 dc. ROUND 5: Work all dc tog 2 by 2 = 4 dc, cut the yarn. Sew the last 4 dc tog with yarn end. COCK'S COMB: Worked back and forth. Work 20 ch with red, then 1 sl st in 2nd ch from hook, then 1 sl st in every ch = 19 sl sts, turn. Skip 1st sl st, in next sl st work: 1 tr, 1 dtr and 1 tr, skip 1 sl st, 1 dc in next sl st, skip 1 sl st, in next sl st work: 2 tr, 1 dtr and 2 tr, skip 1 sl st, 1 dc in next sl st, skip 1 sl st, in next sl st work: 2 tr, 3 dtr and 2 tr, skip 1 sl st, 1 dc in next sl st, skip 1 sl st, in next sl st work: 2 tr, 1 dtr and 2 tr, skip 1 sl st, 1 dc in next sl st, skip 1 sl st, in next sl st work: 1 tr, 1 dtr and 1 tr, finish with 1 sl st in the last sl st, fasten off. BEAK: Worked back and forth. Crochet 2 ch with goldenrod. ROW 1: Work 2 dc in 2nd ch from hook = 2 dc, turn. ROW 2: Work 1 ch, inc 1 dc in every dc = 4 dc, turn ROW 3-4: Work 1 ch, 1 dc in every dc. ROW 5: 1 ch, work all dc tog 2 by 2 = 2 dc. ROW 6: 1 ch, work the 2 dc tog = 1 dc. Fasten off. TAIL: Worked back and forth. Work 12 ch with red, then 1 dc in 2nd ch from hook, then 1 dc in every ch = 11 dc, turn. Skip 1st dc, in next dc work 3 tr, skip 1 dc, 1 dc in next dc, skip 1 dc, in next dc work as follows: 1 tr, 3 dtr and 1 tr, skip 1 dc, 1 dc in next dc, skip 1 dc, in next dc work 3 tr, finish with 1 sl st in last dc, fasten off. WING: Worked in the round in a circle. Start by making a MAGIC CIRCLE in light beige. Work rounds 1 to 17 as on basket = 96 dc. ROUND 18: Switch to red and work as follows: * 1 dc, skip 1 dc, 5 tr in next dc, skip 1 dc *, repeat from *-* the entire round, fasten off. FLOWERS: Worked in the round. Work 2 of each flower. FLOWER 1: ROUND 1: Crochet 3 ch with goldenrod and form a ring with 1 sl st in first ch. Work 1 ch, 8 dc in ch-ring, finish with 1 sl st in first dc. ROUND 2: Work 1 ch, * 1 dc in next dc, 3 ch *, repeat from *-* the entire round, finish with 3 ch and 1 sl st in 1st dc (= 8 ch-spaces). Fasten off. FLOWER 2: Work as FLOWER 1 but work 1ST ROUND with goldenrod and 2ND ROUND with red. FLOWER 3: Work as FLOWER 1 but work 1ST ROUND with red and 2ND ROUND with goldenrod. FLOWER 4: Work as FLOWER 1 but work 1ST ROUND with white and 2ND ROUND with red. FLOWER 5: Work as FLOWER 1 but work 1ST ROUND with goldenrod and 2ND ROUND with white. ASSEMBLY: Sew cock's comb to the top of head, sew the tail to the other side of basket. Sew the beak at the front of head and embroider eyes with medium brown. Place the wing over the basket, fasten it on one side. Use the wing as a lid. Fasten the flowers on to basket and lid. Fill some cotton wool, paper or similar in the top of head to fill it out. |
|
Have you finished this pattern?Tag your pictures with #dropspattern #hennypennybasket or submit them to the #dropsfan gallery. Do you need help with this pattern?You'll find 9 tutorial videos, a Comments/Questions area and more by visiting the pattern on garnstudio.com. © 1982-2026 DROPS Design A/S. We reserve all rights. This document, including all its sub-sections, has copyrights. Read more about what you can do with our patterns at the bottom of each pattern on our site. |
|


With over 40 years in knitting and crochet design, DROPS Design offers one of the most extensive collections of free patterns on the internet - translated to 17 languages. As of today we count 324 catalogues and 12290 patterns translated into English (UK/cm). 12290
We work hard to bring you the best knitting and crochet have to offer, inspiration and advice as well as great quality yarns at incredible prices! Would you like to use our patterns for other than personal use? You can read what you are allowed to do in the Copyright text at the bottom of all our patterns. Happy crafting!
Post a comment to pattern DROPS Extra 0-908
We would love to hear what you have to say about this pattern!
If you want to leave a question, please make sure you select the correct category in the form below, to speed up the answering process. Required fields are marked *.