Comments / Questions (56)
![]() Pat wrote:
Pat wrote:
Was wondering where you measure for the six inches from, from the start of slipper or from top of cuff. Also at the six inches you decrease just that once and then continue with the dc and sc rows till 11 inches. Thank you
17.09.2014 - 08:19DROPS Design answered:
Dear Pat, you measure starting from the start of slipper part. Happy crocheting!
17.09.2014 - 09:31
![]() Ashley wrote:
Ashley wrote:
What if you are making these with a rubber sole?
16.09.2014 - 03:51
![]() Patty wrote:
Patty wrote:
Can the pattern be made smaller as I have a very skinny leg? Also, does the dc and sc count as one of the stitches or do you do the dc or sc as well as 31 more stitches?
12.09.2014 - 06:02DROPS Design answered:
Dear Patty, to make the leg smaller you can adapt your self with your own measurements or/and try with a tighter tension (smaller crochet hook size). Each dc and each sc count as 1 st so that you should get a total of 31 sts at the end of row after dec 2 sts (2nd size). Happy crocheting!
12.09.2014 - 09:27Laura wrote:
No me queda muynclaro el montaje ynseguimiento de comenzar la prenda,podrian decirme con que video puedo,darme idea?!?! Gracias
25.08.2014 - 04:25DROPS Design answered:
Hola Laura. La bota se trabaja de ida y vta. Primero se trabaja la orilla y después se montan los pts para la bota en un lado largo de orilla. Al finalizar la labor se cose borde con borde en forma de letra L (es decir la planta del pie recta y el borde posterior hacia arriba). Estamos haciendo cada vez más video explicativos pero para este modelo todavía no hay uno. Síguenos en Facebook.
25.08.2014 - 13:19
![]() Diana wrote:
Diana wrote:
Ik ben bij de voet en moet daar toer 3 en 4 herhalen tot 28 cm? dit is vreemd want bij begin van de voet heb ik al 31cm (maat 41-43)... tot welke lengte moet ik voor elk van de maten herhalen?
19.08.2014 - 16:37DROPS Design answered:
Hoi Diana. Je hebt eerst de schacht van de slof gehaakt tot 31 cm. Je haakt nu de voet (plaats een markeerder) en haakt door tot 28 cm in de lengte (alleen lengte van de voet - niet de schacht).
21.08.2014 - 16:18
![]() Diana wrote:
Diana wrote:
Ik ben met de toeren 3 en 4 bezig van de voet. Er staat herhaal toer 3 en 4 tot het werk in de lengte 28 cm meet. Maar als je begint met de voet is het al 31 cm... hoelang moet het werk in totaal zijn voor maat 41-43? ooooooooooooooooooooooag info voor de andere maten omdat ik die ook nog wil gaan maken
19.08.2014 - 16:09DROPS Design answered:
Hoi Diana. Dus 31 cm schacht en 28 cm voet.
21.08.2014 - 16:19
![]() Minne wrote:
Minne wrote:
Waar moet je nu eigenlijk mee starten dit is niet duidelijk
19.08.2014 - 12:41DROPS Design answered:
Hoi Minna. Je begint met het haken van de manchet (het grijze manchet op de foto). Vervolgens haak je de slof van boven naar beneden zoals beschreven.
20.08.2014 - 17:20
![]() Teresa wrote:
Teresa wrote:
When is says work until it is 6 inched, does that include the cuff?
15.08.2014 - 16:08
![]() Nadine wrote:
Nadine wrote:
Hallo ich komme mit dem ersten Abschnitt des Hausschuhs einfach nicht zureckt. Was ist hiermit gemeind: Mit 1 Faden hellgrau Eskimo und 1 Faden Alpaca Bouclé 31-33-35 fM gleichmäßig verteilt 31-33-35 fM aus der einen Längsseite der oberen Kante häkeln (die Kante liegt oben quer) Häkel ich das an die Kante ? und wie? Danke für Hilfe Grüße Nadine
09.12.2013 - 23:10DROPS Design answered:
Liebe Nadine, ja genau, Sie häkeln das an die eine lange Seite der grauen Kante oben. Zählen Sie zunächst die Anzahl Reihen, die Sie an dem oberen Teil gehäkelt haben, es sollte etwas mehr als 1 M pro Reihe sein, die dann quer zur Reihe gehäkelt wird.
10.12.2013 - 09:27
![]() Annalena Vigren wrote:
Annalena Vigren wrote:
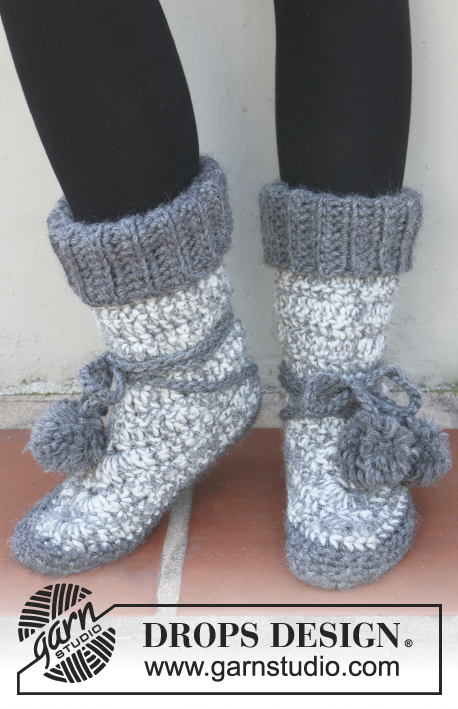
Om man virkar 124 cm långt band ser det ut som på bilden.
02.10.2013 - 06:31
Lucky Wanderer |
|
|
|
|
Crochet DROPS Boots in Snow
DROPS Extra 0-888 |
|
|
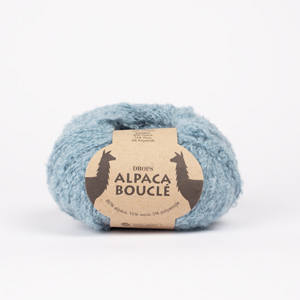
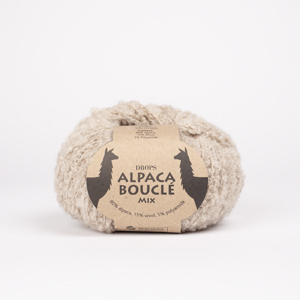
CROCHET 2 STS TOG: Crochet the first st but wait with last YO and pull through, crochet next st and at last pull trough now pull yarn through all 3 loops on hook. CROCHET INFO: Start every row with dc with 1 ch. --------------------------------------------------- CUFF Worked sideways. With 1 strand dark gray Snow ch 13 loosely. Work 1 dc in 2nd ch from hook, then work 1 dc in every ch the entire row = 12 dc. READ CROCHET INFO- Work back and forth with dc in the back loops of the sts for 27-28-29 cm. Fasten off. SLIPPER: Worked top down, back and forth with the opening in the back of leg. With 1 strand ligh gray Snow and 1 strand Alpaca Bouclé held together work 31-33-35 dc evenly along one side of cuff. Continue to work as follows: * ch 2, turn piece, work 1 tr in every st on row, ch 1, turn piece, work 1 dc in every st on row *, repeat from *-*. AT THE SAME TIME when piece measures a total of 15 cm dec 2 sts on next row as follows: Work the first 2 sts tog - see explanation above - and at mid front work 2 sts tog = 29-31-33 sts on row. Continue as before until piece measures 26-28-31 cm. Now work the foot as follows – insert a marker in the middle st on row: ROW 1: Work 1 dc in every st until st before mid st, 2 dc in next st, 1 ch (= middle st), skip next st, 2 dc in next st, 1 dc in each of the last sts, turn piece. ROW 2: Work 1 dc in each of the first sts until the ch, work 7 tr in the middle ch (the 4th tr of the 7 tr is now the middle st) and 1 dc in each of the last sts, turn piece. ROW 3: Work 1 dc in each of the next sts until st before mid st, work 2 dc in next st, 1 ch (= mid st), skip next st, work 2 dc in next st, 1 dc in each of the last sts, turn piece. ROW 4: Work 1 dc in each st until mid st, 7 tr in ch and 1 dc in each of the last sts, turn piece. Repeat 3rd and 4th row until piece measures approx. 23-26-28 cm measured in foot length - measure the piece folded double. Switch to 1 strand dark gray Snow and now measure piece from here. * Work 1 row with dc, finish row with 1 ch and turn piece *, repeat from *-* until piece measures approx. 4-4½-5 cm. Work one more row where you work the first 2 and the last 2 sts tog. Fasten off. ASSEMBLY: Fold the boot double, sew tog under foot and up along back of leg leg. Sew edge to edge to avoid a chunky seam. POM-POM TIES Work a ch-row with dark gray Snow of approx. 150cm. Make small pompoms to fasten in each end – Tip: Before the second pompom is attached to the ch-row, pull the tie through a st at the bottom of leg in the back, in the transition between light gray and dark gray Snow, so it is fastened. Tie around the leg. |
|
Have you finished this pattern?Tag your pictures with #dropspattern or submit them to the #dropsfan gallery. Do you need help with this pattern?You'll find 9 tutorial videos, a Comments/Questions area and more by visiting the pattern on garnstudio.com. © 1982-2026 DROPS Design A/S. We reserve all rights. This document, including all its sub-sections, has copyrights. Read more about what you can do with our patterns at the bottom of each pattern on our site. |


Post a comment to pattern DROPS Extra 0-888
We would love to hear what you have to say about this pattern!
If you want to leave a question, please make sure you select the correct category in the form below, to speed up the answering process. Required fields are marked *.