
Popular categories
Looking for a yarn?


Comments / Questions (45)
![]() Pilar wrote:
Pilar wrote:
Buenos días estoy intentando sacar el patrón del gorro que es precioso No entiendo como tengo que hacer los aumentos para la talla M/L a partir de la fila 9. Me lo podríais explicar Gracias
13.12.2017 - 23:35DROPS Design answered:
Hola Pilar, en la vuelta 9 aumentamos trabajando 2 puntos bajos en un punto bajo. Repetimos este aumento un total de 9 veces a lo largo de la vuelta, aprox. cada 5º punto. La vuelta 4 del ala se trabaja de la misma manera, aprox. cada 15º punto.
17.12.2017 - 18:01
![]() Deanna wrote:
Deanna wrote:
Despite my having the correct gauge, the hat took 125 grms of Drops Eskimo, not the 100 grms that the pattern states. Proved very inconvenient. The pattern is very nice, as are all of your patterns and I'm so pleased I accidentally found your Website
22.02.2017 - 20:53
![]() Marta wrote:
Marta wrote:
...Natomiast zrobiłam też dwa kolejne kapelutki z Eskimo, oba w rozmiarze M/L, i wyszło mi na nie znacznie więcej niż po 2 motki wełny. Jeden robiłam luźniej, drugi ściślej, ale to bez znaczenia - z dwóch motków się nie da. Tak więc być może powinni to Państwo uwzględnić we wzorze - ?
01.11.2015 - 21:50DROPS Design answered:
Wzór zostanie ponownie sprawdzony i jeśli okaże się, że ilość włóczki została oszacowana błędnie do wzoru zostanie naniesiona korekta. Dziękujemy za zwrócenie uwagi. Pozdrawiamy
02.11.2015 - 09:56
![]() Marta wrote:
Marta wrote:
Dzień dobry! Zrobiłam ten kapelusik z Clouda. Wychodzi pięknie, tylko jest trochę mniejszy (węższy) niż z Eskimo w tym samym rozmiarze i rondo wychodzi węższe - gdybym robiła kolejny, dodałabym w trakcie formowania ronda więcej oczek, żeby wyszło szersze. Ale tekstura dzianiny szydełkowej z Clouda jest doskonała.
01.11.2015 - 21:49
![]() Marta wrote:
Marta wrote:
Czy można ten model wykonać z włóczki Drops Cloud? Czy nie będzie ona zbyt lekka/cienka?
09.10.2015 - 11:20DROPS Design answered:
Tak oczywiście. Rezultat proszę koniecznie pokazać na facebooku w grupie DROPS Workshop. POWODZENIA!
10.10.2015 - 20:58
![]() Martinez wrote:
Martinez wrote:
Bonjour à toute j'ai fait ce mode la et je suis très contente et facile à faire et d'un bon rendu, je l'ai fait en plusieurs couleurs............ bonne continuation rosy
28.02.2015 - 20:14
![]() Irena Lewandowska wrote:
Irena Lewandowska wrote:
Jestem w trakcie robienia kapelusika wzór 140-20 i nie rozumiem jak mam wpleść wokół kokardy 8 o.łancuszka. Czy to jest możliwe ?
03.11.2014 - 13:24DROPS Design answered:
Przepleść w znaczeniu przełożyć, zaplątać, owinąć. Pozdrawiam
03.11.2014 - 17:29
![]() Marie wrote:
Marie wrote:
Bonjour, Je suis en train de faire le modèle May en taille S-M et comme Cathy je suis bloquée au tour 4 de la bordure car je ne comprends pas comment atteindre un total de 75 ms en augmentant régulièrement 7 ms à partir de 68 ms. 68/7 cela ne tombe pas rond (75/7 non plus d'ailleurs)! Comment dois-je faire? Merci de bien vouloir m'aider.
29.08.2013 - 23:07DROPS Design answered:
Bonjour Marie, vous devez augmenter à intervalles le plus régulier possible, par ex *10 ms, 2 ms dans la même m, 11 ms, 2 ms dans la même m*, répétez de *-* tout le tour. Bon crochet!
30.08.2013 - 12:32
![]() Macia wrote:
Macia wrote:
Bonjour, Je suis en train de faire le modèle de chapeau ee-431 en taille large et je ne comprends pas comment concrètement faire cette étape: - TOUR 4: 1 ms dans chaque ms, EN MÊME TEMPS, augmenter 7-4 ms à intervalles réguliers = 75-80 ms. S'agit-il, pour un Large, d'augmenter 7 MS à intervalles réguliers pour un total de 80ms, mais alors, comment le faire concrètement. Je ne comprends pas notamment la notion d'intervalles réguliers. Merci pour votre aide. Cathy
06.02.2013 - 14:20DROPS Design answered:
Bonjour Cathy, au tour 4, vous augmentez 7 ms en taille S/M et 4 ms en taille M/L, donc en taille L, vous aviez 76 ms au tour 3, au tour 4 : 76 + 4 augm = 80 ms. 80/4 = 20, vous crochetez *18 ms, 2 ms dans la m suiv*, répétez 4 fois de *-*. Bon crochet !
06.02.2013 - 14:36
![]() PERRAULT wrote:
PERRAULT wrote:
Bonjour, Je tricote avec vos modèles et vos laines depuis très longtemps, les quantités indiquées sont toujours justes, mais pour ce modèle, j'ai été obligée de recommander une pelote avec les frais de transport en sus. Idem pour votre modèle ee.432 Cordialement
16.01.2013 - 14:36
|
|
May#mayhat |
|
|
|
|
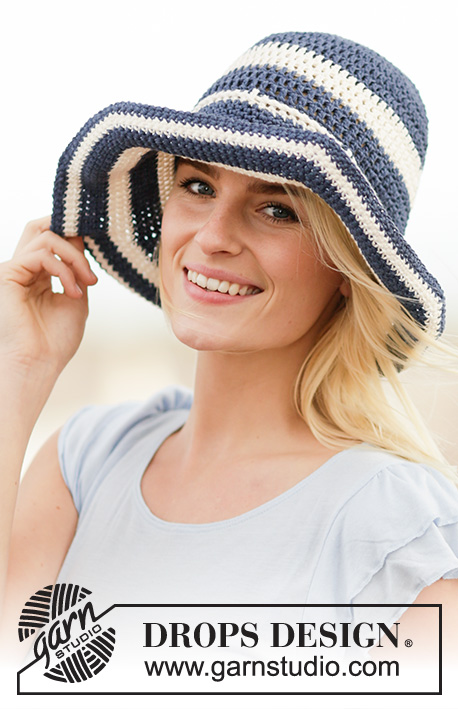
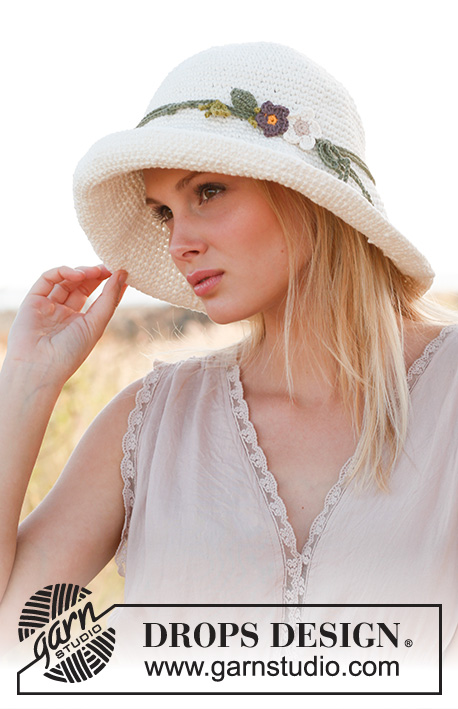
Crochet DROPS hat in "Snow".
DROPS 140-20 |
|
|
CROCHET INFO: Replace first dc at beg of every round with 1 ch. Finish every round with 1 sl st in first ch on round. INCREASE TIP: Inc 1 st by working 2 dc in the same st. ---------------------------------------------------------- HAT: The piece is worked top down. Crochet 4 ch on hook size 6 mm with Snow and form a ring with 1 sl st in first ch. REMEMBER THE CROCHET TENSION! ROUND 1: READ CROCHET INFO! Work 6-6 dc in ch-ring. ROUND 2: Work 2 dc in every dc the entire round = 12-12 dc. ROUND 3: * 1 dc in first dc, 2 dc in next dc *, repeat from *-* the entire round = 18-18 dc. ROUND 4: * 1 dc in each of the first 2 dc, 2 dc in next dc *, repeat from *-* the entire round = 24-24 dc. ROUND 5: * 1 dc in each of the first 3 dc, 2 dc in next dc *, repeat from *-* the entire round = 30-30 dc. ROUND 6: * 1 dc in each of the first 4 dc, 2 dc in next dc *, repeat from *-* the entire round = 36-36 dc. ROUND 7: * 1 dc in each of the first 5 dc, 2 dc in next dc *, repeat from *-* the entire round = 42-42 dc. ROUND 8: * 1 dc in each of the first 6 dc, 2 dc in next dc *, repeat from *-* the entire round = 48-48 dc. ROUND 9: Work 1 dc in every dc - AT THE SAME TIME inc - see explanation above, 3-9 dc evenly on round = 51-57 dc. Then work 1 dc in every dc in the round until piece measures approx. 18-19 cm from the top. Now work the brim as follows: ROUND 1: * 1 dc in each of the first 2 dc, 2 dc in next dc *, repeat from *-* until 2 dc remain, then work 1-2 dc in each dc = 68-76 dc. ROUND 2- 3: Work 1 dc in every dc the entire round. ROUND 4: Work 1 dc in every dc while AT THE SAME TIME inc 7-4 dc evenly on round = 75-80 dc. ROUND 5: Work 1 dc in every dc the entire round. ROUND 6: Work 1 dc in every dc the entire round. Cut and fasten the thread. BOW WITH TIE: Work 4 ch and form a ring with 1 sl st in first ch. Continue to work as follows: * 4 ch, 4 triple tr in ch-ring, 4 ch and 1 sl st in ch-ring *. Repeat from *-* 1 more time. Then work 8 ch, pull the ch-row around the bow and work 1 sl st in the first of the 8 ch. There is now a ch-row around the middle of the bow. Cut and fasten the thread. Work a tie with ch of approx. 80 cm and tie a knot in each end: Pull the tie through the ring at the back of bow and tie it around the hat. |
|
Have you finished this pattern?Tag your pictures with #dropspattern #mayhat or submit them to the #dropsfan gallery. Do you need help with this pattern?You'll find 5 tutorial videos, a Comments/Questions area and more by visiting the pattern on garnstudio.com. © 1982-2026 DROPS Design A/S. We reserve all rights. This document, including all its sub-sections, has copyrights. Read more about what you can do with our patterns at the bottom of each pattern on our site. |


With over 40 years in knitting and crochet design, DROPS Design offers one of the most extensive collections of free patterns on the internet - translated to 17 languages. As of today we count 324 catalogues and 12290 patterns translated into English (UK/cm). 12290
We work hard to bring you the best knitting and crochet have to offer, inspiration and advice as well as great quality yarns at incredible prices! Would you like to use our patterns for other than personal use? You can read what you are allowed to do in the Copyright text at the bottom of all our patterns. Happy crafting!
Post a comment to pattern DROPS 140-20
We would love to hear what you have to say about this pattern!
If you want to leave a question, please make sure you select the correct category in the form below, to speed up the answering process. Required fields are marked *.