
Popular categories
Looking for a yarn?


Comments / Questions (86)
![]() SAILLER Mh wrote:
SAILLER Mh wrote:
Je vous remercie infiniment. Je me suis apercue en relevant les mailles, qu' il aurait été impossible de le faire sans laisser ces mailles rabattues. A present je vois comment j'assemblerai ma manche . Encore merci !
05.08.2015 - 11:36
![]() SAILLER MH wrote:
SAILLER MH wrote:
,Je vous remercie pour votre explication rapide. Je vais essayer,mais je n'ai toujours pas compris pourquoi on ne doit pas relever de mailles au-dessus des mailles rabattues.
30.07.2015 - 18:32DROPS Design answered:
Bonjour Mme Sailler, les premiers rangs de la manche seront assemblés aux mailles rabattues pour l'emmanchure. Bon tricot!
05.08.2015 - 09:55
![]() SAILLER Mh wrote:
SAILLER Mh wrote:
Bonjour. Je reviens à nouveau vers vous pour de l'aide. Pour les manches: selon la " note" ne pas relever de maille au dessus des rabattues emmanchures: pourquoi? Il me semble qu'il y aura un trou sous le bras.... Je pense que cela doit avoir un rapport avec les repéres des cotés et du dos, mais je n'ai pas compris non plus à quoi ces reperes servaient. merci d'avance.
30.07.2015 - 15:15DROPS Design answered:
Bonjour Mme Sailler, les marqueurs placés au devant et au dos servent de repères pour relever les mailles des manches - les premiers rangs de la manche seront assemblés au niveau des emmanchures (mailles rabattues au devant et au dos avant de continuer chaque pièce séparément). Bon tricot!
30.07.2015 - 16:12
![]() Sailler Mh wrote:
Sailler Mh wrote:
Merci beaucoup pour la rapidité et la clarté des explications. J'ai bien compris.
10.07.2015 - 19:26
![]() Sailler M H wrote:
Sailler M H wrote:
Bonjour. Pour la taille S ," à 6cm, placer 2 marqueurs à 42 etc...Que signifie " dépacer les marqueurs au fur et à mesure..." ? En hauteur, seulement, pour qu'il y ait toujours 84 entre les marqueurs ou bien en largeur pour qu'il y ait 86 puis 88 etc.. entre les marqueurs . Pardon pour mes explications un peu confuses. En 2 mots, faut_il les laisser là ou on les a mis la 1ere fois ? Merci.
10.07.2015 - 14:18DROPS Design answered:
Bonjour Mme Sailler, les marqueurs doivent rester en place, mais vous augmentez ensuite 4 fois tous les 8 cm de chaque côté des marqueurs, le nombre de mailles pour le dos sera donc de 92 m entre les marqueurs (+4x2 m) quand les augmentations seront faites. Bon tricot!
10.07.2015 - 16:37
![]() Beaupere wrote:
Beaupere wrote:
Derniere parenthese (=tous les 4 rgs) que veut dire tous les 4 rgs alors que juste avant vous indiquez tous les 2 rgs sur l'endroit rabattre ensuite 3-3-2-3-2-2 merci de votre reponse cdt Bb Vos modeles sont superbes bravo
02.06.2015 - 08:44DROPS Design answered:
Bonjour Mme Beaupère, à la fin du devant droit, on rabat pour l'encolure 3-2 (cf taille) fois 1 m tous les 2 rangs sur l'endroit = tous les 4 rangs (quand on tricote 4 rangs, on a 2 rangs sur l'endroit, la formulation est différente mais le nombre de rangs est le même). Bon tricot!
02.06.2015 - 10:10
![]() Beaupere wrote:
Beaupere wrote:
Que veut dire au devant droit derniere parenthes (=tous les 4 rgs) alors que juste avt vous indiquez rabattre tous les 2 rgs sur endroit Merci de votre participation Tres jolis modeles chez vous bravo Cdt Bb
02.06.2015 - 08:40DROPS Design answered:
Bonjour Mme Beaupère, et merci. Tous les 2 rangs sur l'endroit équivaut à tous les 4 rangs (= 2 rangs sur l'endroit, 2 rangs sur l'envers). Bon tricot!
02.06.2015 - 08:43
![]() Susanna wrote:
Susanna wrote:
Liebes Drops-Team, könnte ich dieses Modell auch mit Drops Air stricken?
03.02.2015 - 14:21DROPS Design answered:
Leider geht das bei diesem Modell nicht, Air gehört in Garngruppe C, Kid-Silk jedoch in Gruppe A, hat also eine abweichende Maschenprobe - das liegt in diesem Fall an der Luftigkeit von Air. Sie können die Garne innerhalb der Garngruppe austauschen. Für eine Jacke, die Sie mit Air stricken können, können Sie in der Suchmaske Garne der Garngruppe C einstellen und "Jacke" als Suchbegriff eingeben, vielleicht finden Sie dann ein Modell, das Ihnen ebenso gut gefällt.
04.02.2015 - 16:12
![]() Yvonne wrote:
Yvonne wrote:
Hallo! Ich verstehe den ersten Teil der Anleitung nicht. Warum gibt es erst einen Abschnitt "Vorder- und Rückenteil" und dann beides nochmal getrennt mit unterschiedlichen Maschenangaben?!
13.03.2014 - 20:09DROPS Design answered:
Liebe Yvonne, Sie stricken ja bis zum Armloch alles in einem Teil, nachher müssen Sie die Arbeit trennen und die beiden Vorderteile und das Rücketeil getrennt vertig stricken.
17.03.2014 - 12:21
![]() Gitta Kwant wrote:
Gitta Kwant wrote:
Wil graag dit vestje breien,maar heb geen rondbreinaald>Hoe bereken ik de steken voor een gewone naald!! b v d gitta
01.03.2014 - 15:07DROPS Design answered:
Hoi Gitta. Dit vest wordt heen en weer gebreid op de rondbreinaalden, je kan ook rechte naalden kiezen.
03.03.2014 - 14:13
|
|
Morning Sky#morningskycardigan |
|
 |
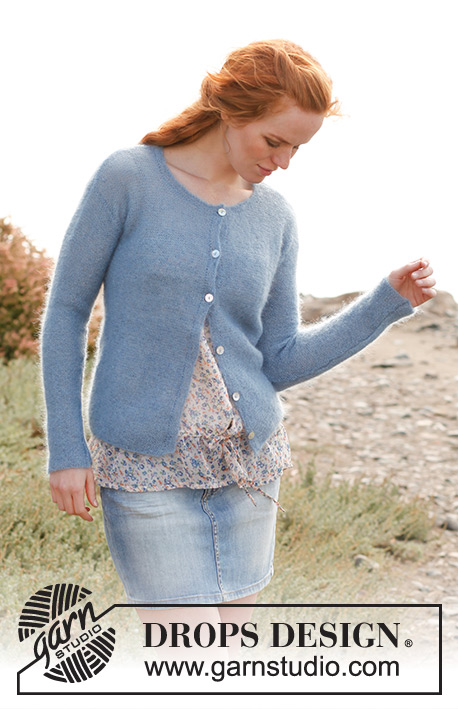 |
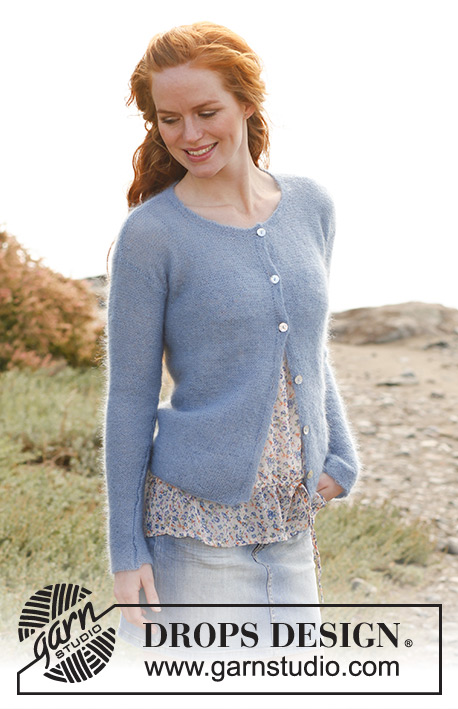
Knitted DROPS jacket in garter st in ”Kid-Silk”. Size S-XXXL.
DROPS 138-21 |
|
|
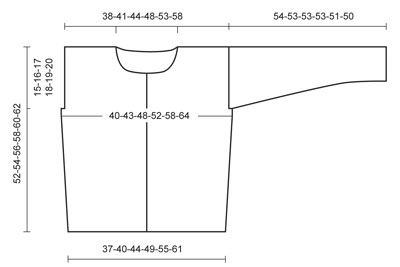
GARTER ST (back and forth on needle): K all rows. INCREASE TIP: Inc 1 st on each side of every marker as follows: Work until 1 st remains before marker, make 1 YO, K 2 (marker is between these sts), make 1 YO. On next row K YOs twisted (i.e. work in back loop of st instead of front) to avoid holes. -------------------------------------------------------- BODY: Worked in garter st - See explanation above - back and forth on circular needle from mid front. Cast on 168-184-204-224-252-280 sts on circular needle size 3 mm with 2 threads Kid-Silk (to avoid a tight cast on edge). Then work back and forth with 1 thread Kid-Silk (1st row = RS). REMEMBER THE KNITTING TENSION! When piece measures 6-6-6-6-7-7 cm, insert 2 markers in the piece; 42-46-51-56-63-70 sts in from each side (= 84-92-102-112-126-140 sts between markers on back piece). Move the markers upwards when working. On next row, inc 1 st on each side of each marker - Read INCREASE TIP above = 4 new sts. Repeat inc every 8-8-8-9-9-9 cm a total of 4 times = 184-200-220-240-268-296 sts. Continue to work until piece measures 37-38-39-40-41-42 cm. On next row cast off 2-3-4-5-6-7 sts for armholes on each side of every marker = 4-6-8-10-12-14 cast off sts in each side. Now divide the piece and finish each part separately. BACK PIECE: = 88-94-102-110-122-134 sts. Remove the markers in the sides and insert new markers at beg and end of row (where to knit up sleeves later). Continue in garter st until piece measures 50-52-54-56-58-60 cm. On next row from RS, cast off the middle 32-36-38-40-42-42 sts for neck and finish each shoulder separately. Continue to cast off 2 sts on next row from neck = 26-27-30-33-38-44 sts remain on the shoulder. Loosely cast off all sts when piece measures 52-54-56-58-60-62 cm. RIGHT FRONT PIECE: = 44-47-51-55-61-67 sts. Insert a marker at end of row (where to knit up sleeves later). Continue in garter st until piece measures 44-46-47-49-50-52 cm. Then cast off for neck at the beg of every row from RS (= every other row) as follows: Cast off 8-10-12-12-14-14 sts 1 time, 3 sts 1 time, and 2 sts 2 times. Then cast off 1 st every other row from RS (= every 4th row) 3-3-2-3-2-2 times = 26-27-30-33-38-44 sts remain on shoulder. Loosely cast off all sts when piece measures 52-54-56-58-60-62 cm. LEFT FRONT PIECE: Work as right front piece but reversed. ASSEMBLY: Sew the shoulder seams tog. SLEEVE: Worked back and forth on needle as follows: Knit up from RS approx. 70 to 100 sts between markers along one armhole (NOTE: Do not knit up sts over the cast off sts for armhole). On next row adjust no of sts to 68-74-78-82-86-92. Then work in garter st. When piece measures 3-3-3-3-4-4 cm, dec 1 st (by K 2 sts tog) in each side of piece. Repeat dec every 4-3½-3-3-2½-2 cm a total of 12-14-15-16-17-19 times = 44-46-48-50-52-54 sts. Continue in garter st until piece measures 54-53-53-53-51-50 cm (shorter measurements in the larger sizes because of broader shoulder width), loosely cast off all sts. Sew sleeve seam inside 1 edge st, NOTE: The top part of the sleeve should be sewn to the cast off edge on each side of back and front piece. Knit up another sleeve in the other side of piece. RIGHT BAND: Worked back and forth on needle as follows: Knit up from RS approx. 100 to 120 sts inside 1 edge st along mid front on right front piece. K 1 row from WS while AT THE SAME TIME adjusting no of sts to 104-109-109-118-118-118. On next row from RS, cast off for 5-5-5-6-6-6 button holes as follows: K 4, * K tog the next 2 sts, make 1 YO, K 18-19-19-17-17-17 *, repeat from *-* a total of 5-5-5-6-6-6 times. On next row K the YOs. Continue in garter st until band measures 2-2-2-3-3-3 cm, loosely cast off all sts. LEFT BAND: Work as right band but without button holes. NECK EDGE: Worked back and forth on needle as follows: Knit up from RS approx. 90 to 110 sts around the neck (also over bands). K 1 row from WS while AT THE SAME TIME adjusting no of sts to 92-96-100-104-108-112. On next row from RS, cast off for the last button hole as follows: K 3-3-3-4-4-4, K tog the next 2 sts, make 1 YO, K the rest of row. On next row K the YO. Continue in garter st until neck edge measures 2 cm, loosely cast off all sts. Sew the buttons on to the left band. |
|
 |
|
Have you finished this pattern?Tag your pictures with #dropspattern #morningskycardigan or submit them to the #dropsfan gallery. Do you need help with this pattern?You'll find 14 tutorial videos, a Comments/Questions area and more by visiting the pattern on garnstudio.com. © 1982-2026 DROPS Design A/S. We reserve all rights. This document, including all its sub-sections, has copyrights. Read more about what you can do with our patterns at the bottom of each pattern on our site. |
|


With over 40 years in knitting and crochet design, DROPS Design offers one of the most extensive collections of free patterns on the internet - translated to 17 languages. As of today we count 324 catalogues and 12290 patterns translated into English (UK/cm). 12290
We work hard to bring you the best knitting and crochet have to offer, inspiration and advice as well as great quality yarns at incredible prices! Would you like to use our patterns for other than personal use? You can read what you are allowed to do in the Copyright text at the bottom of all our patterns. Happy crafting!
Post a comment to pattern DROPS 138-21
We would love to hear what you have to say about this pattern!
If you want to leave a question, please make sure you select the correct category in the form below, to speed up the answering process. Required fields are marked *.