Comments / Questions (35)
![]() Katja wrote:
Katja wrote:
Hallo, ja ich hatte die richtige Anzahl an Stb. Die Maße sind auch genau wie auf dem Diagramm. Nur scheint mir der Halsausschnitt zu fehlen? Ist auf dem Diagramm auch keiner ersichtlich? Aber eigentlich hat doch jedes Kleidungsstück hinten einen Halsausschnitt? Gibt es vielleicht eine Anleitung für einen Halsauschnitt?
11.11.2014 - 13:52DROPS Design answered:
In diesem Fall gibt es keinen Halsausschnitt, der Rand wird einfach so weit wie nötig umgeschlagen und bildet dadurch auch den Schalkragen. Eine Variante mit Halsausschnitt können wir Ihnen an dieser Stelle leider nicht anbieten.
11.11.2014 - 23:44
![]() Katja wrote:
Katja wrote:
Hallo. Ich habe die Weste nach Anleitung gehäkelt ist auch wirklich super schön geworden, nur oben im Nacken scheint mir zuviel "Stoff". Hab ich was falsch gemacht?
10.11.2014 - 13:41DROPS Design answered:
Das lässt sich leider per Ferndiagnose schlecht sagen... Die Weste lässt sich ja oben ein gutes Stück umschlagen. Wenn Sie die richtige Anzahl Stb bei der Kante hatten, sollte eigentlich alles richtig gelaufen sein.
10.11.2014 - 20:25
![]() Silke wrote:
Silke wrote:
Hallo Ich habe nun das Rückenteil und die Lm für die Armĺöcher gehäkelt.Und nun weiss ich nicht weiter, in der Anleitung steht oben und unten am Rückenteil Stäbchen häkeln...ok aber was wird mit den Seiten gemeint...in die Lm von den Armlöchern oder wirklich die Seiten? Da es ja für Größe 128 zb 44 Lm sind, pro Armloch, aber man dann weniger Stäbchen in die Seite häkeln soll. Wenn die Lm gemeint sind..wie häkel ich denn dann ?
09.11.2014 - 09:07DROPS Design answered:
Sie haben ja oben am Rückenteil 65 Stb gehäkelt, dann den 44-Lm-Bogen über die Seite des Rückenteils (= Armausschnitt), dann am unteren Rand des Rückenteils wieder 65 Stb, dann den 44-Lm-Bogen über die andere Seite wieder nach oben. Nun häkeln Sie wieder über den oberen Rand 65 Stb wie zuvor, dann UM den Lm-Bogen 37 Stb (nicht in die einzelnen Lm, sondern um die Lm herum), dann am unteren Rand 65 Stb und um den anderen Lm-Bogen auch 37 Stb. Dann häkeln Sie wie beschrieben weiter.
09.11.2014 - 23:03
![]() Marjorie wrote:
Marjorie wrote:
Ik begin het aardig door te krijgen, dank voor de hulp! Ik vraag me alleen af van waaraf moet ik meten tot ik tot 4cm rand ben? Vanaf het achterpand dat 17 cm meet Of vanaf toer 1 van het rand van het werk? Bedankt weer, groet
08.09.2014 - 12:42DROPS Design answered:
Hoi Marjorie. Je meet vanaf waar je bent begonnen met de rand. Je kan meten aan de kant van het armsgat, of plaats een markeerder op het achterpand (17 cm) waar je bent begonnen met de rand.
08.09.2014 - 14:14Marjorie wrote:
Ik heb dezelfde vraag als Darije. Ik ben bij de rand van het werk. De boven en onderkant begrijp ik, en aan de zijkanten de lossen voor de armsgaten. Maar wat is een l-lus, is dat een losse? Ik heb 46 losse gehaakt. Ik kan toch niet 39 stk in 1 losse doen. En hoe kom je dan tot het totaal van 218?
28.08.2014 - 20:36DROPS Design answered:
l-lus is de afkorting voor een lossenlus, dus een lus van lossen. U haakt de stokjes allemaal om deze lange lus van lossen heen.
01.09.2014 - 17:41
![]() Darije wrote:
Darije wrote:
Ik ben net begonnen aan toer 2(rand van het haakwerk). Moet ik eerst alleen de bovenkant (60 stokjes (de maat 110 die ik haak ) twee toeren van maken? Dus niet overgaan op de armsgaten? En ik moet dan ook gelijk dat stukje meerderen? Naar hoeveel stokjes dan? klopt dit wat ik zeg? En wat dan? Dan moet ik wat gaan meerderen? weer de bovenkant? En met hoeveel? Voor mij graag een nog betere beschrijving graag, want ik kom hier niet uit. Wie kan mij hierbij helpen??????
26.07.2014 - 20:13DROPS Design answered:
U haakt gewoon verder in de rondte, maar er staat uitgelegd hoe te haken aan de boven- en onderkant en hoe over de lussen met lossen voor de armsgaten. U vraagt naar het aantal stokjes, dat staat in het patroon: Haak in de volgende toer 1 stk in ieder stk aan de bovenkant en aan de onderkant van het achterpand en haak in iedere l-lus 33-35-37-39-41 stk = 176-190-204-218-232 stk in totaal.
28.07.2014 - 09:45
![]() Maartjenowee wrote:
Maartjenowee wrote:
Als ik het rugpand opzet begrijp ik niet goed zijn het 5 stokjes en dan een losse en weer 5 stokjes dit tot ,de volgende toer ,deze helemaal stokjes ,en dan weer een toer met gaatjes,Op de foto lijkt het wel 3 toeren met gaatjes,of is dat later met de picotrand.
18.06.2014 - 22:38DROPS Design answered:
Hoi Maartjenowee. Het rugpand is de vierkant in het midden (voor de rand van vierkantjes en de picotrand). Je haakt dus eigenlijk een vierkante lap van stokjes. Je haakt 1 stk in de 4e van de haak, 1 stk in de volgende 3 l (= 3 stk) en dan herhaal je steeds: 1 losse overslaan en 1 stk in de volgende 5 l (dwz, 5 stk over 6 l). Ga dan door met 1 stk in elk stokje tot de vermelde afmeting.
19.06.2014 - 12:38
![]() Doris wrote:
Doris wrote:
Die Maschenprobe ist bei der deutschen Version anscheinend falsch. Hier 23 Stb x 10 Reihen, aber in der norwegischen Anleitung 23 Stb x 12 Reihen.
09.04.2014 - 16:06DROPS Design answered:
Liebe Doris, vielen Dank für den Hinweis, wir werden das gleich korrigieren.
11.04.2014 - 07:43
![]() Alix Friedrichs wrote:
Alix Friedrichs wrote:
Ich bitte um Angabe der Farbnummern für die verschiedenen Fabel-Garne für das Kinderbolero. Vielen Dank im voraus.
04.02.2014 - 16:36DROPS Design answered:
Liebe Alix, es ist nur Farbe 911, fun lila, wie in der Anleitung angegeben.
05.02.2014 - 10:11
![]() NettyHermans wrote:
NettyHermans wrote:
Als ik 49 losse heb voor het armsgat,hoe kan ik daar dan 41stokjes haken ????
10.07.2013 - 07:52DROPS Design answered:
Hoi Netty, je slaat 8 l gelijkmatig over zodat je 41 stk hebt bij elk armsgat.
11.07.2013 - 13:24
Tilda#tildavest |
|
 |
 |
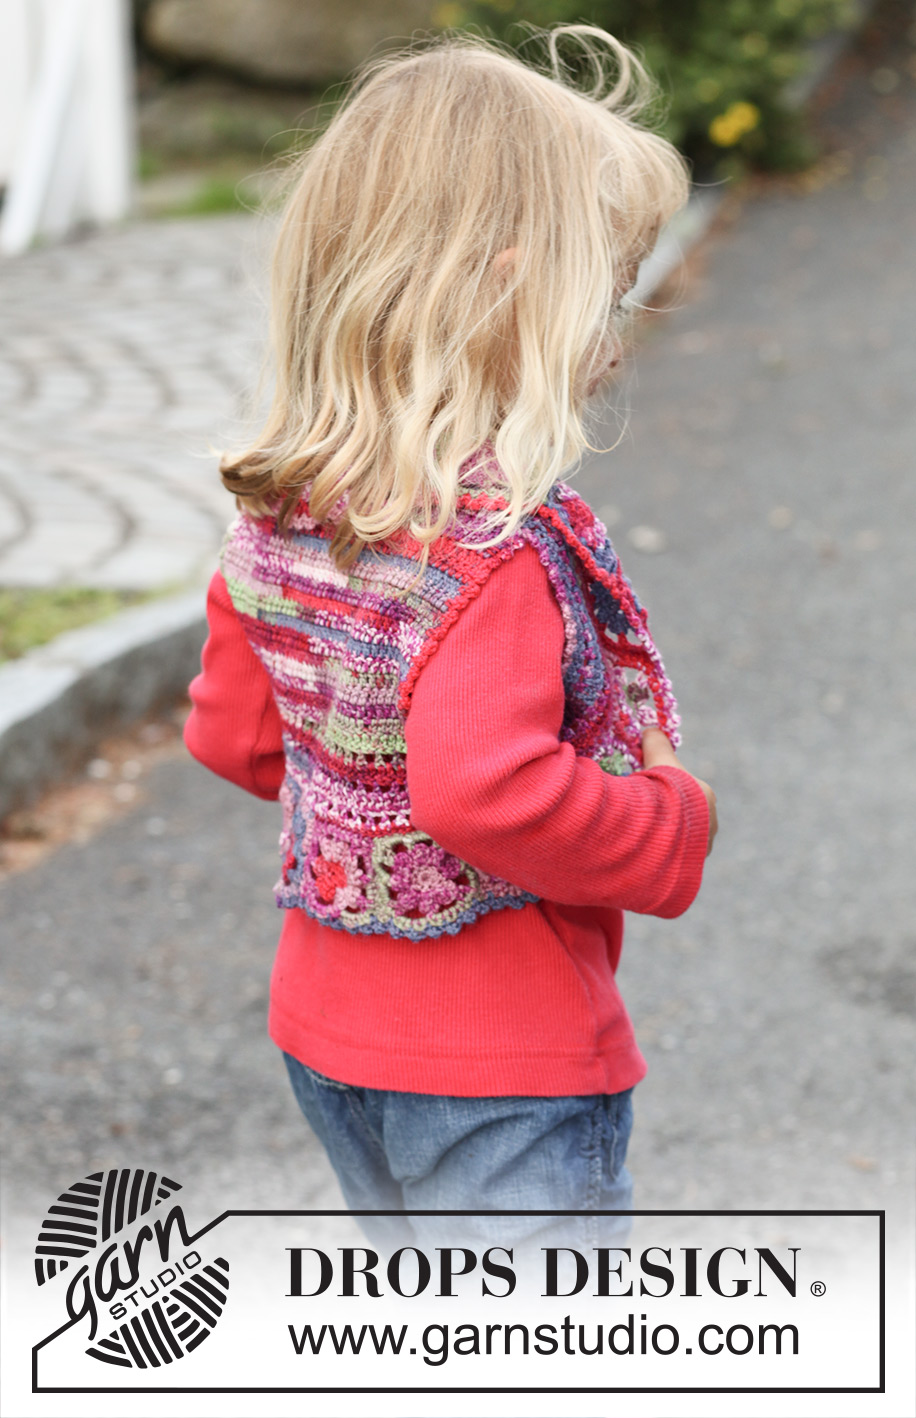
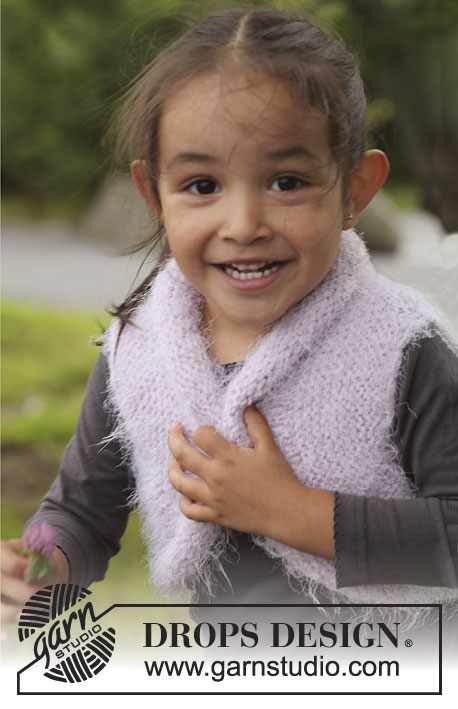
Crochet DROPS bolero in "Fabel". Size 3 - 12 years.
DROPS Children 22-29 |
|
|
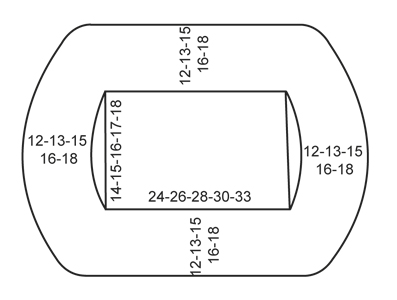
CROCHET INFO: Replace first tr on every row/round with 3 ch. Finish every round with 1 sl st in 3rd ch from beg of round. INCREASE TIP: Inc by working 2 tr in 1 st. --------------------------------------------------------- BACK PIECE: Worked back and forth - SEE CROCHET INFO! Work 67-73-79-85-91 loose ch on hook size 3 mm with Fabel. Work 1 tr in 4th ch from hook, 1 tr in each of the next 3 ch, * skip 1 ch, 1 tr in each of the next 5 ch *, repeat from *-* the rest of the row = 55-60-65-70-75 tr. Then work 1 tr in every tr back and forth until piece measures 14-15-16-17-18 cm. EDGE PIECE: Work 1 tr in each of the 55-60-65-70-75 tr at the top along back piece, then work 39-42-44-46-49 ch (= armhole), 1 tr in each of the 55-60-65-70-75 tr at the bottom along back piece and then 39-42-44-46-49 ch (= armhole), finish with 1 sl st in first tr on round. On next round work 1 tr in every tr at the top and at the bottom of back and in every ch-loop work 33-35-37-39-41 tr = 176-190-204-218-232 tr in total. Continue in the round as follows: ROUND 1: 1 tr in first tr (replaced with 3 ch), * 1 ch, skip 1 tr, 1 tr in next tr *, repeat from *-* and finish with 1 ch, skip 1 tr and 1 sl st in 3rd ch from beg of round. ROUND 2: 1 tr in every tr and 1 tr in every ch. Repeat these 2 rounds upwards - AT THE SAME TIME when edge measures approx. 3-3-3-4-4 cm (adjust so that next round is a round with tr only), inc 16-20-24-29-34 tr evenly - READ INCREASE TIP - repeat inc when piece measures approx. 5-6-7-7-8 cm = 208-230-252-276-300 tr. Work until edge measures approx. 7-8-10-11-13 cm. Put piece aside. CROCHET SQUARE: Work 4 ch on hook size 3 mm with Fabel, form a ring with 1 sl st in first ch. ROUND 1: 8 dc in ch-ring, finish with 1 sl st in first dc from beg of round. ROUND 2: 1 sl st in first dc, * 3 ch, in same dc as sl st work 2 tr but wait with last pull through on each tr until both have been worked, make 1 YO and pull thread through all 3 loops on hook, 3 ch, 1 sl st in same dc as both tr were worked, 1 sl st in next dc *, repeat from *-* until 1 dc remains, work as follows in this dc: 1 sl st, 3 ch, then 3 tr but wait with last pull through on each tr until all 3 have been worked, make 1 YO and pull thread through all 4 loops on hook (= 8 leaves). ROUND 3: * 4 ch, at the top of next leaf work 1 tr + 2 ch + 1 tr (= corner), 5 ch, 1 dc at the top of next leaf, 5 ch, at the top of next leaf work 1 tr + 2 ch + 1 tr (= corner), 4 ch, 1 dc at the top of next leaf, 4 ch, at the top of next leaf work 1 tr + 2 ch + 1 tr (= corner), 3 ch, 1 dc at the top of next leaf, 3 ch, at the top of next leaf work 1 tr + 2 ch + 1 tr (= corner), 4 ch, 1 sl st in first ch from beg of round. ROUND 4: In the 4-ch-loops work 4 dc, in the 5-ch-loops work 5 dc, in the 3-ch-loops work 3 dc and in the 2-ch-loops in every corner work 1 dc, 3 ch, 1 dc = a total of 40 dc around the square, finish with 1 sl st in first dc, cut the thread. Two of the sides are the same width - approx. 5 cm, 1 side is narrower - approx. 4½ cm and 1 side is wider - approx. 5½ cm. Work 20-22-24-26-30 squares. Sew the squares tog in one long strip – sew edge to edge – make sure that the shorter sides are placed against the same side and that the longer sides are placed against the opposite side so that the strip is curved. Begin by fastening the 2 middle squares on the strip mid back at the top of edge piece – sew edge to edge along the shortest side on the squares. Continue to sew down the one side and until mid back at the bottom of edge piece, then sew the other side of the strip on – make sure not sew too tightly when sewing on the strip. If more or less squares are needed this must be adjusted before the last 2 squares are sewn tog mid back. PICOT BORDER: Work on hook size 3 mm with Fabel at the edge around the entire strip of crochet squares. Beg in the first square that was sewn on at the back of neck and work as follows: 1 dc in the second st on square, * 1 picot (= 3 ch, 1 dc in first ch), skip 1 dc, 1 dc in next dc *, repeat from *-* (there should be approx. 5 picots along every square + 1 in the transition to next square), finish with 1 sl st in first dc from beg of round. Work picot border the same way around the armholes. |
|
 |
|
Have you finished this pattern?Tag your pictures with #dropspattern #tildavest or submit them to the #dropsfan gallery. Do you need help with this pattern?You'll find 7 tutorial videos, a Comments/Questions area and more by visiting the pattern on garnstudio.com. © 1982-2025 DROPS Design A/S. We reserve all rights. This document, including all its sub-sections, has copyrights. Read more about what you can do with our patterns at the bottom of each pattern on our site. |
|


Post a comment to pattern DROPS Children 22-29
We would love to hear what you have to say about this pattern!
If you want to leave a question, please make sure you select the correct category in the form below, to speed up the answering process. Required fields are marked *.