
Popular categories
Looking for a yarn?


Comments / Questions (40)
![]() Jette Binder wrote:
Jette Binder wrote:
Hi Does this pattern exist in Danish? it is so lovely :)
10.02.2019 - 00:17DROPS Design answered:
Dear Jette, you can find the Danish translation for this patternhere . Happy Crafting!
11.02.2019 - 03:34Magdalena wrote:
En ce qui concerne le diagramme je crois qu'il y'a une erreur (décalage à gauche du deuxième motif , il devrait être à un carré plus à droite ) merci
15.11.2013 - 00:29DROPS Design answered:
Bonjour Magdalena et merci, un nouveau diagramme M.1 a été publié. Bon tricot!
20.11.2013 - 14:01
![]() Margit wrote:
Margit wrote:
And ofcourse then the other ones are 4 + 1 and 5+1 :)
18.10.2012 - 20:47Margit wrote:
Hi. Please note that that pattern chart is a bit off. The second "flower" should be - 5 right ones, hole and 1 right one. So the second "flower" will stay pretty in the middle of 2 first flowers :)
18.10.2012 - 20:04
![]() Odny wrote:
Odny wrote:
Ja,er klar over det,men; hvis en trekker en diagonal på midten er det ingen mønster over de to midterste maskene.Men når en har strikket M1 og skal gjenta rapporten blir det ingen masker mellom som strikkes uten mønster. Det ble ihverfall penere å strikke en maske midt i og en maske på slutten av M1 uten mønster. Fortsatt er det fem masker mellom mønstrene, men maske 4 eller 5 i rapporten blir maske 8.
07.11.2011 - 19:29
![]() DROPS Design wrote:
DROPS Design wrote:
Er litt usikker hva du mener. Det er 5 masker mellom hver hullmønster og 3 rader.
04.11.2011 - 09:05
![]() Odny wrote:
Odny wrote:
Vedr M1 Er det riktig at det skal være 2 masker mellom hullmønstrene når en ser på midten og at det ikke blir noen masker i mellom når en gjentar rapporten? Skal det ikke være en maske som er uten mønster i midten av rapporten og en på slutten av M1. Det ble ihvertfall penere
03.11.2011 - 19:49
![]() Therese Kurseth wrote:
Therese Kurseth wrote:
Lekker og lett tunika i deilige naturfarger. Denne ønsker jeg å strikke. Ellers vil jeg meddele at dere har mange fine opp skrifter på nydelige tunikaer og topper.
12.06.2010 - 16:46
![]() Drops Design wrote:
Drops Design wrote:
Bonjour Anna, le dos et le devant se tricotent séparément en allers retours (la mention des coutures sera très bientôt ajoutée), sur aiguille circulaire pour avoir assez de place pour y loger toutes les mailles sans qu'elles ne soient trop serrées.
20.04.2010 - 08:57
![]() Anna wrote:
Anna wrote:
Bonjour, Je voudrais bien tricoter ce modèle, sauf que je n'arrive pas comprendre, si il se tricote en un seul morceau ou le dos et devant séparément (il est marqué en aller-retours). Si ca se tricote séparément, pourquoi dans l'assemblage n'est pas indiqué "coudre les cotés" et pourquoi faut-il utiliser des aiguilles circulaires? Au cas ou ca se tricote ensemble, pourriez-vous expliquer comment est-il possible de le faire en aller-retours? Merci.
17.04.2010 - 18:27
|
|||||||||||||
Bailey#baileytunic |
|||||||||||||
 |
 |
||||||||||||
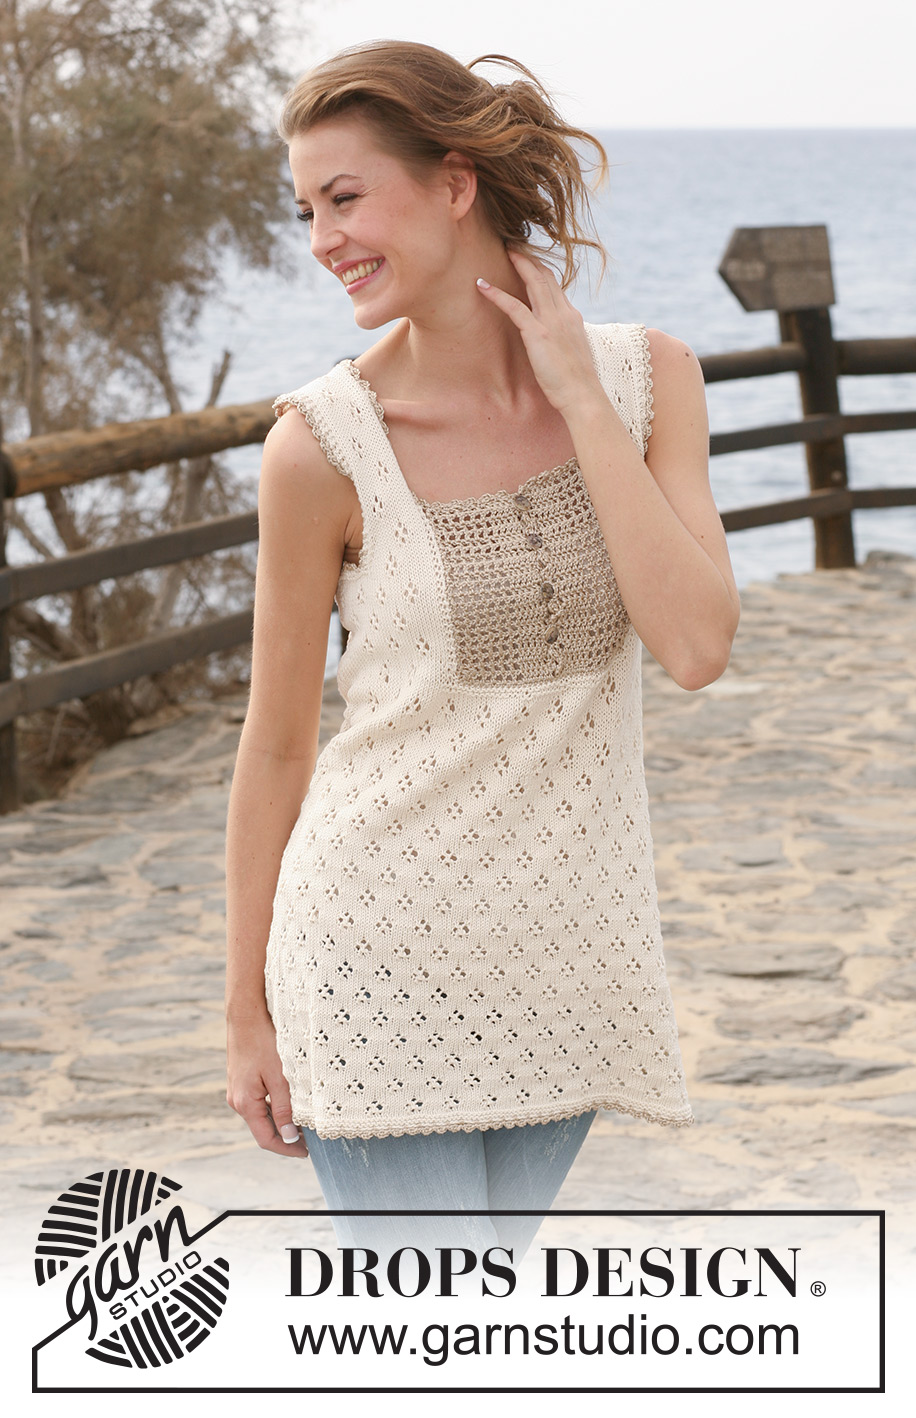
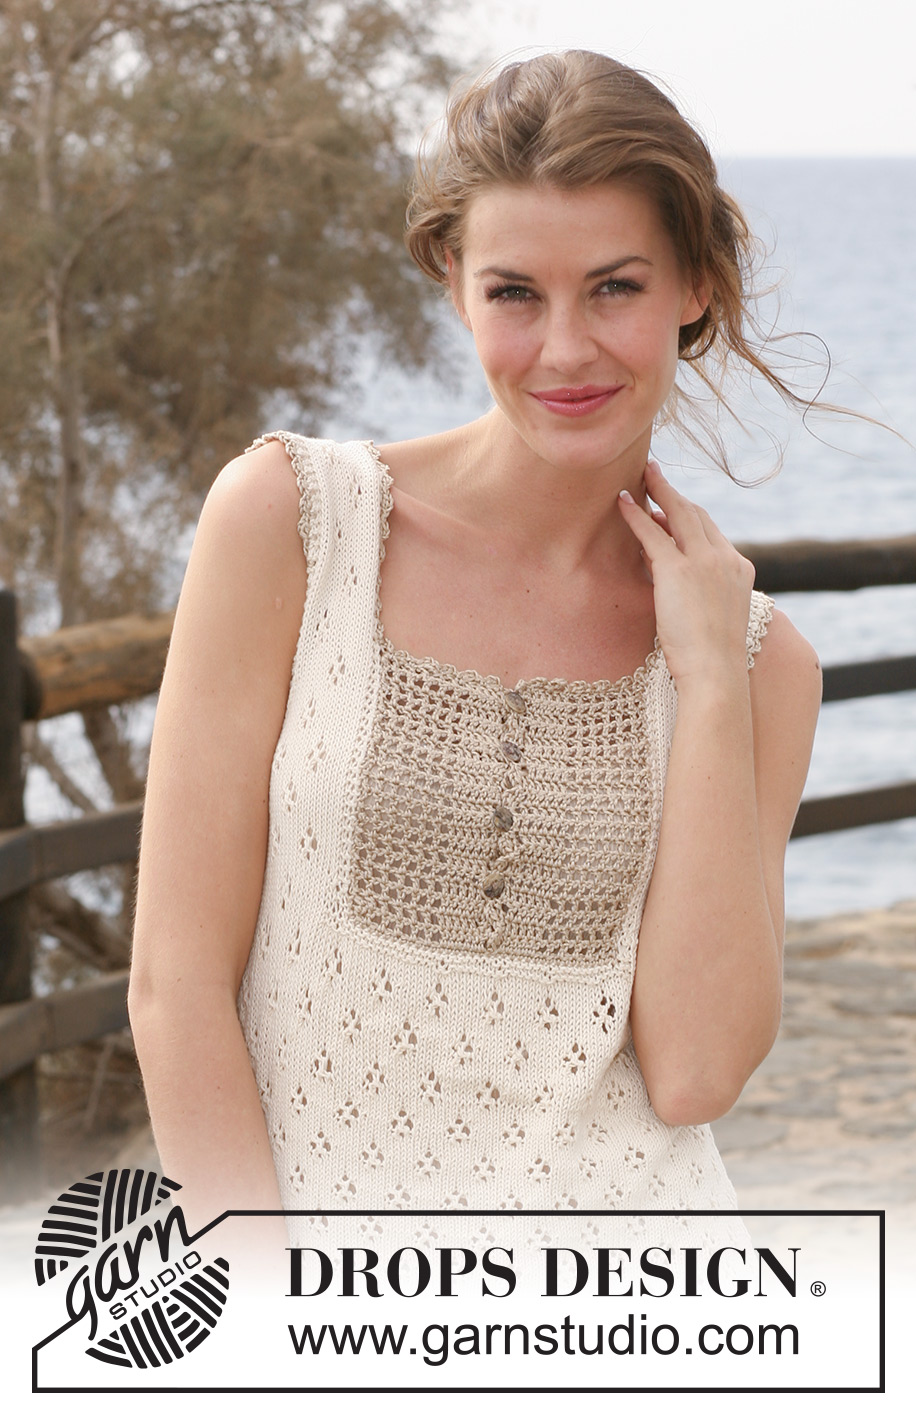
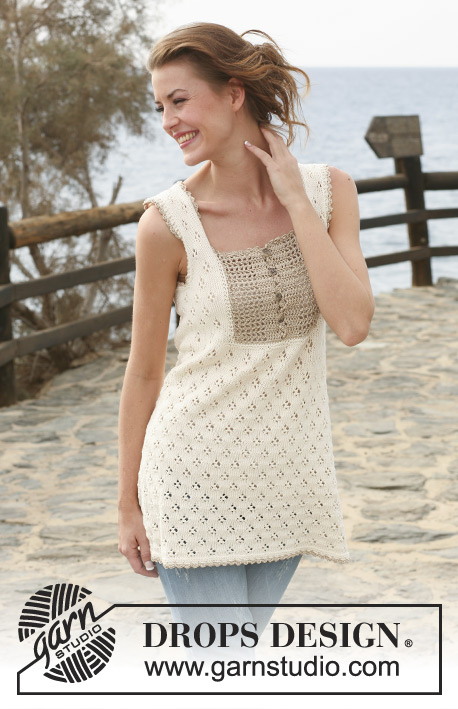
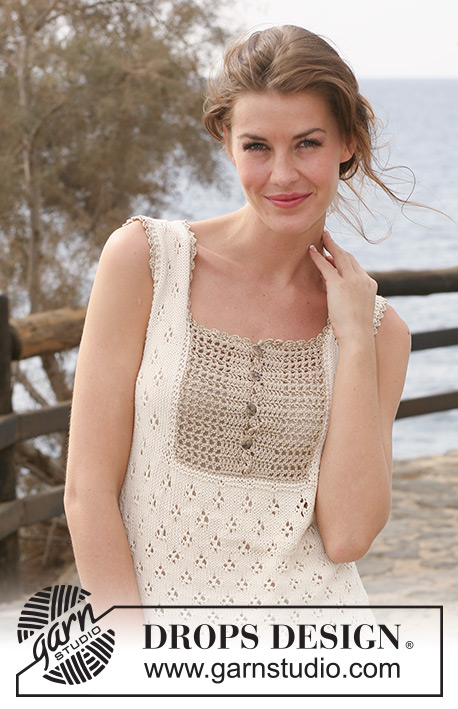
Knitted DROPS Tunic in ”Safran” with crochet yoke in ”Cotton Viscose”. Size XS - XXXL
DROPS 118-22 |
|||||||||||||
|
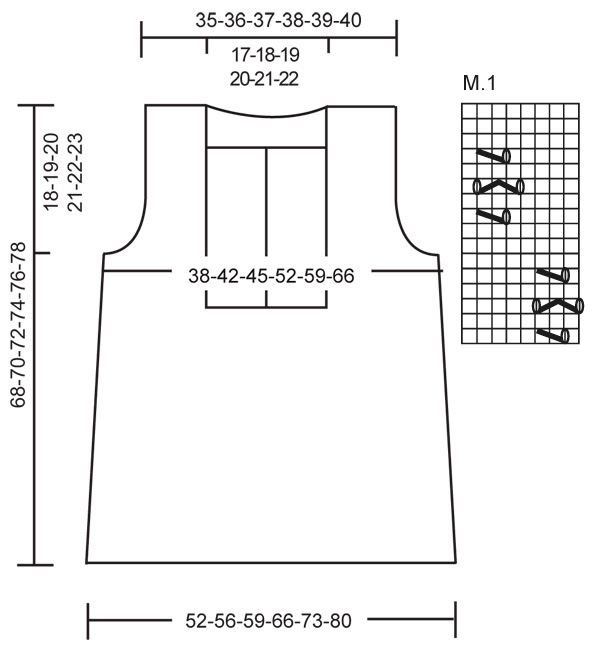
GARTER ST (back and forth on needle): K all rows. PATTERN: See diagram M.1. Diagram shows the pattern from RS. First row = RS. DECREASING TIP (applies to armhole): Make all dec from RS. Dec as follows after 3 garter sts: Slip 1 st as if to K, K1, psso. Dec as follows before 3 garter sts: K2 tog. -------------------------------------------------------- BACK PIECE: Worked back and forth on needle. Cast on 122-130-138-154-170-186 sts on circular needle size 3.5 mm with Safran. Work 4 rows GARTER ST - see above! Work 2 rows stocking st and continue in M.1 with 1 edge st each side. REMEMBER THE KNITTING TENSION! When piece measures 8 cm dec 1 st each side, and repeat the dec on every 2.5 cm a total of 16 times = 90-98-106-122-138-154 sts – work sts not fitting into M.1 in stocking st. When piece measures 49-50-51-52-53-54 cm work 4 rows garter st on 8 sts each side, with remaining sts as before. Now cast off 5 sts each side at the beg of the next 2 rows, and dec 1 st to shape the armhole inside 3 garter sts each side on every row from RS a total of 0-3-5-12-19-26 times – See DECREASING TIP! = 80-82-86-88-90-92 sts. When piece measures 65-67-69-71-73-75 cm work 4 rows garter st on the middle 44-46-48-50-52-54 sts with remaining sts as before. On next row cast off the middle 40-42-44-46-48-50 sts for neck and complete each shoulder (= 20-20-21-21-21-21 sts) separately. Continue with 2 garter sts towards neck, lace pattern and 3 garter sts at the side. Cast off when piece measures 68-70-72-74-76-78 cm. FRONT PIECE: Cast on and work like back piece until piece measures 37-38-39-40-41-42 cm. Now work 4 rows garter st on the middle 44-46-48-50-52-54 sts with remaining sts as before. On next row cast off the middle 40-42-44-46-48-50 sts for neck and complete each side separately. RIGHT SIDE: Continue in M.1 as before but work 2 sts towards mid front in garter st. Work sts not fitting into M.1 in stocking st. When piece measures 49-50-51-52-53-54 cm (adjust so that next row is from WS) work 4 rows garter st on 8 sts at the side with remaining sts as before. On next row cast off 5 sts at the side and dec for armhole as described for back piece. When all dec are complete there are 20-20-21-21-21-21 sts left on needle. Cast off when piece measures 68-70-72-74-76-78 cm. LEFT SIDE: Like right side. YOKE: Crochet with Cotton Viscose and crochet hook size 3.5 mm as follows: Crochet 1 dc from RS in each of the 40-42-44-46-48-50 cast off sts mid front = 40-42-44-46-48-50 dc. Continue as follows: RIGHT SIDE: ROW 1 (from WS): Crochet 4 ch (1 tr + 1 ch), skip 1 dc, *1 tr in next dc, 1 ch, skip 1 dc *, repeat from *-* on the next 12-12-14-14-16-16 dc, crochet 1 tr in each of the next 6-7-6-7-6-7 dc, turn piece. ROW 2: Crochet 1 tr in each of the first 6-7-6-7-6-7 tr, *1 ch, skip 1 ch from previous row, 1 tr in next tr *, repeat from *-* and finish with 1 tr in 3rd ch from previous row. Repeat row 1 and 2 until yoke measures 18-19-20-21-22-23 cm. Cut and fasten thread. Repeat on the left the side, but mirrored to have the 6 tr towards one another mid front. ASSEMBLY: Sew shoulder seams. Sew yoke to the top at the sides under the 2 garter sts towards mid front with neat sts. Yoke should sit approx 12 cm from the shoulder seam. Sew side seams within 1 edge st. CROCHET BORDER: Begin at bottom of split at the front of yoke, crochet up along right side of split, round the neck and down the left side of split with Cotton Viscose and crochet hook size 3.5 mm as follows: 1 dc, * 3 ch, 1 tr in dc, skip approx 1 cm, 1 dc *, repeat from *-*, and finish with 3 ch, 1 tr in dc, skip approx 1 cm and 1 sl st in first dc. Crochet a similar border with Cotton Viscose round armholes and round bottom edge of tunic. Sew buttons evenly to left side of yoke and use crochet border on the right side as buttonholes. |
|||||||||||||
Diagram explanations |
|||||||||||||
|
|||||||||||||
 |
|||||||||||||
Have you finished this pattern?Tag your pictures with #dropspattern #baileytunic or submit them to the #dropsfan gallery. Do you need help with this pattern?You'll find 4 tutorial videos, a Comments/Questions area and more by visiting the pattern on garnstudio.com. © 1982-2026 DROPS Design A/S. We reserve all rights. This document, including all its sub-sections, has copyrights. Read more about what you can do with our patterns at the bottom of each pattern on our site. |
|||||||||||||


With over 40 years in knitting and crochet design, DROPS Design offers one of the most extensive collections of free patterns on the internet - translated to 17 languages. As of today we count 324 catalogues and 12290 patterns translated into English (UK/cm). 12290
We work hard to bring you the best knitting and crochet have to offer, inspiration and advice as well as great quality yarns at incredible prices! Would you like to use our patterns for other than personal use? You can read what you are allowed to do in the Copyright text at the bottom of all our patterns. Happy crafting!
Post a comment to pattern DROPS 118-22
We would love to hear what you have to say about this pattern!
If you want to leave a question, please make sure you select the correct category in the form below, to speed up the answering process. Required fields are marked *.