
Popular categories
Looking for a yarn?


Comments / Questions (39)
![]() Marie wrote:
Marie wrote:
Bonjour, Je ne comprends pas comment on réalise les augmentations du devant droit. Avant ou après M1 ? Merci d'avance. Cordialement, Marie
01.07.2018 - 10:51DROPS Design answered:
Bonjour Marie, on a 2 types d'augmentations pour les devants, une d'elle se fait juste après M.1 (voir AUGMENTATIONS) soit en début de rang sur l'endroit pour le devant droit (pour le devant gauche, on augmentera avant M.2, en fin de rang sur l'endroit), et on augmente en plus sur le côté = en fin de rang sur l'endroit (en début de rang sur l'endroit pour le devant gauche). Bon tricot!
02.07.2018 - 09:53
![]() HERMAN Viviane wrote:
HERMAN Viviane wrote:
Bonjour, je tricote le modèle drops 118-38, petit gilet court. Je suis au 4ème rang du dos et donc je commence un rang à l'envers, or d'après les explications du M3 on doit être sur l'endroit et je me trouve sur l'envers, pouvez-vous m'expliquer comment je fais mon rang avec une diminution ?? merci beaucoup
09.03.2016 - 10:39DROPS Design answered:
Bonjour Mme Herman, on commence M.3 sur l'endroit, donc 1er rang = sur l'endroit, au 4ème rang, vous serez sur l'envers, c'est juste. Répétez M.3 jusqu'à ce que vous ayez 4 rangs point mousse de chaque côté soit 2 côtes mousse, et commencez à rabattre pour les emmanchures au rang suivant sur l'endroit. Bon tricot!
09.03.2016 - 10:51
![]() VERONIQUE wrote:
VERONIQUE wrote:
Merci pour votre réponse. Je n'avais pas compris que les rangs étaient des rangs raccourcis,non précisé sur les explications. Je vais réessayer. Cordialement
27.01.2014 - 11:10
![]() LE QUANG Véronique wrote:
LE QUANG Véronique wrote:
Bonjour, Je n'arrive pas à réaliser le devant gauche avec le diagramme M2. N'y a t-il pas une erreur sur la ligne N° 4 au dessus du V renversé. Sur la M1 au dessus du V renversé au rang suivant il faut faire un jeté et pas sur le M2 ligne 4. Merci d'avance de me donner l'explication. Véronique
26.01.2014 - 17:32DROPS Design answered:
Bonjour Mme Le Quand, le jeté au-dessus du "V" inversé qui est au 8ème rang de M.1 (= juste au-dessus du fameux V inversé) se trouve dans M.2 au 8ème rang, c'est-à-dire le rang suivant le V inversé tricoté sur toutes les mailles (les précédents sont des rangs raccourcis). Bon tricot!
27.01.2014 - 09:20
![]() Claudia wrote:
Claudia wrote:
Seid ihr euch sicher, dass das Diagramm für M2 richtig ist? Laut Diagramm werden Umschläge aufgenommen, die erst 3 Reihen später verarbeitet werden.
10.09.2013 - 13:20DROPS Design answered:
Liebe Claudia, das Diagramm ist korrekt. Mir ist nicht ganz klar, auf welche Stelle sich Ihre Frage bezieht, aber haben Sie gesehen, dass im Diagramm auch verkürzte R sind?
11.09.2013 - 08:08Aurora Isabel wrote:
Ex nas costas está escrito M3 (=5 pts)mas, o M3tem um retângulo com muitos pontos. O mesmo direi de M1 e M2, tenho dificuldade de entender como fazer embora tenha entendido cada símbolo.Não sei se consegui explicar direito a minha dúvida, sou iniciante.Comentários á parte,sou portuguesa residente no Brasil. Tenho saudades de Portugal. Grata
12.06.2013 - 21:55DROPS Design answered:
O diagrama M3 está do lado direito do desenho do modelo e tem 5 pts. Quanto aos diagramas M1 e M2, aconselhamos a que verifique o menu de vídeos que ensinam como ler um diagrama). O separador encontra-se à direita da fotografia do modelo. Para mais dúvidas, pode sempre juntar-se à página de fãs da Drops Garnstudio no Facebook. Com as nossas cordiais saudações directamente de Portugal
18.06.2013 - 10:43
![]() Behnaz wrote:
Behnaz wrote:
= Dear All, Thank you for your professional web-site. Please make a video for: From WS: K first YO from previous row and slip the other off needle Best regards, BEHNAZ
04.07.2012 - 07:43DROPS Design answered:
Dear Mrs Behnaz, in the video "Dropped stitches" you will see how to do this. Happy knitting !
04.12.2012 - 16:49
![]() DROPS Deutsch wrote:
DROPS Deutsch wrote:
Ich nehme an Sie sprechen von der 5. und 6. Runde in M1. Hier werden zuerst 2 M. abgekettert. Danach 4 m, 2 Umschläge, 2 zusammen, 1 m (= 6 Maschen und 2 Umschäge). Bei er nächsten R. werden 7 Maschen gestrickt,d.h. aus dem Umschlag wird eine M. herausgestrickt.
07.11.2011 - 08:59
![]() Maria wrote:
Maria wrote:
Bei M1, nachdem man 2 Maschen abgenommen hat, bleiben 1 Masche plus 4 Maschen (also 5) vor dem doppelten Umschlag übrig. Auf der Rückseite werden, nachdem der doppelte Umschlag bearbeitet wurde, jedoch nur 4 Maschen zu stricken. Wie kann das sein?
04.11.2011 - 12:07
![]() Maria wrote:
Maria wrote:
Hallo Designerteam! bei M1, nachdem man 2 Maschen abgenommen hat, bleiben 1 Masche plus 4 Maschen (also 5) vor dem doppelten Umschlag übrig. Auf der Rückseite werden, nachdem der doppelte Umschlag bearbeitet wurde, jedoch nur 4 Maschen zu stricken. Wie kann das sein?
04.11.2011 - 12:02
|
||||||||||||||||||||||||||||||||||
Pristina#pristinavest |
||||||||||||||||||||||||||||||||||
 |
 |
|||||||||||||||||||||||||||||||||
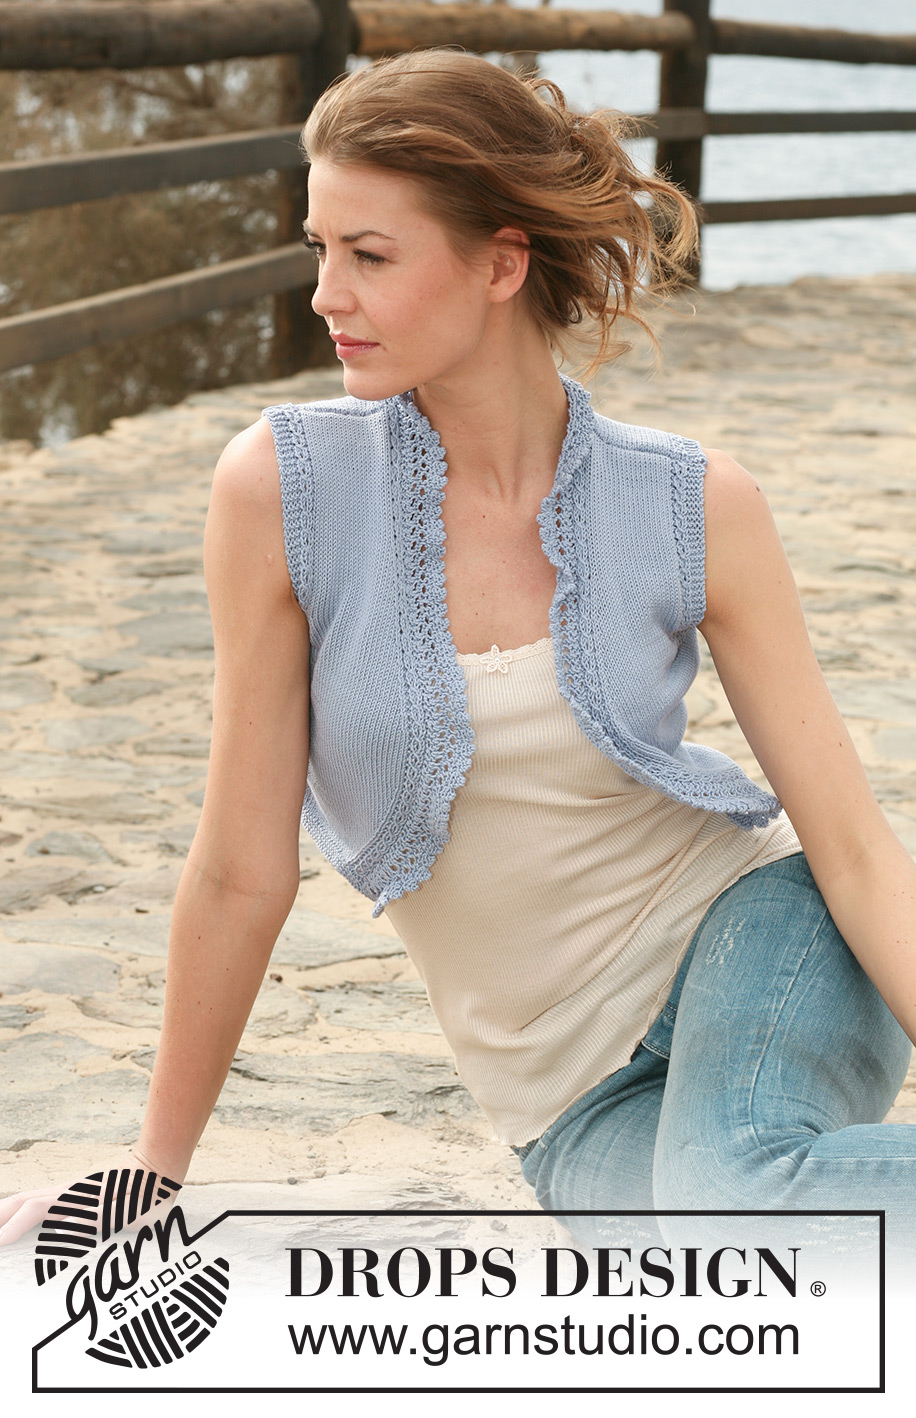
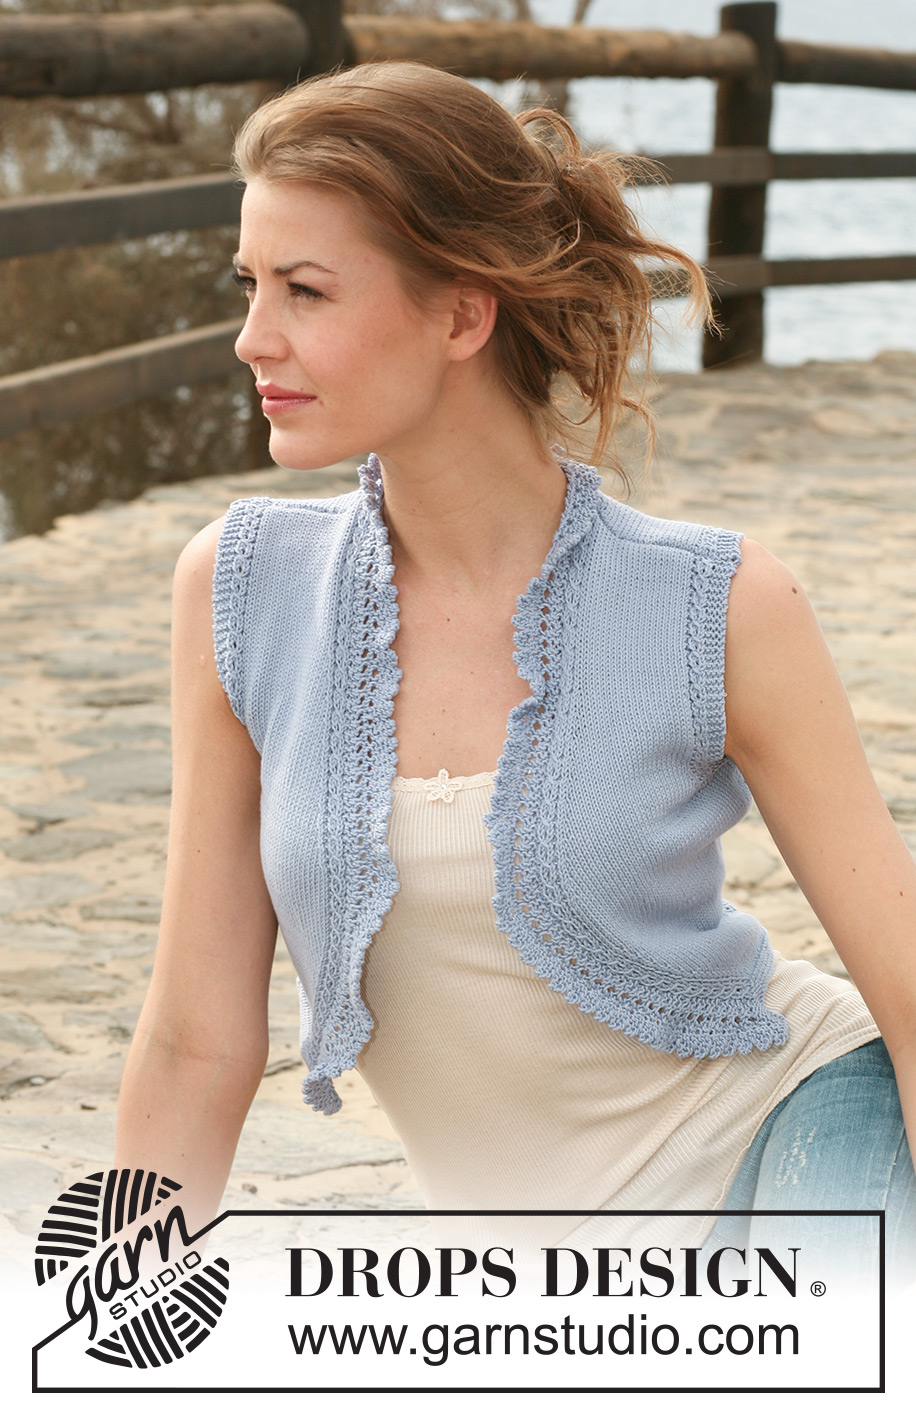
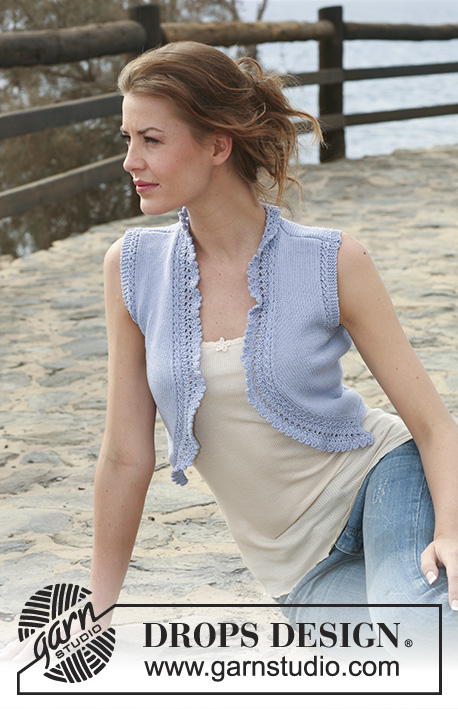
Short DROPS waistcoat in ”Safran” with lace pattern along front bands. Size XS to XXL.
DROPS 118-38 |
||||||||||||||||||||||||||||||||||
|
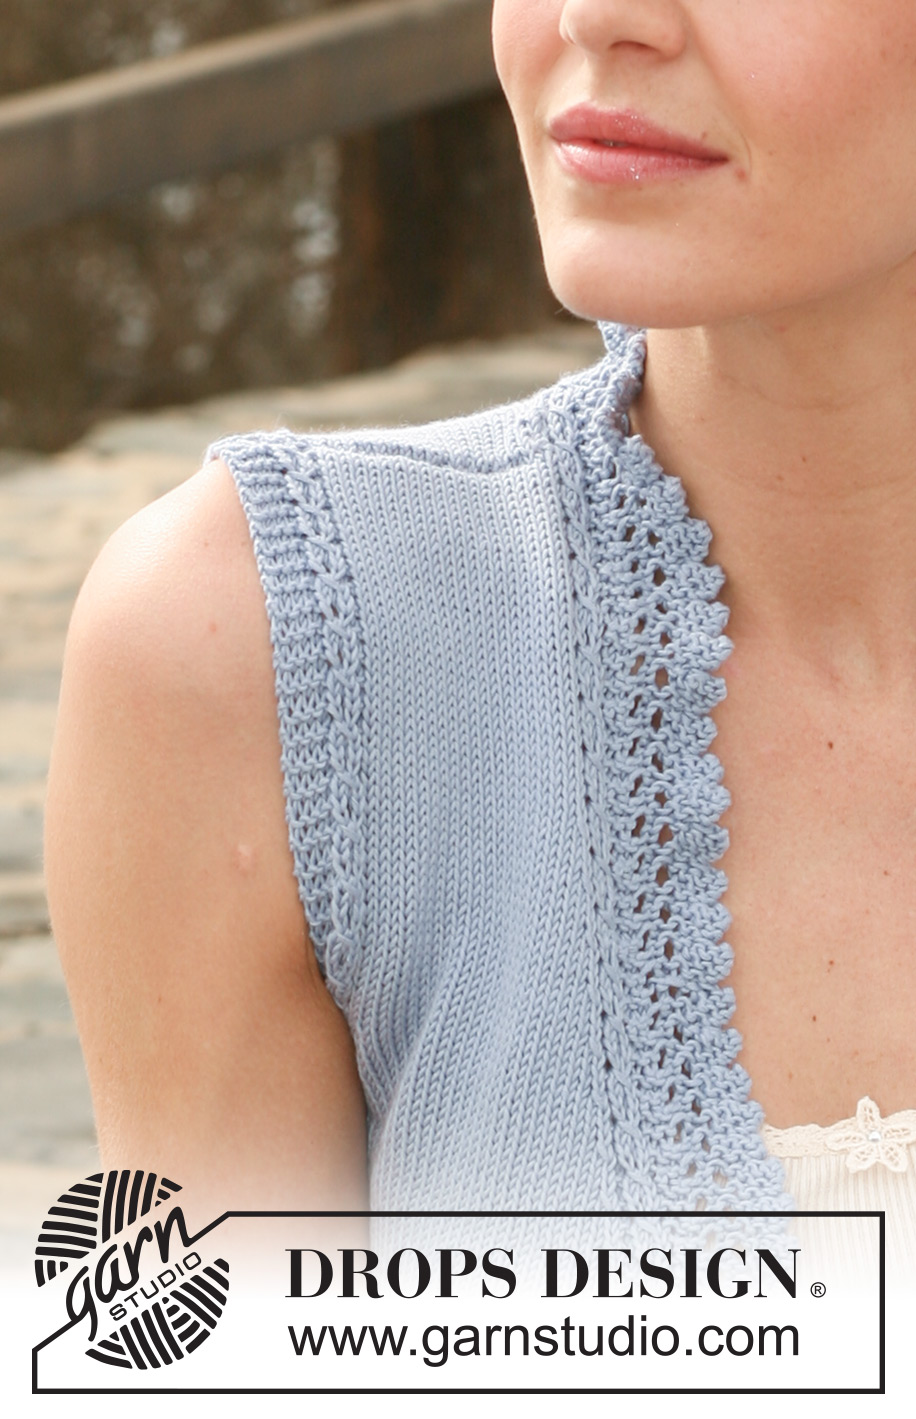
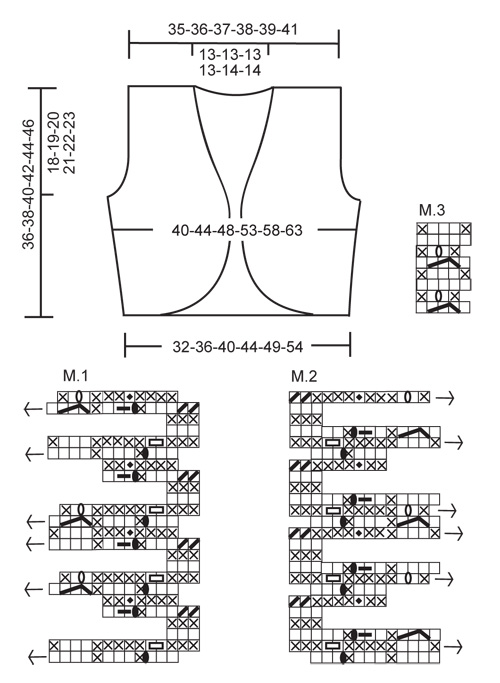
GARTER ST (back and forth on needle): K all rows. PATTERN: See diagram M.1, M.2 and M.3 - pattern in diagram is seen from RS and the first row in all diagrams = RS. To make M.1 and M.2 fall nicely you need to work more rows on these sts than the rest of front piece, do this as shown in diagram. INCREASING TIP: Make all inc from RS. Inc inside all sts in M.1/M.2 + 1 stocking st by making 1 YO, on next row P YO into back of loop to avoid a hole. DECREASING TIP-1 (applies to neck): Make all dec from RS inside M.1/M.2. Dec as follows AFTER M.1: slip 1 st as if to K, K1 and psso. Dec as follows BEFORE M.2: K2 tog. DECREASING TIP-2 (applies to armhole): Make all dec from RS inside 8 sts (i.e. 3 garter sts + M.3). Dec as follows AFTER 8 sts: slip 1 st as if to K, K1 and psso. Dec as follows BEFORE 8 sts: K2 tog. -------------------------------------------------------- -------------------------------------------------------- BACK PIECE: Worked back and forth on needle. Cast on 78-88-98-108-120-132 sts (includes 1 edge st each side) on needle size 2.5 mm. Work 6 rows GARTER ST – see above! Change to needle size 3 mm and continue in stocking st (first row = RS). REMEMBER THE KNITTING TENSION! When piece measures 5-5-6-6-7-7 cm inc 1 st each side, and repeat the inc on every 4th row a total of 10 times = 98-108-118-128-140-152 sts. When piece measures 17-18-19-20-21-22 cm continue as follows (from RS): 7-9-11-13-15-17 garter sts, M.3 (= 5 sts), stocking st until 12-14-16-18-20-22 sts remain, M.3 (= 5 sts) and 7-9-11-13-15-17 garter sts. Continue like this until there are 4 rows garter st each side. Now cast off 4-6-8-10-12-14 sts each side for armhole (i.e. at the beg of the next 2 rows) = 90-96-102-108-116-124 sts. Continue in stocking st with 3 garter sts + M.3 each side, AT THE SAME TIME on next row from RS dec 1 st each side to shape the armhole – SEE DECREASING TIP-2, and repeat the dec on every other row a total of 3-5-7-8-11-13 times = 84-86-88-92-94-98 sts. Continue with 3 garter sts and M.3 each side until finished measurements. When piece measures 33-35-37-39-41-43 cm cast off the middle 24-24-26-26-28-28 sts for neck and complete each shoulder separately. Cast off 1 st at the beg of every row from neck 3 times = 27-28-28-30-30-32 sts left on shoulder. Cast off when piece measures 36-38-40-42-44-46 cm. RIGHT FRONT PIECE: Worked back and forth on needle. Cast on 30-35-40-45-51-57 sts on needle size 2.5 mm (includes 1 edge st at the side). Work 6 rows garter st and change to needle size 3 mm. READ ALL OF THE FOLLOWING SECTION BEFORE CONTINUING! Continue as follows (first row = RS): M.1 (= 12 sts), and stocking st on remaining sts on row, AT THE SAME TIME on this row inc 1 st towards mid front – SEE INCREASING TIP, and repeat the inc on every other row a total of 10 times and then on every 4th row a total of 5 times. INC AT SIDE: When piece measures 5-5-6-6-7-7 cm inc at the side as described for back piece (i.e. 1 st 10 times). When all inc are complete there are 43-48-53-58-64-70 stocking sts (includes 1 edge st at the side) + M.1 (varies from 12 to 14 sts) on needle. NECKLINE: When piece measures 16-17-18-19-20-21 cm dec 1 st towards mid front for neck – SEE DECREASING TIP-1, and repeat the dec on every 4th row a total of 9-9-10-10-11-11 times. ARMHOLE: When piece measures 17-18-19-20-21-22 cm continue as follows (first row = RS). Work row until 12-14-16-18-20-22 sts remain, work M.3 (= 5 sts) and 7-9-11-13-15-17 garter sts. Continue like this until there are 4 rows garter st at the side on the first 7-9-11-13-15-17 sts - AT THE SAME TIME on last garter st row cast off the first 4-6-8-10-12-14 sts for armhole - i.e. cast off from WS. Continue with 3 garter sts + M.3 towards armhole, AT THE SAME TIME dec to shape the armhole as described for back piece. When all dec for armhole and neck are complete there are 27-28-28-30-30-32 sts + M.1 left on needle. When piece measures 36-38-40-42-44-46 cm cast off the 27-28-28-30-30-32 sts on shoulder (cast off from WS) and continue in M.1 on the remaining sts for collar until collar measures approx 7-7.5 cm on the shorter side. LEFT FRONT PIECE: Cast on and work like right front piece, but mirrored, i.e. work first row after the garter st as follows: stocking st until 12 sts remain, work these in M.2. NOTE: Cast off the 4-6-8-10-12-14 sts for armhole from RS – i.e. on first row AFTER the 4 rows garter st. Also cast off shoulder sts from RS. ASSEMBLY: Sew shoulder seams. Sew side seams inside 1 edge st. Sew collar tog, edge to edge, mid back and sew collar to neckline on back piece by placing garter sts on collar on neckline and sew with small, neat sts. |
||||||||||||||||||||||||||||||||||
Diagram explanations |
||||||||||||||||||||||||||||||||||
|
||||||||||||||||||||||||||||||||||
 |
||||||||||||||||||||||||||||||||||
Have you finished this pattern?Tag your pictures with #dropspattern #pristinavest or submit them to the #dropsfan gallery. Do you need help with this pattern?You'll find 21 tutorial videos, a Comments/Questions area and more by visiting the pattern on garnstudio.com. © 1982-2026 DROPS Design A/S. We reserve all rights. This document, including all its sub-sections, has copyrights. Read more about what you can do with our patterns at the bottom of each pattern on our site. |
||||||||||||||||||||||||||||||||||


With over 40 years in knitting and crochet design, DROPS Design offers one of the most extensive collections of free patterns on the internet - translated to 17 languages. As of today we count 324 catalogues and 12290 patterns translated into English (UK/cm). 12290
We work hard to bring you the best knitting and crochet have to offer, inspiration and advice as well as great quality yarns at incredible prices! Would you like to use our patterns for other than personal use? You can read what you are allowed to do in the Copyright text at the bottom of all our patterns. Happy crafting!
Post a comment to pattern DROPS 118-38
We would love to hear what you have to say about this pattern!
If you want to leave a question, please make sure you select the correct category in the form below, to speed up the answering process. Required fields are marked *.