
Popular categories
Looking for a yarn?


Comments / Questions (9)
![]() Sandrine wrote:
Sandrine wrote:
1. question: bordure des devants/col: „placer la bande de sorte qu‘il y ait 3 m end sur l‘extérieur“. je ne comprends pas! 2. question: la bande doit être aussi longue que le dos en bas, l’encolure et les deux devants?
15.05.2021 - 19:08DROPS Design answered:
Bonjour Sandrine, la bordure des devants/col se tricote en une seule partie et doit être cousue au-dessus des 3 mailles point mousse le long des devants. Cette bordure doit mesurer entre 125-143 cm - cf taille. ajustez la longueur si besoin pour qu'elle ne resserre pas l'ouvrage et pour qu'elle ne soit pas trop longue non plus. Bon tricot!
17.05.2021 - 09:09
![]() Delebecque wrote:
Delebecque wrote:
La bordure devant fait elle le tour complet du gilet, c'est à dire devant droit , bas devant droit, bas du dos, encolure dos, devant gauche et bas gauche ? je ne comprends pas bien non plus pourquoi faut-il couvrir les 3 m au point mousse des milieux devant ? Merci pour votre aide.
05.01.2021 - 19:26DROPS Design answered:
Bonjour Mme Delebecque, tout à fait, la bordure des devants / col fait tout le tour de l'ouverture du gilet, vous la coudrez en commençant par le bas du devant, au-dessus des 3 mailles point mousse en remontant jusqu'à l'encolure, le long de l'encolure dos et en descendant le long de l'autre côté du gilet, au-dessus des 3 mailles point mousse également. Bonnes finitions!
06.01.2021 - 07:22
![]() Mieke Spaink wrote:
Mieke Spaink wrote:
Moet het voorpand-en kraagbeleg over de 3 ribbelsteken worden genaaid of aan de rand zodat je de 3 ribbel steken ook ziet?
30.11.2020 - 20:01DROPS Design answered:
Dag Mieke,
De bies/ het beleg moet over de 3 ribbelsteken geplaats worden, zodat je deze ribbels niet meer ziet. Ik heb de beschrijving overigens ietsje aangepast: met de verkeerde kanten tegen elkaar verwijderd en de zin tussen haakjes toegevoegd.
14.12.2020 - 11:57
![]() Myra-Ellen wrote:
Myra-Ellen wrote:
Bonjour, Qu'entendez-vous par "tricoter les 3m du milieu devant au point mousse" ? et "augmenter côté milieu devant" ? A partir de quand dois-je tricoter au point mousse et où ? Et les augmentations du "côté milieu devant" ne se mélangent-elles pas avec celles sur le côté indiquées plus loin ? Du coup, sont-ce 28 mailles (taille L) que je dois avoir tout compris ou seulement avec les augmentations du côté ? Merci de me dépanner !
10.10.2015 - 18:42DROPS Design answered:
Bonjour Myra-Ellen, les 3 m du milieu devant sont celles de la bordure devant (les 3 premières m sur l'endroit pour le devant droit) pour former l'arrondi du devant. Les augmentations côté milieu devant se font après ces 3 m point mousse (devant droit), celle sur le côté se font en fin de rang sur l'endroit (devant droit) = côté couture au dos. Quand toutes ces augmentations sont faites, vous avez 28 m au total en taille L. Bon tricot!
12.10.2015 - 09:34
![]() Teresa wrote:
Teresa wrote:
Hello, I am having trouble with the button band/collar. The bottom of front sweater pieces are roundec but the band is not. how do I get the band to fit at lower front? And what stitch do you recommend for attaching button band? Thank you
10.09.2015 - 14:09DROPS Design answered:
Dear Teresa, the band is sewn over the 3 sts in garter sts of front pieces, lay the band over the opening of cardigan - it can help to pin it - the band will then follow the curved edge on both front pieces. Happy knitting!
10.09.2015 - 14:16
![]() Els wrote:
Els wrote:
Er zit een fout in het patroon mbt het aantal steken. Ik heb bv maat M genomen, is 56 steken opgezet. Na 10 cm aan weerskanten 1 meerderen en daarna 4x 1 steek aan weerskanten op de 7 cm. Dan kom ik op 66 steken en geen 64 steken.
31.12.2012 - 22:41DROPS Design answered:
Het patroon klopt. U begint met 56 st en meerdert 1 st aan beide zijkanten in totaal 4 keer: 2x4 st = 8 st. 56+8 = 64
04.01.2013 - 17:05Rebecca Brandt wrote:
Le dessin montre un V sur le devant pour l'encolure, mais les explications montent tout droit (sans diminutions pour le V). Est-ce normal, ou manque-t-il quelque chose?
07.09.2012 - 17:28DROPS Design answered:
Bonjour Rebecca, on ne fait aucune diminution pour l'encolure sur les devants. Le schéma montre la veste finie quand vous la portez. Bon tricot !
11.09.2012 - 08:52
![]() DROPS Design wrote:
DROPS Design wrote:
När du har stickat 18 m på st nr 7 med vienna, i resårstick, så det mäter 125-129-133-139-143 cm, så lägger du detta framstycke ovanpå framstycket på koftan. Du skall täcka de tre yttersta maskorna som du ju har längs framsidornas båda sidor. Lycka till!
08.01.2010 - 12:15
![]() Wanja Waleij wrote:
Wanja Waleij wrote:
Önskar en tydligare förklaring hur jag skall sy fast framkamnten mot framstycke, ska den ligga på framstyckets rätsida eller? Hur jag än läser mönstret så får jag det inte att stämma med höger och vänster sida.
05.01.2010 - 10:48
|
|
DROPS 91-13 |
|
|
|
|
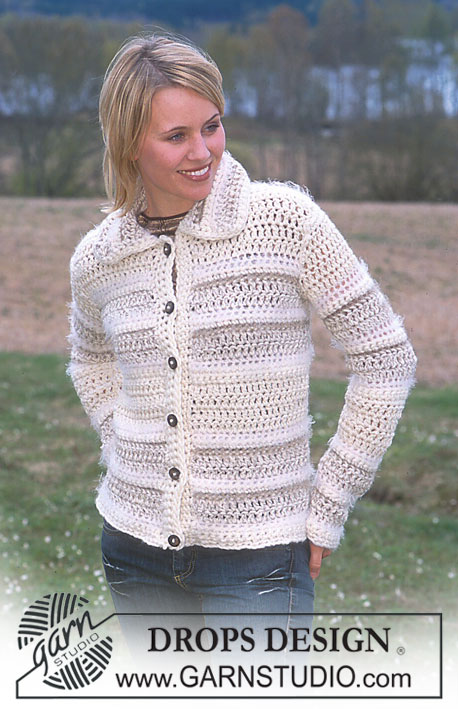
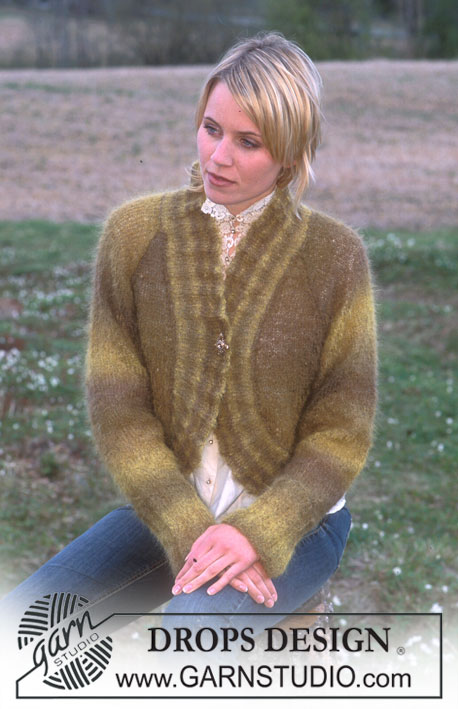
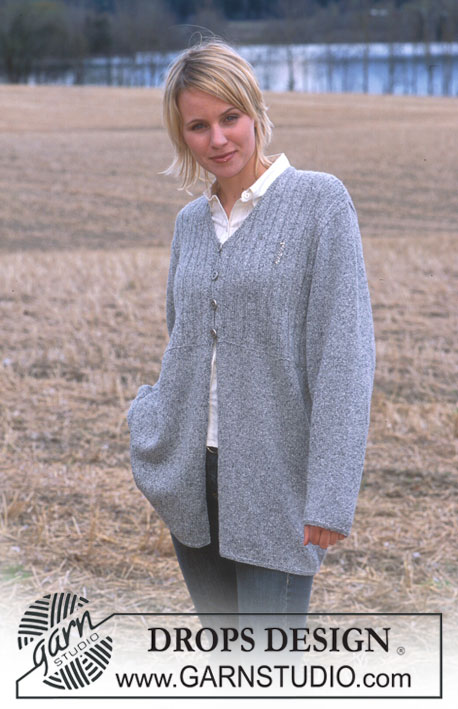
DROPS Cardigan and Scarf in Vienna Special
DROPS 91-13 |
|
|
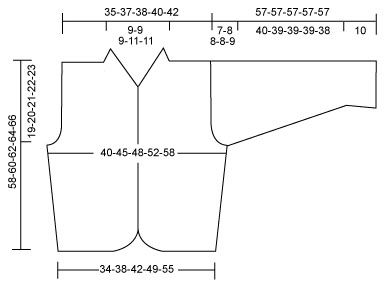
CARDIGAN: Gauge: 13 sts x 18 rows in stockinette st = 10 x 10 cm. Rib: * K 3, P 3 *, repeat from * - *. Back: Cast on 46-52-56-66-74 sts and knit 2 rows garter st. Change to stockinette st. When the piece measures 10 cm inc 1 st at each side every 7-7-7-16-16 cm a total of 4-4-4-2-2 times = 54-60-64-70-78 sts. When the piece measures 39-40-41-42-43 cm bind off for armhole at each side every other row: 3 sts 0-1-1-1-1 time, 2 sts 1-1-1-1-2 times and 1 st 2-1-2-4-5 times = 46-48-50-52-54 sts. When the piece measures 57-59-61-63-65 cm bind off the center 12-12-12-14-14 sts for the neck = 17-18-19-19-20 sts remain on each shoulder. On the next row bind off the remaining sts, the piece measures approx. 58-60-62-64-66 cm. Right front: Cast on 7-10-12-16-20 sts and knit 2 rows garter st. Read the entire section before knitting: Inc for buttonband: Change to stockinette st but keep the 3 outermost sts at the center front edge in garter st to finished measurements. Cast on new sts at the center front edge every other row: 2 sts 2 times and 1 st 4 times, then every 4 rows: 1 st 2 times. Side inc: When the piece measures 10 cm inc at the side as on back = 21-24-26-28-32 sts. When the piece measures 39-40-41-42-43 cm bind off for armhole at the side as on back = 17-18-19-19-20 sts. When the piece measures 58-60-62-64-66 cm bind off all sts. Left front: Cast on and knit the same as the right, reversing shaping. Sleeve: Cast on 38-38-40-40-42 sts and knit 2 rows garter st. Change to stockinette st, decreasing 6 sts evenly distributed on 1st row = 32-32-34-34-36 sts. When the piece measures 10 cm inc 1 st at each side every 7-5-4.5-3.5-3 cm a total of 6-8-9-11-12 times = 44-48-52-56-60 sts. When sleeve measures 50-49-49-49-48 cm bind off for sleeve cap at each side every other row: 3 sts 1 time, 2 sts 1-1-2-2-2 times and 1 st 1-2-2-2-3 times, then bind off 2 sts at each side until piece measures 56 cm, then bind off 3 sts at each side 1 time. Bind off the remaining sts, the piece measures approx. 57 cm. Assembly: Sew shoulder seams. Buttonband/collar: Cast on 18 sts and knit rib. When the piece measures 125-129-133-139-143 cm bind off all sts. Lay the band to cover the 3 outermost sts in garter st at the center front on the cardigan, along center front edge, around back neck and down along other center front edge (place band so that there will be K 3 at outer edge). Sew band in place. Sew in sleeves. Sew sleeve and side seams using edge sts as a seam allowance. SCARF: Measurements: approx. 20 x 140 cm Materials: Garnstudio VIENNA SPECIAL 50 gr nr 67, pink variegated DROPS 10 mm needles, or size needed to obtain correct gauge. Gauge: 9 sts in stockinette st = 10 cm wide. Rib: * K 3, P 3 *, repeat from * - *. Scarf: Cast on 18 sts around 2 needles (so that the cast-on edge will be elastic). Pull out one needle and knit rib. When the piece measures 140 cm bind off all sts loosely in rib. |
|
 |
|
Have you finished this pattern?Tag your pictures with #dropspattern or submit them to the #dropsfan gallery. Do you need help with this pattern?You'll find 16 tutorial videos, a Comments/Questions area and more by visiting the pattern on garnstudio.com. © 1982-2026 DROPS Design A/S. We reserve all rights. This document, including all its sub-sections, has copyrights. Read more about what you can do with our patterns at the bottom of each pattern on our site. |


With over 40 years in knitting and crochet design, DROPS Design offers one of the most extensive collections of free patterns on the internet - translated to 17 languages. As of today we count 324 catalogues and 12290 patterns translated into English (UK/cm). 12290
We work hard to bring you the best knitting and crochet have to offer, inspiration and advice as well as great quality yarns at incredible prices! Would you like to use our patterns for other than personal use? You can read what you are allowed to do in the Copyright text at the bottom of all our patterns. Happy crafting!
Post a comment to pattern DROPS 91-13
We would love to hear what you have to say about this pattern!
If you want to leave a question, please make sure you select the correct category in the form below, to speed up the answering process. Required fields are marked *.