
Popular categories
Looking for a yarn?








































Comments / Questions (29)
 Silke wrote:
Hallo, kann ich die Jacke auch mit langen Ärmeln stricken?
24.10.2026 - 07:42DROPS Design answered:
Liebe Silke, ja, Sie können die Ärmel auch verlängern, sie werden ja angestrickt. Wenn Sie den Ärmel gerade geschnitten haben möchten (er wird dann unten weit), stricken Sie einfach bis zur gewünschten Länge. Wenn er enger werden soll, nehmen Sie in regelmäßigen Abständen 2 Maschen an der unteren Ärmelmitte ab - wie oft, das müssten Sie selbst anpassen bzw. errechnen, oder anhand eines gut passenden Ärmels vergleichen. Viel Spaß beim Stricken!
24.10.2026 - 09:00
 Netty wrote:
Thanks for your response. I have another point: In the pattern it says where to put the markers. I have 55 stitches and if I place them on the right spots, I still have 4 stitches left. I have put on both sides now 5 stitches instead of 3 stiches. Somehow there is something not right, in my opinion, in the position of the markers. Did I do the right thing?
07.10.2026 - 14:51DROPS Design answered:
Hi Netty, The markers are inserted in stitches, rather than between stitches. So insert marker-1 in the 4th stitch, then marker-2 in the 14th stitch, marker-3 in the 42nd stitch and marker-4 in the 52nd stitch with 3 stitches remaining. Regards, Drops Team.
08.10.2026 - 05:38
 Netty wrote:
Mijn vraag is al opgelost. Ik heb wel een andere. Er staat dat het patroon vande pas is gecorrigeerd maar wat is er gecorrigeerd want dat kan ik niet zien.
06.10.2026 - 18:36DROPS Design answered:
Dag Netty,
Fijn dat je het al gevonden hebt. De correctie is al doorgevoerd in het online patroon.
07.10.2026 - 11:56
Netty wrote:
In het begin ga ik al mis. Ikheb 11,5 cm koord gebreid en één geminderd endan moet 46 steken opzetten langs het koord. Betekent dit, 22 steken in het koord en verder steken er bij opzetten?
06.10.2026 - 13:09
Antonia wrote:
Hallo :) Ist es richtig, dass an der linken Blende in der Hinreihe inklusive der zweiten Masche vom I-cord Rand drei rechte Maschen in Folge gestrickt werden sollen? Das gibt ein ganz anderes Bild als an der rechten Blende. Müsste es nicht in der Hinreihe der linken Masche 2 I-Cord Maschen, eine links und eine kraus rechts heißen? Oder wo könnte mein Fehler liegen? Über eine Antwort würde ich mich sehr freuen :) Liebe Grüße
13.09.2026 - 22:47DROPS Design answered:
Liebe Antonia, die Blenden sind von oben nach unten gestrictk, so beginnen bei den Hinreihen die linke Blende mit 2 I-Cord und bei den Rückreihen die rechte Blende mit 2 I-Cord. Viel Spaß beim Stricken!
14.09.2026 - 09:11
 Jana wrote:
How can I make the sleeves longer and more oversized?
31.08.2026 - 19:42DROPS Design answered:
Dear Jana, you can get helped from a pattern with the same construction and same tension and the requested length of sleeves. Maybe your Yarn store can even help you, even per mail or telephone. Happy knitting!
01.09.2026 - 20:01
Suus wrote:
Voor de omslag op het lijf: betekent om elke 2e naald elke 2e naald of elke 4e naald?
31.08.2026 - 12:53DROPS Design answered:
Dag Suus,
Elke 2e naald betekent de ene naald wel en de andere naald niet, dus om de naald, niet elke 4e naald.
31.08.2026 - 19:43
 Eva Magnusson wrote:
Förstår inte hur de två framkanterna ska användas och maskor till oket ska läggas?
31.08.2026 - 08:37DROPS Design answered:
Hej Eva, her ser du principen på hvordan man starter - vigtigt er dog at du strikker ifølge mønsteret: halskant i 2 delar
01.09.2026 - 14:16
 Auxiliadora wrote:
Gracias
27.08.2026 - 08:47
Suusdr wrote:
Hoi, bij de voorbies dtaat: eindig met een naald aan de verkeerde kant. Betekent dit dat de laatste naald die je breit een verkeerde kant naald is? Je breit dus een even aantal naalden na opzet om tot 11 cm te komen?
21.08.2026 - 21:14DROPS Design answered:
Dag Suus,
Ja, klopt. De laatste naald brei je aan de verkeerde kant, zodat de naald die daarna komt aan de goede kant is.
22.08.2026 - 09:07
|
|
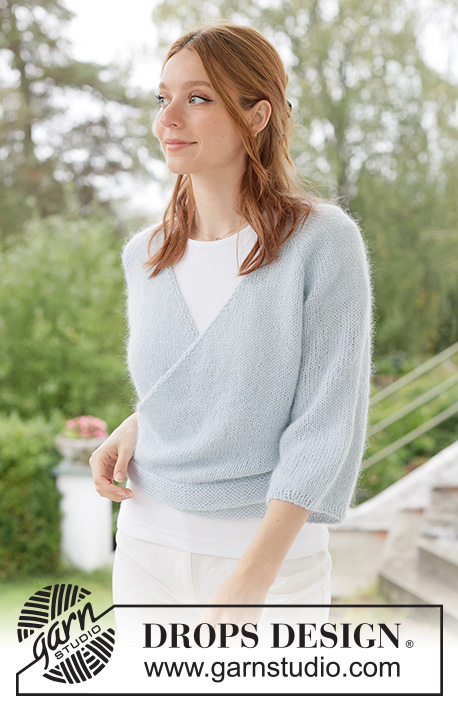
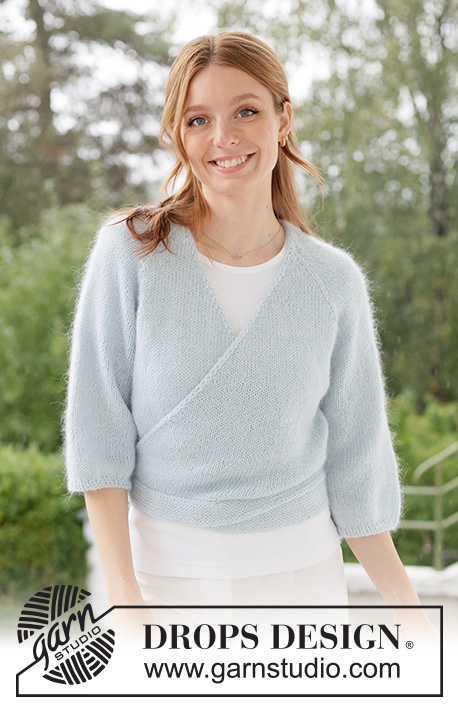
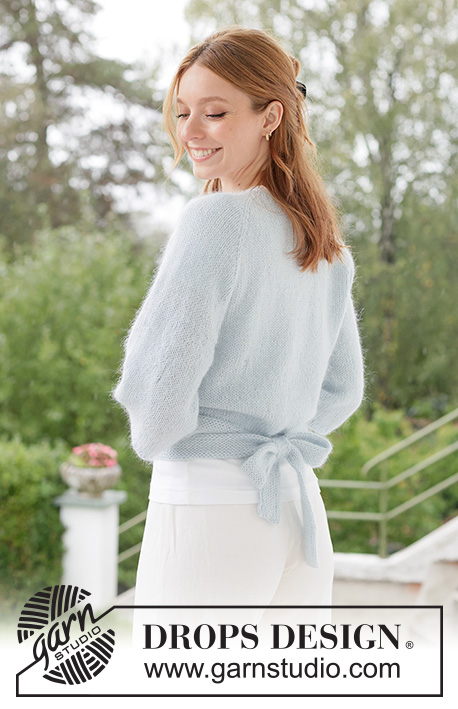
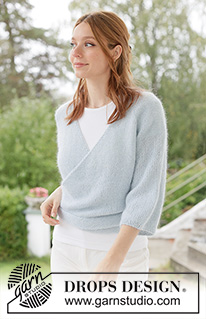
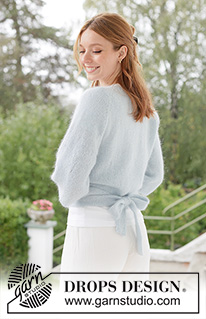
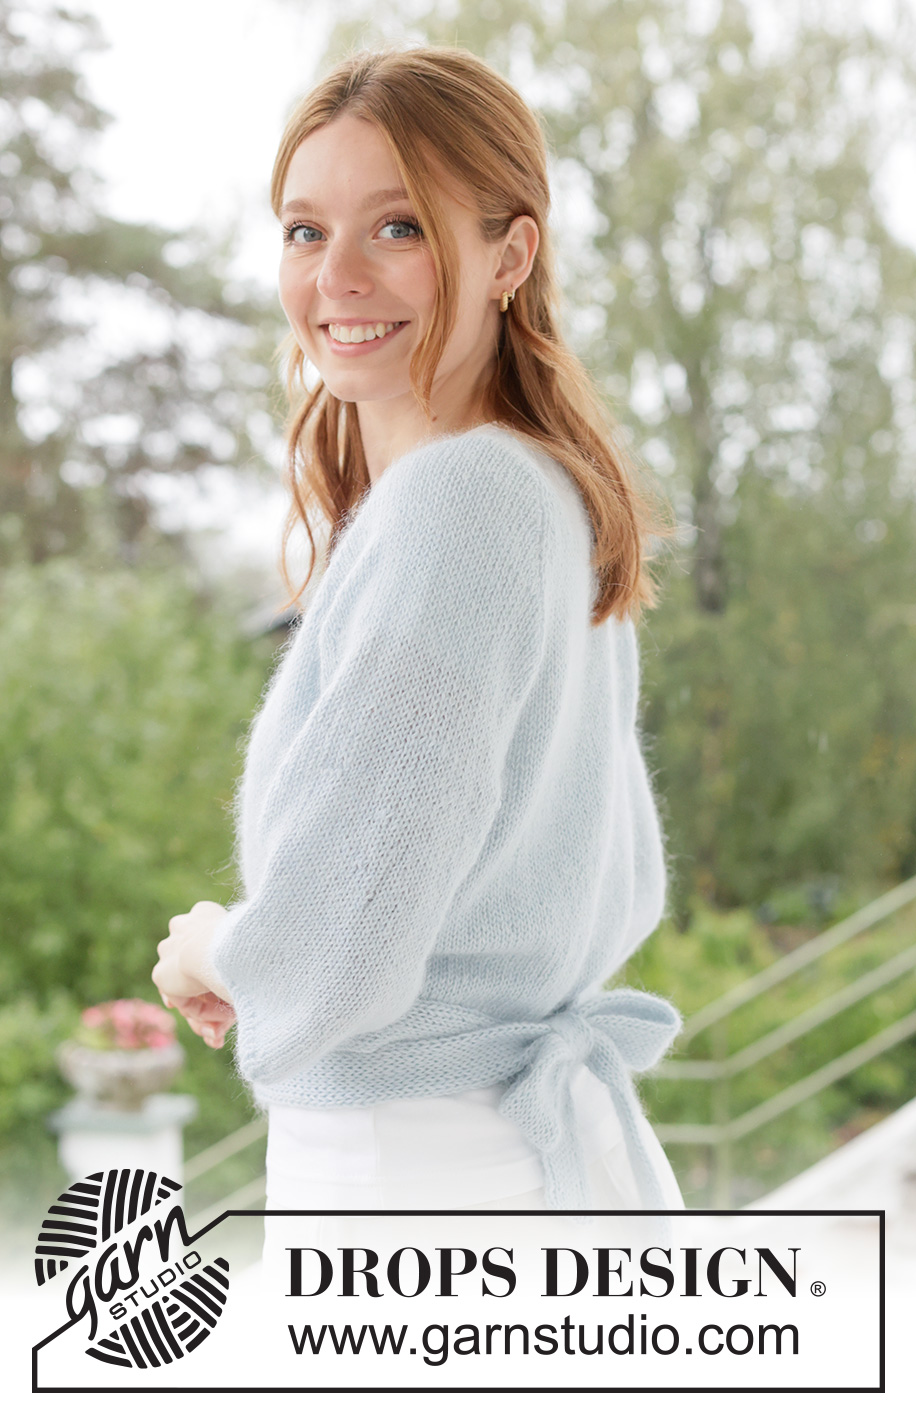
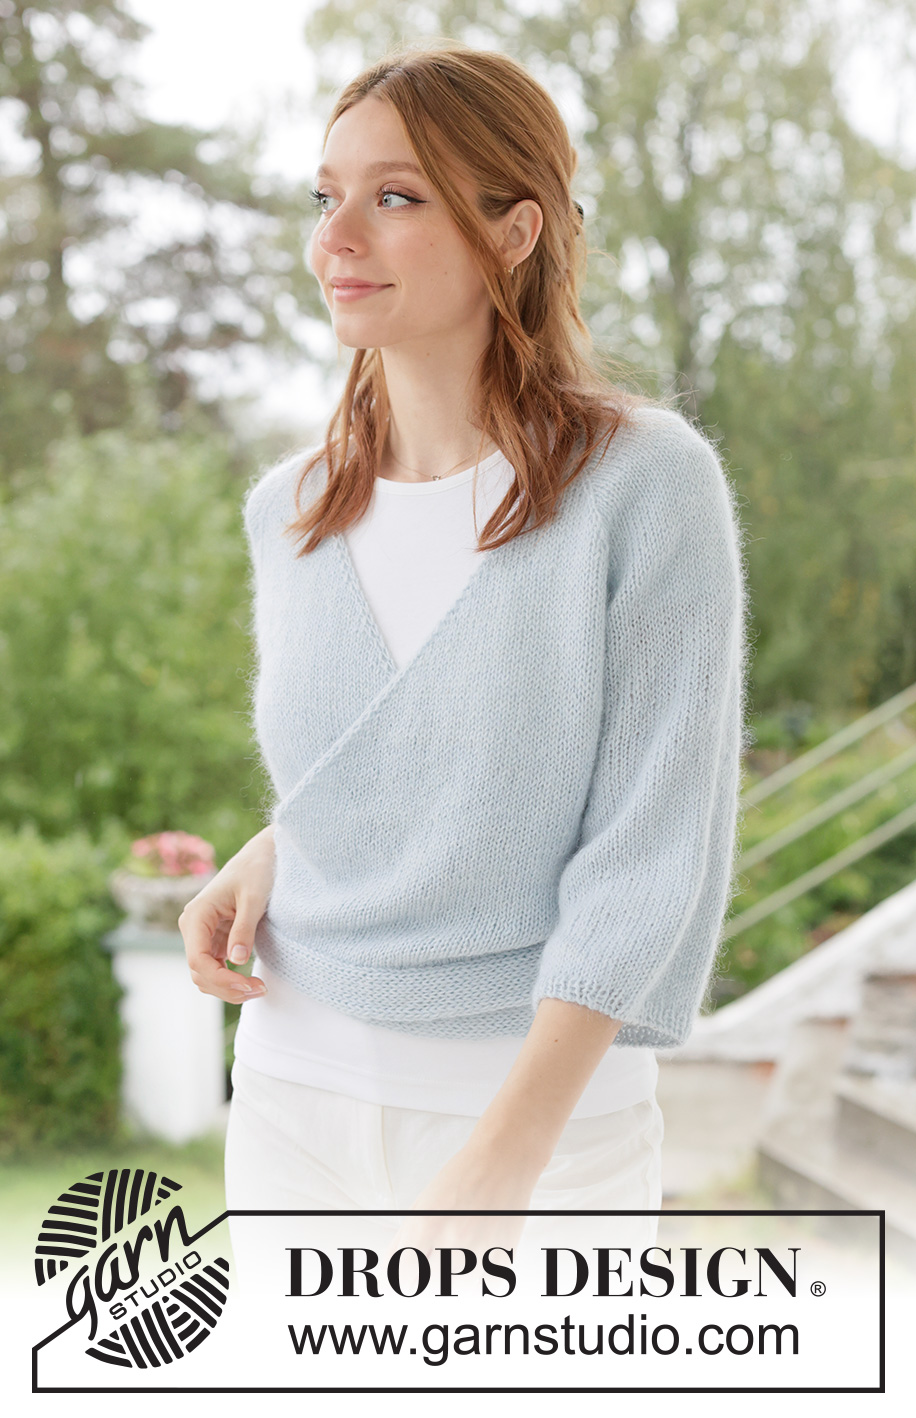
Icy Ballerina Wrap#icyballerinawrap |
|
 |
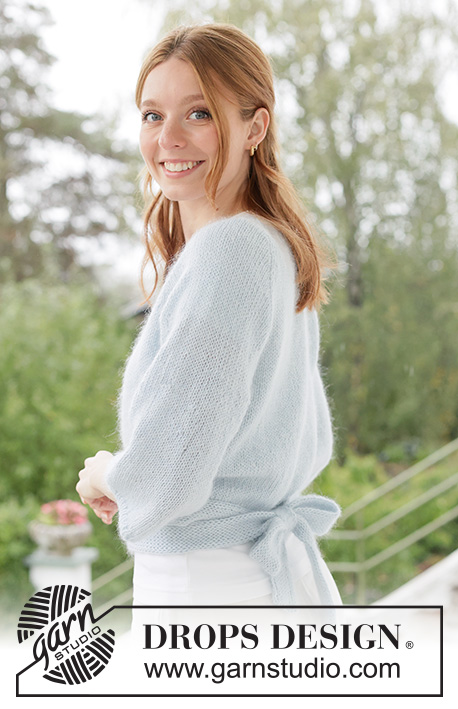 |
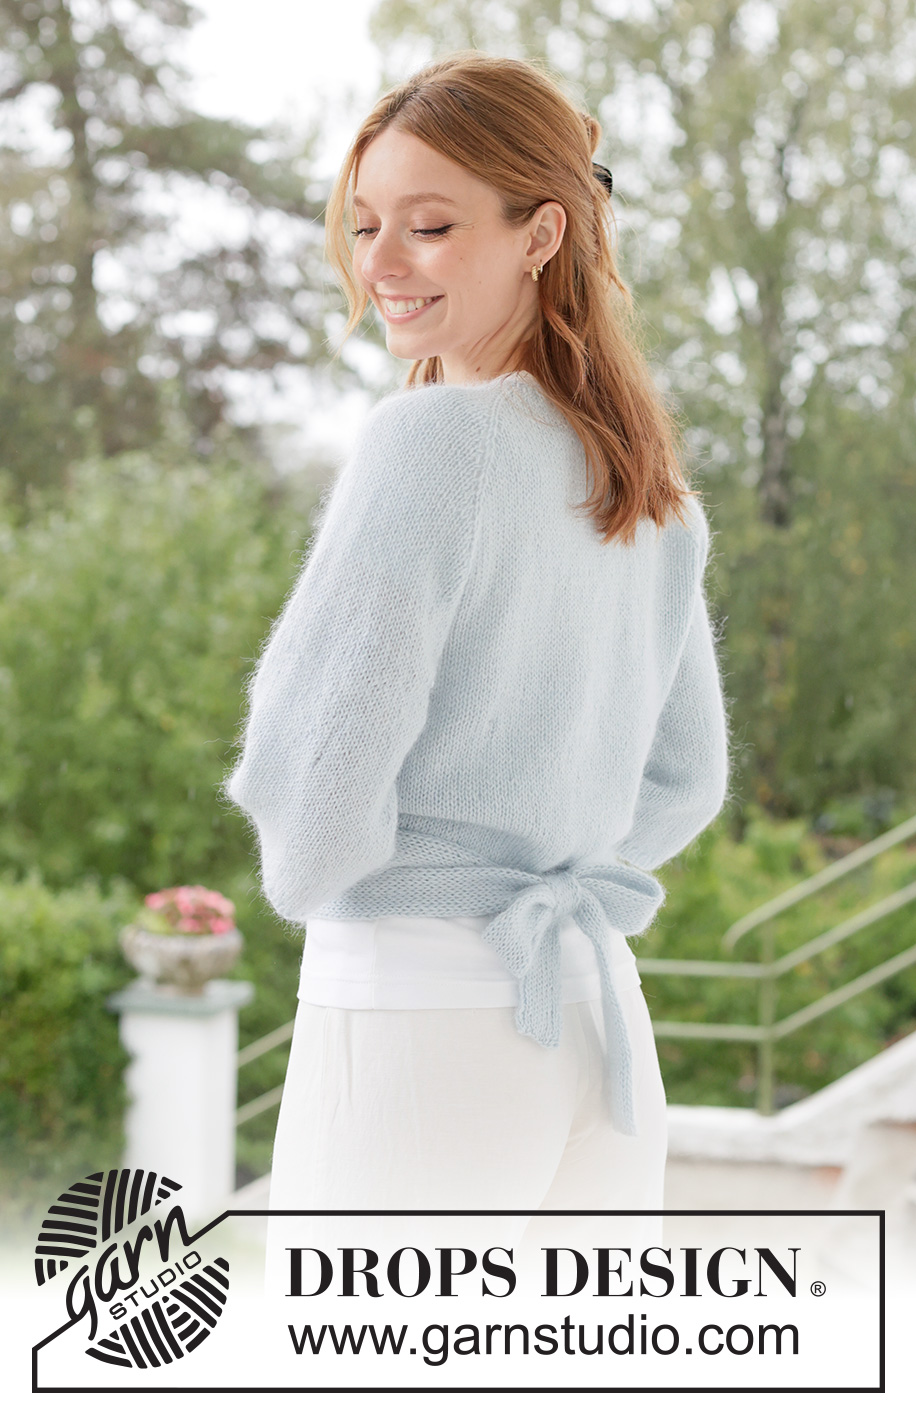
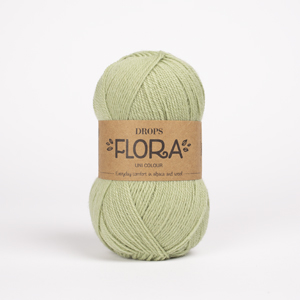
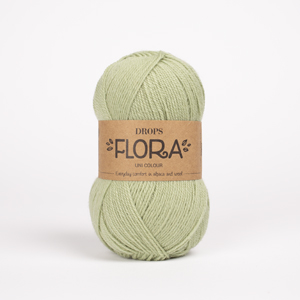
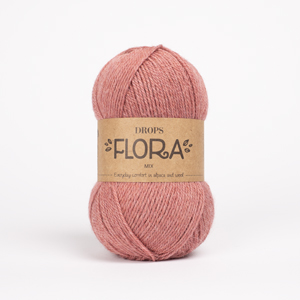
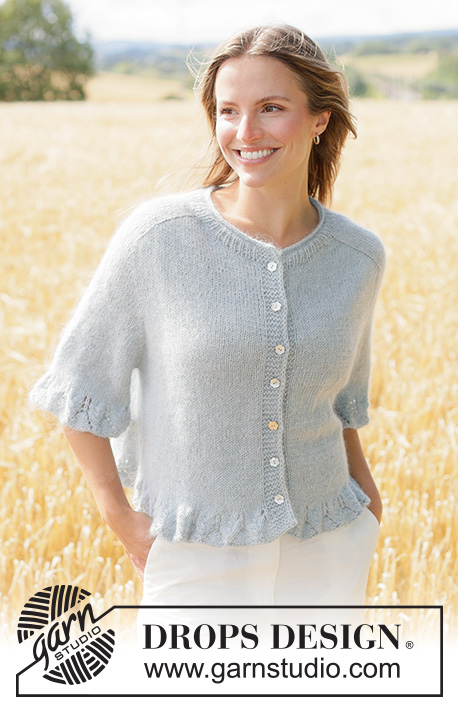
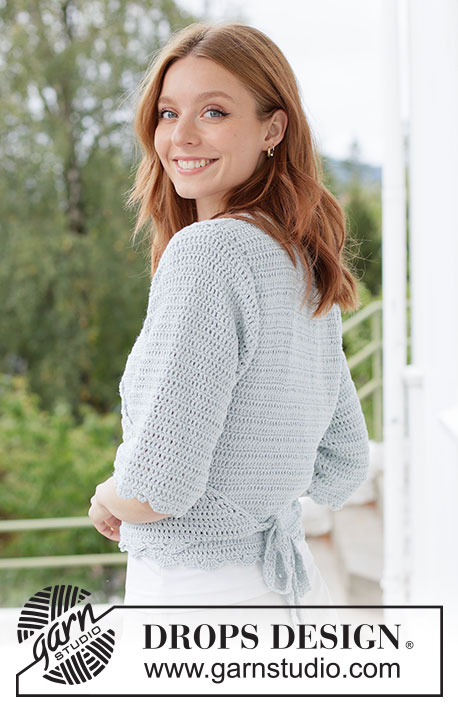
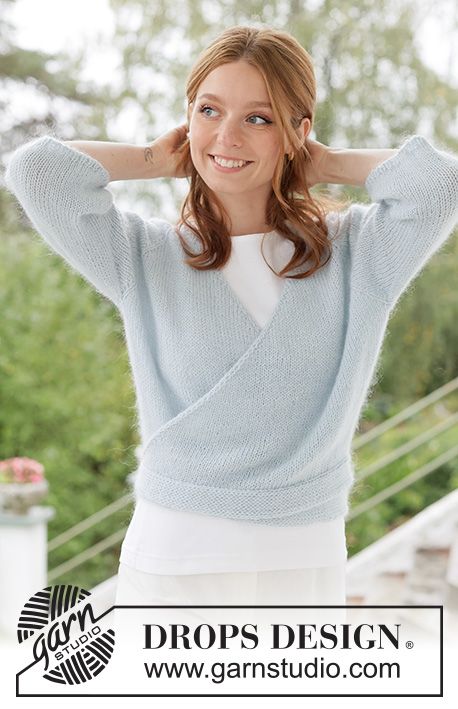
Knitted jacket in DROPS Flora and DROPS Kid-Silk or DROPS Alpaca and DROPS Kid-Silk. The piece is worked top down with wrap-around, raglan and I-cord. Sizes XS - XXXL.
DROPS 266-3 |
|
|
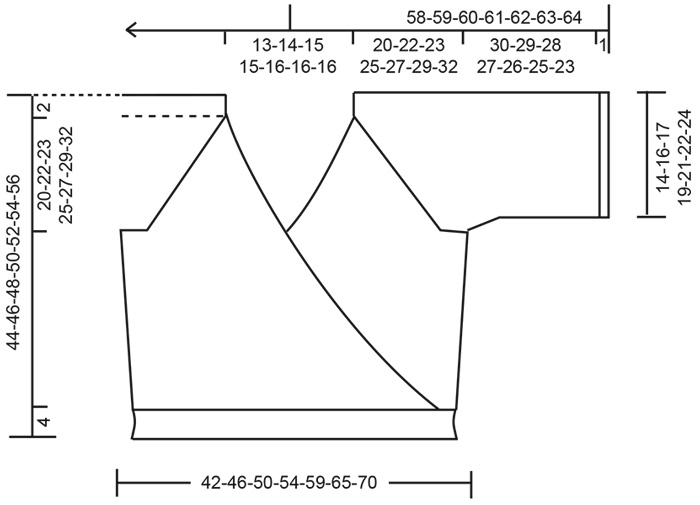
------------------------------------------------------- EXPLANATIONS FOR THE PATTERN: ------------------------------------------------------- GARTER STITCH: Knit all rows, from both the right and wrong side. 1 ridge in height = knit 2 rows. 2 STITCHES I-CORD: BEGINNING OF ROW: Slip 1 stitch purl-wise with the strand in front, knit 1. END OF ROW: Work until there are 2 stitches left on the row, slip 1 stitch purl-wise with the strand in front, knit 1. Continue like this from both the right and wrong side. RAGLAN: All increases are worked from the right side! Increase 1 stitch by making 1 yarn over, which is worked as follows on the next row: BEFORE MARKER (yarn over twists to the left): Purl through the stitch loop that lies on the back of the needle (avoids a hole). AFTER MARKER (yarn over twists to the right): Slip the yarn over from the left needle to the right needle purl-wise, then replace it by inserting the left needle through the back (the yarn over is the other way round). Purl through the stitch loop that lies on the front of the needle (avoids a hole). Continue the new stitches in stocking stitch. WRAP-AROUND: All increases are worked from the right side! Increase 1 stitch by making 1 yarn over, which is worked as follows on the next row: BEGINNING OF ROW (yarn over twists to the right): Slip the yarn over from the left needle to the right needle purl-wise, then replace it by inserting the left needle through the back (the yarn over is the other way round). Purl through the stitch loop that lies on the front of the needle (avoids a hole). Continue the new stitches in stocking stitch. END OF ROW (yarn over twists to the left): Purl through the stitch loop that lies on the back of the needle (avoids a hole). Continue the new stitches in stocking stitch. SLEEVE TIP: When knitting up stitches under the sleeve, you can get a small hole in the transition between stitches on the body and sleeve. This hole can be closed by picking up the strand between 2 stitches and working this strand twisted together with the first stitch between body and sleeve. DECREASE TIP: Decrease 1 stitch on each side of the marker-thread as follows: Work until there are 4 stitches left before the marker-thread, knit 2 together, knit 4 (marker-thread sits in the middle of these 4 stitches), slip 1 stitch knit-wise, knit 1 and pass the slipped stitch over the knitted stitch (2 stitches decreased). ------------------------------------------------------- START THE PIECE HERE: ------------------------------------------------------- JACKET – SHORT OVERVIEW OF THE PIECE. The pattern uses both long and short needles; start with the length which fits the number of stitches and change when necessary. First the bands are worked back and forth, then stitches are knitted up for the yoke along each band. The neck and yoke are worked back and forth with circular needle, from mid front and top down, while increasing for raglan and the wrap-around. When the yoke is finished, it is divided for body and sleeves and the body continued back and forth, while the sleeves wait. The sleeves are worked in the round, top down. A tie-band is worked back and forth in double knit to finish. If there is a «0» in your chosen size, skip the information and go straight to the next instruction. RIGHT BAND WITH I-CORD: Cast on 4 stitches with double pointed needles size 4 mm, DROPS Kid-Silk and DROPS Flora or DROPS Kid-Silk and DROPS Alpaca (2 strands). Work as follows: RIGHT SIDE: 1 GARTER STITCH, knit 1, work 2 STITCHES I-CORD – read explanations above. WRONG SIDE: Work 2 stitches I-cord, purl 1, 1 garter stitch. Repeat these rows until the band measures 10½-11-11½-11½-12-12-12 cm, with the last row from the wrong side. Cut the strand and place the stitches on a stitch holder. LEFT BAND WITH I-CORD: Knit up 4 stitches along the cast-on edge on the right band with double pointed needles and 1 strand of each quality (2 strands), making sure to match the garter stitches and I-cord onwards from the right band. Stitches will later be knitted up inside the 1 garter stitch for the yoke. Work as follows: RIGHT SIDE: Work 2 stitches I-cord, knit 1, 1 garter stitch. WRONG SIDE: Work 1 garter stitch, purl 1 and 2 stitches I-cord. Repeat these rows until the band measures 10½-11-11½-11½-12-12-12 cm, with the last row from the wrong side. The whole band measures 21-22-23-23-24-24-24 cm, with the join mid-back. Now knit up stitches along the band, inside the 1 garter stitch and from the right side, as follows: Work 2 stitches I-cord, slip 1 stitch knit-wise, knit 1, pass the slipped stitch over (= 3 band-stitches), knit up 45-47-49-49-51-51-51 stitches along the band, with equal numbers of stitches on each side of the cast-on edge mid-back, then work across the right band as follows: knit 2 together, work 2 stitches I-cord (= 3 band- stitches) = 51-53-55-55-57-57-57 stitches. YOKE: Insert 4 markers, without working the stitches and inserting each marker in a stitch (the raglan-stitches) and you increase for raglan on each side of the raglan-stitches). Count 3 stitches (= left front piece), insert marker-1 in the next stitch, count 9 stitches (= sleeve), insert marker-2 in the next stitch, count 23-25-27-27-29-29-29 stitches (= back piece), insert marker-3 in the next stitch, count 9 stitches (= sleeve), insert marker-4 in the next stitch. There are 3 stitches left (= right front piece). Continue stocking stitch back and forth with 2 stitches I-cord on each side, while increasing for RAGLAN on each side of the raglan-stitches every 2nd row and increasing for the WRAP-AROUND inside 3 stitches on each side every 4th row – read explanations above describing how to increase. ROW 1 (wrong side): Purl with 2 stitches I-cord on each side as before. ROW 2 (right side): Work 2 stitches I-cord, knit until there are 2 stitches left on the row, increasing for raglan on each side of all the raglan-stitches, finish with 2 stitches I-cord (8 increased stitches). ROW 3 (wrong side): Purl with 2 stitches I-cord on each side (remember to work the yarn overs as described under RAGLAN). ROW 4 (right side): Work 2 stitches I-cord, knit 1, increase 1 stitch for the wrap-around, knit until there are 3 stitches left on the row, increasing for raglan on each side of all the raglan-stitches, increase 1 stitch for the wrap-around, knit 1, work 2 stitches I-cord (10 increased stitches; 2 for the wrap-around and 8 for raglan). ROW 5 (wrong side): Purl with 2 stitches I-cord on each side (remember to work the yarn overs as described under raglan and wrap-around). Work ROWS 2 to 5 a total of 3 times (12 rows worked) = 105-107-109-109-111-111-111 stitches. A total of 3 increases in height for the wrap-around and 6 increases in height for raglan. Remember to maintain the knitting tension. Now increase for both raglan and the wrap-around every 2nd row: ROW 1 (right side): Work 2 stitches I-cord, knit 1, increase 1 stitch for the wrap-around, knit until there are 3 stitches left on the row, increasing for raglan on each side of all the raglan-stitches, increase 1 stitch for the wrap-around, knit 1, work 2 stitches I-cord (10 increased stitches; 2 for the wrap-around and 8 for raglan). ROW 2 (wrong side): Purl with 2 stitches I-cord on each side (remember to work the yarn overs as described under raglan and wrap-around). Work ROWS 1 and 2 a total of 18-20-22-24-25-25-26 times (36-40-44-48-50-50-52 rows worked) = 285-307-329-349-361-361-371 stitches. A total of 21-23-25-27-28-28-29 increases in height for the wrap-around and 24-26-28-30-31-31-32 increases in height for raglan. Now only increase for raglan on the front and back pieces (do not increase across the sleeves) as well as increasing for the wrap-around every 2nd row: ROW 1 (right side): Work 2 stitches I-cord, knit 1, increase 1 stitch for the wrap-around, knit until there are 3 stitches left on the row, while increasing for raglan before 1st and 3rd raglan stitch and after 2nd and 4th raglan stitch, increase 1 stitch for the wrap-around, knit 1, work 2 stitches I-cord (6 increased stitches; 2 for the wrap-around and 4 for raglan). ROW 2 (wrong side): Purl with 2 stitches I-cord on each side (remember to work the yarn overs as described under raglan and wrap-around). Work ROWS 1 and 2 a total of 1-1-1-1-2-5-8 times (2-2-2-2-4-10-16 rows worked) = 291-313-335-355-373-391-419 stitches. A total of 22-24-26-28-30-33-37 increases in height for the wrap-around and 24-26-28-30-31-31-32 increases for raglan on the sleeves and 25-27-29-31-33-36-40 increases in height for raglan on the front and back pieces. The yoke measures approx. 20-22-23-25-27-29-32 cm from mid-back. Now divide for the body and sleeves. DIVIDE FOR BODY AND SLEEVES: Divide and continue increasing for the wrap-around as follows: Work 2 stitches I-cord, work 1 stocking stitch, increase 1 stitch for the wrap-around, work 48-52-56-60-64-70-78 stocking stitches (includes marker-stitch-1 = front piece), place the next 57-61-65-69-71-71-73 stitches on a stitch holder for the sleeve, cast on 4-6-8-12-16-20-22 stitches (mid-under the sleeve), work 75-81-87-91-97-103-111 stocking stitches (from marker-stitch-2 up to and including marker-stitch-3 = back piece), place the next 57-61-65-69-71-71-73 stitches on a stitch holder for the sleeve, cast on 4-6-8-12-16-20-22 stitches (mid-under the sleeve), work 48-52-56-60-64-70-78 stocking stitches (3 stitches left), increase 1 stitch for the wrap-around, work 1 stocking stitch and 2 stitches I-cord (= front piece). The body and sleeves are finished separately. BODY: = 187-205-223-243-265-291-319 stitches. Insert 1 marker-thread in the middle of the 4-6-8-12-16-20-22 cast-on stitches under each sleeve. Allow these threads to follow your work onwards, they are used when decreasing each side of the body. Continue stocking stitch with 2 stitches I-cord on each side while increasing for the wrap-around every 2nd row as before (2 increased stitches on each increase-row). When the body measures 4 cm from the division, decrease 1 stitch on each side of both marker-threads – read DECREASE TIP (4 decreased stitches). Decrease like this every 5 cm a total of 3 times (12 decreased stitches). When the decreases are finished, continue stocking stitch with 2 stitches I-cord on each side while increasing for the wrap-around every 2nd row as before until the piece measures 38-40-42-44-46-48-50 cm from mid-back = 221-239-259-279-301-327-353 stitches. Leave the stitches on the needle. Work a tie-band which will be worked into these stitches. TIE-BAND: Cast on 17 stitches with double pointed needles size 4 mm and 1 strand of each quality (2 strands). Work double knit as follows back and forth: ROW 1: * Knit 1, slip 1 stitch purl-wise with the strand in front *, work from *-* until there is 1 stitch left, knit 1. ROW 2: * Slip 1 stitch purl-wise with the strand in front, knit 1 *, work from *-* until there is 1 stitch left, slip 1 stitch purl-wise with the strand in front. Repeat ROWS 1 and 2 until the cord measures 55-60-65-70-75-80-85 cm. Stretch the cord slightly before measuring. Finish after row 2. Now work this band into the body, working the last stitch on tie-band together with the next stitch on body, starting with left front piece and continuing as follows: ROW 1: * Knit 1, slip 1 stitch purl-wise with the strand in front *, work from *-* until there is 1 stitch left, knit this stitch twisted together with the first stitch on the body (1 stitch on the body decreased). Turn. ROW 2: * Slip 1 stitch purl-wise with the strand in front, knit 1 *, work from*-* until there is 1 stitch left, slip 1 stitch purl-wise with the strand in front. Repeat ROWS 1 and 2 until all the body-stitches are cast off. Continue double knit as before back and forth across the cord until it is of equal length on the other side = 55-60-65-70-75-80-85 cm. Cast off. The band measures approx. 4 cm in width. The jacket measures approx. 42-44-46-48-50-52-54 cm from mid-back and 44-46-48-50-52-54-56 cm from the shoulder. SLEEVES: Place the 57-61-65-69-71-71-73 sleeve-stitches from one stitch holder onto circular needle size 4 mm and knit up 1 stitch in each of the 4-6-8-12-16-20-22 cast-on stitches under the sleeve – read SLEEVE TIP = 61-67-73-81-87-91-95 stitches. Insert a marker-thread in the middle of the 4-6-8-12-16-20-22 new stitches under the sleeve. The round starts by the marker-thread. Work stocking stitch in the round. AT THE SAME TIME, when the sleeve measures 1 cm from the division, decrease mid-under the sleeve – remember DECREASE TIP as follows: Decrease 2 stitches every 2nd round 3-3-4-4-4-3-2 times = 55-61-65-73-79-85-91 stitches. Continue working until the sleeve measures 30-29-28-27-26-25-23 cm from the division. Work 3 rounds of rib (knit 1, purl 1), decreasing 1 stitch on the first round = 54-60-64-72-78-84-90 stitches. Cast off with rib. The sleeve measures approx. 31-30-29-28-27-26-24 cm from the division. |
|
 |
|
Have you finished this pattern?Tag your pictures with #dropspattern #icyballerinawrap or submit them to the #dropsfan gallery. Do you need help with this pattern?You'll find 23 tutorial videos, a Comments/Questions area and more by visiting the pattern on garnstudio.com. © 1982-2026 DROPS Design A/S. We reserve all rights. This document, including all its sub-sections, has copyrights. Read more about what you can do with our patterns at the bottom of each pattern on our site. |
|






With over 40 years in knitting and crochet design, DROPS Design offers one of the most extensive collections of free patterns on the internet - translated to 17 languages. As of today we count 333 catalogues and 12532 patterns translated into English (UK/cm). 12521
We work hard to bring you the best knitting and crochet have to offer, inspiration and advice as well as great quality yarns at incredible prices! Would you like to use our patterns for other than personal use? You can read what you are allowed to do in the Copyright text at the bottom of all our patterns. Happy crafting!
Post a comment to pattern DROPS 266-3
We would love to hear what you have to say about this pattern!
If you want to leave a question, please make sure you select the correct category in the form below, to speed up the answering process. Required fields are marked *.