
Popular categories
Looking for a yarn?



































Comments / Questions (163)
 Marie-Luise wrote:
Hallo, ich habe eine Frage zum Anschlag. Den Pulli möchte ich in L/XL stricken (bei einer Maschenprobe von 20 M=10cm). Warum muss ich 304 M anschlagen? Das ist doch viel zu weit - oder habe ich einen Denkfehler?
27.10.2026 - 13:35DROPS Design answered:
Liebe Marie-Luise, die Maschenprobe wird glattrechts mit der grösseren Nadeln gestrickt, das Bündchen wird mit den kleineren Nadeln gestrickt und man braucht mehr Maschen für Rippenmuster mit kleineren Nadeln als fürs Glattrechts mit grösseren Nadeln, deshalb muss man mehr Maschen anschlagen; auch beim Zopfmuster braucht man mehr Maschen als fürs Glattrechts; sollte Ihre Maschenprobe richtig sein, dann sollten Sie die gewünschte Breite am Ende bekommen. Viel Spaß beim Stricken!
28.10.2026 - 07:42
Regina wrote:
Ich bin beim Stricken dieses Herrenpullovers 224-10, habe den ersten Teil und Ärmel fertig aber nun komme ich nicht weiter, bis dahin habe ich die Anleitung gut verstanden, es heißt da: die Ärmel auf dieselbe Rundnadel und im Muster weiter Stricken ??, ( wie viel Runden?und dann beginnen die raglanAbnahme , wann? Ich verstehe es leider nicht. Vielleicht können Sie mir helfen. Mit freundlichen Grüßen Regina Vogel
12.10.2026 - 18:42DROPS Design answered:
Liebe Regina, die Anleitung wurde an der Stelle etwas umformuliert, vielleicht ist es nun eindeutiger. Sie beginnen in der nächsten Runde, nachdem Sie die Raglanmarkierer angebracht haben, mit den Raglanabnahmen. Dabei stricken Sie weiterhin im Muster. Viel Spaß beim Weiterstricken!
12.10.2026 - 23:26
Amelie wrote:
Leider wurde meine Frage nicht beantwortet. Ganz konkret: Werden nur zwei Reihen für die Erhöhung des Halsausschnitts hinten gestrickt oder mehr?
09.10.2026 - 09:18DROPS Design answered:
Liebe Amelie, in S stricken Sie den Halsauschnitt nach 55 cm und und es wird dann noch 3 weitere Reihen gestrickt (beidseitig 2 M 1 Mal und 1 Masche 1 Mal), es sind ca 2 cm zwischen Halsauschnitt vorne und letzte Reihe mit Raglanabnahmen - siehe Maßskizze. Viel Spaß beim Stricken!
09.10.2026 - 15:58
Amelie wrote:
Danke für die letzte Antwort, danach ist der Groschen zu den Raglanabnahmen gefallen! Ich habe nun noch folgende Frage: Ich habe in Größe S nach den beiden Reihen, bei denen ich für den Halsausschnitt Maschen am Rand abkette, noch wenige Raglanabnahmen übrig. Soll das so sein, d.h. wird danach noch weiter gestrickt? Entsteht dann nicht eine Stufe zwischen Hin- und Rückreihen und den abgeketteten Maschen? Vielen Dank noch einmal.
09.10.2026 - 00:37DROPS Design answered:
Liebe Amelie, die Raglanabnahmen stricken Sie wie zuvor weiter, auch wenn Sie die Maschen für den Halsausschnitt beidseitig abketten - so wird den Halsauschnitt beim Rückenteil höher als beim Vorderteil. Viel Spaß beim Stricken!
09.10.2026 - 08:10
Amelie wrote:
Liebes Drops Team, ich habe noch nie Raglan-Abnahmen gestrickt. So wie ich die Anleitung verstehe, soll nur eine Reihe mit je 1 Masche rechts vor und hinter dem Marker gestrickt und in der nächsten Reihe schon mit den Abnahmen begonnen werden. Ist das korrekt? Und auf allen Bildern sieht es so aus, als seien bei den Raglan-Abnahmen insgesamt 4 Maschen durchgehend rechts gestrickt, das passt aber nicht zur Anleitung, wo nur von 2 Maschen die Rede ist. Danke schon einmal für die Antwort!
05.10.2026 - 09:54DROPS Design answered:
Liebe Amelie, Sie sollen Markierer an jedem Übergang zwischen Vorder-/Ärmel/Rückenteil einsetzen = 4 Markierer; und die Raglanabnahmen entstehen beidseitig von 2 Maschen mit dem Markierer dazwischen, so nehmen Sie wie unter RAGLANABNAHMEN: erklärt wird, die Hin-Reihen aber auch die Rückreihen (nach dem Halsausschnitt) werden dort erklärt. Die 2 Raglanmaschen + 1 Abanhme beidsetig bilden insgesamt 4 Maschen -Raglanlinien. Viel Spaß beim Stricken!
05.10.2026 - 16:30
 Steph D wrote:
Hi there, I'm having a hard time with the neck and the raglan decreases. I am knitting size L. Could you tell me approximately how many raglan decreases I should have left to do when you reserve the front neck stitches? Also, where does the '34' middle stitches come from if we are decreasing the middle to 24 before putting on a piece of thread? do you count out 5 stitches from each side? Thank you!
28.09.2026 - 21:25DROPS Design answered:
Dear Steph D, the number of remaining stitches depend on your tension and the height is more important than the remaining stitches, in other words when piece measures 59 cm, count the number of sts you have for front piece, divide it by 2 and place a marker = mid front, then you'll find the middle 24 stitches (= 12 st on each side of the marker), work these stitches decreasing 6 sts evenly and place the middle 34 sts (= 17 sts on each side of the marker) on a stitch holder, work round to the end then cut the yarn and now start working in rows from the wrong side after the 34 sts slipped aside on mid front. Happy knitting!
29.09.2026 - 09:18
 Maja wrote:
Hei! Holder på å strikke ermer, og har strikket vrangborden og har økt til 75 m (str L). Begynte på mønstret, men ser at rettmaskene i mønstret ikke sitter likt som de i vrangborden (slik som bolen). Er det mulig å øke maskene slik at rettmaskene i vrangborden er på samme plass som rettmaskene i mønstret?
10.09.2026 - 23:35DROPS Design answered:
Hei Maja. Er nok en grunn for at det ikke er skrevet slik som bolen, mulig det vil fungere i noen str. og andre ikke. Du kan evnt prøve og se om det vil fungere i str. L (Design avd. har dessverre ikke muligheten til å regne ut/forandre oppskriften). mvh DROPS Design
14.09.2026 - 13:01
Silva Tanguay wrote:
I am making size L and have reached the DOUBLE NECK section. I don't understand how I am supposed to have 142 stitches on my needle. i did the decreaseases as instructed and have 102 on the long circular needles + 34 on the thread =136. Where are the extra 6 stitches from?
23.08.2026 - 19:38DROPS Design answered:
Dear Mrs Tanguay, work the remaining 102 sts on needle, work back the middle 34 sts slipped on a thread and pick up 3 sts on each side of the stitches on mid front so that you get: 102+3+34+3=142 sts. Happy knitting!
24.08.2026 - 09:19
 Laetitia wrote:
Bonjour, je termine le dos et le devant. Dans les instructions, il est écrit "ajuster pour que le tour suivant soit un rang impair" cela signifie t il que je dois faire les diminutions sur le rang impair ou que je dois faire les diminutions sur un rang pair pour que le tour suivant soit impair ? Merci de votre aide
13.08.2026 - 10:22DROPS Design answered:
Bonjour Laetitia, arrêter le point fantaisie après un tour pair des diagrammes, ainsi le tour suivant est un tour impair, et vous allez rabattre les mailles des emmanchures sur un tour impair des diagrammes. Bon tricot!
13.08.2026 - 15:57
 Gabriella wrote:
Sto facendo il collo, ho separato le maglie centrali del davanti e intrecciato le maglie all’inizio del ferro….ad un certo punto devo iniziare a lavorare 2 diritti e 2 rovesci. Dal momento in cui ho separato le maglie centrali del davanti dice di lavorare in piano ma questo pezzo diventa un lavoro a maglia rasata? Se sì il risultato è brutto. Non c’è una foto che mostra il dietro! Oppure il collo è da piegare verso l’esterno in modo da coprire questo pezzo? Grazie per i suggerimenti
26.06.2026 - 15:47DROPS Design answered:
Buongiorno Gabriella, se sta facendo riferimento alla parte del collo lavorato in piano, deve continuare il motivo come prima. Buon lavoro!
27.06.2026 - 15:21
|
|||||||||||||||||||||||||||||||
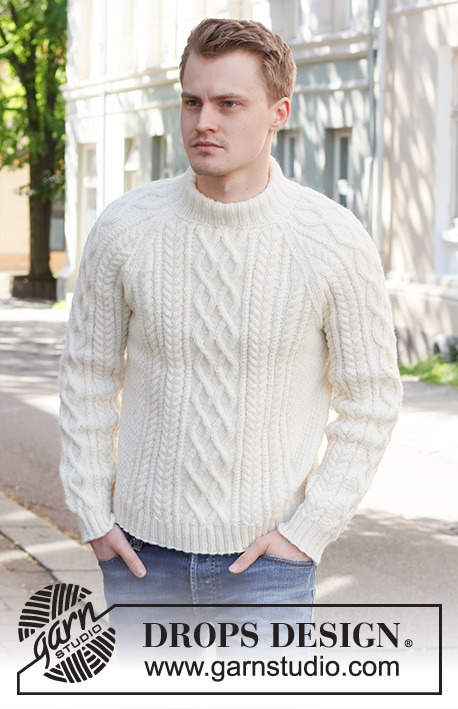
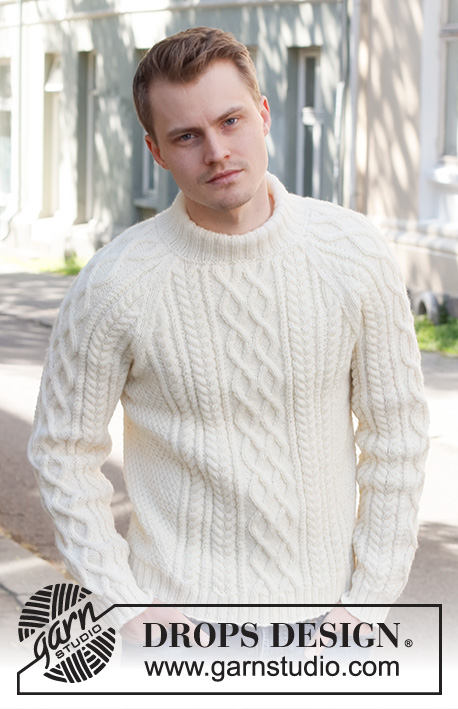
Ice Island#iceislandsweater |
|||||||||||||||||||||||||||||||
 |
 |
||||||||||||||||||||||||||||||
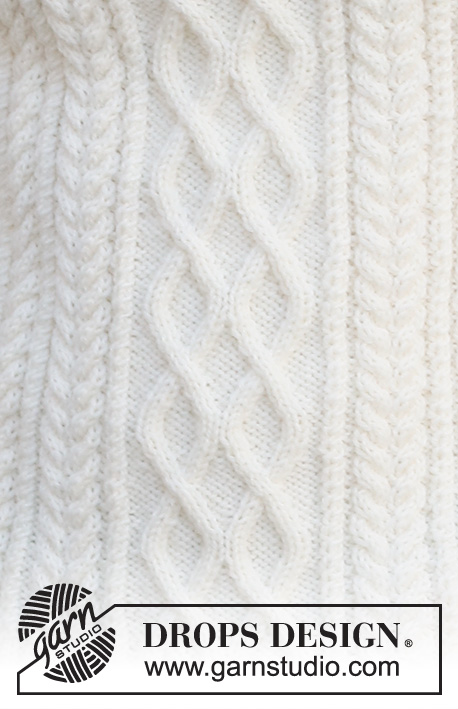
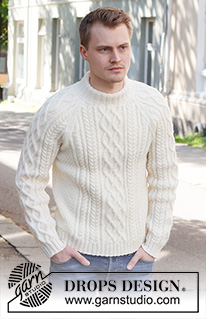
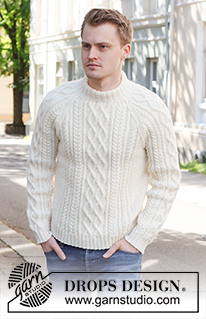
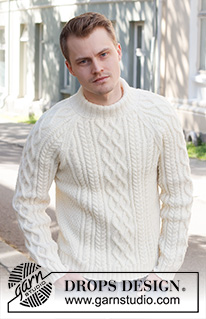
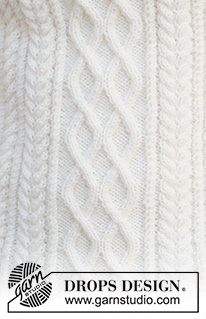
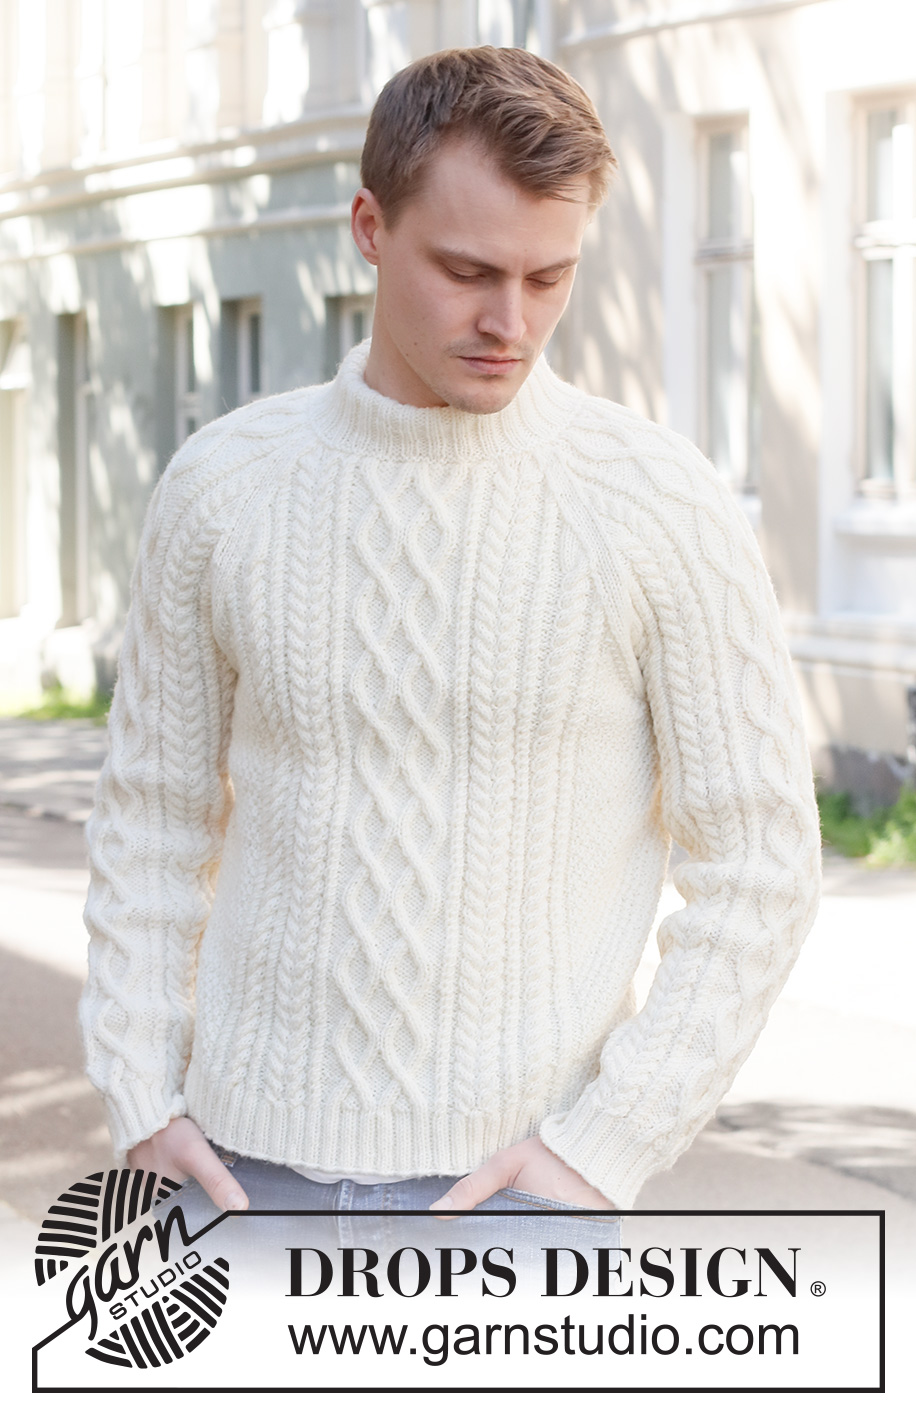
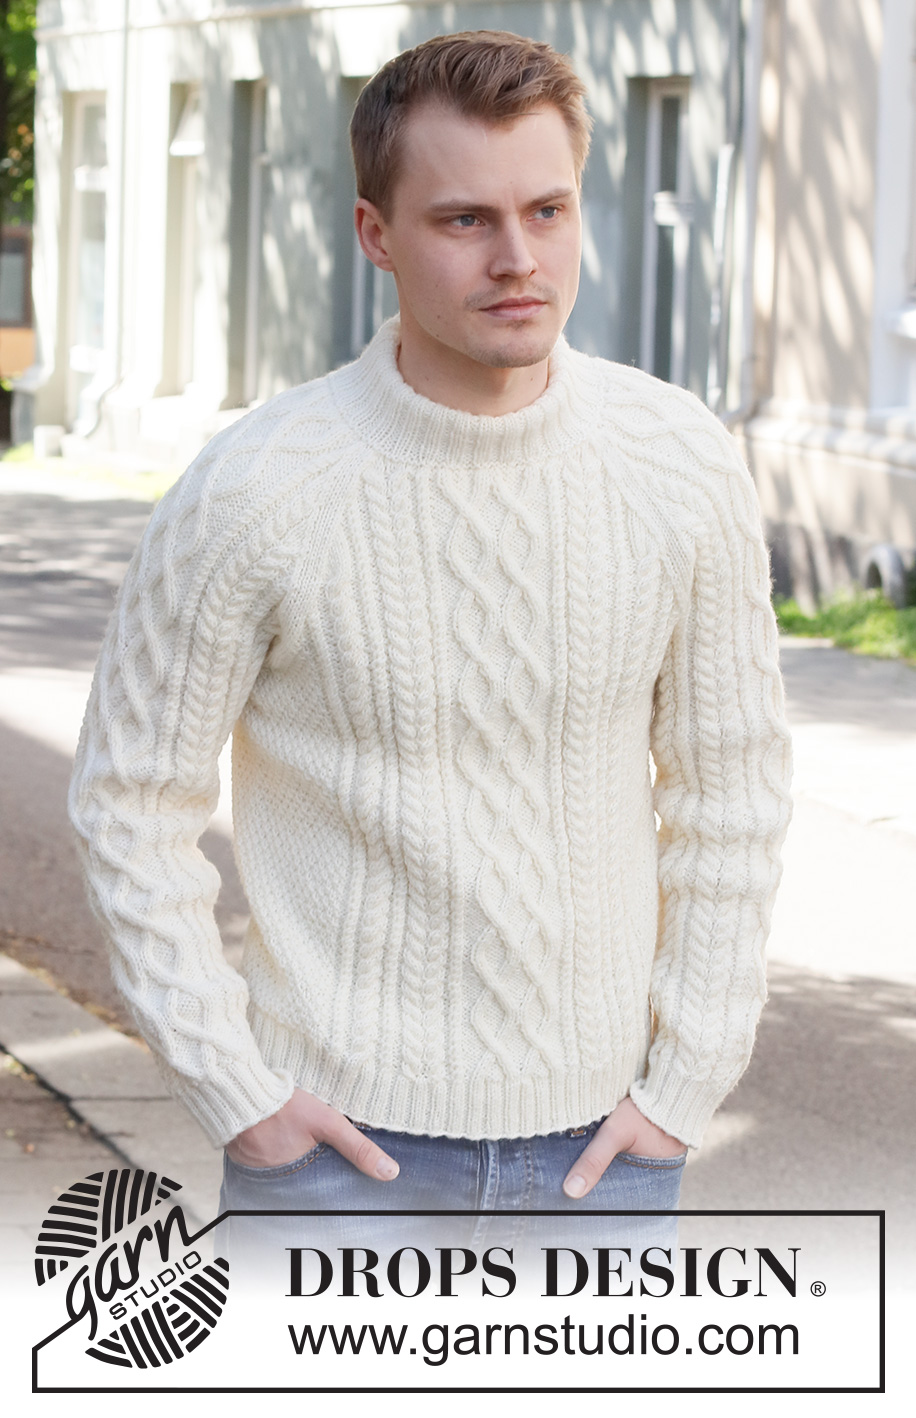
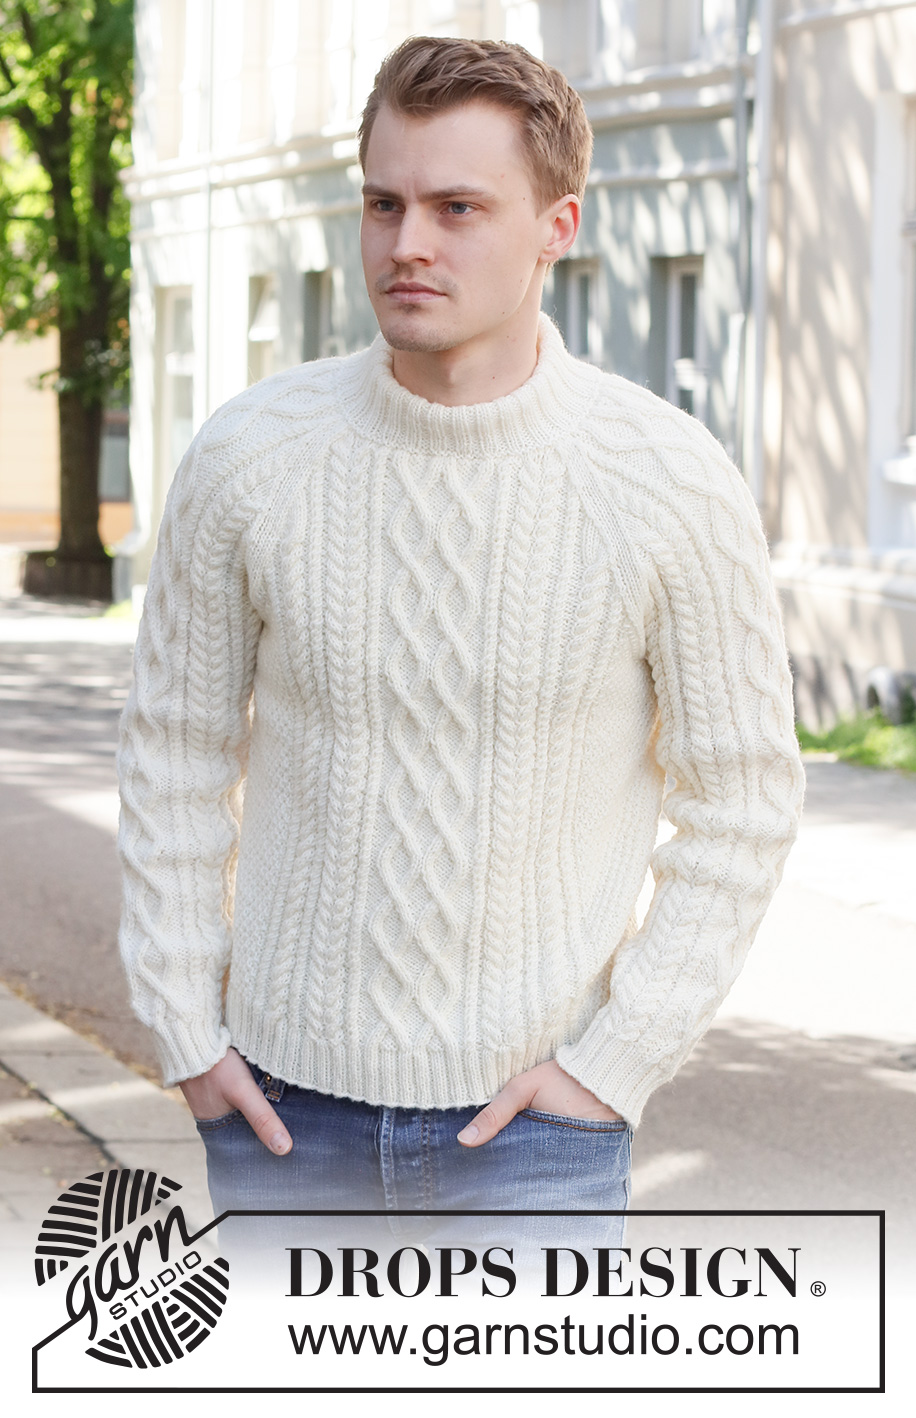
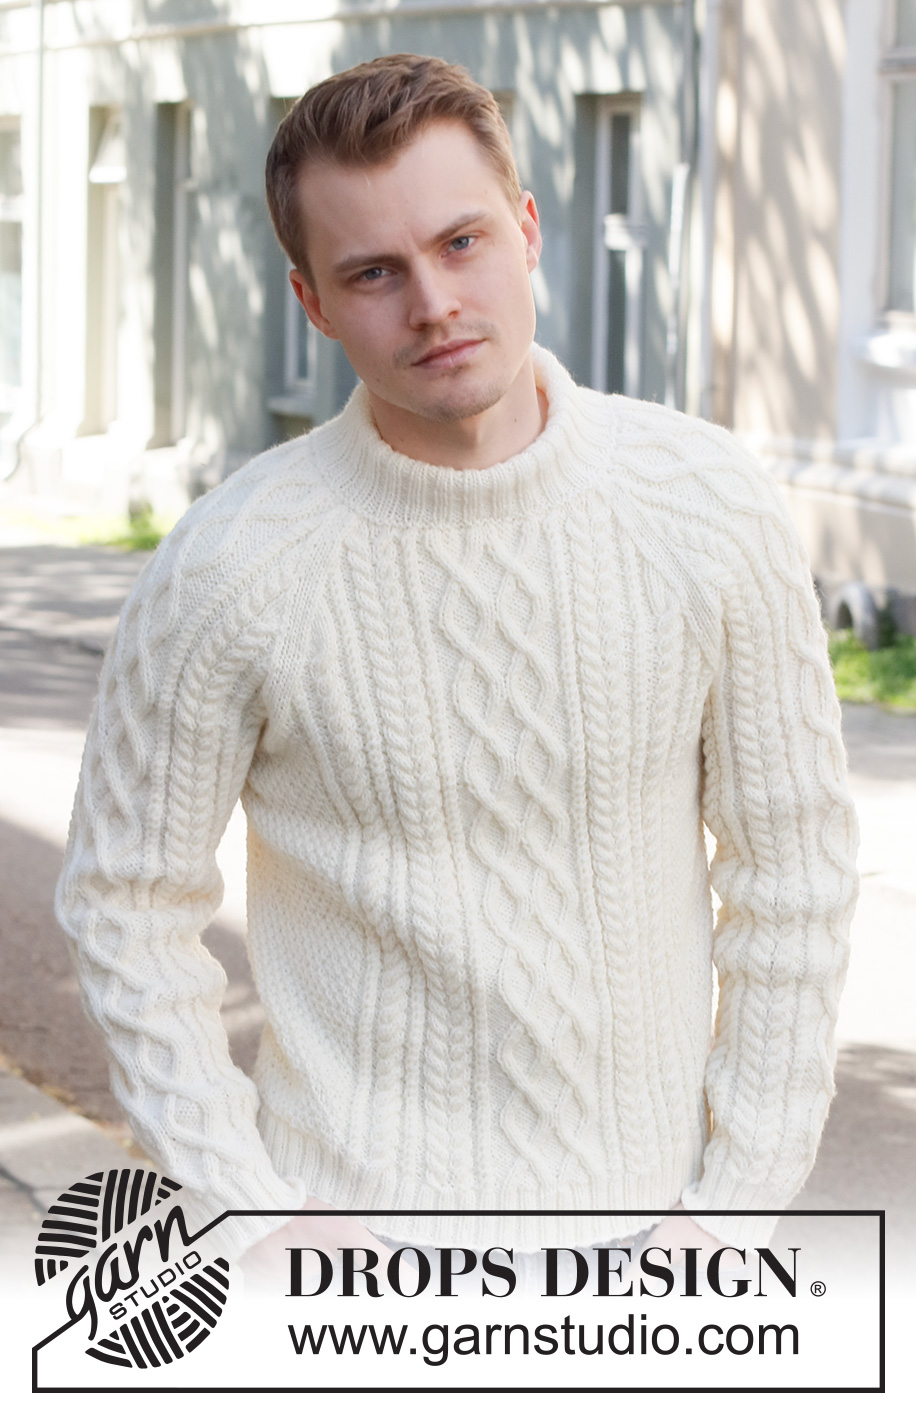
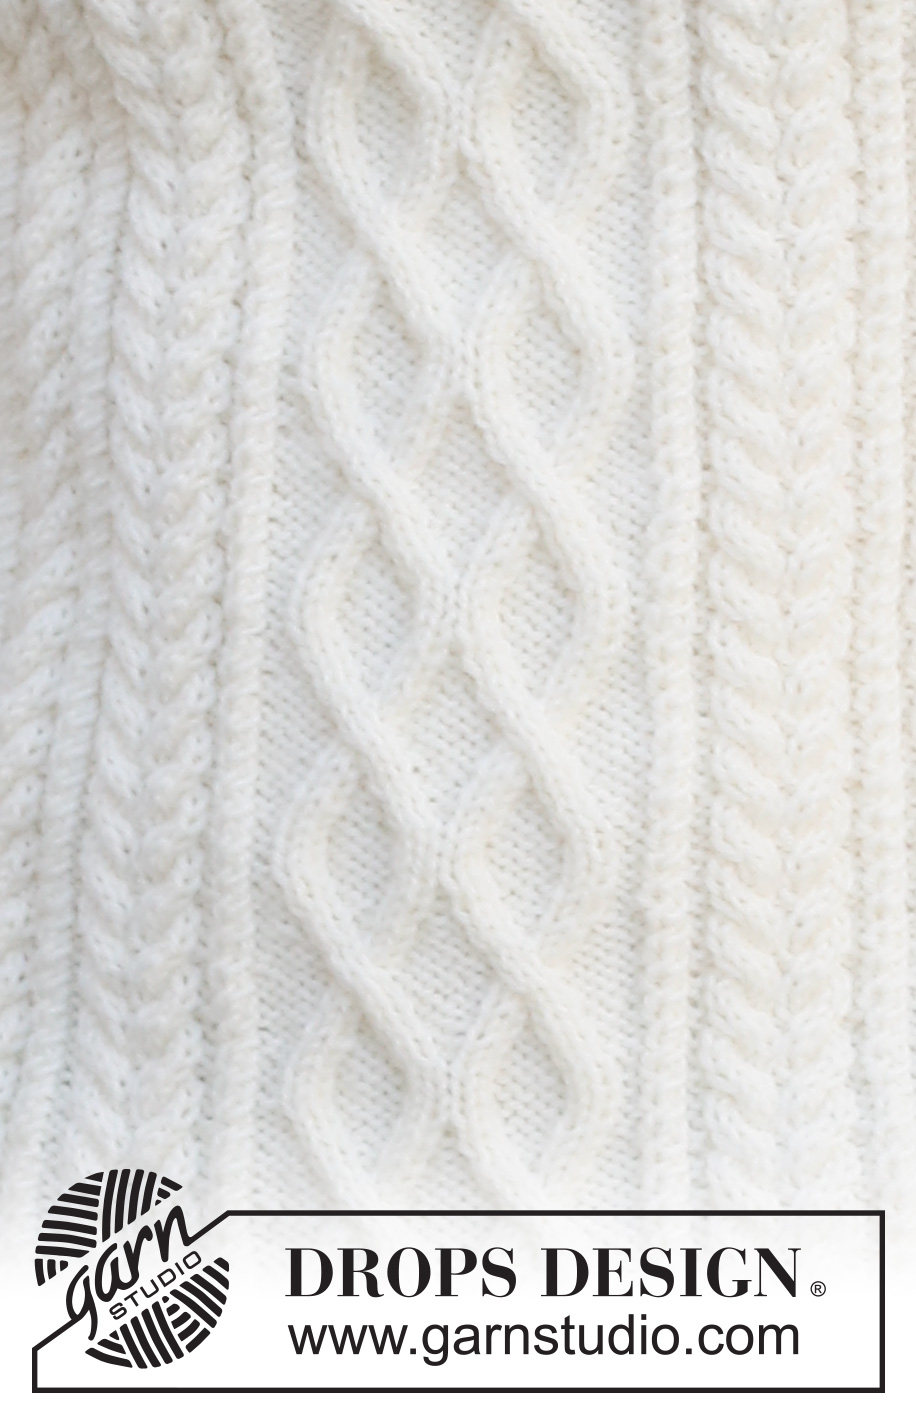
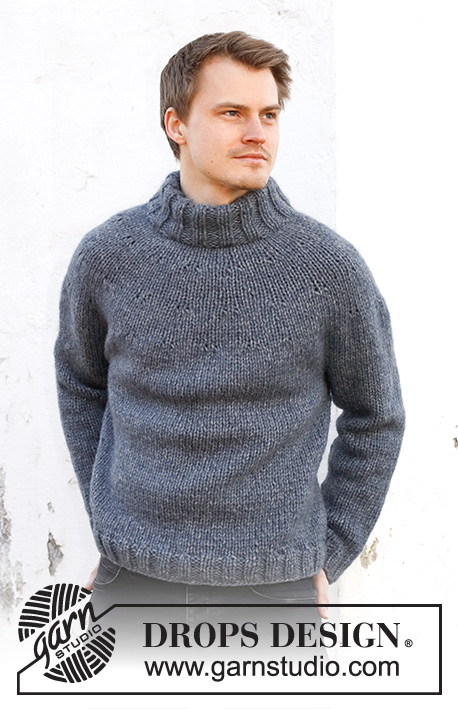
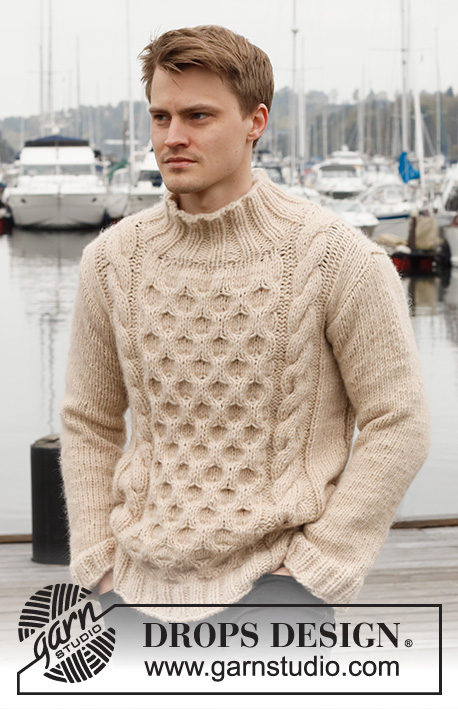
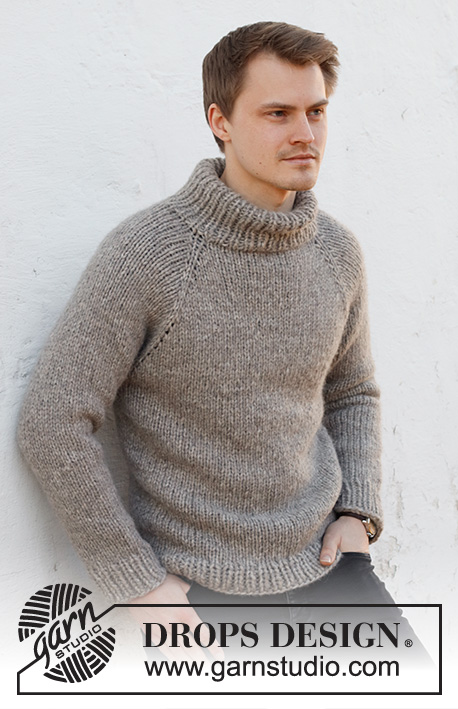
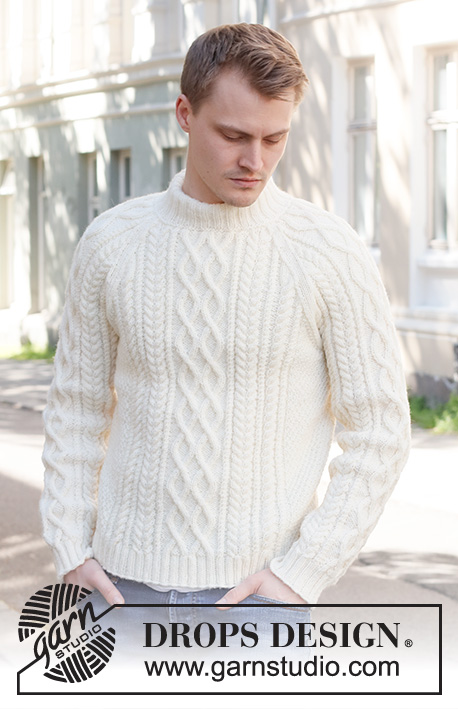
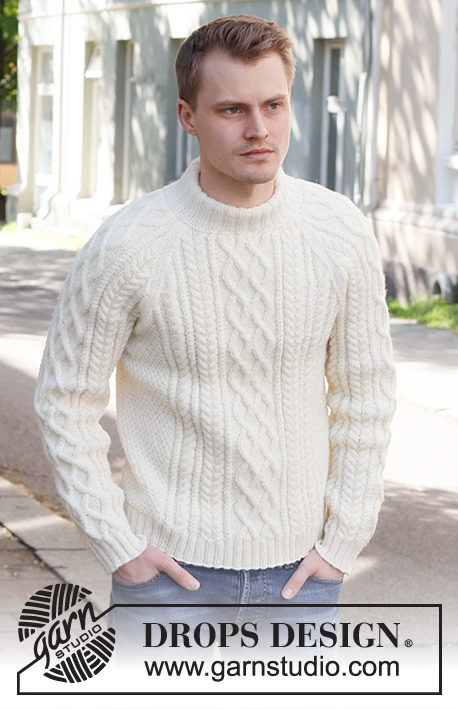
Knitted jumper for men in DROPS Karisma. The piece is worked with raglan, cables and double neck. Sizes S - XXXL.
DROPS 224-10 |
|||||||||||||||||||||||||||||||
|
------------------------------------------------------- EXPLANATIONS FOR THE PATTERN: ------------------------------------------------------- KNITTING TIP: In sizes XL, XXL and XXXL, there will be 4 purl stitches next to each other when A.1 is worked 2 times in width. So the rib will match under A.5/A.8, which is worked after the rib. PATTERN: See diagrams A.1 to A.10. The diagrams show all rows in the pattern from the right side. DECREASE/INCREASE TIP (evenly spaced): To work out how to decrease/increase evenly, count the number of stitches to be decreased/increased over (e.g. 23 stitches), and divide by the number of decreases/increases to be made (e.g. 6) = 3.8. In this example, decrease by knitting together approx. each 3rd and 4th stitch. When increasing, make 1 yarn over after approx. each 4th stitch. On the next round work the yarn overs twisted to avoid holes. INCREASE TIP (sleeves): Increase 2 stitches under the sleeve by making 1 yarn over on each side of the marker-stitch as follows: Work the marker-stitch (always the first stitch in A.4), 1 yarn over, pattern as far as the marker-stitch, 1 yarn over (= 2 stitches increased). On the next round work the yarn overs twisted to avoid holes. Then work the new stitches into A.9/A.10 until you have room for a complete repeat, then work the stitches in A.4. RAGLAN: Decrease to raglan on each side of the marker, in each transition between body and sleeves as follows. FROM RIGHT SIDE: AFTER THE MARKER: Knit 1, slip 1 stitch as if to knit, knit 1 and pass the slipped stitch over the knitted stitch (= 1 stitch decreased) BEFORE THE MARKER: Work until there are 3 stitches left before the marker, knit 2 together, knit 1 (= 1 stitch decreased). FROM WRONG SIDE: AFTER THE MARKER: Purl 1, purl 2 together (= 1 stitch decreased) BEFORE THE MARKER: Work until there are 3 stitches left before the marker, purl 2 twisted together, purl 1 (= 1 stitch decreased). ------------------------------------------------------- START THE PIECE HERE: ------------------------------------------------------- JUMPER – SHORT OVERVIEW OF THE PIECE: The body is worked in the round with circular needle as far as the armholes. The sleeves are worked in the round with double pointed needles/short circular needle, bottom up. The body and sleeves are placed on the same circular needle and the yoke worked, decreasing to raglan at the same time. Stiches are cast off for the neck mid-front and the piece continued back and forth. The neck is worked to finish. BODY: Cast on 272-288-304-344-360-392 stitches with circular needle size 3.5 mm and DROPS Karisma. Knit 1 round. Then work the following rib: Purl 1, knit 2, * purl 2, knit 2 *, work from *-* over the next 20-24-28-24-28-36 stitches, work A.1 over the next 14-14-14-28-28-28 stitches (= 1-1-1-2-2-2 repeats of 14 stitches – read KNITTING TIP), A.2 (= 18 stitches), A.3 (= 26 stitches), A.2, A.1 over the next 14-14-14-28-28-28 stitches (= 1-1-1-2-2-2 repeats of 14 stitches – read KNITTING TIP), * knit 2, purl 2 *, work from *-* over the next 44-52-60-52-60-76 stitches, knit 2, A.1 over the next 14-14-14-28-28-28 stitches – remember KNITTING TIP, A.2, A.3, A.2, A.1 over the next 14-14-14-28-28-28 stitches – remember KNITTING TIP, * knit 2, purl 2 *, work from *-* over the next 20-24-28-24-28-36 stitches, knit 2 and purl 1. Continue this rib – NOTE: In diagrams A.2 and A.3 repeat the first 2 rounds onwards. When 1 round remains before the piece measures 5 cm, decrease stitches as follows: Work stocking stitch over the first 23-27-31-27-31-39 stitches and decrease 6-6-6-6-6-8 stitches evenly over these stitches – read DECREASE/INCREASE TIP, work A.1 as before over the next 14-14-14-28-28-28 stitches, work the last round in A.2 (= 18 stitches, 1 stitch decreased), work the last round in A.3 (= 26 stitches, 2 stitches decreased), work the last round in A.2 (= 18 stitches, 1 stitch decreased), A.1 as before over the next 14-14-14-28-28-28 stitches, work stocking stitch over the next 46-54-62-54-62-78 stitches and decrease 13-13-13-13-13-17 stitches evenly over these stitches, A.1 as before over the next 14-14-14-28-28-28 stitches, work the last round in A.2 (= 18 stitches, 1 stitch decreased), work the last round in A.3 (= 26 stitches, 2 stitches decreased), work the last round in A.2 (= 18 stitches, 1 stitch decreased), A.1 as before over the next 14-14-14-28-28-28 stitches, work stocking stitch over the last 23-27-31-27-31-39 stitches and decrease 7-7-7-7-7-9 stitches evenly over these stitches = 238-254-270-310-326-350 stitches. The rib is now finished. Insert 1 marker in the first stitch and 1 marker in the 120th-128th-136th-156th-164th-176th stitch (= sides). Allow these markers to follow your work onwards; they are used when casting off for the armholes. Change to circular needle size 4.5 mm. Work the next round as follows: A.4 over the first 17-21-25-21-25-31 stitches, A.5 over the next 14-14-14-28-28-28 stitches (= 1-1-1-2-2-2 repeats of 14 stitches), A.6 (= 17 stitches), A.7 (= 24 stitches), A.6, A.8 over the next 14-14-14-28-28-28 stitches (= 1-1-1-2-2-2 repeats of 14 stitches), A.4 over the next 33-41-49-41-49-61 stitches (marker sits in the middle of these stitches), A.5 over the next 14-14-14-28-28-28 stitches, A.6, A.7, A.6, A.8 over the next 14-14-14-28-28-28 stitches and A.4 over the last 16-20-24-20-24-30 stitches. Continue this pattern. REMEMBER THE KNITTING TENSION! When the piece measures 36 cm in all sizes, cast off for the armholes as described below. There is approx. 26-28-30-32-34-36 cm left to finished length. Adjust so that next round is an odd numbered row in the diagrams, and cast off the first 6-6-7-7-8-8 stitches, continue the pattern until there are 5-5-6-6-7-7 stitches left before the second marker-stitch, cast off 11-11-13-13-15-15 stitches, work until there are 5-5-6-6-7-7 stitches left on the round and cast off 5-5-6-6-7-7 stitches = 108-116-122-142-148-160 stitches on the front piece and 108-116-122-142-148-160 stitches on the back piece. Cut the strand. Lay the piece to one side and work the sleeves. SLEEVES: Cast on 56-60-60-64-64-68 stitches with double pointed needles size 3.5 mm and DROPS Karisma. Knit 1 round, then work rib in the round (knit 2, purl 2) for 5 cm. Knit 1 round where you increase 19-15-15-19-19-15 stitches evenly spaced – remember DECREASE/INCREASE TIP = 75-75-75-83-83-83 stitches. Insert 1 marker in the first stitch – allow the marker to follow your work onwards; it is used when increasing under the sleeve. Change to double pointed needles size 4.5 mm. Work the next round with pattern as follows: A.4 over the first stitch (marker-stitch), A.9 (= 8-8-8-12-12-12 stitches – start the diagram by the mark for your size and work from right to left), A.6 (= 17 stitches), A.7 (= 24 stitches), A.6, A.10 (= 8-8-8-12-12-12 stitches – start at the first stitch in A.10 and work from right to left as far as the mark for your size). Continue this pattern. When the piece measures 8-10-7-8-9-6 cm, increase 2 stitches under the sleeve – read INCREASE TIP. Increase like this every 4-2½-2½-2½-2-2 cm a total of 11-15-17-15-17-19 times = 97-105-109-113-117-121 stitches – NOTE: The increased stitches are first worked in A.9/A.10 until there is room for a complete repeat, then worked in A.4. Continue working until the sleeve measures approx. 51-49-48-46-45-43 cm (shorter measurements in larger sizes due to wider neck and longer yoke). Try the sleeve on and work to desired length. Adjust so that the next round is an odd numbered row in the diagrams and cast off for the armhole as follows: Cast off the first 6-6-7-7-8-8 stitches, work as before until there are 5-5-6-6-7-7 stitches left and cast off the last 5-5-6-6-7-7 stitches = 86-94-96-100-102-106 stitches. Cut the strand. Work the other sleeve in the same way. YOKE: Place the sleeves on the same circular needle size 4.5 mm as the body, where stitches were cast off for the armholes (without working the stitches) = 388-420-436-484-500-532 stitches. Insert a marker thread in each transition between the body and sleeves = 4 marker threads. Allow the threads to follow your work onwards; they are used when decreasing to raglan. Start at the transition between the back piece and the left sleeve – you can insert a marker here to show the start of the round. Continue the pattern as before, with 2 stitches in stocking stitch on each side of all 4 marker threads. OVERVIEW OF THE NEXT SECTION: On the next round start to decrease to raglan; you will also cast off stitches for the neck mid-front and finish working back and forth from mid-front. When there are not enough stitches for the cables, work stocking stitch over these stitches. Read RAGLAN and NECK before continuing. RAGLAN: Decrease to RAGLAN on each side of all 4 marker threads – read description above. Decrease every 2nd round a total of 24-27-30-32-36-38 times, then every round 7-7-6-7-4-4 times. NECK: When the piece measures 55-57-59-60-62-64 cm (adjust so the next round is an odd round in the diagrams), decrease 6-6-6-10-10-10 stitches evenly over the middle 24-24-24-32-32-32 in front – remember DECREASE/INCREASE TIP. Then place the middle 30-32-34-42-46-54 stitches on a thread for the neck. Work to the beginning of the round. Cut the strand. Start from the wrong side, by the neck and continue the pattern back and forth. AT THE SAME TIME cast off at the beginning of each row from the neck as follows: 2 stitches 1 time and 1 stitch 1-1-1-2-2-2 times on each side. After all the decreases to raglan and neck there are 98-104-102-112-116-124 stitches on the needle. Cut the strand. DOUBLE NECK: Start mid-back and knit up 134-142-142-162-170-186 stitches around the neck (including the stitches on the thread and on the needle) with short circular needle size 3.5 mm and DROPS Karisma. On the next round decrease stitches to avoid the neck being too loose – knit 1 round and decrease to 104-108-112-116-120-124 stitches evenly spaced. Purl 1 round and knit 1 round. Work the next round as follows: Knit 1, * purl 2, knit 2 *, work from *-* until there are 3 stitches left, purl 2 and knit 1. Continue this rib until the neck measures 8-8-8-10-10-10 cm. On the next round increase all purl-2 to purl-3 by making 1 yarn over after each purled section (the yarn overs are purled twisted on the next round to avoid holes). Continue working until the neck measures 11-11-11-13-13-13 cm. Switch to circular needle size 4.5 mm and cast off loosely with knit over knit and purl over purl. Fold the neck double to the inside and sew down. To avoid the neck being tight and rolling outwards, it is important that the seam is elastic. ASSEMBLY: Sew the opening under each sleeve. |
|||||||||||||||||||||||||||||||
Diagram explanations |
|||||||||||||||||||||||||||||||
|
|||||||||||||||||||||||||||||||
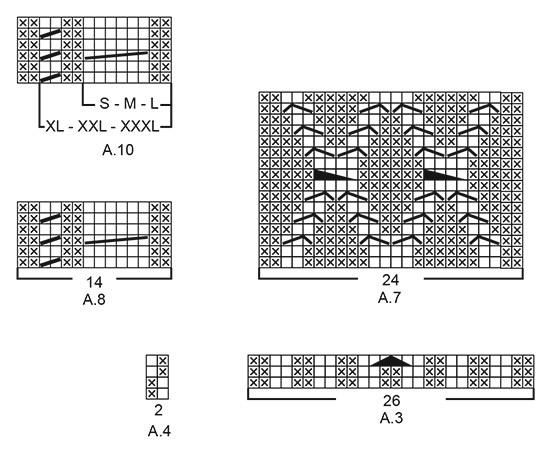 |
|||||||||||||||||||||||||||||||
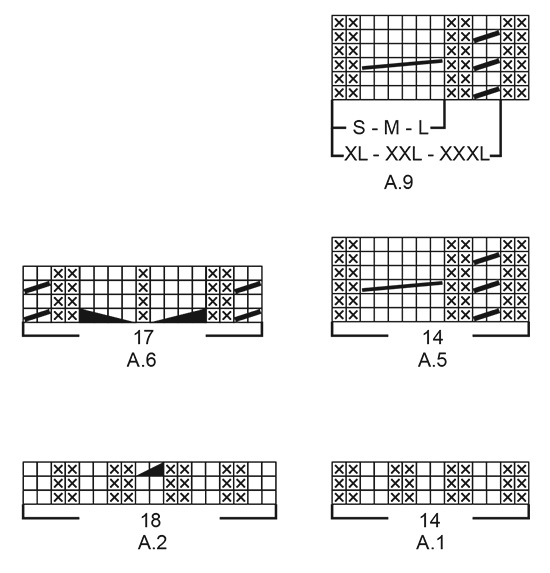 |
|||||||||||||||||||||||||||||||
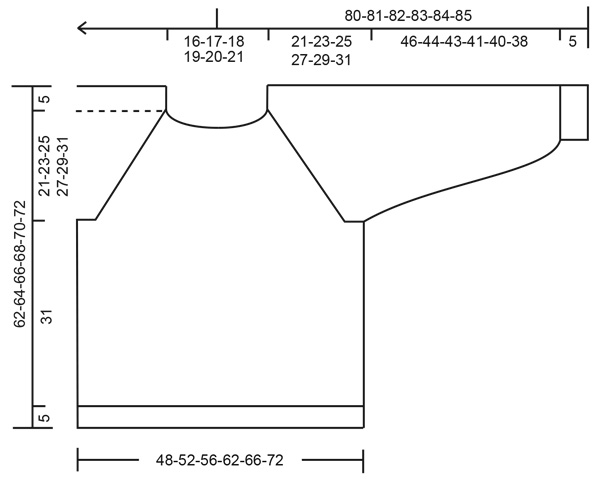 |
|||||||||||||||||||||||||||||||
Have you finished this pattern?Tag your pictures with #dropspattern #iceislandsweater or submit them to the #dropsfan gallery. Do you need help with this pattern?You'll find 21 tutorial videos, a Comments/Questions area and more by visiting the pattern on garnstudio.com. © 1982-2026 DROPS Design A/S. We reserve all rights. This document, including all its sub-sections, has copyrights. Read more about what you can do with our patterns at the bottom of each pattern on our site. |
|||||||||||||||||||||||||||||||






With over 40 years in knitting and crochet design, DROPS Design offers one of the most extensive collections of free patterns on the internet - translated to 17 languages. As of today we count 333 catalogues and 12532 patterns translated into English (UK/cm). 12532
We work hard to bring you the best knitting and crochet have to offer, inspiration and advice as well as great quality yarns at incredible prices! Would you like to use our patterns for other than personal use? You can read what you are allowed to do in the Copyright text at the bottom of all our patterns. Happy crafting!
Post a comment to pattern DROPS 224-10
We would love to hear what you have to say about this pattern!
If you want to leave a question, please make sure you select the correct category in the form below, to speed up the answering process. Required fields are marked *.