
Popular categories
Looking for a yarn?













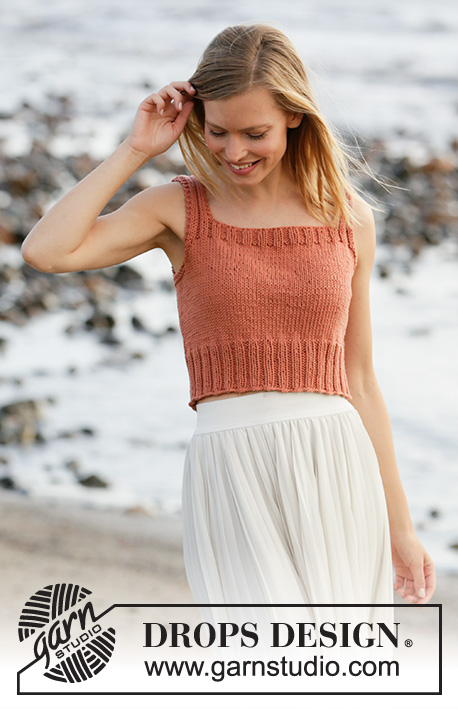
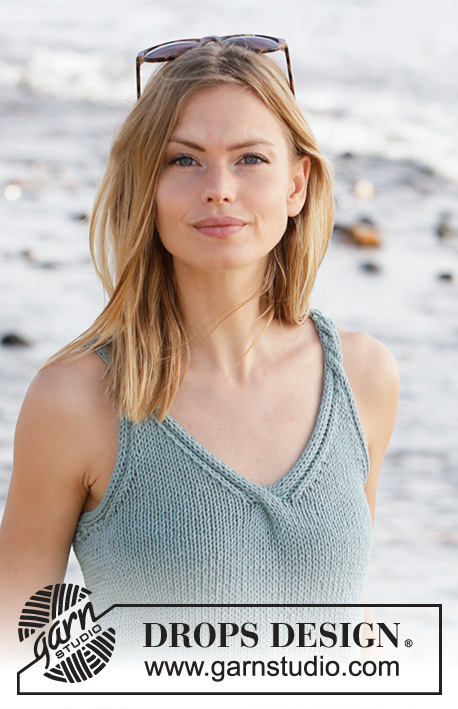
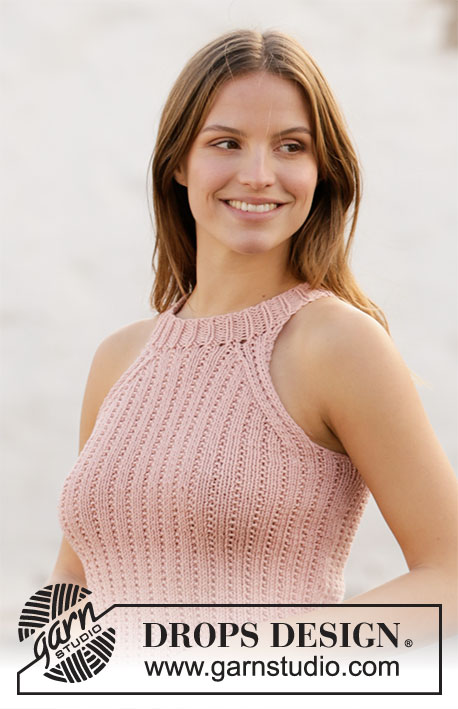















Comments / Questions (146)
 Anja Vesth wrote:
Hvordan strikkes mønstret A6? Kan ikke se det i opskriften? Vh Anja
20.10.2026 - 19:18
 Vanessa wrote:
Buonasera sono arrivata alla lavorazione del dietro ma non riesco a capire come devo procedere . Ho diviso su due ferri diversi le 52 maglie per ferro per il davanti , ma il dietro ha una lavorazione centrale a punto legaccio , dove io ho accavallato le maglie e quindi s'interrompe il lavoro . Inoltre guardando la foto del dietro non corrisponde al mio lavoro. Spero di essere stata chiara e di poter ricevere aiuto per procedere col lavoro . Grazie. Vanessa
11.09.2026 - 23:05DROPS Design answered:
Buonasera Vanessa, si ritrova 104 maglie per il dietro? Buon lavoro!
31.10.2026 - 18:04
 Pauline wrote:
Bonjour dans la partir "dos= 104 maille" quand vous dites de tricoter un rang de côtes comme avant qu'est ce que cela signifie? svp je tricote la taille s
21.08.2026 - 10:44DROPS Design answered:
Bonjour Pauline, vous avez auparavant rabattu les mailles des emmanchures, vous avez maintenant 5 m point mousse, 94 m de A.1 et 5 m point mousse pour le dos = 5+94+5=104 mailles. Tricotez sur l'envers comme avant = les mailles endroit à l'endroit et les mailles envers à l'envers pour conserver les côtes et 5 m point mousse (= à l'endroit) de chaque côté. Bon tricot!
21.08.2026 - 16:57
 Teresa wrote:
En los diagramas, los signos que se ven en las pasadas del reves son como se deben tejer los puntos o como se ven por el derecho.
17.08.2026 - 15:03DROPS Design answered:
Hola Teresa, los símbolos muestran como se ve la labor por el lado derecho. Así que las filas por el lado revés deberían trabajarse al contrario de como se ve el punto por el lado derecho. Esto se explica en las explicaciones del diagrama, donde te indican que el cuadrado blanco es 1 derecho por el lado derecho O 1 revés por el lado revés. El cuadrado de la cruz es 1 revés por el lado derecho O 1 derecho por el lado revés.
23.08.2026 - 22:22
 Sunny wrote:
Liebes Drops-Team, ich möchte die Anleitung für den Pullover White Springs, sehr gerne stricken. Das Top wird von unten nach oben gestrickt. Leider kann ich nicht verstehen, warum es ein Rumpfteil, ein Rückenteil und ein Vorderteil gibt? Ist mit Armkugel der Armausschnitt gemeint? Vielen lieben Dank! Lg Sunny
27.06.2026 - 18:18DROPS Design answered:
Liebe Sunny, meinen Sie dieses Modell? Hier wird man von unten nach oben stricken: das Rumpfteil in der Runde bis Armlöcher stricken, dann das Vorder- und das Rückenteil separat in Hin- und Rückreihen stricken. Die Armkugel ist das obere Teil der Ärmel, wo man beidseitig abketten/abnehmen wird, für den Armausschnitt. Viel Spaß beim Stricken!
29.06.2026 - 07:37
 Agata wrote:
Nabrałam 224 oczka - rozmiar S - i top wychodzi OGROMNY. Czy to są na pewno poprawne wymiary? Używam włóczki Safran i drutów 3mm, nie robię bardzo luźno. Według mnie jest o około 50 oczek za dużo
26.05.2026 - 10:38DROPS Design answered:
Witaj Agato, czy wykonałaś próbkę dżersejem i była zgodna z tą podaną we wzorze czyli 24 oczka na szerokość i 32 rzędy na wysokość = 10 x 10 cm?
27.05.2026 - 15:59
 Nancy Tencer wrote:
I am starting the back. I cannot understand Diag A4 and A5. I am reading it right to left on the odd rows and left to right on the even rows and it’s not looking right. Why would I purl 2tog tbl with 2 knit stitches? The pattern is not coming out.
20.11.2025 - 01:57DROPS Design answered:
Dear Mrs Tencer, the stitches are decreased as purl stitches, so you will purl 2 twisted together either knit or purl stitches from previous row. Between A.4 and A.5 just work stitches K over K and P over P. Happy knitting!
20.11.2025 - 10:23
Özi wrote:
Hallo Drops Team, ich bin am Rückenteil des Tops und müsste jetzt abketten aber ich habe die 14 cm noch nicht erreicht. Es fehlen mir noch 1,5 cm. Wie soll ich vorgehen? Danke im vorraus . Grüße Özi
04.09.2025 - 09:32DROPS Design answered:
Liebe Frau Özi, stimmt Ihre Maschenprobe in der Höhe? Wenn Sie in die 4. Größe 5 Mal die 8 Reihen A.4/A.5 stricken, dann sollen diese 40 Reihen ca 12,5 cm messen, mit den Krausrippen haben Sie dann 14 cm. Sollte Ihre Maschenprobe in der Höhe nicht stimmen, können Sie dann wahrscheinlich etwas mehr krausrechts stricken. Viel Spaß beim Stricken!
04.09.2025 - 10:55
Elli wrote:
Hi, ich stricke gerade TEIL 1 vom Vorderteil und beginne mit 60 Maschen. Nach dreimaliger Wiederholung von A6 (immer 8 Maschen weniger) komme ich auf 36 Maschen, nicht 34 Maschen (60-(3x8)=36). Wo fehlen mir noch zwei Abnahmen? Vielen Dank für Ihre Hilfe.
20.08.2025 - 12:46DROPS Design answered:
Liebe Elli, stricken Sie noch eine Hinreihe mit Abnahmen wie in A.6 gezeigt, so sind es 2 weitere Maschen abgenommen, so haben Sie nur 34 Maschen übrig. Viel Spaß beim Stricken!
20.08.2025 - 16:18
Beata wrote:
Dzień dobry, czy schematy zawierają rzędy na lewej stronie robótki czy należy je przerabiać tak jak oczka schodzą z drutów? I czy 3 ściągacze francuskie to w sumie 6 rzędów?
11.08.2025 - 23:19DROPS Design answered:
Witaj Beato, schemat zawiera wszystkie rzędy robótki, ale pokazuje oczka na prawej stronie robótki. Więcej jak czytać schematy znajdziesz TUTAJ. 3 ściągacze francuskie to inaczej 6 rzędów przerobionych na prawo. Pozdrawiamy!
12.08.2025 - 12:45
|
||||||||||||||||||||||
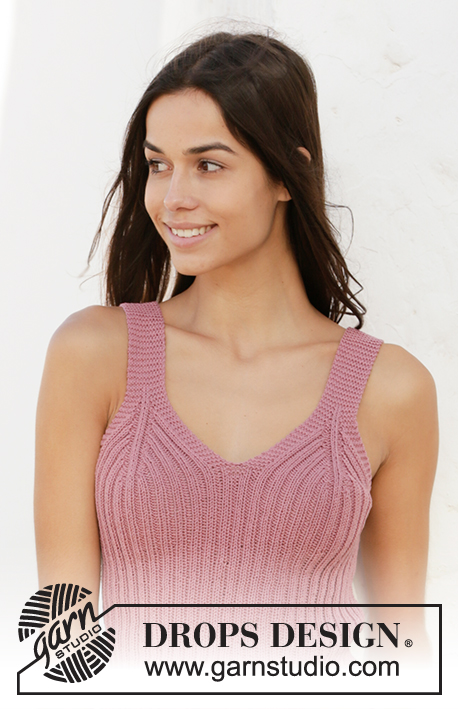
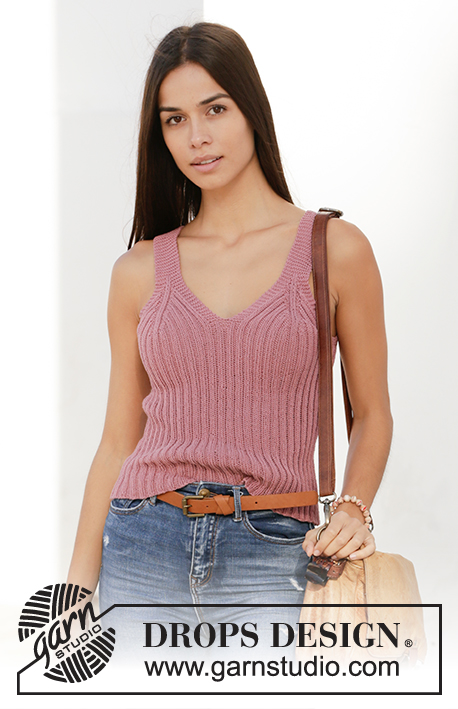
Strawberry Summer#strawberrysummertop |
||||||||||||||||||||||
 |
 |
|||||||||||||||||||||
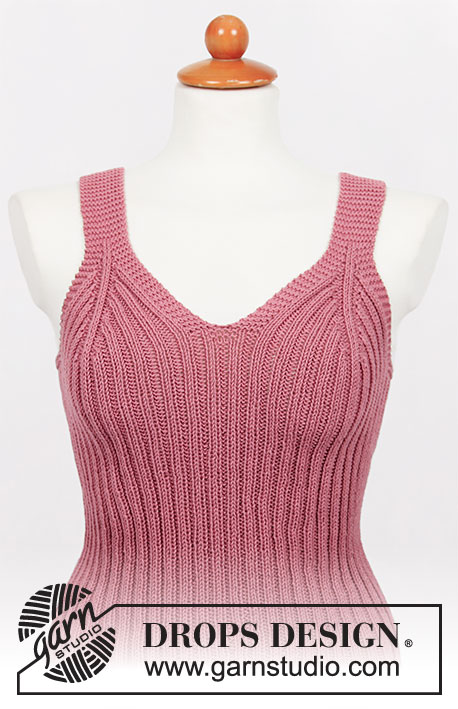
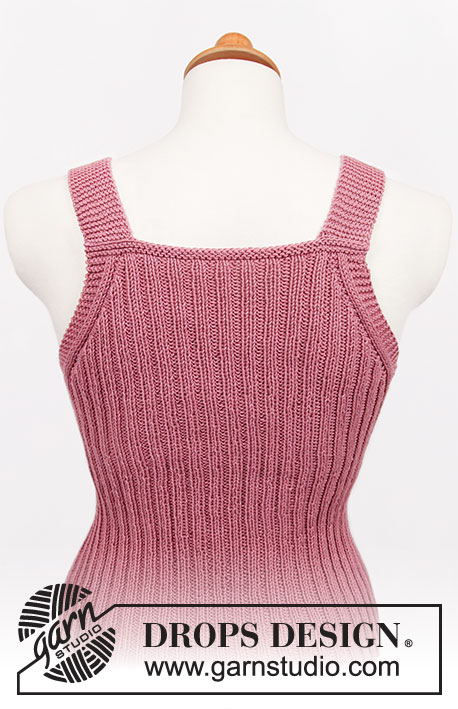
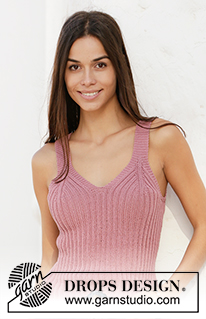
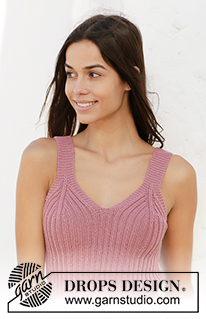
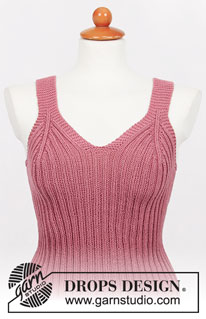
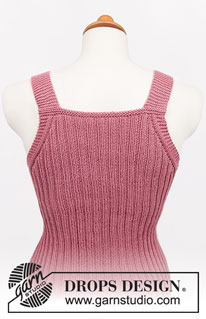
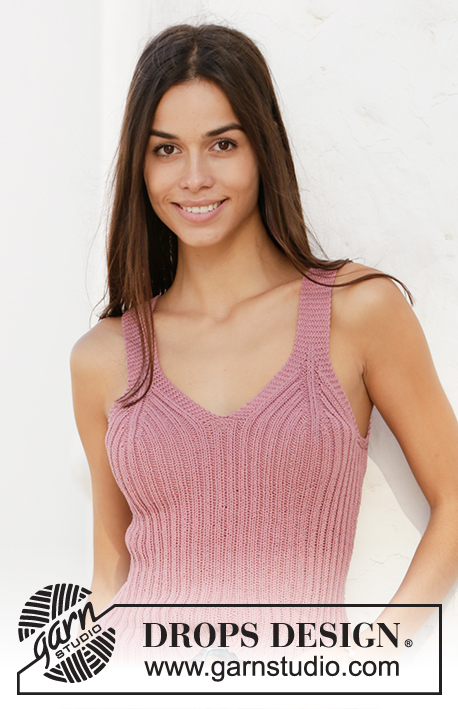
Knitted top in DROPS Safran. Piece is knitted bottom up with rib. Size: S - XXXL
DROPS 211-18 |
||||||||||||||||||||||
|
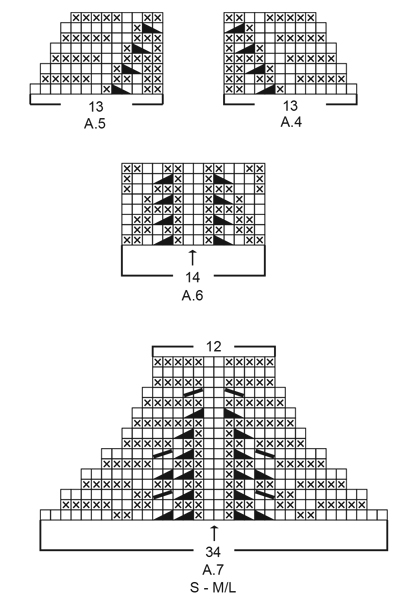
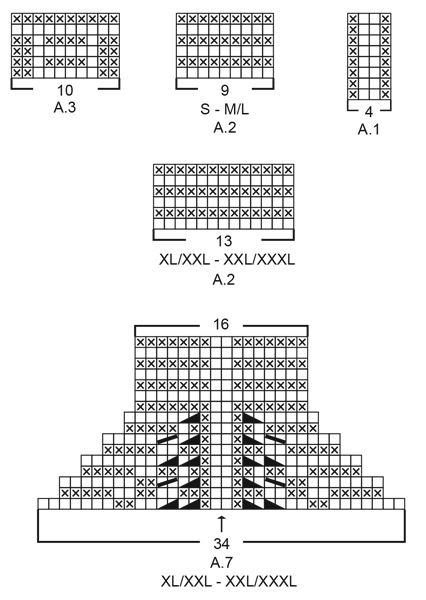
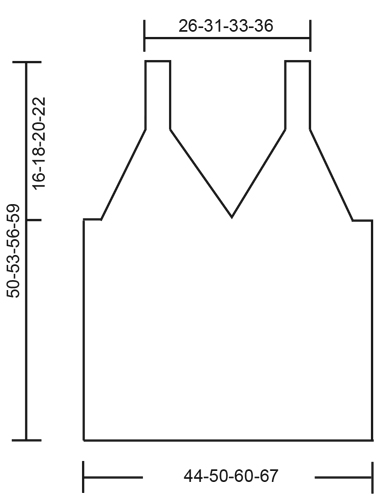
---------------------------------------------------------- EXPLANATION FOR THE PATTERN: ---------------------------------------------------------- GARTER STITCH (back and forth): Knit all rows. 1 ridge vertically = knit 2 rows. PATTERN: See diagrams A.1 to A.7. Choose diagram for your size (applies to A.2 and A.7). Diagrams show all rows in pattern seen from the right side. ---------------------------------------------------------- START THE PIECE HERE: ---------------------------------------------------------- TOP - SHORT OVERVIEW OF THE PIECE: Work body in the round on circular needle, from the bottom and up to armholes. Then work back piece and the 2 front pieces separately, back and forth on circular needle until finished measurements. Straps on front piece are fastened to back piece. BODY: Cast on 224-256-304-336 stitches on circular needle size 3 mm with Safran. Work A.1 in the round – insert at the same time 1 marker thread at the beginning of round (= left side when garments is worn), and 1 marker thread after 112-128-152-168 stitches (= right side when garment is worn). Both marker threads is between 2 purl stitches. Move the marker thread upwards when working. REMEMBER THE KNITTING TENSION! When piece measures 33-34-35-36 cm, work next round as follows (approx. 1 cm remains until piece is divided mid front, and decrease for armholes): Work A.2 (= 9-9-13-13 stitches), continue A.1 over the next 42-50-58-66 stitches, work A.3 (= 10 stitches mid front), continue A.1 over the next 42-50-58-66 stitches), work A.2 over the next 18-18-26-26 stitches (= 2 repetitions of 9-9-13-13 stitches – marker thread is between these 2 repetitions), continue A.1 over the next 94-110-126-142 stitches (= back piece), and work A.2 over the remaining 9-9-13-13 stitches. Continue pattern like this until A.2 and A.3 have been worked vertically. On next round cast off for armholes, i.e. work next round as follows: Cast off 4-4-8-8 stitches for armhole, work 5 stitches in GARTER STITCH – read explanation above, continue A.1 over the next 42-50-58-66 stitches, work 10 stitches in garter stitch (= mid front), continue A.1 over the next 42-50-58-66 stitches, work 5 stitches in garter stitch, cast off 8-8-16-16 stitches for armhole, work 5 stitches in garter stitch, continue A.1 over the next 94-110-126-142 stitches, work 5 stitches in garter stitch, and cast off the remaining 4-4-8-8 stitches for armhole. Cut the yarn. Finish back piece and front pieces separately. BACK PIECE: = 104-120-136-152 stitches. Begin from wrong side and work 1 row in rib as before with 5 edge stitches in garter stitch in each side. Continue to work in rib with 5 edge stitches in garter stitch in each side while AT THE SAME TIME decreasing for armholes on every row from right side as explained below. I.e. work first row from right side as follows: Work A.4 (= 13 stitches), continue rib as before until 13 stitches remain on row, finish with A.5 (= 13 stitches). Continue pattern like this until A.4 and A.5 have been worked 4-4-5-6 times in total vertically (= 16-16-20-24 stitches decreased in each side) = 72-88-96-104 stitches remain. Work 3 ridges back and forth over all stitches. Cast off - make sure that the cast-off edge is not too tight. Back piece measures approx. 11-11-14-16 cm from where piece was divided for front piece and bac piece. FRONT PIECE: = 104-120-136-152 stitches. Divide the piece mid front and slip half the stitches on 1 stitch holder or extra needle. Then work first part as explained below. PART-1: = 52-60-68-76 stitches. Begin from wrong side and work 1 row in rib as before with 5 edge stitches in garter stitch in each side. Insert 1 marker between the 2 middle stitches on row (= between 2 knit stitch seen from right side). Marker indicates the middle. Continue to work in rib with 5 edge stitches in garter stitch in each side while at the same time decreasing on each side of the middle as explained below. I.e. work first row from right side as follows: 5 edge stitches in garter stitch, work rib as before until 7 stitches remain before marker, work A.6 (= 14 stitches), work rib as before until 5 stitches remain on row, and finish with 5 edge stitches in garter stitch. Continue pattern like this, and repeat A.6 vertically until 34 stitches remain on row – finish after 1 row from wrong side. Now work A.7 over these 34 stitches. When A.7 has been worked, 12-12-16-16 stitches remain on needle for strap, and front piece measures approx. 11-13-16-18 cm from where piece was divided for front and back piece. Work strap as explained below. STRAP: = 12-12-16-16 stitches. Work in garter stitch back and forth until the strap measures approx. 10-12-10-10 cm – try the top on and work to desired length, strap should continue over the shoulder and down to back piece. Cast off. PART-2: Slip the 52-60-68-76 stitches from stitch holder or extra needle back on circular needle size 3 mm, and work part-2 the same way as part-1. Then work strap the same way as on part-1. Cast off. ASSEMBLY: Fasten straps to back piece - begin at the edge in each side and sew stitch to stitch. Cut and fasten the thread. |
||||||||||||||||||||||
Diagram explanations |
||||||||||||||||||||||
|
||||||||||||||||||||||
 |
||||||||||||||||||||||
 |
||||||||||||||||||||||
 |
||||||||||||||||||||||
Have you finished this pattern?Tag your pictures with #dropspattern #strawberrysummertop or submit them to the #dropsfan gallery. Do you need help with this pattern?You'll find 8 tutorial videos, a Comments/Questions area and more by visiting the pattern on garnstudio.com. © 1982-2026 DROPS Design A/S. We reserve all rights. This document, including all its sub-sections, has copyrights. Read more about what you can do with our patterns at the bottom of each pattern on our site. |
||||||||||||||||||||||






With over 40 years in knitting and crochet design, DROPS Design offers one of the most extensive collections of free patterns on the internet - translated to 17 languages. As of today we count 333 catalogues and 12525 patterns translated into English (UK/cm). 12525
We work hard to bring you the best knitting and crochet have to offer, inspiration and advice as well as great quality yarns at incredible prices! Would you like to use our patterns for other than personal use? You can read what you are allowed to do in the Copyright text at the bottom of all our patterns. Happy crafting!
Post a comment to pattern DROPS 211-18
We would love to hear what you have to say about this pattern!
If you want to leave a question, please make sure you select the correct category in the form below, to speed up the answering process. Required fields are marked *.