
Popular categories
Looking for a yarn?


Comments / Questions (118)
![]() Maria wrote:
Maria wrote:
Is it possible, that your stitch count is incorrect? With size XL I get 212 stitches around the chest, which come to 124 cm of circumference with a gauge of 17 stitches, instead of the indicated 116 cm... As Klaudia, I do not get your proportions: 84 cm (144 stitches at a 17 st gauge) of neckline circumference!?
04.02.2026 - 14:55
![]() Silvia wrote:
Silvia wrote:
Buongiorno, i 4 ferri in cui metto in attesa le maglie per lo scollo devono coincidere con gli ultimi 4 ferri del raglan? Io ho iniziato a mettere in attesa a 41 cm ma poi il raglan è continuato per un po' e mi sono trovata uno scalino...
30.12.2025 - 09:21DROPS Design answered:
Buongiorno Silvia, deve seguire le indicazioni riportate: se le diminuzioni non sono terminate deve diminuire 1 maglia su ogni ferro fino alla fine delle diminuzioni. Buon lavoro!
30.12.2025 - 22:09
![]() Klaudia wrote:
Klaudia wrote:
Vielen Dank für die rasche Antwort. Mir war nicht klar, dass die Jacke einen so weiten Halsausschnitt hat - aber kein Problem, ich stricke einfach ein paar Abnahmen und Reihen mehr. Passt dann sicherlich auch noch oder?
02.12.2025 - 08:56DROPS Design answered:
Liebe Klaudia, wenn Sie Änderungen machen möchten, denken Sie daran, die Jacke regelmäßig anzuprobieren, so wissen Sie, ob alles passt. Viel Spaß beim Stricken!
02.12.2025 - 17:07
![]() Klaudia wrote:
Klaudia wrote:
Servus, rein mathematisch bleiben mir erheblich mehr Maschen nach Abschluss der Raglanabnahmen übrig: ich stricke in XXL und habe bei Beginn der Rundpasse 352 M auf der Nadel, nehme dann 20 plus 6 x 8 M ab - sind 208 M. Es bleiben also 144 M übrig. Laut Anleitung sollten es jedoch "ca. 80 - 120 M entlang des gesamten Halsrandes" sein. Ich hab mal für alle Größen gerechnet und komm auf 92 - 156 M ??
01.12.2025 - 14:22DROPS Design answered:
Liebe Klaudia, in XXL sind es 352 M am Anfang der Passe, für Raglan wird man insgesamt 208 Maschen abnehmen, dazu werden noch auch wenigstens 44 Maschen für den Hals stillgelegt und zwar: 12 M + (3 Maschen x 2) + (2 M x 2)= 22 M + 1 M in jeder 2. Reihe bis die Raglanabnahmen fertig sind. So sind es ca: 352-208-(22x2 Seiten) = 100 Maschen - dann stricken Sie alle Maschen inkl. die stillgelgten Maschen = wenigstens 44 Maschen (22 beidseitig) = ca 144 M. Viel Spaß beim Stricken!
01.12.2025 - 16:17
![]() Karishma Shah wrote:
Karishma Shah wrote:
Hi! When you say "remember the gauge" for the button band garter stitch, does that mean I should switch back to my Size 7 needles for the button band while using Size 8 needles for the stockinette?
24.10.2025 - 21:33DROPS Design answered:
Dear Karishma Shah, after garter stitch at the bottom, you start working all the stitches on circular needle size 8 mm (including band mid front stitches). Happy knitting!
03.11.2025 - 08:53
![]() Tanja wrote:
Tanja wrote:
Kann das erste Knopfloch auch bereits nach 16cm statt nach 24 cm gearbeitet werden oder fällt der Kragen dann nicht richtig? Ich möchte den Hals lieber geschlossener haben.
03.09.2025 - 08:45DROPS Design answered:
Liebe Tanja, das letzte Knopfloch wird ca 1 cm bevor man die Maschen für den Hals stilllegt, so können Sie kalkulieren, ob Sie am besten ein anderes Knopfloch vor dem 1. stricken möchten oder ob Sie dann liber das letzte früher stricken. Viel Spaß beim Stricken!
03.09.2025 - 16:18
![]() Susanne Hermann Danielsen wrote:
Susanne Hermann Danielsen wrote:
Hvor er opskriften til kraven ???
05.05.2025 - 13:07DROPS Design answered:
Hei Susanne. Står under HALS: Når raglan indtagningerne er færdige skiftes til rundp 4,5 og der strikkes m op fra trådene = ca 80 til 120 m langs hele halskanten. Strik 1 p r - Samtidig med at m-ant justeres til 84-88-92-96-100-108 m. Fortsæt med retstrik til kraven måler 8-8-8-9-9-9 cm. Luk alle m løst af. mvh DROPS Design
05.05.2025 - 14:10
![]() Marie Duranceau wrote:
Marie Duranceau wrote:
Can you help me please, I have decreased 13 times and have reached the length recommended before I start to decrease on both the knit side and again on the purl side. How can I progress?
26.04.2025 - 23:53DROPS Design answered:
Dear Mrs Duranceau, what about your tension? Do you have the 22 rows stocking stitch = 10 cm in height? If not, then you might have to edit how often you should work the decreases to match your own tension and the finished measurements. Happy knitting!
28.04.2025 - 09:29
![]() Marie Duranceau wrote:
Marie Duranceau wrote:
I find the instructions for the yoke very confusing, what do I do? Do I do the decreases on the knit and purl rows then do a plain knit and purl rows with no decreases? That makes 4rows altogether, and then do the 2 decrease rows again?
23.04.2025 - 15:49DROPS Design answered:
See answer below, if it's still not clear, make sure to tell us which size you are working on. Happy knitting!
23.04.2025 - 16:20
![]() Marie Duranceau wrote:
Marie Duranceau wrote:
I find the instructions for the yoke very confusing, what do I do? Do I do the decreases on the knit and purl rows then do a plain knit and purl rows with no decreases? That makes 4rows altogether, and then do the 2 decrease rows again?
23.04.2025 - 15:49DROPS Design answered:
Dear Mrs Duranceau, you start to decrease for raglan on the very first row over all stitches for yoke; and decrease for raglan a total of 18 -20 times (see size) on every other row = on every row from the right side then 2 to 8 times on every row = from both right side and wrong side, at the same time, remember to shape neck when piece measures 41-45 cm, first slipping stitches on each side on a thread/stitch holder, then casting off stitches. Can this help? Happy knitting!
23.04.2025 - 16:19
|
|
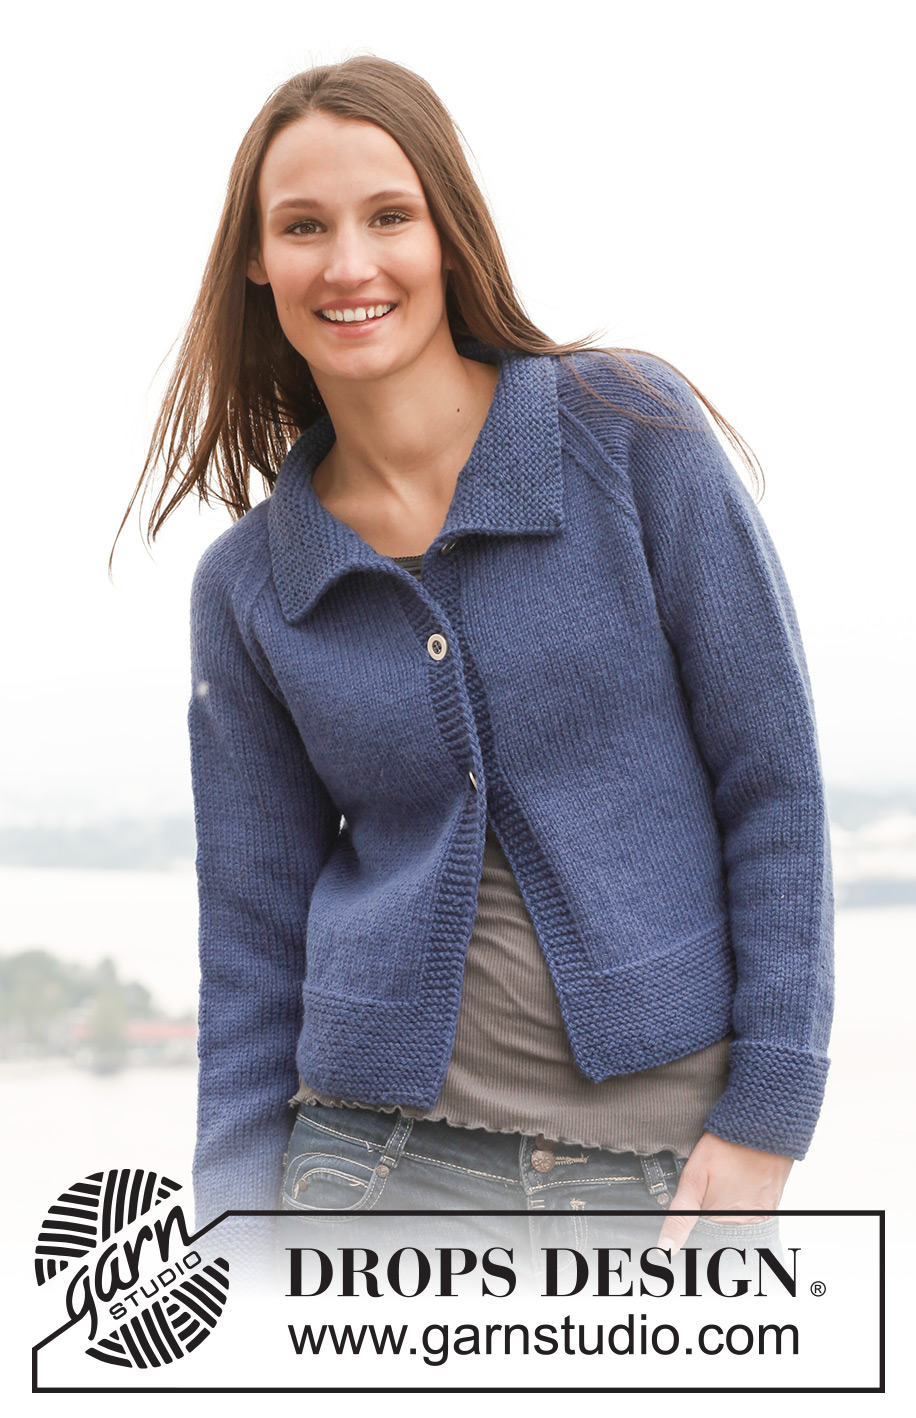
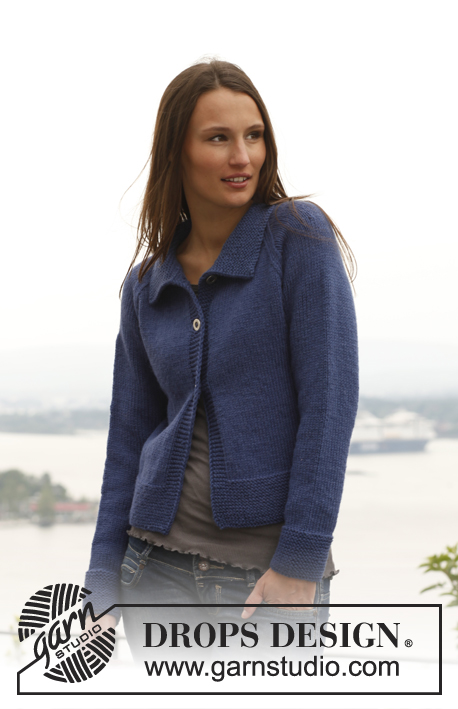
Winter Morning#wintermorningcardigan |
|
 |
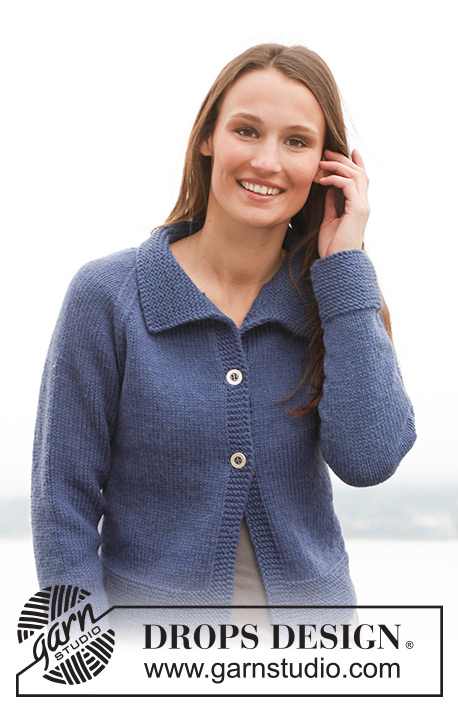 |
Knitted DROPS jacket with raglan sleeves in ”Alaska”. Size: S - XXXL.
DROPS 141-9 |
|
|
GARTER ST (back and forth on needle): K all rows. 1 ridge = 2 rows K. GARTER ST (in the round on needle): * K 1 round and P 1 round *, repeat from *-*. INCREASE TIP: Inc 1 st on each side of marker as follows: Work until 1 st remains before marker, make 1 YO, work 2 sts (marker is between these 2 sts), make 1 YO. On next row work YO twisted to avoid holes. RAGLAN: Dec as follows from RS: Work until 3 sts remain before marker, K 2 tog, K 2 (marker is between these 2 sts), slip 1 st as if to K, K 1, psso. Dec as follows from WS: Work until 3 sts remain before marker, P 2 twisted tog (i.e. work in back loop of sts instead of front), P 2 (marker is between these 2 sts), P 2 tog. BUTTONHOLES: Cast off from RS for 3 buttonholes on right band. 1 buttonhole = cast off 5th and 6th st from mid front and cast on 2 new sts on next row over these sts. Cast off for buttonholes when piece measures: SIZE S: 24, 32, 40 cm. SIZE M: 25, 33, 41 cm. SIZE L: 24, 33, 42 cm. SIZE XL: 25, 34, 43 cm. SIZE XXL: 24, 34, 44 cm. SIZE XXXL: 24, 34, 44 cm. -------------------------------------------------------- BODY: Worked back and forth on circular needle from mid front. Cast on 140-156-172-192-212-232 sts with Alaska on circular needle size 4.5 mm. Work in GARTER ST - see explanation above - for 8-8-8-9-9-9 cm. On next row from RS switch to circular needle size 5 mm, work in stocking st - but work the outermost 6-6-6-8-8-8 sts in each side in garter st (= band mid front). REMEMBER THE KNITTING TENSION! READ ALL OF THE FOLLOWING SECTION BEFORE CONTINUING. Continue in stocking st with 6-6-6-8-8-8 sts in garter st in each side until piece measures 9-9-9-10-10-10 cm. Insert a marker 38-42-46-52-57-62 sts in from each side (= 64-72-80-88-98-108 sts between markers on back piece). Move the markers upwards when working. Now inc 1 st on each side of every marker - Read INCREASE TIP above = 4 sts inc on row. Repeat inc every 4-4-4½-4½-4½-4½ cm 4 more times (a total of 5 times) = 160-176-192-212-232-252 sts (= 74-82-90-98-108-118 sts between markers on back piece) - AT THE SAME TIME when piece measures 24-25-24-25-24-24 cm cast off for 1st buttonhole on right band - READ BUTTONHOLES. Continue until piece measures 29-30-31-32-33-34 cm. Then cast off 3 sts on each side of every marker for armholes (i.e. 6 sts cast off in each side) = 148-164-180-200-220-240 sts remain on needle. Put piece aside and knit the sleeves. SLEEVE: Worked in the round on double pointed needles. Cast on 36-38-40-42-44-44 sts on double pointed needles size 4.5 mm with Alaska. Work in garter st for 8 cm. Then switch to double pointed needles size 5 mm and continue in stocking st. Insert a marker at beg of round (= mid under sleeve). When piece measures 9 cm, inc 1 st on each side of marker. Repeat inc 10-11-12-12-13-15 more times every 3½-3-3-3-2½-2 cm (= a total of 11-12-13-13-14-16 times) = 58-62-66-68-72-76 sts. When piece measures 48-48-47-47-46-46 cm (shorter measurements in the larger sizes because of longer sleeve cap), cast off 3 sts on each side of marker (= 6 sts cast off mid under sleeve) = 52-56-60-62-66-70 sts remain on needle. YOKE: Slip sleeves on to same circular needle as body where armholes were cast off = 252-276-300-324-352-380 sts. Insert 1 marker in every transition between body and sleeves (= 4 markers), move the markers upwards when working. Then work in stocking st with 6-6-6-8-8-8 sts in garter st in each side - AT THE SAME TIME on 1st row from RS, beg dec for RAGLAN - see explanation above. Dec every other row a total of 18-18-18-20-20-20 times, then every row 2-4-6-4-6-8 times. AT THE SAME TIME when piece measures 41-42-43-44-45-45 cm, slip the first sts at beg of every row from neck on a stitch holder as follows: 8-8-10-10-12-12 sts 1 time, 3 sts 1-1-1-2-2-2 times, 2 sts 2 times, then 1 st until raglan dec has been worked. NECK: When all raglan dec are done, switch to circular needle size 4.5 mm, work on sts from stitch holders = approx. 80 to 120 sts along the entire neck edge. K 1 row while AT THE SAME TIME adjusting no of sts to 84-88-92-96-100-108. Then work in garter st until collar measures 8-8-8-9-9-9 cm. Loosely cast off all sts. ASSEMBLY: Sew the openings under the sleeves tog. Sew the buttons on to left front piece. |
|
 |
|
Have you finished this pattern?Tag your pictures with #dropspattern #wintermorningcardigan or submit them to the #dropsfan gallery. Do you need help with this pattern?You'll find 16 tutorial videos, a Comments/Questions area and more by visiting the pattern on garnstudio.com. © 1982-2026 DROPS Design A/S. We reserve all rights. This document, including all its sub-sections, has copyrights. Read more about what you can do with our patterns at the bottom of each pattern on our site. |
|


With over 40 years in knitting and crochet design, DROPS Design offers one of the most extensive collections of free patterns on the internet - translated to 17 languages. As of today we count 324 catalogues and 12290 patterns translated into English (UK/cm). 12290
We work hard to bring you the best knitting and crochet have to offer, inspiration and advice as well as great quality yarns at incredible prices! Would you like to use our patterns for other than personal use? You can read what you are allowed to do in the Copyright text at the bottom of all our patterns. Happy crafting!
Post a comment to pattern DROPS 141-9
We would love to hear what you have to say about this pattern!
If you want to leave a question, please make sure you select the correct category in the form below, to speed up the answering process. Required fields are marked *.