
Popular categories
Looking for a yarn?


Comments / Questions (73)
![]() Cheryl wrote:
Cheryl wrote:
How can I create a yarn group D with Brushed Alpaca Silk, which is a yarn group C. Will A+ C = D?
07.11.2025 - 20:09DROPS Design answered:
Hi Cheryl, Yes 1 strand of yarn from group C + 1 strand from group A = same thickness as 1 strand of yarn from group D. Regards, Drops Team.
12.11.2025 - 07:06
![]() Anni Nielsen wrote:
Anni Nielsen wrote:
Hej igen. Når jeg skal strikke kant, er det så rigtig forstået at jeg skal tage ud (ved at lave omslag) til ca dobbelt antal masker, f.eks. 650 masker for den største størrelse hvor jeg inden kanten slutter med 328 masker ?
28.07.2022 - 18:28DROPS Design answered:
Hej Anni, ja det stemmer, dels bliver omkredsen større og dels bruger snoningerne flere masker samtidigt som det bliver som en smuk flæsekant :)
05.08.2022 - 08:17
![]() Anni Nielsen wrote:
Anni Nielsen wrote:
Hej. Jeg har delt maskerne (4 x 82) og strikker højre forstykke hvor sidste maske skal sættes på tråden til hhv nakke og midt bagpå, men skalsidste maske strikkes eller flyttes inden . Jeg har prøver begge dele men uanset hvad jeg gør, så bliver den sidste maske meget lang. Håber I kan hjælpe 🤞
04.07.2022 - 17:56DROPS Design answered:
Hej Anni, jo du strikker pinden ud, strikker maskerne som skal sættes på tråden og fortsætter pinden ud i den anden side. Ja de vil blive lidt længere, men stram den første maske efter tråden :)
05.07.2022 - 08:43
![]() Phạm Hoang wrote:
Phạm Hoang wrote:
Hi, I use 2.5mm needles, i have total 328 sts when it come 23cm. How can i divide for armhole? Please help.
06.12.2021 - 05:35DROPS Design answered:
Dear Mrs Hoang, this pattern has been writtten for a tension of 19 sts x 26 rows stocking stitch = 10 x 10 cm and we are unfortunately not able to adjust each of our pattern to every single request - please contact the store where you bought the yarn for any individual assistance. Thanks for your comprehension. Happy knitting!
06.12.2021 - 09:04
![]() Carrole Lebel wrote:
Carrole Lebel wrote:
Bonjour. J'ai 2 questions. 1) Lorsque je tricote un tour sans augmentation, (tricoter 30-32-34 m, rabattre 36-40-44 m ) continuer ... tricoter les 30-32-34 dernières ... du tour), est-ce que je le fais alternativement jersey envers et jersey endroit comme au début de l'ouvrage ou jersey endroit sur tout le rang ? 2) Les augmentations (jusqu'à ce que l'ouvrage mesure 25-28-31 cm à partir du centre), se font-elles en vis-èa-vis des jetés ? Merci beaucoup
23.05.2019 - 01:48DROPS Design answered:
Bonjour Mme Lebel, tout à fait, quand vous rabattez les mailles des emmanchures, vous tricotez les mailles comme avant (jersey endroit et jersey envers) pour continuer le même motif qu'avant. Ensuite, vous continuez comme avant de nouveau, comme si vous n'aviez pas rabattu les mailles des emmanchures, vous devez avoir 1 m en plus dans chaque "section" et les jetés doivent continuer comme avant. Bon tricot!
23.05.2019 - 09:35
![]() HUOT-MARCHAND wrote:
HUOT-MARCHAND wrote:
Bonjour, quel fil utiliser à présent pour réaliser ce modèle ? MERCI Bonne journée
20.05.2018 - 09:50DROPS Design answered:
Bonjour Mme Huot-Marchand, vous pouvez utiliser 2 fils DROPS Kid-Silk ou 1 fil Brushed Alpaca Silk - essayez notre convertisseur en indiquant bien le poids de fil indiqué pour la taille puis "trouver des alternatives". Bon tricot!
22.05.2018 - 08:32
![]() Heather wrote:
Heather wrote:
The instructions for the right front piece are confusing English -please can you help clarify? Do you continue YO increases every other row when knitting back and forth maintaining pattern of loops in middle and one side of right front piece? Or does "now done" mean finished as in no more increases and you'd start with 66 and finish with 18 stitches if doing small/medium size?
21.02.2017 - 00:33DROPS Design answered:
Dear Heather, when you are working back and forth on right front piece, inc are done, ie you don't work any YOs anymore, just work K over K and P over P while slipping at the same time the last 2-2-1 st on every row on a st holder (= on each side) until there are 12-32-26 sts on a st holder in each side). Happy knitting!
21.02.2017 - 09:48
![]() Heather wrote:
Heather wrote:
Aha now I understand it is meant to be 8 segments radiating out from the middle of the circle alternating stocking and garter each separated buy the pretty YO loops. It's hard to make out on photo and at first I though was all stocking as wool pale and fluffy, beautiful though. (I need to flip the loops/purl into back of loop to get loophole pattern rather than plain increase whereas the knit YOs make the pattern treated normally)
11.02.2017 - 21:41
![]() Heather wrote:
Heather wrote:
The pattern is written for the round but to get the effect I think is in the photo it's best to ignore the purls and knit all stitches... at least the way I have been taught! The instructions as written produce 4 segments of half socking and half garter stitch radiating out from the middle with 4 YO loop patterns dividing them and the other YOs are knitted as invisible increases. Is this right or should I knit all and make each YO form pattern radiating out from middle?
11.02.2017 - 17:12DROPS Design answered:
Dear Heather, you should have *1 section in stocking st, 1 section in reversed stocking st* around (total of 8 sections with YOs in between), there are no garter st there. Happy knitting!
13.02.2017 - 10:12
![]() Heather wrote:
Heather wrote:
Currently making practice circles to make sure I understand the pattern. Please can you help? Should it be 4 YO loop details with the segments between half stocking and half garter in appearance or it be stocking stitch all over with all 8 YO loops making lovely pattern radiating out from the middle?
11.02.2017 - 17:02DROPS Design answered:
Dear Heather, you will have a total of 8 sections with 1 YO in between (from round 3), then work every other section in stocking st, and every other remaining section in reversed stocking st. Happy knitting!
13.02.2017 - 10:11
|
||||||||||
Ocean Waves#oceanwavesbolero |
||||||||||
 |
 |
|||||||||
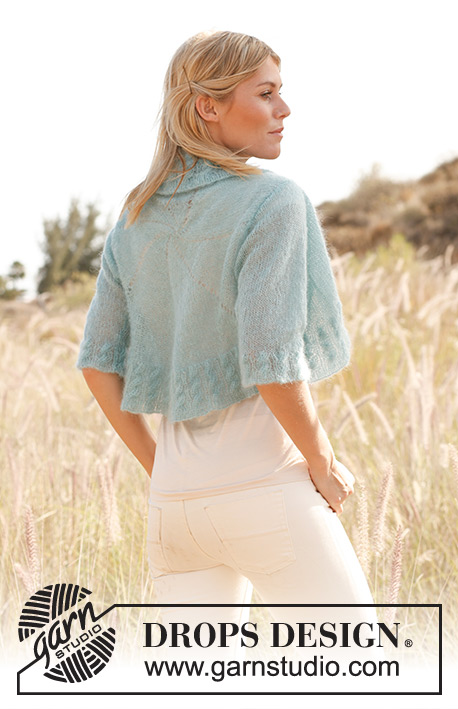
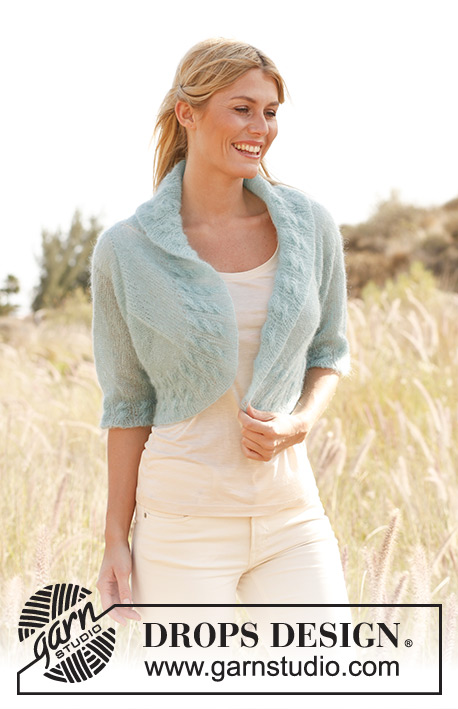
Knitted DROPS bolero with ¾ sleeves and cable edges in ”Vivaldi”. SIZE S - XXXL
DROPS 138-24 |
||||||||||
|
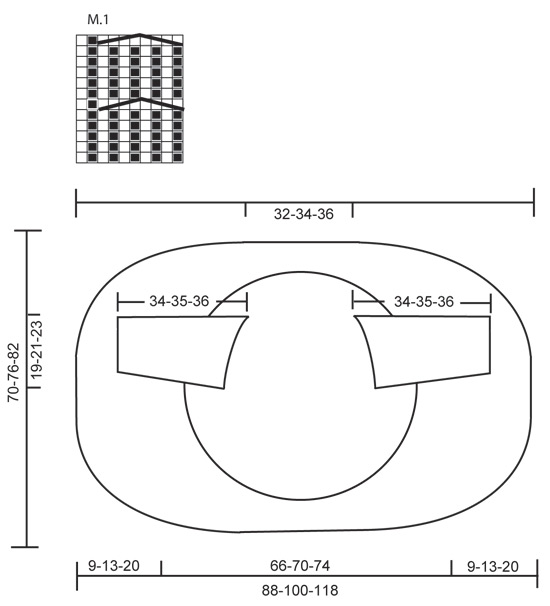
BOLERO: Worked in the round in a circle from mid back. All measurements should be done when piece is flat. Cast on 8 sts with Vivaldi and divide them on 4 double pointed needles size 4 mm (= 2 sts on every needle). Insert a marker at beg of round = mid up towards neck. ROUND 1: * K 1, 1 YO, P 1, 1 YO *, repeat from *-* 4 times = 16 sts. ROUND 2: * K 2, P 2 *, repeat from *-* the entire round. ROUND 3: * K 2, 1 YO, P 2, 1 YO *, repeat from *-* the entire round = 24 sts. ROUND 4: * K 3, P 3 *, repeat from *-* the entire round. ROUND 5: * K 3, 1 YO, P 3, 1 YO *, repeat from *-* the entire round = 32 sts. ROUND 6: * K 4, P 4 *, repeat from *-* the entire round. Continue to inc the same way every other round (= 8 inc). For every inc there will be 1 st more between every inc. Switch to circular needle when needed. REMEMBER THE KNITTING TENSION! When piece measures 19-21-23 cm from centre (there are approx. 200-224-240 sts on needle), work next round as follows (this must be a round without inc): Work 30-32-34 sts, cast off 36-40-44 sts (= armhole), work until 66-72-78 sts remain, cast off 36-40-44 sts (= armhole), work the last 30-32-34 sts on round. On next round cast on the same no of new sts over each armhole as was cast off + sts which are to be inc over the armhole on this round. Continue to work with inc until piece measures 25-28-31 cm from centre (= approx. 264-296-328 sts on needle). On next round work as follows (this must be a round without inc): Slip the last 33-37-41 sts that were worked on a stitch holder, work the first 33-37-41 sts on round and then slip them on to same stitch holder (= up towards neck), work 66-74-82 sts and slip them on another stitch holder (= left front piece), work 66-74-82 sts and slip them on a third stitch holder (= bottom mid back), work the last 66-74-82 sts (= right front piece). RIGHT FRONT PIECE: Continue to work back and forth over the 66-74-82 sts on needle as before – NOTE: Inc are now done – AT THE SAME TIME slip the last 2-2-1 sts on every row on to the same stitch holder where sts towards neck and towards mid back are. This is done 12-16-26 times in each side (= 24-32-26 sts in each side). Finally slip the remaining sts on to one of the stitch holders. LEFT FRONT PIECE: Slip the 66-74-82 sts from stitch holder in the left side back on needle. Work as right side. EDGE: Slip all sts back on circular needle size 4 mm. K 1 round while AT THE SAME TIME making 1 YO between approx. every st – adjust so that total no of sts is divisible by 10. On next round work P 1/K 1 (work YOs twisted to avoid holes, i.e. work in back loop of st). Then work diagram M.1 for 8 cm (make sure that P and K sts fit over each other from first round), continue with P 1/K 1 for 5 rounds after last cable, then cast off with P over P and K over K. SLEEVE: Worked in the round on double pointed needles. Cast on 80-90-100 sts on double pointed needles size 4 mm with Vivaldi. Insert a marker at beg of round (= mid under sleeve). Work diagram M.1 one time vertically + the first 4 rounds one more time. Work next round as follows: * K 1, K 2 tog *, repeat from *-* until 2-0-1 st remains, K this/these st(s) = 54-60-67 sts. Continue in stocking st. When piece measures 8 cm, inc 1 st on each side of marker mid under sleeve. Repeat inc every 3 cm a total of 6 times = 66-72-79 sts. When piece measures 25 cm, cast off 6 sts mid under sleeve (i.e. cast off 3 sts on each side of marker) and work back and forth on needle until finished measurements. Then cast off for sleeve cap at beg of every row in each side: 2 sts 3 times and 1 st 4-5-6 times, then cast off 2 sts in each side until piece measures 33-34-35 cm, then cast off 3 sts 1 time in each side. Cast off the remaining sts, piece measures approx. 34-35-36 cm. ASSEMBLY: Sew in the sleeves so that middle of sleeve cap is placed where armholes are the closest tog (i.e. where 1st st was cast off for first armhole and where last st was cast off on second armhole). |
||||||||||
Diagram explanations |
||||||||||
|
||||||||||
 |
||||||||||
Have you finished this pattern?Tag your pictures with #dropspattern #oceanwavesbolero or submit them to the #dropsfan gallery. Do you need help with this pattern?You'll find 15 tutorial videos, a Comments/Questions area and more by visiting the pattern on garnstudio.com. © 1982-2026 DROPS Design A/S. We reserve all rights. This document, including all its sub-sections, has copyrights. Read more about what you can do with our patterns at the bottom of each pattern on our site. |
||||||||||


With over 40 years in knitting and crochet design, DROPS Design offers one of the most extensive collections of free patterns on the internet - translated to 17 languages. As of today we count 325 catalogues and 12298 patterns translated into English (UK/cm). 12298
We work hard to bring you the best knitting and crochet have to offer, inspiration and advice as well as great quality yarns at incredible prices! Would you like to use our patterns for other than personal use? You can read what you are allowed to do in the Copyright text at the bottom of all our patterns. Happy crafting!
Post a comment to pattern DROPS 138-24
We would love to hear what you have to say about this pattern!
If you want to leave a question, please make sure you select the correct category in the form below, to speed up the answering process. Required fields are marked *.