
Popular categories
Looking for a yarn?


Comments / Questions (24)
![]() Nathalex wrote:
Nathalex wrote:
Bonjour, je bloque complètement pour assembler la tortue. Je ne comprends pas comment faire des mailles serrées quand il y a une patte, ou la tête, ou la queue, entre les deux carapaces ? Pouvez-vous m'expliquer ? Comment faire pour que le fil ne soit pas obligé de "faire le tour" de la patte (ou tête ou queue) ? On doit assembler envers contre envers ou endroit contre endroit ? Merci de votre réponse, qui me permettra j'espère de finir cette jolie tortue !
06.05.2014 - 10:43DROPS Design answered:
Bonjour Nathalex, pour tout assembler entre les 2 moitiés de carapace, on pique le crochet d'abord dans les 2 moitiés de carapace pour crocheter des ms (sur l'endroit), puis, quand on assemble par ex une patte, on place la patte entre les 2 moitiés de carapace et on pique le crochet dans les 3 épaisseurs. Bon crochet !
06.05.2014 - 13:35
![]() Lene Pedersen wrote:
Lene Pedersen wrote:
Hej....forstår ik opskrift ....skal bolden gemmes helt under de to skjolde ? Eller skal noget af bolden, blive synligt efter sammen hækling ? ? HJÆLP HJÆLP .... Lene
19.01.2014 - 16:16DROPS Design answered:
Hej Lene. Skjoldet er to "halve" bolde du saa haekler sammen. Du hekler skjoldet som den store bold fra 1. til 9. omg. Videre hækles der to omg til, samtidlig som udtagningen fortsætter som før = 11 omg - dvs, f.eks. omg 10 bliver: 7 fm, 2 fm i naeste omg. Hækl 2 stk = under- og overskjold. Saa haekler du 4 ben med udgangspunkt i beskrivelsen til öjne/arm forklaringen, men kun omg 1 til 7 og saa videre.
20.01.2014 - 10:42
![]() Ingrid Plejdrup wrote:
Ingrid Plejdrup wrote:
Forstår heller ikke opskriften :-( hvor skal bolden monteres,det står der ikke noget om i opskriften! Skal den gemmes mellem skjoldene eller skal den måske monteres under skjoldene, når de er hæklet sammen?
18.01.2014 - 20:16
![]() Dorthe wrote:
Dorthe wrote:
Jeg forstår ikke et klap af denne opskrift overhovedet.
17.01.2014 - 02:02DROPS Design answered:
Hej Dorthe. Hvad er det praecis du ikke forstaar? Der staar i opskrift hvilke dele du skal haekle og beskrivelsen af hver del finder du ogsaa her.
17.01.2014 - 17:31
![]() Caterina wrote:
Caterina wrote:
Buongiorno, vorrei realizzare la tartaruga, ma vorrei che venisse più grande. Come posso farla senza falsare le proporzioni? Grazie
03.01.2014 - 13:38DROPS Design answered:
Buongiorno Caterina, per farla più grande può usare il filo doppio e un uncinetto più grande oppure utilizzare il filato Paris, che è un cotone più grosso. Buon lavoro!
04.01.2014 - 14:40
![]() Ariane Kosick-Albitz wrote:
Ariane Kosick-Albitz wrote:
Hallo, das Zusammenhäkeln ist eindeutig falsch beschrieben: an den Stellen, an denen die Beine und der Kopf mit eingehäkelt werden, kann nur mit Kettmaschen gearbeitet werden! Sonst stimmt die Fadenführung nicht mehr. Liebe Grüße, Ariane
01.11.2013 - 21:14DROPS Design answered:
Liebe Ariane, wir haben unsere Anleitung überprüft und sie ist korrekt, es wird mit festen Maschen gehäkelt. Was meinen Sie mit "Fadenführung"?
05.11.2013 - 07:49
![]() Stephanie Nollen wrote:
Stephanie Nollen wrote:
Hallo...ich versteh das zusammenhäkeln der Panzer nicht...da ja der kopf die beine und der schwanz dazwischen gelegt werden kann ich das nicht so zusammenhäkeln...was mach ich da? Danke
19.03.2013 - 14:25DROPS Design answered:
Liebe Stephanie, Sie führen die Nadel an diesen Stellen nicht nur durch 2, sondern durch 4 Lagen.
20.03.2013 - 08:43
![]() Elfe wrote:
Elfe wrote:
Der Häkelanleitung für die Schildkröte geht nur bis und mit "Zusammenhäkeln von fM", der Rest ab "Grosser Ball" gehört zu einem anderen Häkelanleitung
29.06.2012 - 12:33
![]() Ann wrote:
Ann wrote:
Op de Noorse versie heeft het schid veel meer toeren dan op de Nederlandse? Welke is de juiste?
20.03.2012 - 02:12DROPS Design answered:
Hoi. Het Nederlandse patroon is correct. Ook in het Noorse patroon heeft het schild 9 toeren. Zij hebben het patroon anders gepubliceerd dan wij. Het Noorse patroon begint met de beschrijving van een grote bal en het schild is toer 1 tot 9 van de grote bal.
20.03.2012 - 09:30
![]() Willy wrote:
Willy wrote:
Ik heb hem af en hij is best wel goed gelukt. Groetjes Willy
11.10.2010 - 10:05
|
|
Timmy the Turtle#dropstimmytheturtle |
|
 |
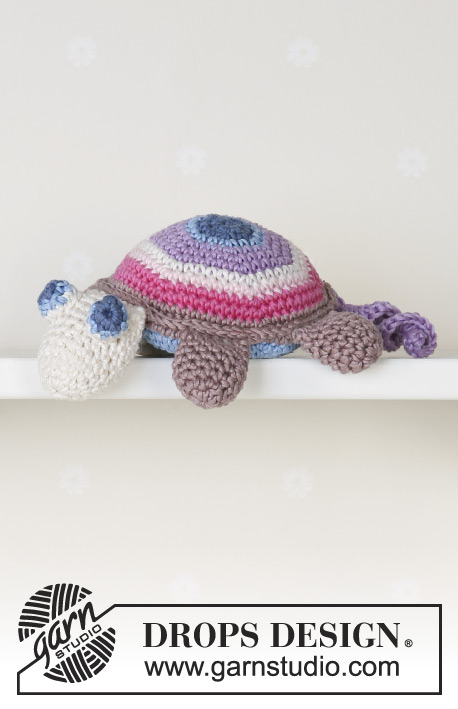 |
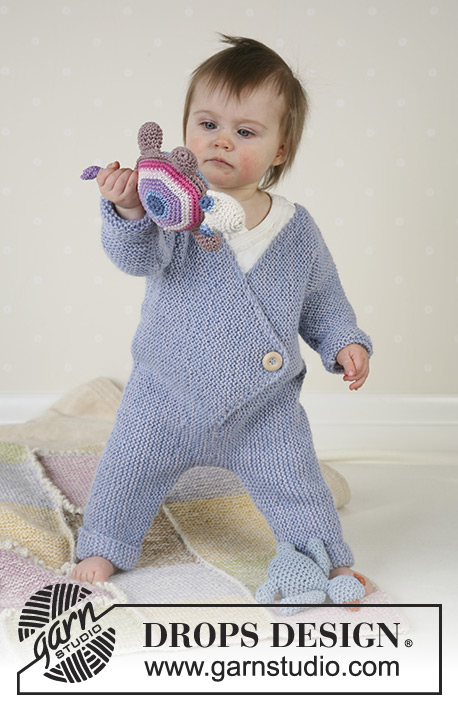
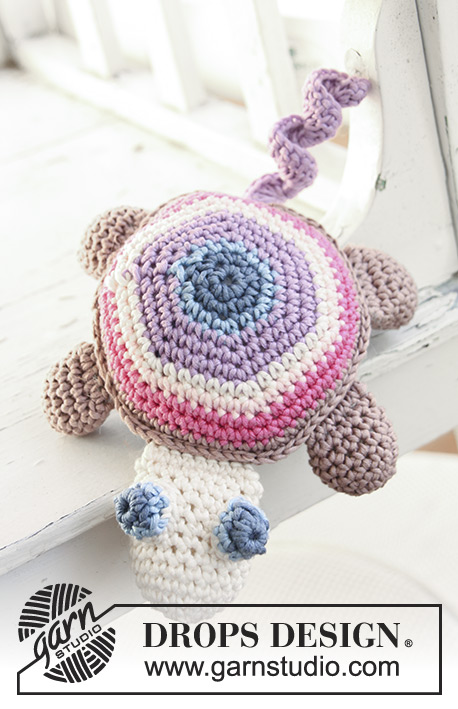
Tortoise
DROPS Baby 13-31 |
|
|
Crochet the tortoise with Muskat or Safran, making the shell with stripes, 1 spiral for the tale, feet and head single coloured. Shell: Crochet the shell as a big ball below from round 1 to 9. Crochet 2 more rounds, at the same time continue the increases as before = 11 rounds (Crochet 2 pieces = 1 bottom and 1 top shell) Legs: Crochet 4 legs. Fill with cotton wool and crochet the opening tog. Head: Crochet a big ball round 1 – 4 = 18 dc. Crochet 10 rounds, (1 dc in each dc = 14 rounds in total). Fill with cotton wool and crochet the opening tog. Eyes: Crochet as knob, but in addition crochet 1 round of 1 dc in each dc, so a total of 3 rounds. Tale: Crochet 1 spiral. Assembly: Put the feet, head and tale in between the bottom and top shell. Crochet around the shell with dc, push the hook through all layers so all parts are crochet tog. Note: Fill the shell with cotton wool before it is crochet totally together. Crochet dc’s tog. as follows: Crochet 2 dc tog. to 1 dc as follows: Push the hook through the 1st dc, pull the thread through, push the hook through the next dc, pull the thread through, yrh and pull the thread through all 3 sts on hook BIG BALL: 1st round: Crochet 3ch and make a loop with a sl st. 2nd round: Crochet 6 dc around the loop, finish with a sl st in the 1st dc, 1 ch. 3rd round: 2 dc in each dc = 12 dc, finish with a sl st in the 1st dc, 1 ch. 4th round: *1 dc, 2 dc in the next dc*, repeat from *-* finish with a sl st in the 1st dc, 1 ch = 18 dc. 5th round: *2 dc, 2 dc in the next dc*, repeat from *-* finish with a sl st in the 1st dc, 1 ch = 24 dc. 6th round: *3 dc, 2 dc in the next dc*, repeat from *-* finish with a sl st in the 1st dc, 1 ch = 30 dc. 7th round: *4 dc, 2 dc in the next dc*, repeat from *-* finish with a sl st in the 1st dc, 1 ch = 36 dc. 8th round: *5 dc, 2 dc in the next dc*, repeat from *-* finish with a sl st in the 1st dc, 1 ch = 42 dc. 9th round: *6 dc, 2 dc in the next dc*, repeat from *-* finish with a sl st in the 1st dc, 1 ch = 48 dc. LEGS: 1st round: Crochet 3ch and make a loop with a sl st in the first ch. 2nd round: Crochet 6 dc around the loop, finish with a sl st in the 1st dc, 1 ch. 3rd round: 2 dc in each dc = 12 dc, finish with a sl st in the 1st dc, 1 ch. 4th - 7th round: Crochet dc all around, finish with a sl st in the 1st dc, sew the thread tight. KNOB: 1st round: Crochet 3ch and make a loop with a sl st in the first ch.. 2nd round: Crochet 6 dc around the loop, finish with a sl st in the 1st dc. SPIRAL: 1st row: Crochet 12 ch, turn. 2nd row: Crochet 3 tr in each ch, cut the thread. |
|
Have you finished this pattern?Tag your pictures with #dropspattern #dropstimmytheturtle or submit them to the #dropsfan gallery. Do you need help with this pattern?You'll find 10 tutorial videos, a Comments/Questions area and more by visiting the pattern on garnstudio.com. © 1982-2026 DROPS Design A/S. We reserve all rights. This document, including all its sub-sections, has copyrights. Read more about what you can do with our patterns at the bottom of each pattern on our site. |
|


With over 40 years in knitting and crochet design, DROPS Design offers one of the most extensive collections of free patterns on the internet - translated to 17 languages. As of today we count 324 catalogues and 12290 patterns translated into English (UK/cm). 12290
We work hard to bring you the best knitting and crochet have to offer, inspiration and advice as well as great quality yarns at incredible prices! Would you like to use our patterns for other than personal use? You can read what you are allowed to do in the Copyright text at the bottom of all our patterns. Happy crafting!
Post a comment to pattern DROPS Baby 13-31
We would love to hear what you have to say about this pattern!
If you want to leave a question, please make sure you select the correct category in the form below, to speed up the answering process. Required fields are marked *.