
Popular categories
Looking for a yarn?


Comments / Questions (14)
![]() Bjørg wrote:
Bjørg wrote:
Hei igjen. mulig oppskriften er enkel og tidligere svar er opplysende , men jeg forstår det ikke og har vært innom 2 forskjellige garnbutikker og spurt om assistanse men heller INGEN der forstod oppskriften. I den ene butikken foreslo de til slutt at oppskriften måtte tolkes som at oppskriften skulle strikkes to ganger å så sy delene sammen .
09.05.2017 - 10:11DROPS Design answered:
Jo du slår 100 m op strikker frem og tilbage i riller i 22 cm. (Opslåningskanten skal syes sammen så du får en søm midt ovenpå hovedet fra panden og bagud). Du slår nu nye masker op i hver side (de masker som går ind mod hagen) deler arbejdet midt bagpå (så du får en åbning midt bagpå) og strikker frem og tilbage fra midt bagpå. Bare følg opskriften, så ser du hvordan det er tænkt. God fornøjelse!
10.05.2017 - 08:17
![]() Bjørg wrote:
Bjørg wrote:
Jeg har nå strikket de første 22 cm rillestrikk. Hvor skal jeg øke maskene? I begynnelsen og slutten av hver pinne? Dette er veldig utydelig i oppskriften
04.05.2017 - 01:46DROPS Design answered:
Hej Bjørg, se tidligere svar, da forklarer vi hvordan du gør :)
08.05.2017 - 15:51
![]() Dorte Hallenslev wrote:
Dorte Hallenslev wrote:
Jeg kan ikke rigtig forstå denne opskrift. Hvor skal man tage ud, er det i siderne eller midt i strikketøjet??? Hvordan ser arbejdet ud når det er færdigt inden det sys sammen?
15.11.2015 - 11:53DROPS Design answered:
Hej Dorte, Du strikker selve hætten først, frem og tilbage hvor hver side er mod hver side af ansigtet. Du tager m ud mod midt foran (halsen) hvor du da deler arbejdet midt bagpå og strikker da frem og tilbage mod midt bagpå. Der er bare at følge opskriften som der står. God fornøjelse!
25.11.2015 - 15:50
![]() Gunilla Nilsson wrote:
Gunilla Nilsson wrote:
Hej! Ledsen men jag förstår inte texten i mössans mönstertext. Finns det bild på omonterad? mvh Gunilla
08.10.2013 - 15:28DROPS Design answered:
Börja sticka enligt beskrivningen, så ger det sig :)
09.10.2013 - 09:37
|
|
Snow Bound |
|
|
|
|
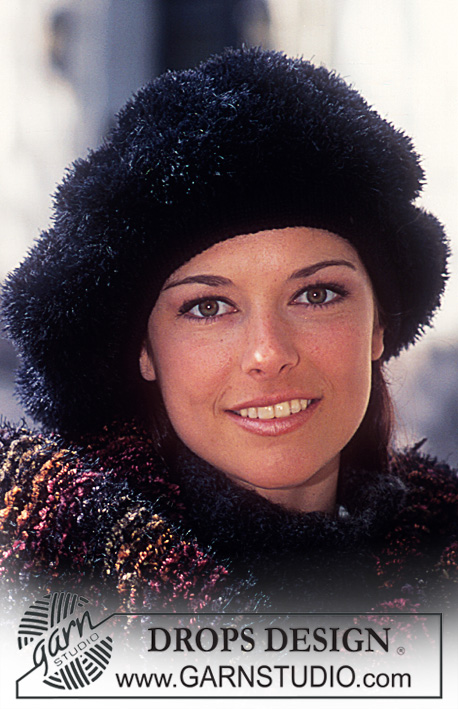
DROPS hood / balaclava and gloves in Karisma Superwash.
DROPS 58-22 |
|
|
Pattern instructions HOOD: DROPS 2.5 mm and 3 mm circular needles, or sizes needed to obtain correct gauge. Gauge: 23 sts and 48 rows on larger needles = 10 x 10 cm. Hood: The hood is worked back and forth on circular needle, beginning at top of head. You work from the opening towards the face, all around the head and to the other side of the opening towards face. The cast on edge will be sewn to itself at the end = seam on top of head. Later, you cast on stitches under chin and piece is now worked back and forth from mid-back Cast on 100 sts on larger circular needles and knit in garter st back and forth. When the work measures 22 cm, inc on each side every other row: 1 st 2 times, 2 sts 5 times (= 12 stitches increased in each side) = 124 sts on needle. Now divide the work at the center back and knit all sts back and forth like so: work across sts on side of head towards the opening for face, cast on 28 stitches (= under chin), continue working across stitches on the other side of opening for face until you get to mid-back = 152 sts (you do this so that you will sew together at the center back). Measure the work from here. Knit 10 cm . On the next right side row inc 34 sts evenly distributed on the row. 186 sts. Knit 7 cm even. On the next right side row inc 26 sts evenly distributed on the row. 212 sts. On the next right side row inc 26 sts evenly distributed on the row . 238 sts. Knit 7 cm even. Bind off with double yarn. Assembly: Sew the seam directly on top of the head from the right side with neat elastic sts. Pick up approximately 150 sts around the face opening on smaller circular needles and join. P 1 row, K 1 row, P 1 row, K 1 row, knit 6 cm in K1, P1 rib and bind off elastically. Fold the edge over against the wrong side and sew. Sew the seam at the center back. Make a dense tassel approximately 8-10 cm in diameter and attach it to the peak at the center back. ________________________________________ GLOVES: DROPS 3 mm and 3.5 mm double pointed needles, or sizes needed to obtain correct gauge. Gauge: 22 sts and 30 rows on larger needles in stockinette st = 10 x 10 cm . Rib: * K 2, P 2 . Repeat from * - *. Gloves: Cast on 52 (56) sts on smaller double pointed needles. Join being careful not to twist the sts. Place a marker at the join and knit 4 rows in garter st, then rib for 15 cm . Dec 8 (8) sts evenly distributed on the last row = 44 (48) sts. Change to larger double pointed needles and stockinette st and place a marker after 22 (24) sts in the 23rd (25th) st. Inc the sts for the thumb on each side of this st. The remaining 21 (23) sts = inside the hand. Measure the work from here. When the work measures 1 cm inc 1 st on each side of the marker stitch 5 (6) times every 4th row (every 3rd row). 54 (60) sts. After the thumb increases put the center 11 sts over the thumb on a stitch holder. Then cast on 1 new st over the sts on the stitch holder. 44 (50) sts. Continue until the work measures 10 (11) cm . Knit the fingers as follows: Little finger: Pick up 4 (6) sts from on top of the hand and 4 (5) sts from inside the hand and cast on 3 sts toward the ring finger for 11 (14) sts. Knit 5 (6) cm . On the next row, * K 2 tog * across and then pull the doubled strand through the sts. Knit 3 rows over the remaining sts on the glove before knitting the remaining fingers. Ring finger: Pick up 6 (6) sts from on top of the hand and 6 (7) sts from inside the hand and cast on 1 st toward the little finger and one toward the center finger for 14 (15) sts. Knit 6 (7) cm . On the next row, * K 2 tog * across and then pull the doubled strand through the sts. Center finger: Like the ring finger, but knit 7 (8) cm . Index finger: Pick up 6 (6) sts from on top of the hand and 6 (7) sts from inside the hand and cast on 1 st toward the center finger for 13 (14) sts. Knit like the ring finger. Thumb: Pick up the 11 sts from the stitch holder + 3 (5) sts toward the hand and knit 6 (6.5) cm and bind off as on the ring finger. Sew a small invisible st between the fingers. Knit another glove, but with the thumb on the opposite side. |
|
Have you finished this pattern?Tag your pictures with #dropspattern or submit them to the #dropsfan gallery. Do you need help with this pattern?You'll find 23 tutorial videos, a Comments/Questions area and more by visiting the pattern on garnstudio.com. © 1982-2026 DROPS Design A/S. We reserve all rights. This document, including all its sub-sections, has copyrights. Read more about what you can do with our patterns at the bottom of each pattern on our site. |


With over 40 years in knitting and crochet design, DROPS Design offers one of the most extensive collections of free patterns on the internet - translated to 17 languages. As of today we count 324 catalogues and 12290 patterns translated into English (UK/cm). 12290
We work hard to bring you the best knitting and crochet have to offer, inspiration and advice as well as great quality yarns at incredible prices! Would you like to use our patterns for other than personal use? You can read what you are allowed to do in the Copyright text at the bottom of all our patterns. Happy crafting!
Post a comment to pattern DROPS 58-22
We would love to hear what you have to say about this pattern!
If you want to leave a question, please make sure you select the correct category in the form below, to speed up the answering process. Required fields are marked *.