
Popular categories
Looking for a yarn?


Comments / Questions (24)
![]() Francoise wrote:
Francoise wrote:
Bonjour J'aimerais tricoter cette écharpe en fil Kid silk , est ce possible? Dois je aussi doubler la laine et combien dois je monter de mailles , svp?
28.01.2026 - 10:02DROPS Design answered:
Bonjour Françoise, comme Kid-Silk et Alpaca appartiennent au même groupe, vous pouvez tout à fait tricoter l'écharpe en Kid-Silk, il vous faudra 2 fils Kid-Silk pour remplacer 2 fils Alpaca; la tension devrait être la même, mais le résultat sera naturellement différent car les 2 laines sont différentes; le nombre de mailles à monter dépendra donc du résultat souhaité, et sera à calculer si vous la voulez plus large. Calculez ici la quantité Kid-Silk nécessaire. Bon tricot!
29.01.2026 - 08:30
![]() Maryanne wrote:
Maryanne wrote:
Thank you for responding but that does not answer my query. On the little finger there is a gap where I cast in the additional stitches. Do I have to something like Kitchener stitch to close the gap. The instructions are not clear. Maryanne
24.02.2025 - 12:01DROPS Design answered:
Dear Maryanne, when working all stitches back in the round for hand, you can pick up 1 stitch in each of the 2 stitches cast on for little finger to avoid any seam, but if you cast on these stitches, then you can close the hole with a seam with kitchener stitch. Happy knitting!
26.02.2025 - 09:59
![]() Maryanne wrote:
Maryanne wrote:
How do you join up the stitches cast on for the little finger and the middle finger. I do not understand the instructions.
22.02.2025 - 21:05DROPS Design answered:
Dear Maryanne, you knit each finger separately. First, you have 8-10 stitches for the little finger. Cast on stitches towards the slipped stitches on a needle and join to form a small round; knit the finger in stocking stitch in the round. Finish the little finger off as indicated. Slip all stitches back on the needles and pick up stitches from the little finger, so that it doesn't get cut off at the little finger from both sides. Then you work in the round. Now slip stitches onto 2 auxiliary needles; the palm and upper hand. And slip stitches from both for the ring finger. Cast on new stitches as in the little finger for the middle finger and work in the round. Happy knitting!
24.02.2025 - 00:35
![]() Ulrike wrote:
Ulrike wrote:
Hallo liebes Drops-Team. Hier wurde mehrfach der Hinweis angebracht, dass beim Schal das Muster M2 nicht stimmt. Dem ist auch so und ich habe herausgefunden woran es liegt. Die 3.Reihe in M2 im Musterdiagramm muss genauso gestrickt werden wie die Reihe 1 in M1 im Musterdiagramm. Dann erhält man auch den wellenförmigen Abschluss. Vielleicht könnten Sie das Musterdiagramm für nachfolgende Strickerinnen ändern. Viele Grüße und frohe Weihnachten.
23.12.2024 - 21:48
![]() Bjørg Nygaard wrote:
Bjørg Nygaard wrote:
Dere kan slette min kommentar, jeg ser at garnet er mye drøyere enn antatt. Beklager .
07.12.2024 - 11:56
![]() Bjørg Nygaard wrote:
Bjørg Nygaard wrote:
Hei ! Det må være feil i oppskriften på skjerfet her, det kan umulig være nok m 150 gr garn når en skal strikke med dobbelt tråd i Alpaca. Det skjerfet som modellen har på er ikke Alpaca garn fra Drops. Jeg syns at det er dårlig å villede folk på denne måten.
05.12.2024 - 15:46DROPS Design answered:
Hei Bjørg. Skjerfet er strikket i DROPS Alpaca og med 2 tråder, og har en løpelengde på ca 167 m. Så garnmengden skal stemme. mvh DROPS Design
09.12.2024 - 12:00
![]() Kata wrote:
Kata wrote:
Onko ohjeessa virhe M2 kohdassa? Ohjeen mukainen silmukankierto tekee reiän (aloituksen aina oikeaa 4 kerrosta) kerroksien väliin, eikä päättelyn jälkeen reuna näytä samalta kuin aloitus. Vaikka päättelee löysästi.
06.10.2022 - 22:09
![]() Martine wrote:
Martine wrote:
Bonjour. j'ai tricoté l'écharpe mais le le diagramme M.2 ne correspond pas à la vague tricotée au début. Pouvez-vous me donner les explications pour avoir la même vague au début et à la fin de l'écharpe ? Merci. Cordialement.
02.03.2022 - 17:41DROPS Design answered:
Bonjour Martine, je suis vraiment désolée, nous ne sommes pas en mesure de pouvoir adapter chaque modèle à chaque demande, dans ce modèle, on termine par M.2, les 2 extrémités de l'écharpe seront ainsi effectivement légèrement différentes. Bon tricot!
02.03.2022 - 17:46
![]() Gabriella wrote:
Gabriella wrote:
Buongiorno, sto terminando la sciarpa. Ho 37 punti e dovrei aumentarli per finire come all'inizio ma non mi trovo perché se diminuisco 2 maglie e ne aumento 2 i punti restano 37. Come faccio a fare l'ondina come all'inizio? Grazie
29.10.2021 - 22:43DROPS Design answered:
Buonasera Gabriella, l'onda si ottiene con la chiusura lenta, le maglie non vanno aumentate. Buon lavoro!
30.10.2021 - 14:17
![]() Oppskrift Drops 86-5 wrote:
Oppskrift Drops 86-5 wrote:
Hei. Jeg strikker skjerfet med hullmønster. På slutten av arbeidet strikket jeg diagrammet M.2, men det ble ikke make som begynnelsen av arbeidet, ikke bølge kant. Kan det være noe feil i oppskriften? Er takknemlig for rask tilbakemelding. Mvh Anne-Britt N. Lavik
19.02.2021 - 21:24DROPS Design answered:
Hej Anne-Britt, det bør bølge sig når du har lukket maskerne løst af :)
24.02.2021 - 15:43
|
|||||||||||||
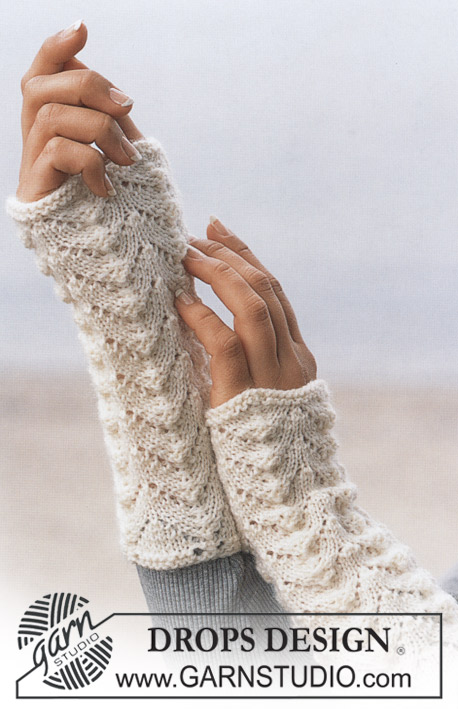
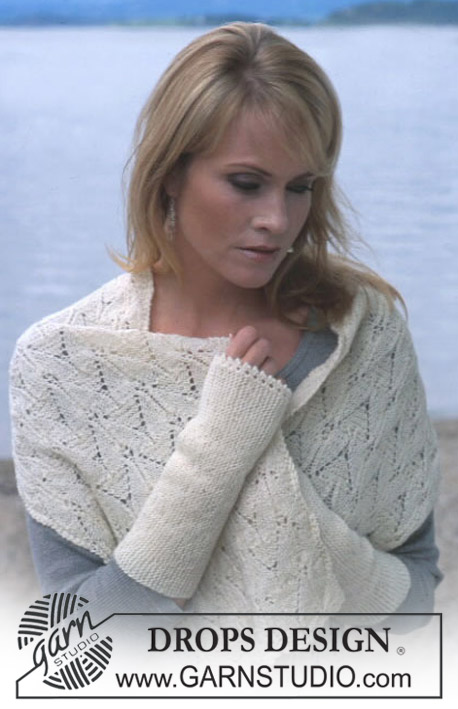
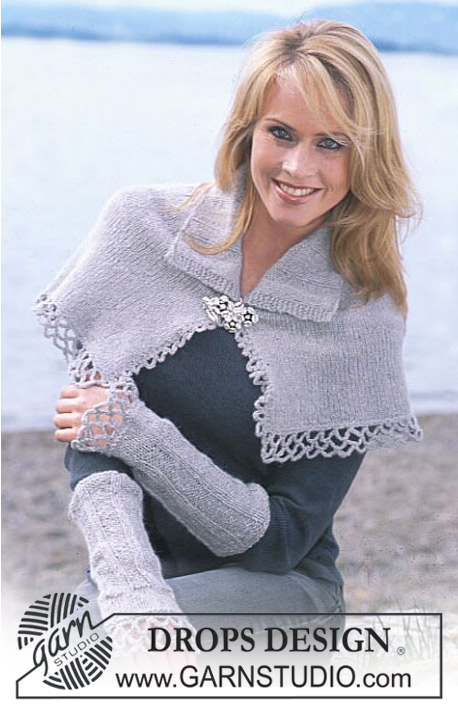
Golden Wawes |
|||||||||||||
|
|
|||||||||||||
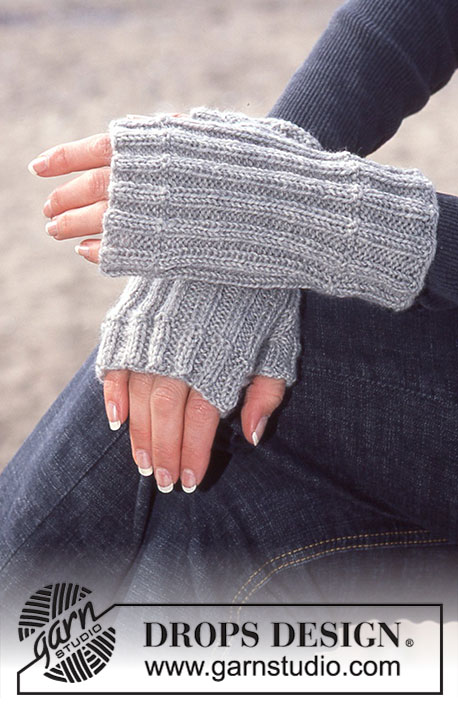
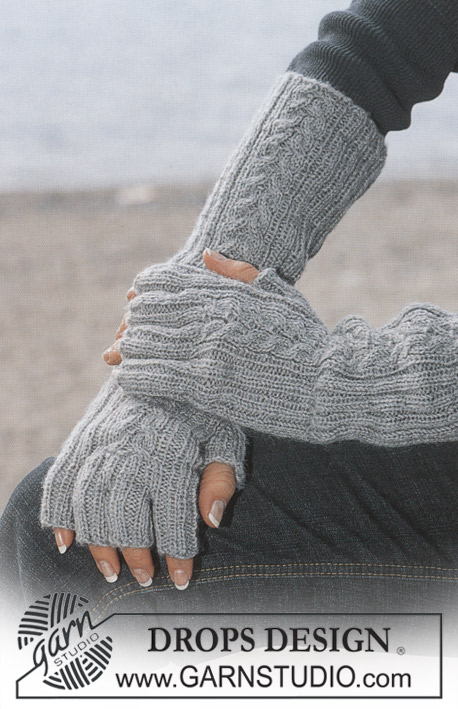
DROPS Scarf and Gloves in Alpaca
DROPS 86-5 |
|||||||||||||
|
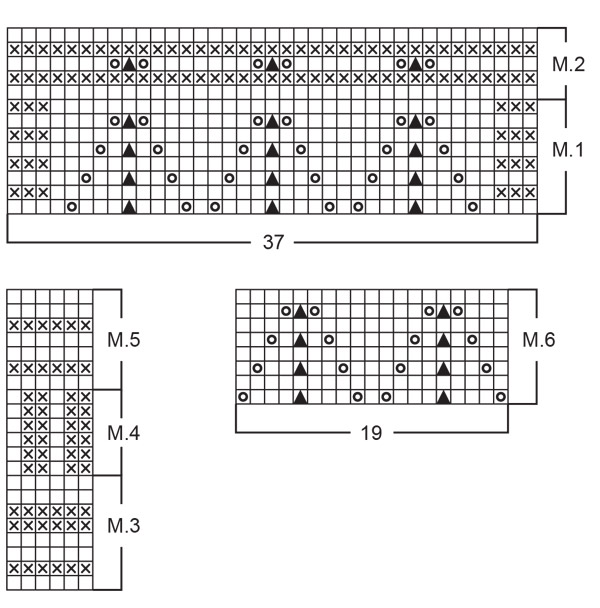
Gauge: 18 sts x 23 rowswith 2 strands and stockinette = 10 x 10 cm Pattern: See chart 1 and 2. The pattern is seen from the right side. SCARF Cast on 43 sts with 2 strands of yarn and knit 4 rows garter st. Knit the next row as follows (right side row): K 8, sl 1, K 2 tog, psso, *K 9, sl 1, K 2 tog, psso*, repeat *-* 1 time, then K 8. here are now 37 sts. Purl the next row, but K 3 sts at each side. On the next row knit Pattern 1 over all sts. When the piece measures approx. 119 cm - adjust to end after a complete repeat, knit Pattern 2 and then bind off loosely. ______________________________________________________________ GLOVES: Sizes: (XS/S) M/L Materials: DROPS ALPACA from Garnstudio (100) 100 gr nr 0100, natural DROPS 2.5 mm double-pointed needles, or size needed to obtain correct gauge. Gauge: 25 sts x 34 rows in stockinette st = 10 x 10 cm Pattern: See the charts. The pattern is seen from the right side. Right glove: Cast on (112) 126 sts on double-pointed needles; join and place a marker at the join. Knit picot edge as follows: *K7, pass the 6th st, then the 5th st, then the 4th st over the 7th st = 4 sts remain on needles*, repeat from *-* around row = (64) 72 sts. Then knit Pattern 3 – on last rows of the pattern dec (4) 6 sts evenly distributed = (60) 66 sts. Read the entire next section before knitting. Pattern: Knit Pattern 4 until the piece measures (11) 12 cm, and then knit Pattern 5, decreasing (14) 12 sts evenly distributed on the first row of Pattern 5 = (46) 54 sts. After Pattern 5 knit the next row as follows: K (23) 27 sts (= palm), place a marker (= side), K (2) 4 sts, Pattern 6 (19 sts), K (2) 4 sts, place a marker (= side). Continue in pattern as established. Thumb: On the 2nd row of Pattern 6 (the piece measures approx. (13) 14 cm) inc for thumb: inc 1 st at each side of the 2nd st on row, every other row (5) 6 times = (11) 13 thumb-sts – inc 1 st by pulling up and knitting a st from the previous row. When the piece measures (18) 20 cm (it is very important that the piece is at least (5) 6 cm long from the beginning of the thumb incs to here) put the (11) 13 thumb-sts on a st holder. Then cast on 1 new st behind the st holder and join = (46) 54 sts, continue the pattern as before. When the piece measures approx. (22) 23 cm – adjust to end after a complete repeat of Pattern 6 – knit stockinette st over all sts. When the piece measures (23) 24 cm put the first and the last (19) 22 sts on the row on a st holder, then knit the little finger with the (8) 10 sts remaining on needles. Little finger: Cast on (5) 4 new sts toward sts on st holder = (13) 14 sts, divide sts onto 3 double-pointed needles; join and knit stockinette st until finger measures approx. 5-6 cm. Then K 2 tog over all sts, cut yarn and pull through the remaining sts. Put sts on st holder back on needles and pick up 2 sts at little finger = (40) 46 sts; join and knit 3 rows stockinette st over all sts. Put sts on st holders: (20) 23 sts for palm on 1 st holder and (20) 23 sts upper hand on 2nd st holder. Ring finger: Put (7) 8 sts from each st holder back on needles, cast on 2 new sts toward middle finger = (16) 18 sts. Divide sts onto 3 double-pointed needles; join and knit stockinette st until finger measures approx. (7) 8 cm. Then K 2 tog over all sts, cut yarn and pull through the remaining sts. Middle finger: Put (6) 7 sts from each st holder on needles, pick up (3) 4 sts at ring finger and cast on 3 new sts toward index finger = (18) 21 sts. Divide sts on 3 double-pointed needles; join and knit stockinette st until finger measures approx. (8) 9 cm. Then K 2 tog over all sts, cut yarn and pull through the remaining sts. Index finger: Put the remaining (14) 16 sts on needles, pick up (3) 4 sts at middle finger = (17) 20 sts; join and knit stockinette st until finger measures approx. (6) 7 cm. Then K 2 tog over all sts, cut yarn and pull through the remaining sts. Thumb: Put the (11) 13 sts on st holder onto needles and pick up (7) 8 sts behind these sts = (18) 21 sts. Divide sts onto 3 double-pointed needles; join and knit stockinette st for approx. (5) 6 cm, then K 2 tog over all sts, cut yarn and pull through the remaining sts. Left glove: Knit the same as the right, reversing all shaping. After Pattern 5 knit the next row as follows: K (2) 4 sts, Pattern 6 (19 sts), K (2) 4 sts, place a marker (= side), K (23) 27 sts (= palm), place a marker (= side) and inc for thumb at each side of the next to last st on row. |
|||||||||||||
Diagram explanations |
|||||||||||||
|
|||||||||||||
 |
|||||||||||||
Have you finished this pattern?Tag your pictures with #dropspattern or submit them to the #dropsfan gallery. Do you need help with this pattern?You'll find 20 tutorial videos, a Comments/Questions area and more by visiting the pattern on garnstudio.com. © 1982-2026 DROPS Design A/S. We reserve all rights. This document, including all its sub-sections, has copyrights. Read more about what you can do with our patterns at the bottom of each pattern on our site. |
|||||||||||||


With over 40 years in knitting and crochet design, DROPS Design offers one of the most extensive collections of free patterns on the internet - translated to 17 languages. As of today we count 324 catalogues and 12290 patterns translated into English (UK/cm). 12290
We work hard to bring you the best knitting and crochet have to offer, inspiration and advice as well as great quality yarns at incredible prices! Would you like to use our patterns for other than personal use? You can read what you are allowed to do in the Copyright text at the bottom of all our patterns. Happy crafting!
Post a comment to pattern DROPS 86-5
We would love to hear what you have to say about this pattern!
If you want to leave a question, please make sure you select the correct category in the form below, to speed up the answering process. Required fields are marked *.