
Popular categories
Looking for a yarn?























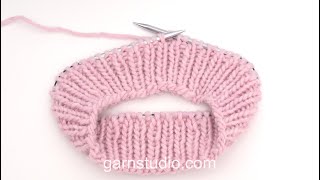
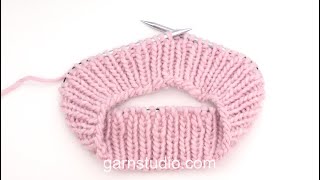
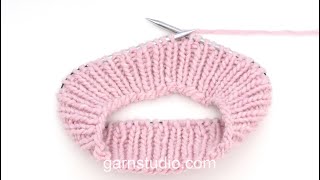
















Comments / Questions (8)
 Jane wrote:
Har I læst opskriften? Jeg er godt klar over, at de 2 x12 masker er medregnet i ryg/forstykke, men under ærmer står følgende: ERMER: Sett de 58-60-64-68-76-76-80 maskene fra tråden i den ene siden av arbeidet på settpinner eller liten rundpinne 4. Strikk i tillegg opp 1 maske i hver av de 8-8-8-12-12-16-16 maskene som ble lagt opp i siden under ermet = 66-68-72-80-88-92-96 masker. Sett 1 merketråd midt under ermet – dvs midt i de 8-8-8-12-12-16-16 nye maskene.
03.11.2026 - 17:58
Jane Sørensen wrote:
Selvom jeg vælger "spørgsmål" i muligheden ovenfor får jeg følgende svar fra Drops: Tak for din kommentar??????
30.10.2026 - 16:25DROPS Design answered:
Hei Jane. Takk for ditt innspill. Vi skal se om dette kan omformuleres. mvh DROPS Design
02.11.2026 - 10:20
Jane Sørensen wrote:
FORTSAT: "Strik 1 maske i hver af de 12 masker som blev slået op i siden under ærmet”. Hvordan kan de nye masker regnes med i maskeantallet for både ryg/forstykke og ærmer?
30.10.2026 - 16:23DROPS Design answered:
Hei igjen :) Beklager, forstår fremdeles ikke helt hva du mener. De nye maskene (12 + 12 under hver erme) tilhører nå maskeantallet til Ryg/Forstykke = 54 + 12 + 108 +12 + 54 = 240 masker på omgangen. Erm maskene, 68 m x 2 hviler nå på en tråd. mvh DROPS Design
02.11.2026 - 10:19
Jane Sørensen wrote:
Alle udtagninger er foretaget i bærestykket og der deles op i Ryg/Forstykke og ærmer. For min størrelse (L) angives 240 masker på ryg/forstykke (og det antal opnår jeg således: 108 + 108 = 216 + nyopslåede 2 x 12 masker i siden under hvert ærme = i alt 240 masker). Ærmer angiver 68 masker, men herudover siger opskriften: "Strik 1 maske i hver af de 12 masker som blev slået
30.10.2026 - 16:22DROPS Design answered:
Hei Janne. Usikker på hva du mener. Du har delt masker til Ryg/Forstykke og ærmer og lagt opp nye masker under ermene = 54 (halve bakstykket) +12 (nye masker) + 108 (forstykket) +12 (ny masker) + 54 (halve bakstykket) = 240 masker på omgangen når du begynner å strikke Ryg/Forstykke. Dette maskeantallet skal du ha til arbejdet måler 50 cm fra mærket midt foran. mvh DROPS Design
02.11.2026 - 10:18
 Maria wrote:
Waarom kan ik de afbeeldingen van de patronen niet zien?
28.10.2026 - 19:50
 Connie wrote:
Thank you so very much for this wonderful pattern!
27.10.2026 - 01:06
 Sara wrote:
Siete sorprendenti , non sapevo che potessero esistere tante varianti nell utilizzare i ferri circolari...Complimenti .
24.10.2026 - 21:29
 Céline Blais wrote:
Très joli patron, je l' adore... si mon fil est du groupe A ... une grosseur fingering ,,, puis-je adapter et doubler mon fil ?
16.10.2026 - 00:23DROPS Design answered:
Bonjour Mme Blais, votre tension risque d'être différente, il vous faudra alors entièrement recalculer votre taille en fonction de votre propre échantillon. Bon tricot!
16.10.2026 - 16:31
|
||||||||||||||||||||||
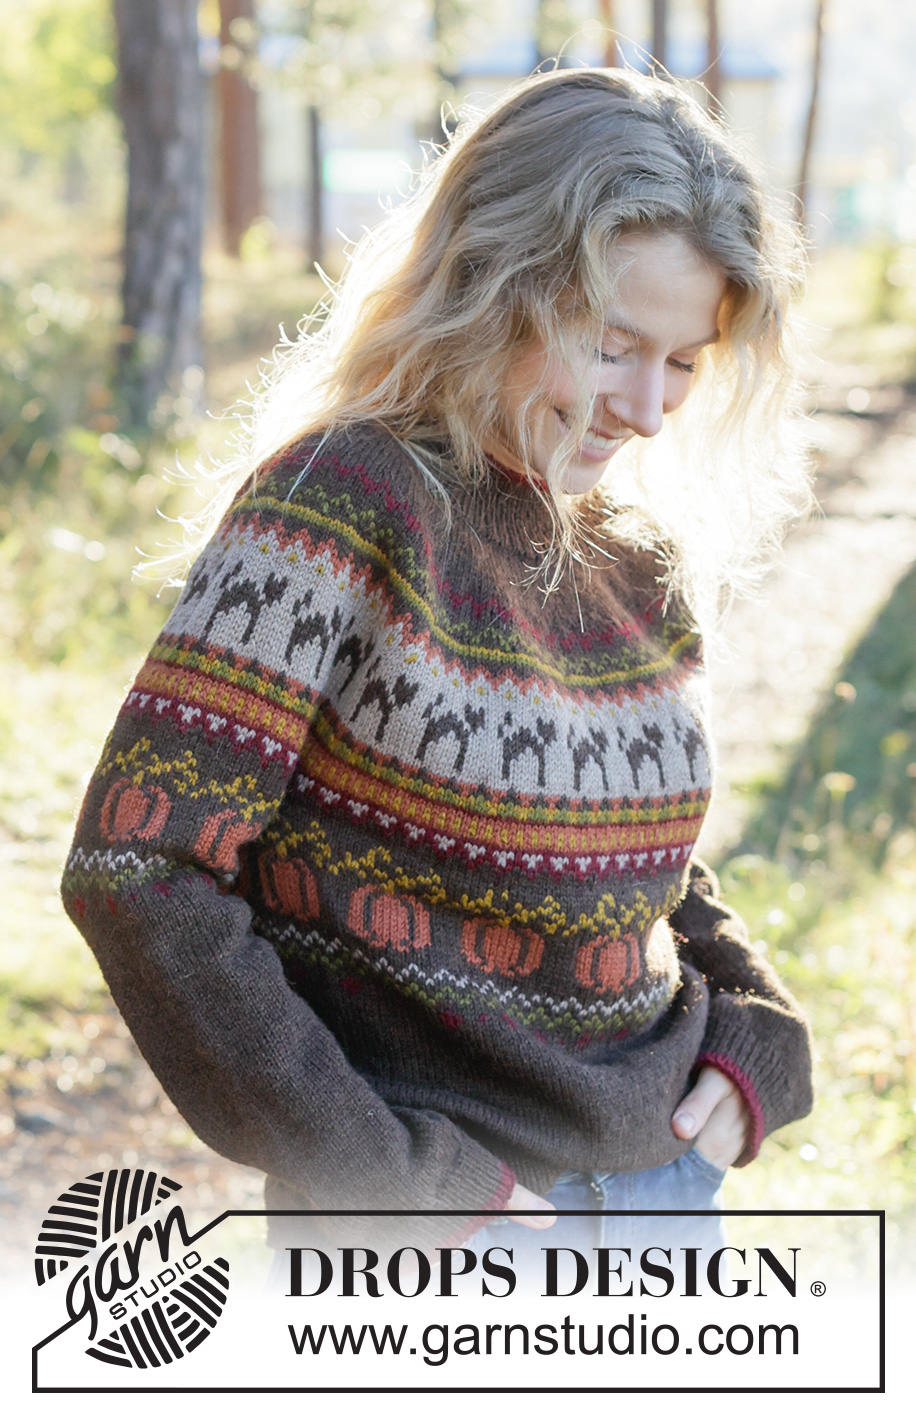
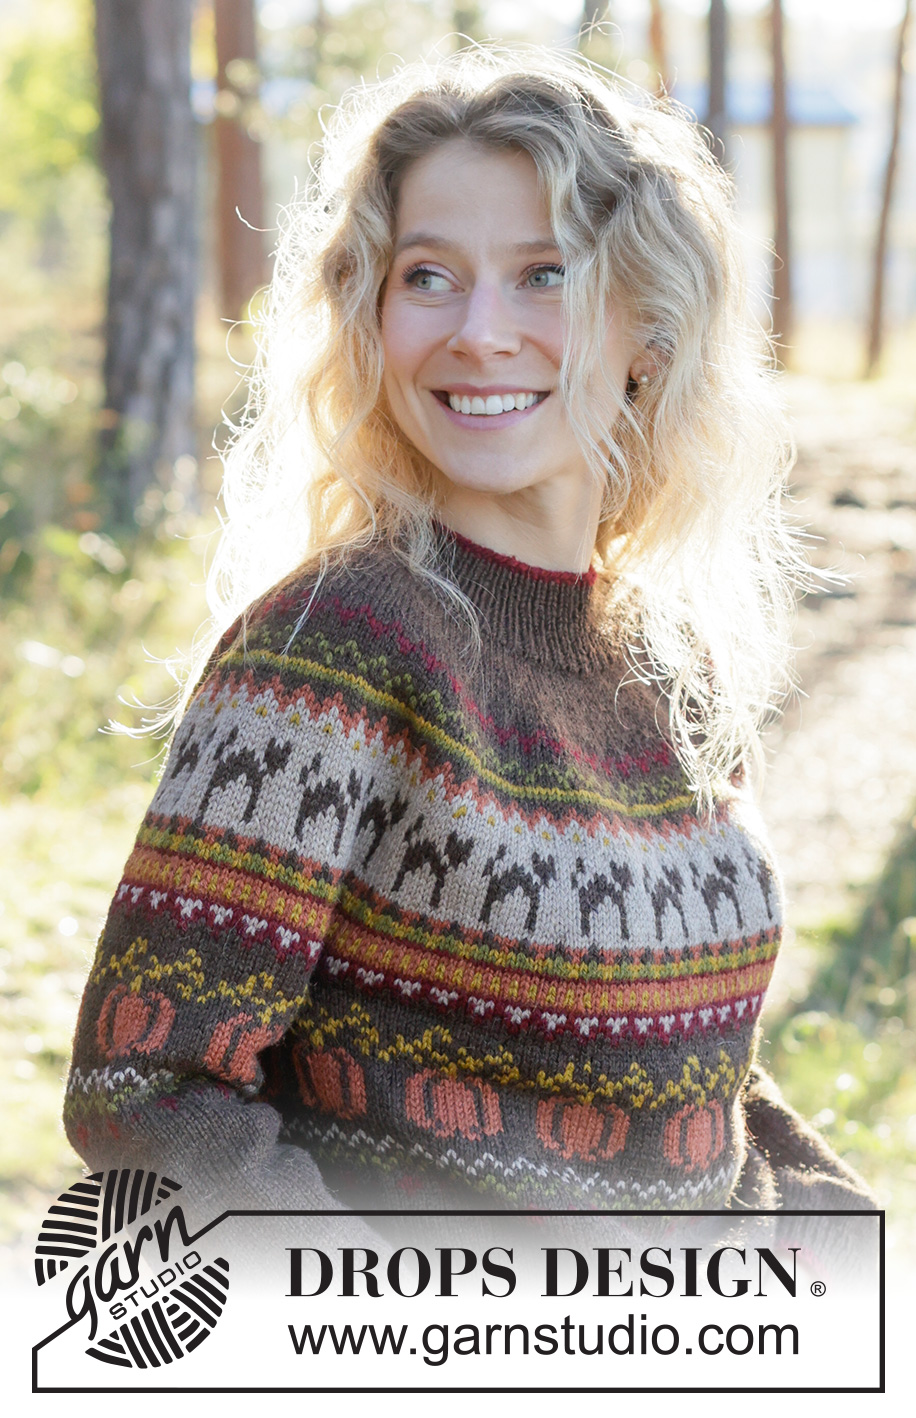
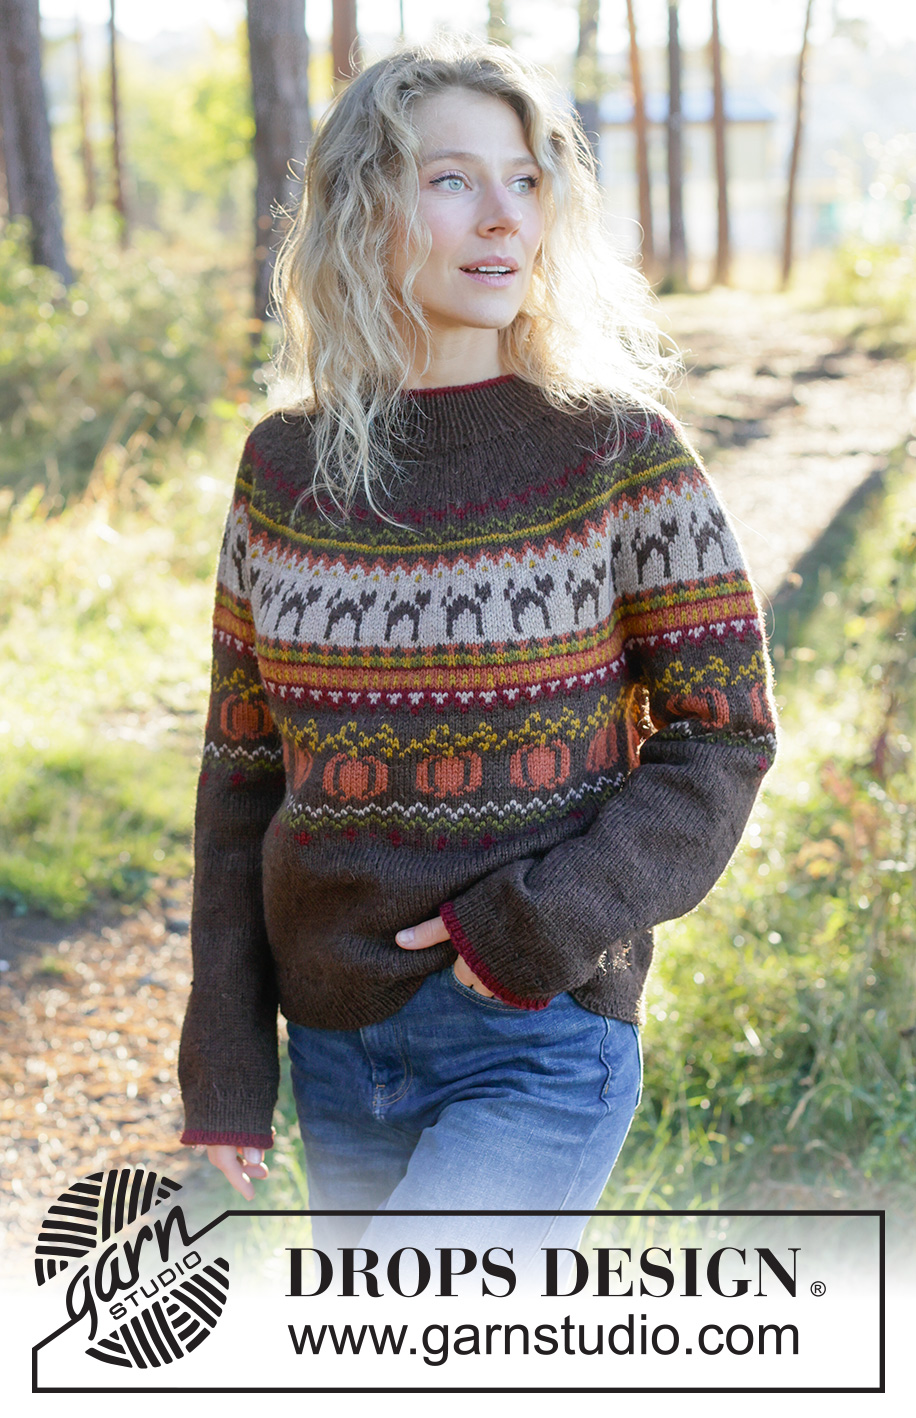
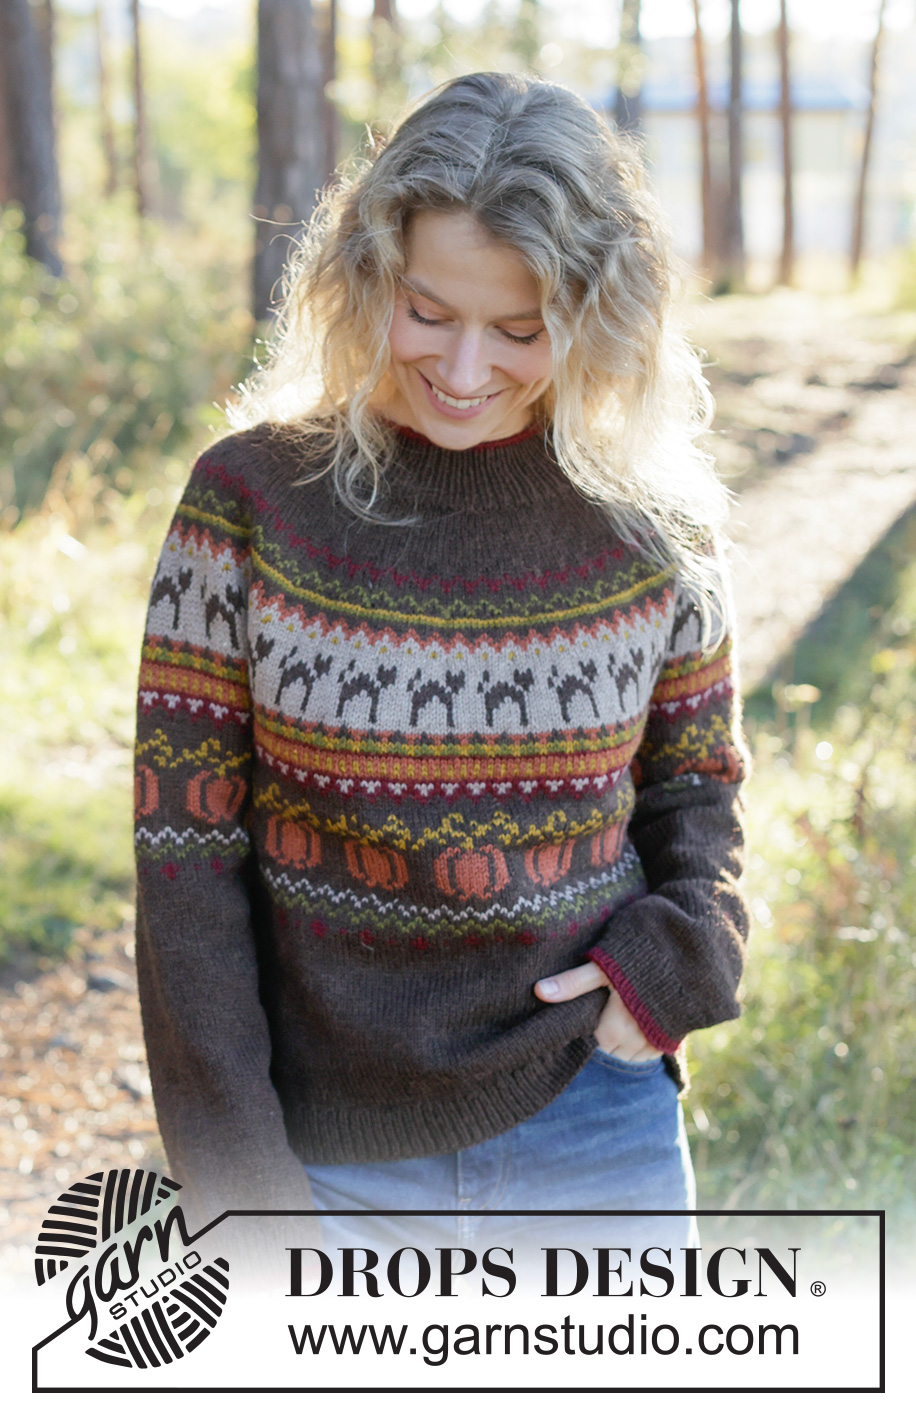
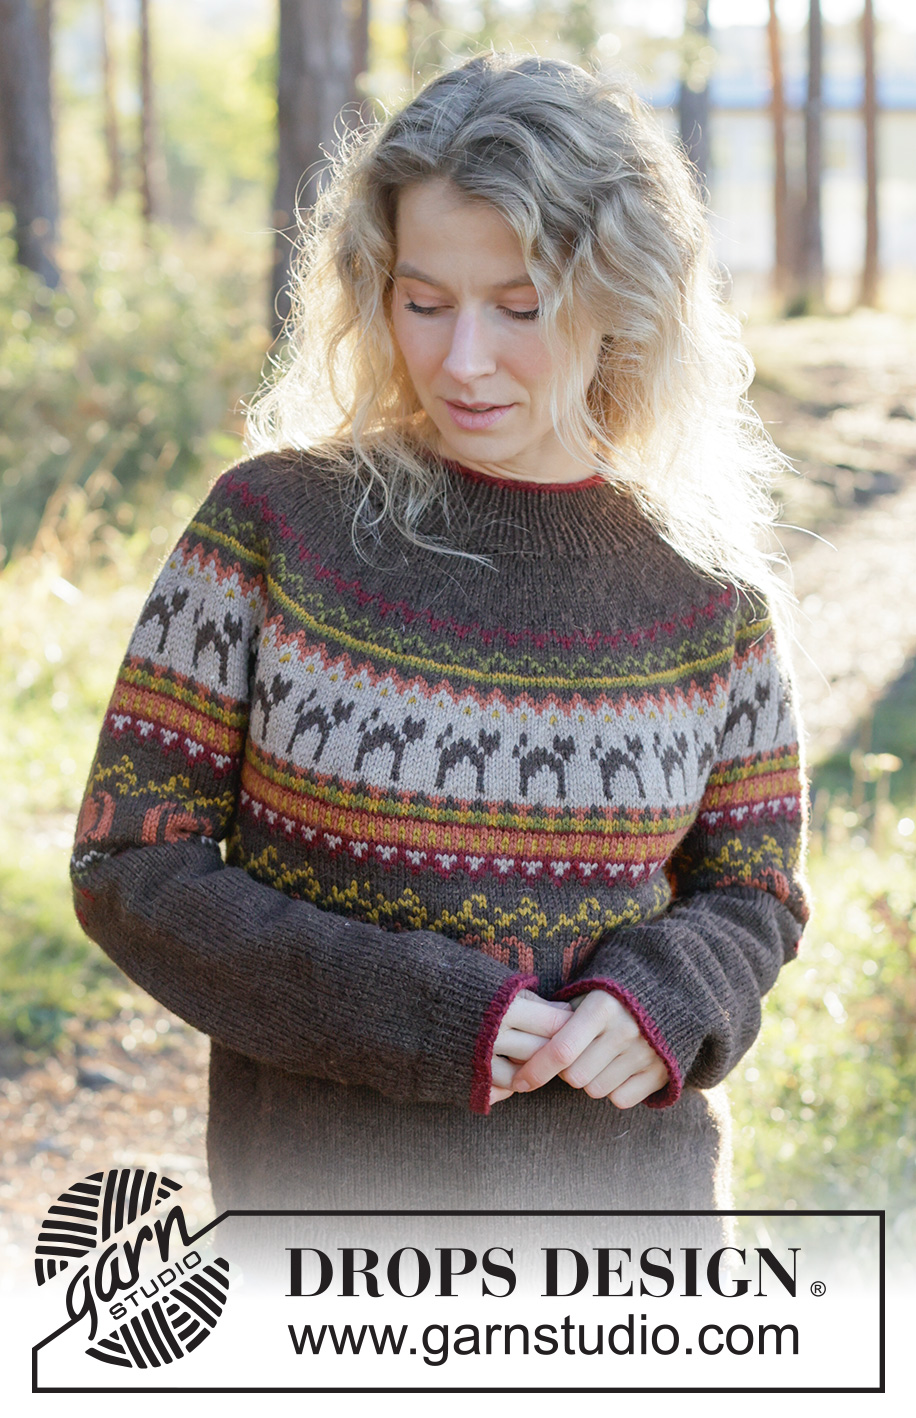
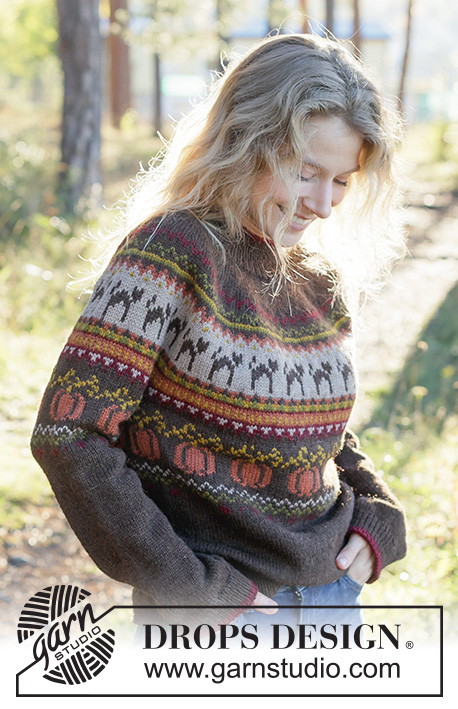
October Magic Sweater#octobermagicsweater |
||||||||||||||||||||||
 |
 |
|||||||||||||||||||||
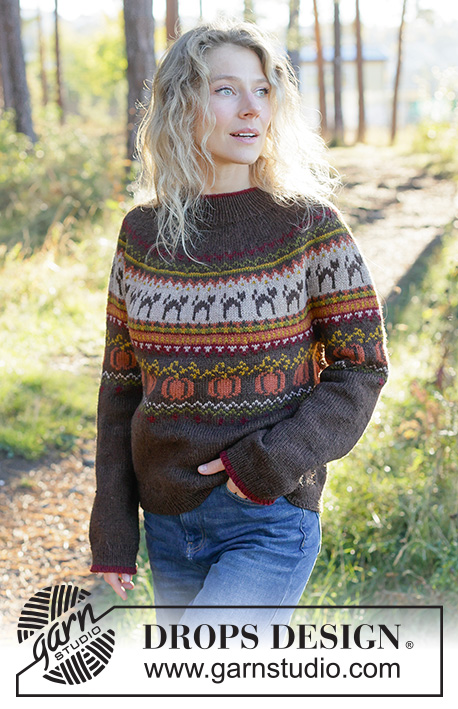
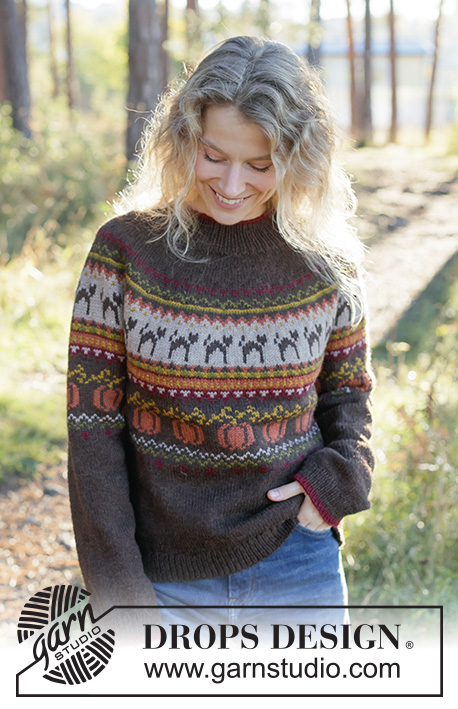
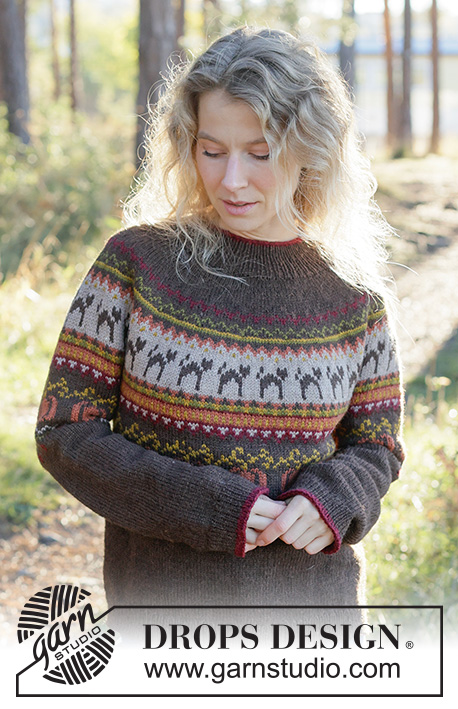
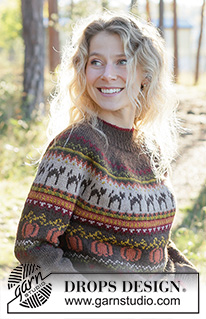
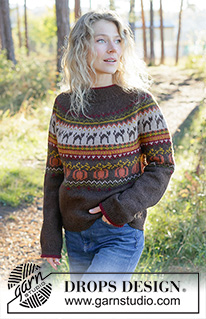
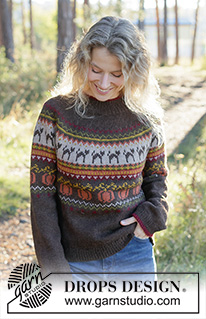
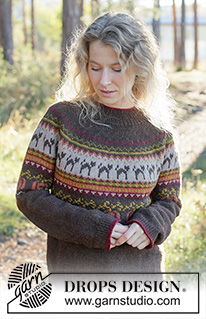
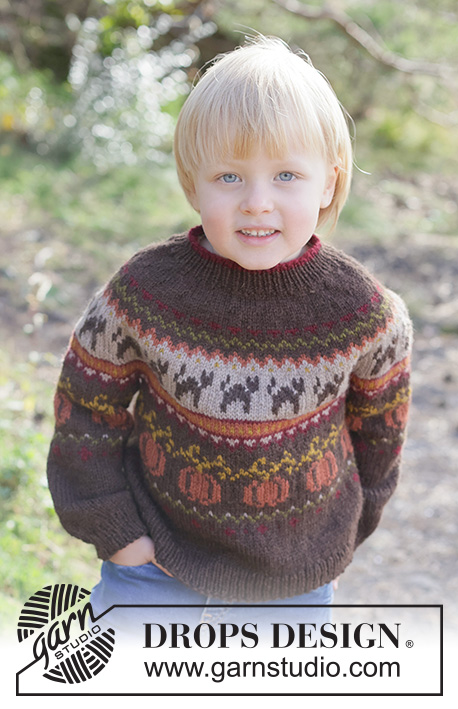
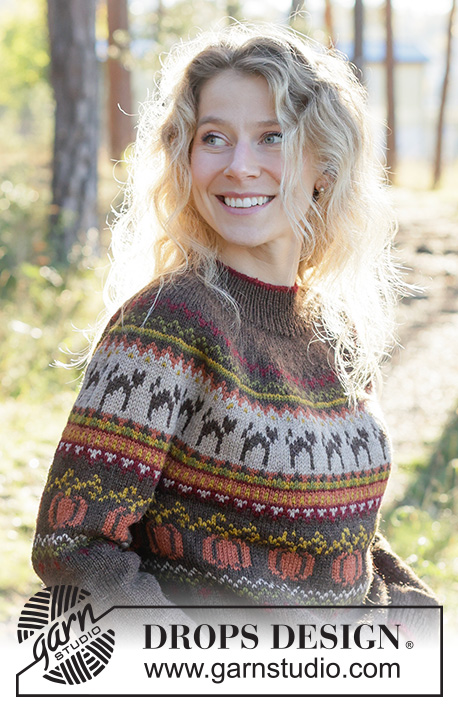
Knitted jumper in DROPS Saga. The piece is worked top down with round yoke and multi-coloured pattern with pumpkins and cats. Sizes XS – XXXL.
DROPS 272-48 |
||||||||||||||||||||||
|
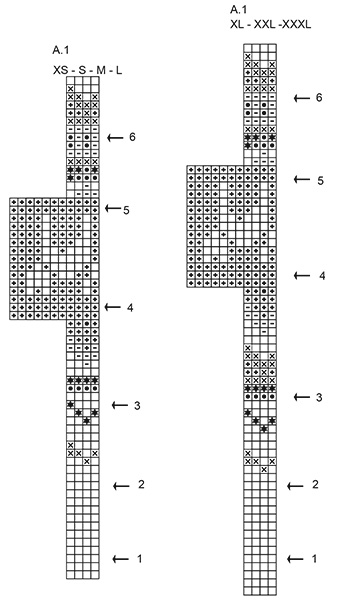
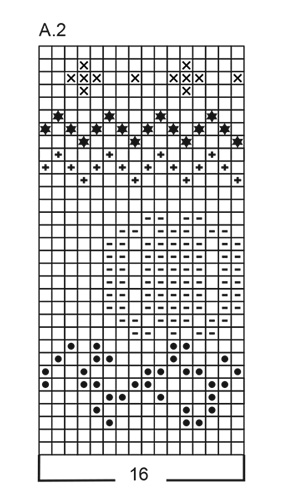
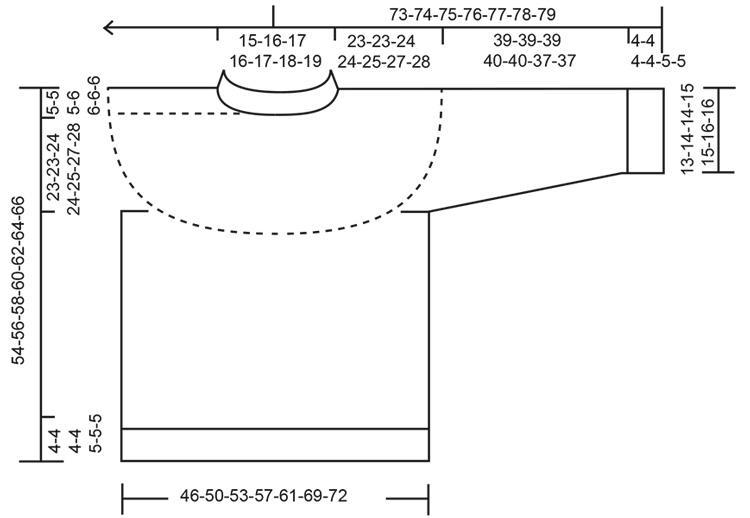
------------------------------------------------------- EXPLANATIONS FOR THE PATTERN: ------------------------------------------------------- ELEVATION: To make the back of the neck slightly higher when working a round yoke, you can work an elevation as described here. Start from the right side by the marker (mid-back) and knit 15-16-17-18-19-20-21, turn and purl 30-32-34-36-38-40-42. Work German Short Rows (see below) to avoid holes after each turn. Turn, tighten the strand and knit 45-48-51-54-57-60-63, turn, tighten the strand and purl 60-64-68-72-76-80-84. Turn, tighten the strand and knit 75-80-85-90-95-100-105, turn, tighten the strand and purl 90-96-102-108-114-120-126. Turn, tighten the strand and knit to the marker-thread mid-back. Continue the yoke as described in the text. GERMAN SHORT ROWS: When working short rows, there will be a small hole after each turn. This hole can be closed by tightening the strand or using the technique German Short Rows as follows: Slip the first stitch purl-wise with the strand in front, take the strand over the right needle and tighten well from the back (2 loops on the needle). These loops are worked together on the next row. PATTERN: See diagrams A.1 and A.2. The patterns are worked in stocking stitch. See diagram for your size in A.1. KNITTING TIP: To avoid the knitting tension becoming tight when working pattern, it is important that the strands at the back are not tight. Use a size larger needle when working pattern if this is necessary. INCREASE TIP (evenly spaced): Increase 1 stitch by making 1 yarn over, which is worked twisted on the next round to avoid a hole. Then work the new stitches in stocking stitch. DECREASE TIP (for mid-under sleeves): Decrease 1 stitch on each side of the marker-thread as follows: Work until there are 3 stitches left before the marker-thread, knit 2 together, knit 2 (marker-thread sits between these 2 stitches), slip 1 stitch knit-wise, knit 1 and pass the slipped stitch over the knitted stitch (2 stitches decreased). ------------------------------------------------------- START THE PIECE HERE: ------------------------------------------------------- JUMPER – SHORT OVERVIEW OF THE PIECE: The pattern uses both long and short needles; start with the length which fits the number of stitches and change when necessary. The neck and yoke are worked in the round with circular needle, top down and from mid-back, increasing for the round yoke. When the yoke is finished, it is divided for the body and sleeves and the body is continued in the round, while the sleeves wait. The sleeves are worked top down, in the round. NECK: Cast on 106-110-114-118-122-128-132 stitches with circular needle size 3 mm and colour Cherry Jam DROPS Saga. Knit 1 round. Change to colour Coffee and work rib in the round (knit 1 and purl 1) for 5-5-6-6-6-6-6 cm. YOKE: Change to circular needle size 4 mm. Insert 1 marker-thread at the beginning of the round (mid-back). Allow the thread to follow your work onwards. Knit 1 round and increase 22-22-22-22-22-24-28 stitches evenly spaced – read INCREASE TIP = 128-132-136-140-144-152-160 stitches. Insert 1 marker in the middle of the round (mid-front). The yoke is now measured from here. Work an ELEVATION at the back of the neck – read explanation above. Continue stocking stitch in the round with colour Coffee for 0-0-1-1-0-2-3 cm. Now work pattern and increase – read KNITTING TIP and PATTERN in explanations above. Remember to maintain the knitting tension. Work A.1 in the round. On each row with an arrow in the diagram increase as follows – remember INCREASE TIP: ARROW-1: Increase 44-44-44-44-44-48-60 stitches evenly spaced = 172-176-180-184-188-200-220 stitches. ARROW-2: Increase 32-36-36-40-40-48-48 stitches evenly spaced = 204-212-216-224-228-248-268 stitches. ARROW-3: Increase 24-28-32-36-44-48-48 stitches evenly spaced = 228-240-248-260-272-296-316 stitches. ARROW-4: Increase 25-24-38-37-36-45-47 stitches evenly spaced = 253-264-286-297-308-341-363 stitches. ARROW-5: Increase 19-28-22-27-36-31-37 stitches evenly spaced = 272-292-308-324-344-372-400 stitches. ARROW-6: Increase 20-20-28-28-40-36-32 stitches evenly spaced = 292-312-336-352-384-408-432 stitches. Work until the yoke measures 23-23-24-24-25-27-28 cm from mid-front. All the increases must be finished. If A.1 is not finished in height, continue the pattern on the body and sleeves. Now divide for the body and sleeves DIVIDE FOR BODY AND SLEEVES Work 44-48-52-54-58-64-68 (half the back piece), place the next 58-60-64-68-76-76-80 stitches on a stitch holder for the sleeve, cast on 8-8-8-12-12-16-16 stitches (mid-under the sleeve), work 88-96-104-108-116-128-136 stitches (front piece), place the next 58-60-64-68-76-76-80 stitches on a stitch holder for the sleeve, cast on 8-8-8-12-12-16-16 stitches (mid-under the sleeve), work the last 44-48-52-54-58-64-68 stitches (= half the back piece). The body and sleeves are finished separately. BODY: = 192-208-224-240-256-288-304 stitches. Insert 1 marker-thread in the middle of the 8-8-8-12-12-16-16 cast-on stitches under each sleeve. If A.1 was not finished on the yoke, complete A.1 on the body, then work A.2 in the round. When A.2 is finished, continue with stocking stitch and colour Coffee until the piece measures 45-47-49-50-51-53-55 cm from the marker mid-front. Knit 1 round and increase 20-20-22-24-26-28-30 stitches evenly spaced – remember INCREASE TIP = 212-228-246-264-282-316-334 stitches. Change to circular needle size 3 mm. Work rib (knit 1 and purl 1) in the round for 4-4-4-4-5-5-5 cm. Cast off slightly loosely. The jumper measures approx. 49-51-53-54-56-58-60 cm from the marker mid-front and 54-56-58-60-62-64-66 cm from the shoulder. SLEEVES: Place the 58-60-64-68-76-76-80 sleeve-stitches from one stitch holder onto circular needle size 4 mm and knit up 1 stitch in each of the 8-8-8-12-12-16-16 cast-on stitches under the sleeve = 66-68-72-80-88-92-96 stitches. Insert a marker-thread in the middle of the 8-8-8-12-12-16-16 new stitches under the sleeve and allow it to follow your work onwards; it is used when decreasing under the sleeve. Begin the round by the marker-thread and work pattern in the round. If A.1 was not finished on the yoke, complete A.1 then work A.2 in the round. NOTE! A.2 will not fit under the sleeve. Position a pumpkin mid-top of sleeve and work the pattern as far as it will go under the sleeve. When A.2 is finished, continue with stocking stitch and colour Coffee. AT THE SAME TIME, when the sleeve measures 1 cm, decrease 2 stitches mid-under the sleeve – read DECREASE TIP. Decrease like this every 8-8-6-4-2½-2½-2 cm a total of 5-5-6-9-12-13-14 times = 56-58-60-62-64-66-68 stitches. Work until the sleeve measures 39-39-39-40-40-37-37 cm from the division. Change to double pointed needles size 3 mm. Work rib (knit 1 and purl 1) increasing 12 stitches evenly on the first round = 68-70-72-74-76-78-80 stitches. When the rib measures 3-3-3-3-4-4-4 cm, change to colour Cherry Jam and work 1 more cm of rib. Cast off slightly loosely. The sleeve measures approx. 43-43-43-44-45-42-42 cm from the division. |
||||||||||||||||||||||
Diagram explanations |
||||||||||||||||||||||
|
||||||||||||||||||||||
 |
||||||||||||||||||||||
 |
||||||||||||||||||||||
 |
||||||||||||||||||||||
Have you finished this pattern?Tag your pictures with #dropspattern #octobermagicsweater or submit them to the #dropsfan gallery. Do you need help with this pattern?You'll find 25 tutorial videos, a Comments/Questions area and more by visiting the pattern on garnstudio.com. © 1982-2026 DROPS Design A/S. We reserve all rights. This document, including all its sub-sections, has copyrights. Read more about what you can do with our patterns at the bottom of each pattern on our site. |
||||||||||||||||||||||






With over 40 years in knitting and crochet design, DROPS Design offers one of the most extensive collections of free patterns on the internet - translated to 17 languages. As of today we count 333 catalogues and 12532 patterns translated into English (UK/cm). 12532
We work hard to bring you the best knitting and crochet have to offer, inspiration and advice as well as great quality yarns at incredible prices! Would you like to use our patterns for other than personal use? You can read what you are allowed to do in the Copyright text at the bottom of all our patterns. Happy crafting!
Post a comment to pattern DROPS 272-48
We would love to hear what you have to say about this pattern!
If you want to leave a question, please make sure you select the correct category in the form below, to speed up the answering process. Required fields are marked *.