
Popular categories
Looking for a yarn?


Comments / Questions (62)
![]() Katinka wrote:
Katinka wrote:
Kan denna stickas med big merino?
31.07.2025 - 23:56DROPS Design answered:
Hei Katinka. Strikkefastheten vil nok ikke stemme helt, da Big Merino tilhører garngruppe C, mens Daisy tilhører B og Kid-Silk A (A+B = litt tykkere en C). Men har du garnet Bid Merino, kan du strikke en prøvelapp og se om du får den oppgitte strikkefastheten men husk også at Big Merino har enn mer tyngde enn Daisy + Kid-Silk, slik at arbeidet kan sige noe. mvh DROPS Design
25.08.2025 - 10:48
![]() Ria Dammers wrote:
Ria Dammers wrote:
Er staat dat je aan elke kant van de 7 raglansteken 2 steken moet meerderen. Dat is niet in de 6e, 8e, 12e, 14e enz. steek want dan heb ik 32 steken gemeerderd. Welke steken betreft het wel? Ik was al bij de verdeling van lijf en mouwen en zag dat er geen model in zat. Ik begrijp blijkbaar de bedoeling niet van de beschrijving. Hopelijk kunt u het wat verduidelijken. Alvast bedankt.
23.04.2025 - 15:01DROPS Design answered:
Dag Ria,
Je laat de 7 raglansteken in tact en je meerdert 4 deze steken en na deze steken. Dus niet voor en na elk van de 7 steken maar voor en na het hele groepje van 7 steken. Op de foto zie ook de raglanlijnen lopen, dat zijn 7 steken naast elkaar die a.h.w. van de oksel naar de hals lopen.
23.04.2025 - 21:40
![]() Jana wrote:
Jana wrote:
Dobrý den, ráda bych svetr upletla s vyšším průkrčníkem a se zipem, umístěným v raglánovém zkosení. Což znamená, že bych začátek práce - průkčník a cca polovinu sedla - pletla v rovných řadách a až poté navázala kruhovými. Bude přechod z rovných řad na kruhové vidět na vzoru? Lze případně stručně popsat, jak nejlépe postupovat? Díky.
10.04.2025 - 16:01
![]() Konstanze wrote:
Konstanze wrote:
Vielen Dank für die Antwort. Da bei Rumpfteil und Ärmelteil unterschiedliche Maschen am Ende / bzw. Beginn sind - wenn Rumpfteil mit rechts beginnt/endet, endet/beginnt Ärmel mit links usw. - ist meine Beobachtung richtig.
09.04.2025 - 09:17
![]() Konstanze wrote:
Konstanze wrote:
Liebes Dropsteam, ist es richtig, dass die 5 neuen Maschen für das Rumpfteil später (ohne Umschläge gedacht) rechts-links-rechts-links-rechts abgestrickt werden und diese neuen Maschen beim Ärmel aber genau umgekehrt links - rechts- links-rechts-links gestrickt werden?
08.04.2025 - 23:13DROPS Design answered:
Liebe Konstanze, diese Maschen werden genauso gleich beim Rumfpteil und bei den Ärmeln gestrickt: wenn die letzte Masche vor der Aufteilung/ die erste Masche nach der Aufteilung eine linke Masche ist, dann werden die 1. und letzte dieser 5 Maschen eine rechte Masche beim Rumpf sowie beim Ärmel sein. Viel Spaß beim Stricken!
09.04.2025 - 08:36
![]() Hélène Amrit wrote:
Hélène Amrit wrote:
Je découvre deux façon de faire les côtes anglaises. Est ce que je peux opter pour les côtes anglaises avec des mailles doubles plutôt que des jetés ? Est ce que cela aura la même consommation de laine, et surtout est ce que je pourrai suivre le modèle sans difficulté? Merci beaucoup pour vos réponses :)
31.03.2025 - 18:58DROPS Design answered:
Bonjour Mme Amrit, la consommation de laine peut être effectivement différente, l'idéal est de tricoter un échantillon dans les 2 types de côtes anglaises et de comparer le métrage utilisé. Pour les augmentations et les diminutions, entrainez-vous éventuellement sur un échantillon auparavant pour être certaine du résultat (et pour vérifier la fréquence des augmentations / diminutions). Bon tricot!
01.04.2025 - 08:43
![]() Hélène Amrit wrote:
Hélène Amrit wrote:
Bonjour, Je suis débutante. J'ai fait un bonnet en cote 2X2 avec des circulaire et là je termine un pull en jersey avec des circulaire maches raglan avec des erreurs. Est ce que ce modèle sera à ma portée ? Autre question : on tricote les deux fil ensemble c'est bien cela ? Alors pourquoi vous ne donnez pas le même poids pour le second fil ? Aurais-je assez de laine en kid silk ? Merci pour votre aide précieuse
21.03.2025 - 19:52DROPS Design answered:
Bonjour Mme Amrit, lisez attentivement les explications, visualisez les techniques utilisées en consultant les vidéo, éventuellement entraînez vous aux côte anglaises, aux augmentations et diminutions sur un échantillon si besoin. Si vous avez une question, n'hésitez pas à utiliser cet espace. On tricote effectivement avec 2 laines différentes : soit Daisy soit Puna +.1 fil Kid-Silk, ce qui compte lorsque l'on tricote 2 laines en même temps c'est le métrage et pas le poids, notez juste qu'1 pelote Kid-Silk = 25 g. Bon tricot!
24.03.2025 - 07:57
![]() Maren wrote:
Maren wrote:
Meinte natürlich 108 Maschen Halsblende
25.02.2025 - 10:33
![]() Maren wrote:
Maren wrote:
Hey, wie komme ich von 198 Maschen der Halsblende auf 72 Maschen der Passe?
25.02.2025 - 10:32DROPS Design answered:
Liebe Maren, in 2. Größe schlägt man 108 M und bei der 1. Reihe vom Patentmuster wird man abnehmen - so daß es dann nur 72 Maschen übrig sind. Viel Spaß beim Stricken!
25.02.2025 - 16:30
![]() EB wrote:
EB wrote:
Stickfråga: först stickar man ju halsen. 108 m resår. sedan ska man gå över till att sticka patent för oket, Då ska det plötsligt vara 72 maskor. Men det står inte att man ska minska på något sätt. VAR framkommer det att man ska minska halsmaskorna?
07.02.2025 - 10:27
|
|
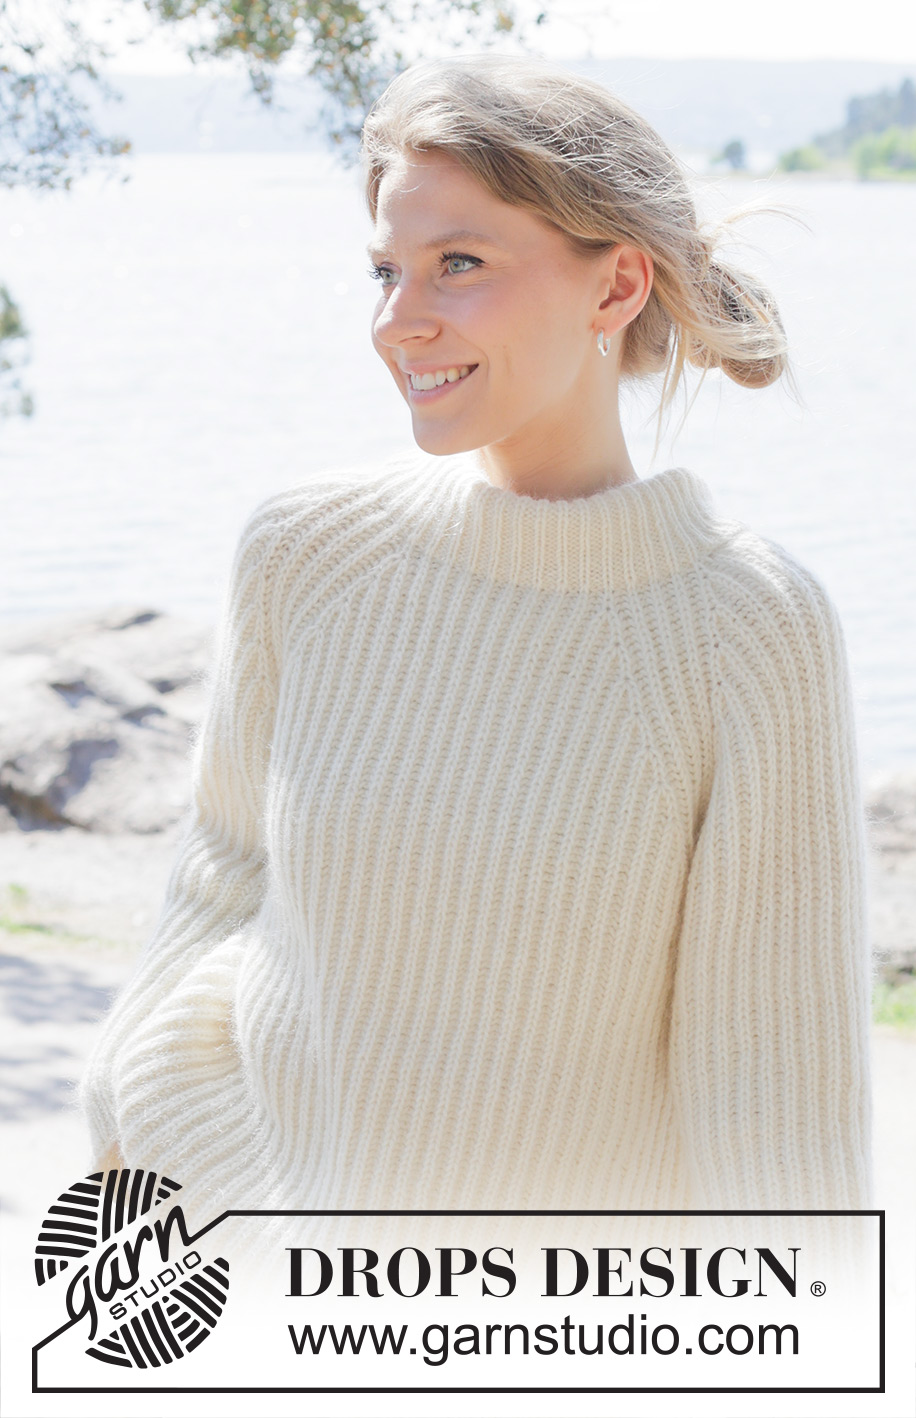
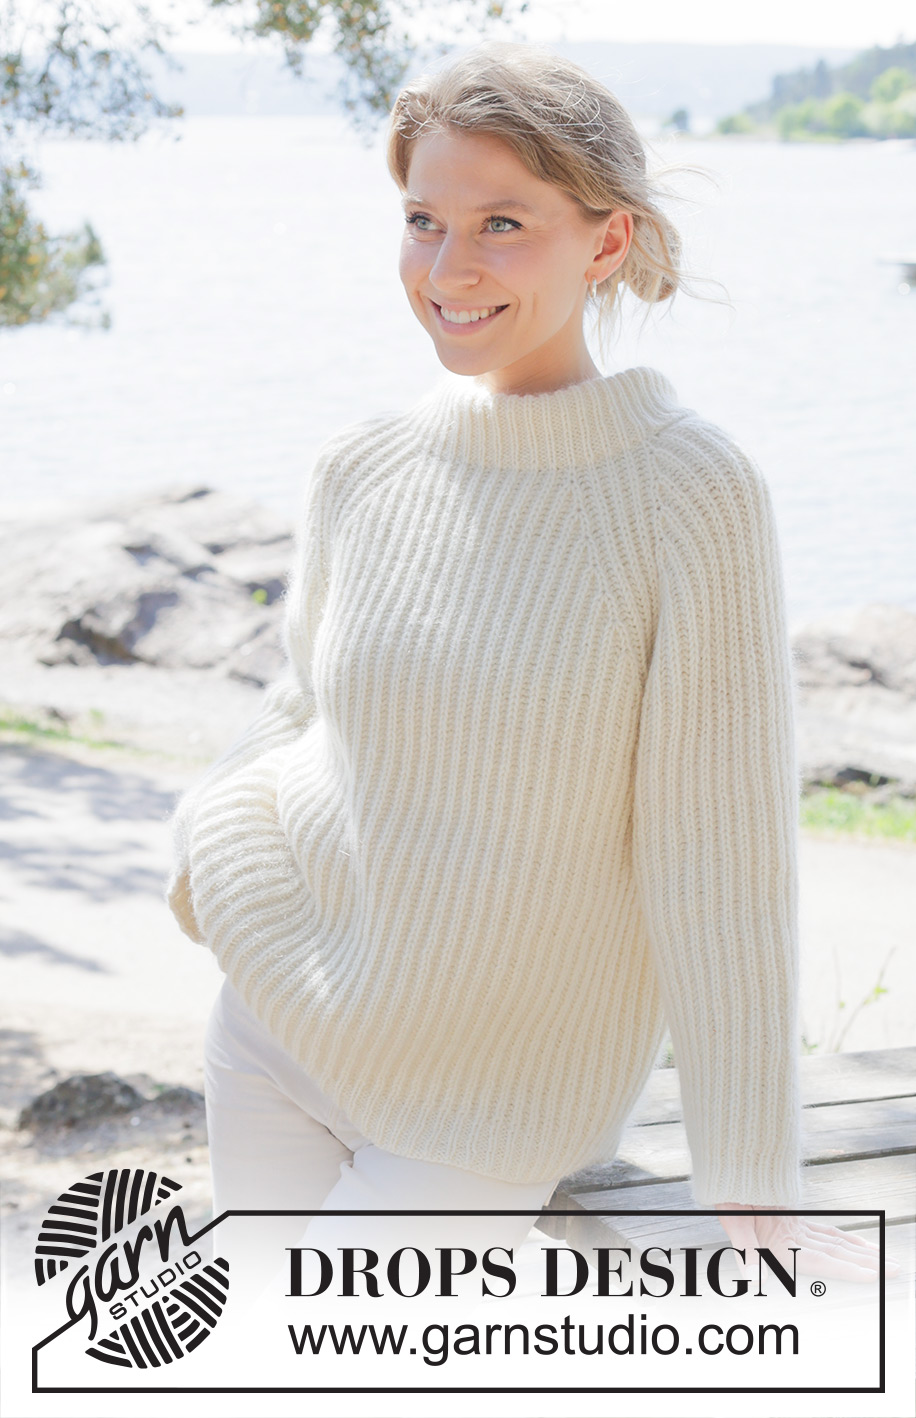
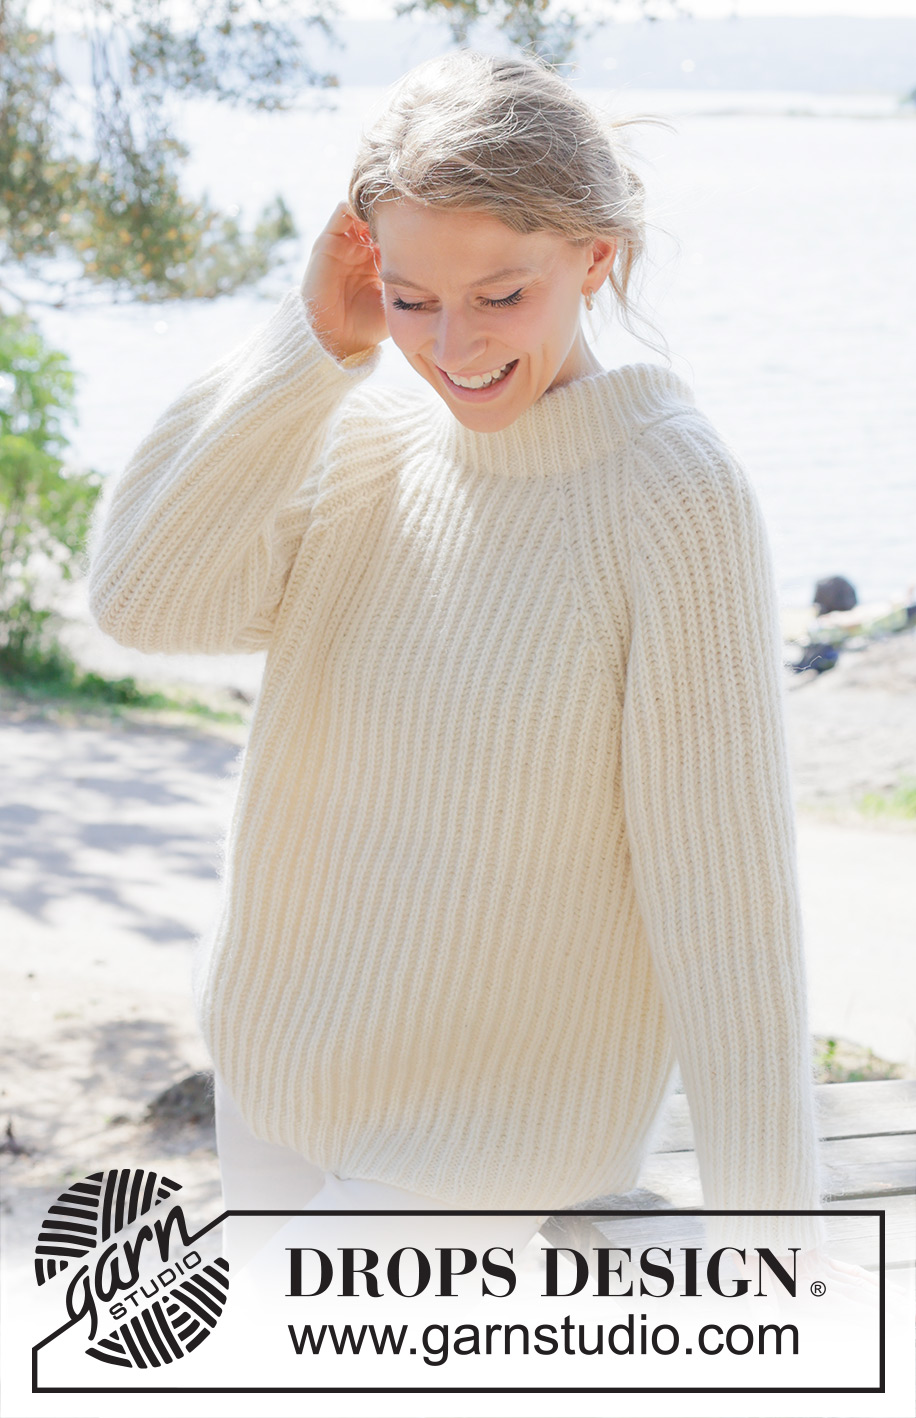
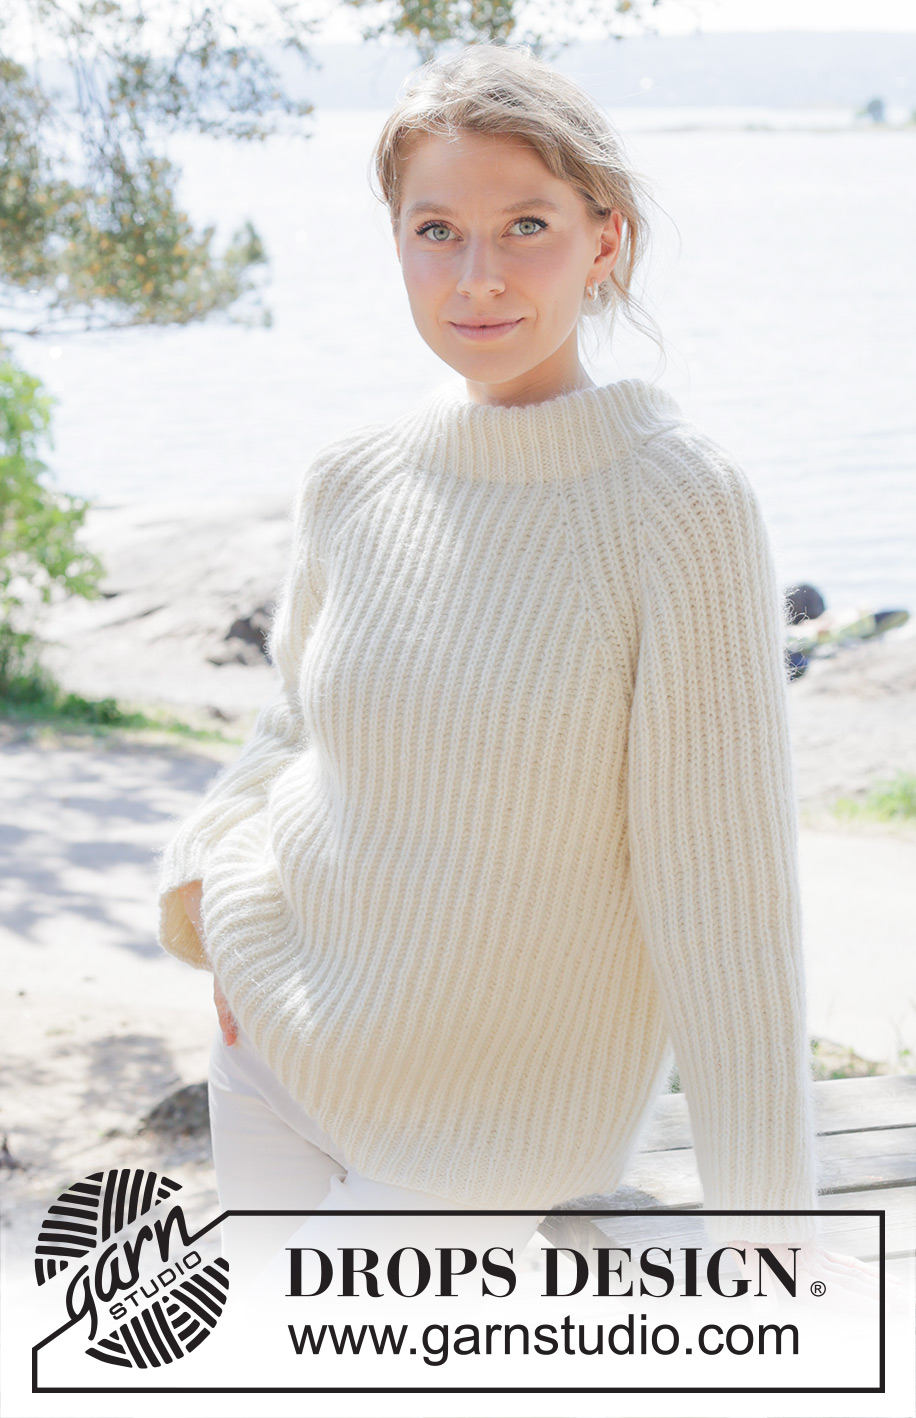
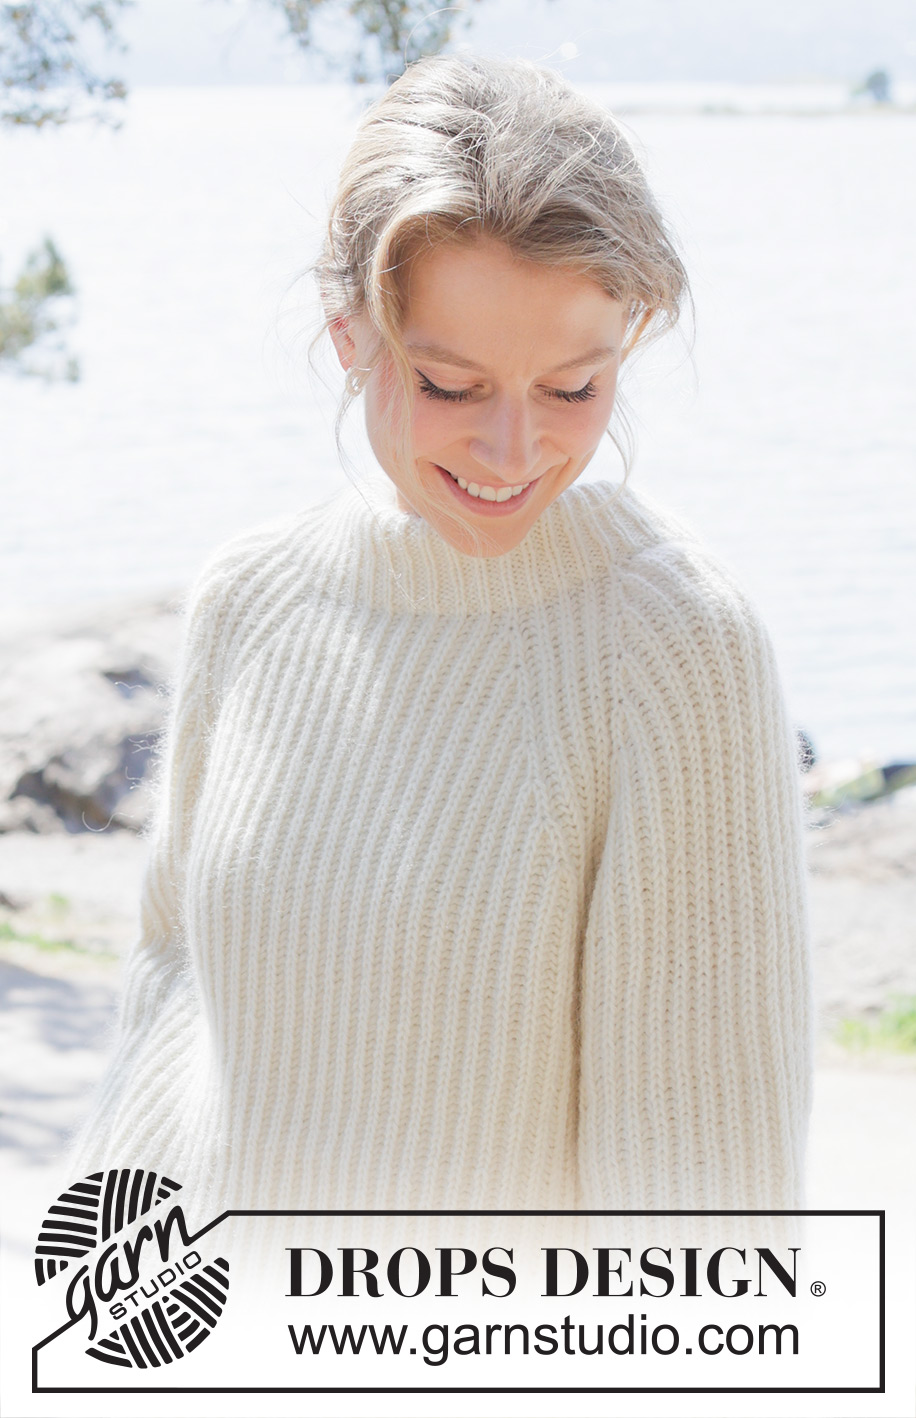
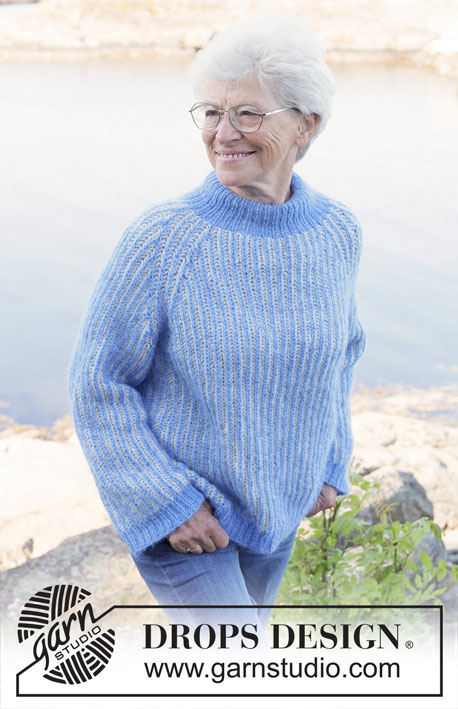
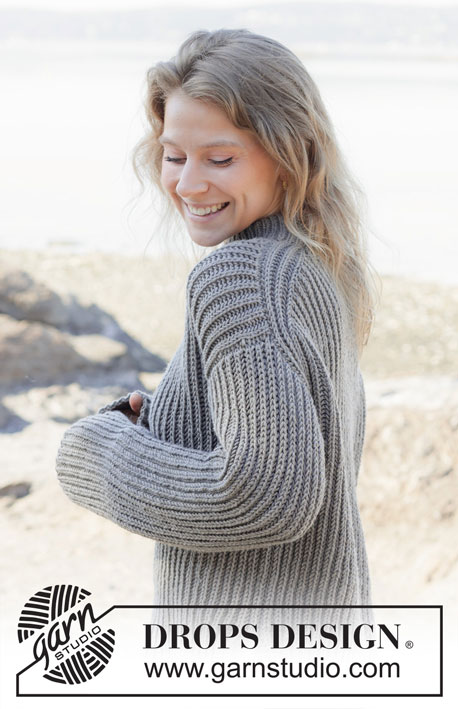
Cherish Sweater#cherishsweater |
|
 |
 |
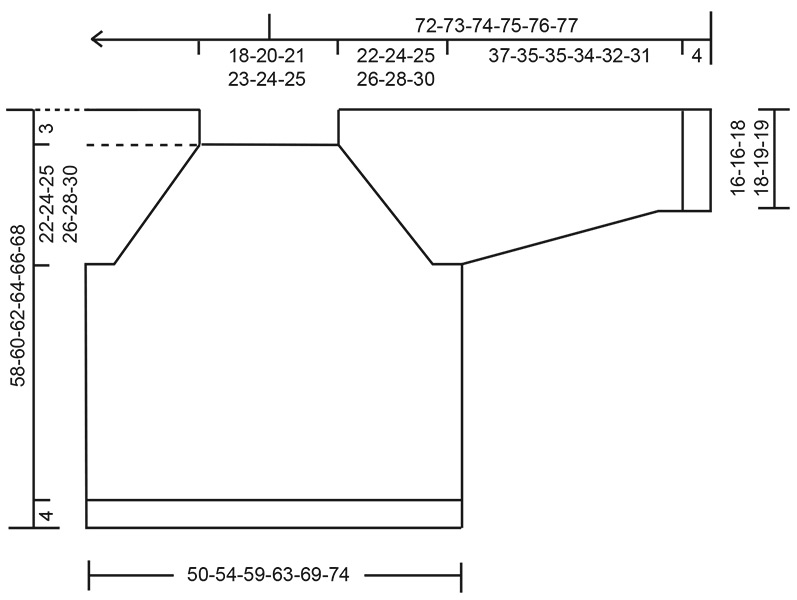
Knitted jumper in 1 strand DROPS Daisy and 1 strand DROPS Kid-Silk or 1 strand DROPS Puna and 1 strand DROPS Kid-Silk. Piece is knitted top down with raglan and English rib. Size: S - XXXL
DROPS 252-8 |
|
|
---------------------------------------------------------- EXPLANATION FOR THE PATTERN: ---------------------------------------------------------- KNITTING TIP: When counting the stitches, the yarn overs are not counted as stitches. INCREASE TIP: All increases are done on a round where yarn over and knit stitch are knitted together. Increase 2 stitches in knit stitch and yarn over by working 3 stitches in stitch and yarn over as follows: Knit stitch and yarn over together but wait to slip stitch and yarn over off the left needle, make 1 yarn over on right needle and knit the same stitch and yarn over together one more time (= 2 stitches increased). Then work the new stitches in English rib but note that the increased stitches are missing the yarn over the first time they are worked. ENGLISH RIB: ROUND 1: * Purl 2 together, make 1 yarn over, slip 1 stitch purlwise *, repeat from *-* the entire round. ROUND 2: * Make 1 yarn over, slip 1 stitch purlwise, knit yarn over and slipped stitch together *, repeat from *-* the entire round. ROUND 3: * Purl yarn over and the slipped stitch together, make 1 yarn over, slip 1 stitch purlwise *, repeat from *-* the entire round. AFTER ROUND 3: Repeat rounds 2 and 3. DECREASE TIP (applies to sleeves): All decreases are done on a round where yarn over and knit stitch are knitted together. Decrease 2 stitches on each side of stitch with marker as follows: DECREASE 2 STITCHES AT BEGINNING OF ROUND: Begin at first knit stitch in English rib after stitch with marker: Slip first stitch and yarn over loosely on to right needle knitwise, knit the next 2 together (i.e. 1 purl + knit stitch and yarn over), then pass loose stitch and yarn over over stitches worked together (= 2 stitches decreased). DECREASE 2 STITCHES AT END OF ROUND: Work until next to last knit stitch in English rib before stitch with marker: Slip first knit stitch and yarn over loosely on to right needle knitwise, purl 1, pass slipped stitch and yarn over over purl stitch, slip stitch back on to left needle, slip stitch and yarn over over stitch slipped back on to left needle, slip the remaining stitch on to right needle (= 2 stitches decreased). ---------------------------------------------------------- START THE PIECE HERE: ---------------------------------------------------------- JUMPER - SHORT OVERVIEW OF THE PIECE: In this pattern needles of different length have been used, begin with fitting length for number of stitches and switch as needed. Work neck edge and yoke in the round on circular needle from right shoulder back, and work top down. When yoke is done, divide piece for body and sleeves. Work body down wards in the round on circular needle while putting the sleeves aside. Then work sleeves downwards in the round on needle. Fold the neck edge double against the wrong side and fasten. NECK EDGE: Cast on 102-108-114-120-126-132 stitches on circular needle size 5 mm with 1 strand DROPS Daisy and 1 strand DROPS Kid-Silk, or 1 strand DROPS Puna and 1 strand DROPS Kid-Silk (= 2 strands). Switch to circular needle size 3.5 mm (cast on on a larger needle to get an elastic cast-on edge). Work rib in the round (= purl 2/knit 1) for 11 cm. The neck edge is later folded in towards wrong side and assembled to form a neck edge of approx. 5 cm. YOKE: Switch to circular needle size 5 mm and work 1st round with ENGLISH RIB, read explanation above = 68-72-76-80-84-88 stitches. Beginning of round is at right shoulder at the back. Insert 1 marker in piece after the first 26-27-28-29-30-31 stitches on round (= approx. mid front), measures piece from this marker. Read KNITTING TIP and insert 8 marker threads on needle between 2 stitches as follows: Insert 1 marker thread (= beginning of round), count 7 stitches (= raglan stitches), insert 1 marker thread before next stitch, count 5 stitches (= sleeve), insert 1 marker thread before next stitch, count 7 stitches (= raglan stitches), insert 1 marker thread before next stitch, count 15-17-19-21-23-25 stitches (= front piece), insert 1 marker thread before next stitch, count 7 stitches (= raglan stitches), insert 1 marker thread before next stitch, count 5 stitches (= sleeve), insert 1 marker thread before next stitch, count 7 stitches (= raglan stitches), insert 1 marker thread before next stitch. 15-17-19-21-23-25 stitches remain on row after last marker thread (= back piece). Continue to work in the round from 2nd round with English rib, AT THE SAME TIME increase for RAGLAN as explained below. Remember to follow the knitting tension! RAGLAN: When 5 rounds have been worked in the round with English rib (= on next round work as 2nd round English rib), increase 2 stitches in knit stitch and yarn over on each side of the 7 raglan stitches – read INCREASE TIP (= 16 stitches increased). Increase like this every 8th round (i.e. every other 4th round with visible English rib stitches vertically) 9-10-10-11-11-12 times in total vertically = 212-232-236-256-260-280 stitches. Increases for sleeve are now done, but continue to increase for raglan on front piece and back piece on every 8th round 1-1-1-1-2-2 more times = 220-240-244-264-276-296 stitches on needle. Work without increasing until piece measures 22-24-25-26-28-30 cm from marker after neck edge – adjust so that next round worked is the same as 3rd round with English rib. Now divide yoke for body and sleeves. DIVIDING FOR BODY AND SLEEVES: AT THE SAME TIME as next round is worked divide yoke for body and sleeves as follows: Work 5 stitches as before (= belongs to back piece), slip the next 45-49-49-53-53-57 stitches on a thread for sleeve, cast on 5-5-9-9-11-13 new stitches on needle (= in the side mid under sleeve), work 65-71-73-79-85-91 stitches as before (= front piece), slip the next 45-49-49-53-53-57 stitches on a thread for sleeve, cast on 5-5-9-9-11-13 new stitches on needle (= in the side mid under sleeve) and work the last 60-66-68-74-80-86 stitches (= rest of back piece). Finish body and sleeves separately. BODY: = 140-152-164-176-192-208 stitches. Work with the same thread, round begins by marker thread as before, and continue with English rib in the round until piece measures 51-53-55-57-59-61 cm from marker mid front – adjust so that next round worked is the same as 3rd round with English rib. Switch to circular needle size 3.5 mm, * make 1 yarn over, purl the purl stitch, knit yarn over and the slipped stitch together *, work from *-* the rest of round. Work rib (= purl 2/knit 1) as follows: Work knit over knit and purl over purl AT THE SAME TIME purl all yarn overs = 210-228-246-264-288-312 stitches. When rib measures 4 cm, cast off with knit over knit and purl over purl. Jumper measures 55-57-59-61-63-65 cm from marker mid front and approx. 58-60-62-64-66-68 cm from the top of shoulder. SLEEVES: Slip the 45-49-49-53-53-57 sleeve stitches from one thread on circular needle size 5 mm. Begin by picking up 1 stitch in each of the 5-5-9-9-11-13 stitches cast on under sleeve = 50-54-58-62-64-70 stitches. Insert 1 marker in the middle of the 5-5-9-9-11-13 new stitches under sleeve - round begins with this stitch. To make the English rib stitches fit nicely over sleeves work first round in the round as follows: Continue from where the 5-5-9-9-11-13 stitches were picked up under sleeve, * knit yarn over and the slipped stitch together, make 1 yarn over, slip 1 stitch purlwise *, repeat from *-* all the round until the new stitches mid under sleeve – note that the new stitches are missing the yarn over the first time they are worked. In sizes S, M, L, XL and XXXL marker is in a knit stitch, in size XXL marker is in a purl stitch. Move the marker upwards when working; it should be used for decrease mid under sleeve. Continue in the round with English rib as before. When sleeve measures 4 cm from division, decrease mid under sleeve – read DECREASE TIP and decrease as follows: Decrease 4 stitches every 4 cm 1-2-2-3-3- 4 times in total = 46-46-50-50-52-54 stitches. Work until sleeve measures 37-35-35-34-32-31 cm from division – adjust so that last round worked is the same as 3rd round with English rib. Switch to double pointed needles size 3.5 mm, work 1st round as follows: SIZE S, M, L, XL and XXXL: * Make 1 yarn over, purl 1, knit yarn over and knit stitch together *, work from *-* the rest of round. SIZE XXL: * Knit yarn over and knit stitch together, make 1 yarn over, purl 1 *, work from *-* the entire round. Work rib (= knit 1/purl 2). Work knit over knit and purl over purl AT THE SAME TIME purl all yarn overs = 69-69-75-75-78-81 stitches. When rib measures 4 cm, cast off with knit over knit and purl over purl. Sleeve measures approx. 41-39-39-38-36-35 cm from division. ASSEMBLY: Fold rib at the top of neck down on inside of garment. Fasten rib to get a double neck edge. To avoid a tight neck edge that sticks out it is important to keep the seam elastic. |
|
 |
|
Have you finished this pattern?Tag your pictures with #dropspattern #cherishsweater or submit them to the #dropsfan gallery. Do you need help with this pattern?You'll find 29 tutorial videos, a Comments/Questions area and more by visiting the pattern on garnstudio.com. © 1982-2026 DROPS Design A/S. We reserve all rights. This document, including all its sub-sections, has copyrights. Read more about what you can do with our patterns at the bottom of each pattern on our site. |
|


With over 40 years in knitting and crochet design, DROPS Design offers one of the most extensive collections of free patterns on the internet - translated to 17 languages. As of today we count 324 catalogues and 12290 patterns translated into English (UK/cm). 12290
We work hard to bring you the best knitting and crochet have to offer, inspiration and advice as well as great quality yarns at incredible prices! Would you like to use our patterns for other than personal use? You can read what you are allowed to do in the Copyright text at the bottom of all our patterns. Happy crafting!
Post a comment to pattern DROPS 252-8
We would love to hear what you have to say about this pattern!
If you want to leave a question, please make sure you select the correct category in the form below, to speed up the answering process. Required fields are marked *.