
Categorías populares
¿Buscas un hilo?


Comentarios / Preguntas (9)
![]() Vicky escribió:
Vicky escribió:
Hi, I am left with a large loose loop in the middle where there was excess yarn between knitting up the first half and knitting up the second half before rejoining. The video showeda very large loose loop so that the top of the completed first half was not tightly joined to the bottom of the second half. Yet once the second half is knitted up the excess yarn between the 2 halves isn't shown again. Where did I go wrong? What do I do with the loose loop? Thank you.
23.11.2024 - 17:50DROPS Design respondió:
Dear Vicky, the joining of both halves should be quite tight. If you have excess yarn you could start pulling the thread in the adjacent stitches, so that instead of having a giant loop you can have a few smaller loops. If you have been following the video, the big thread should have been covered by the upper half and be hidden. Happy knitting!
24.11.2024 - 22:41
![]() Anna escribió:
Anna escribió:
Hi, I started knitting this pattern but changed the number of stitches cause it was too big and I wanted it thinner, but I'm afraid something is wrong. I cast on 12 sts, giving me 3 ribs on the RS, 2 on the WS. The problem is that after the criss cross, on the RS I only have 2 ribs instead of 3, and I don't see a way to make it 3 on the RS after the cross. Is the problem the halved sts, like, does the pattern works only with 24?
21.11.2023 - 18:59DROPS Design respondió:
Dear Anna, it might be, as with 24 sts you get P2 in the middle and can then divide piece in 2 separate pieces. Happy knitting!
22.11.2023 - 08:45
![]() Jennifer escribió:
Jennifer escribió:
I am not understanding the pattern . Knit the first stitch, k2 P2 until last 3 stitches, k2, knit the last stitch. This does not make a ribbing. Edge stitch in garter to me means knit?
13.11.2023 - 23:00DROPS Design respondió:
Dear Jennifer, you should work ribbing (K2, P2) as follows: knit 1 (garter stitch), repeat (K2, P2) until 3 sts remain, finish with K2 and K1 (garter stitch). From WS work: K1, repeat (P2, K2) until 3 sts remain, finish with P2, K1 - edge stitches are worked in garter stitch, they will be knitted on every row. Happy knitting!
14.11.2023 - 10:32
![]() Zdenka escribió:
Zdenka escribió:
Jak pokračuji s druhou polovinou 12 ok když mi končí příze na první polovině o 7 cm výše? Děkuji
19.10.2023 - 21:52DROPS Design respondió:
Dobrý den, Zdenko, poté, co dopletete první polovinu (= 7 cm výšky) tato oka odložíte na pomocnou jehlici a upletete stejným způsobem tu druhou půlku (= 12 ok, která byla dosud odložená) - přízi můžete napojit třeba z druhého konce klubíčka (pokud jste dosud odvíjela přízi z povrchu klubka, můžete nyní vytáhnout konec zevnitř klubka - nebo naopak :-) ). Jakmile doplete i druhou půlku do stejné výšky, obě půlky překřížíte a pak už pletete zase nad oběma půlkami dohromady, tedy v řadách nad celou šířkou čelenky. Hodně zdaru! Hana
21.10.2023 - 19:12
![]() Joanna escribió:
Joanna escribió:
Czy w tym wzorze można połączyć włóczkę Snow z Kid-Silk?
05.12.2022 - 00:55DROPS Design respondió:
Można Joanno. Pozdrawiamy!
05.12.2022 - 14:38
![]() Luz Coz escribió:
Luz Coz escribió:
Que es punto musgo
02.02.2021 - 21:03DROPS Design respondió:
Hola Luz. El punto musgo, que también llaman punto bobo o punto santa clara, se trabaja haciendo todos los puntos de derecho (tanto por el lado derecho como por el lado revés).
07.02.2021 - 20:36
![]() Silvia65 escribió:
Silvia65 escribió:
Ich möchte gerne wissen, wie breit das Stirnband ist. Über eine kurze Rückmeldung wäre ich Ihnen sehr sehr dankbar. Mfg S. Janssen
30.10.2020 - 11:52DROPS Design respondió:
Liebe Silvia65, diese Angabe haben wir nicht (und Stirnband haben wir nicht mehr), aber sollte Ihre Maschenprobe stimmen, dann sollte das Stirnband wie auf dem Foto aussehen. Viel Spaß beim stricken!
30.10.2020 - 13:25
![]() Lutgardis escribió:
Lutgardis escribió:
Graag de uitleg
06.02.2020 - 12:34
![]() Sandy escribió:
Sandy escribió:
Looking forward to knitting this
08.10.2019 - 03:37
|
|
Weekender#weekenderheadband |
|
 |
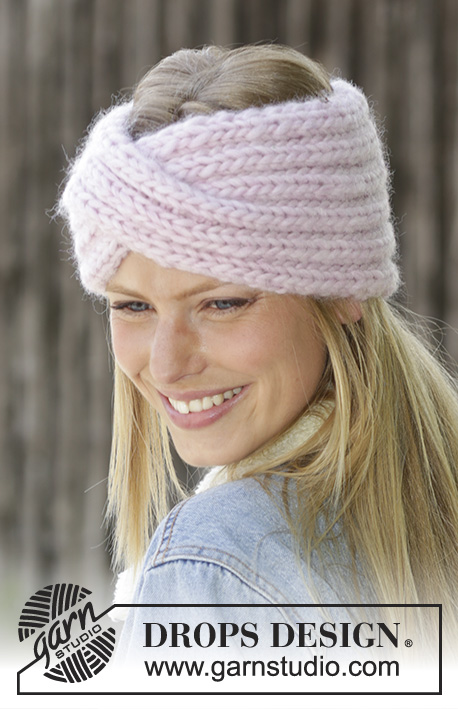 |
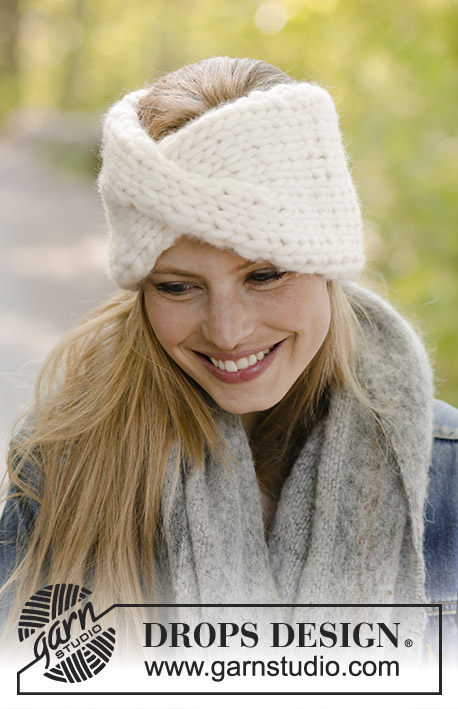
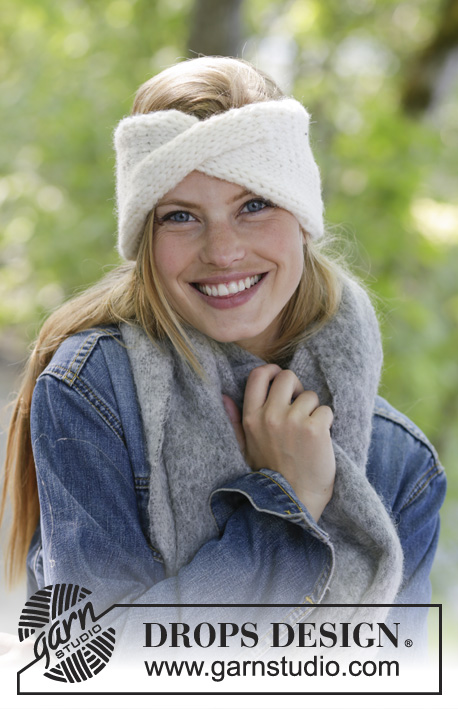
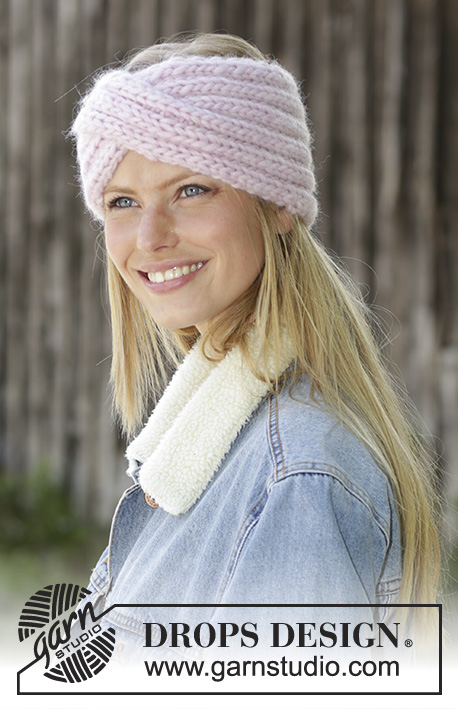
Banda para la cabeza de punto en DROPS Snow. La pieza está tejida en resorte con una torsada en el centro del frente.
DROPS 192-1 |
|
|
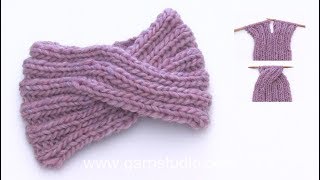
EXPLICACIONES PARA REALIZAR EL PATRÓN: ----------------------------------------------------- PUNTO MUSGO (tejido de ida y vuelta): 1 punto de orillo en punto musgo = tejer el punto de derecho por el lado derecho y de derecho por el lado revés. ----------------------------------------------------- COMENZAR LA PIEZA AQUÍ: ----------------------------------------------------- BANDA PARA LA CABEZA – RESUMEN CORTO DE LA PIEZA: La pieza se teje de ida y vuelta en las agujas a partir del centro de la parte de atrás y se une con una costura cuando está terminada, pero a la mitad del trabajo, se divide en el centro para hacer una torsada en el centro del frente. BANDA PARA LA CABEZA: Montar 24 puntos con agujas tamaño 10 mm y Snow. Tejer el patrón por el lado derecho de la manera siguiente: 1 punto de orillo en PUNTO MUSGO – leer descripción arriba, (2 derechos, 2 reveses) hasta que resten 3 puntos en la hilera, 2 derechos, 1 punto de orillo en punto musgo. Continuar así de ida y vuelta. ¡RECORDARSE DE MANTENER LA MISMA TENSIÓN DE TEJIDO DE LA MUESTRA! Cuando la pieza mida 21-22-23 cm, dividir la pieza en el centro (= 12 puntos en cada mitad). Tejer en resorte como antes con 1 punto de orillo en punto musgo a cada lado durante 7 cm sobre la primera mitad. Después tejer la segunda mitad de la misma manera. Colocar los puntos de la primera mitad de vuelta en la aguja, pero cambiar de lugar con la segunda mitad de modo que las dos mitades queden trenzadas en el centro del frente. Continuar con resorte y 1 punto de orillo en punto musgo a cada lado hasta que la banda para la cabeza mida un total de 49-51-53 cm. Rematar con derecho sobre derecho y revés sobre revés. ENSAMBLAJE: Unir la banda para la cabeza con una costura en el centro de la parte de atrás, cosiendo un punto de la orilla de remate juntamente con un punto de la orilla de montaje. Asegurarse de que la costura no quede apretada. Cortar y rematar el hilo. |
|
¿Terminaste este patrón?Entonces, etiqueta tus fotos con #dropspattern #weekenderheadband o envíalas a la galería #dropsfan. ¿Necesitas ayuda con este patrón?Encontrarás 14 videos tutoriales, un espacio para comentarios/preguntas y más visitando la página del patrón en garnstudio.com © 1982-2026 DROPS Design A/S. Todos los derechos reservados. Este documento, incluyendo todas sus sub-secciones, está protegido por los derechos de autor (copyright). Lee más acerca de lo que puedes hacer con nuestros patrones en la parte de abajo de cada patrón de nuestro sitio. |
|


Con más de 40 años en el diseño de modelos de punto y de ganchillo, DROPS Design ofrece una de las más vastas colecciones de patrones gratuitos en el internet - traducidos en 17 idiomas. Al día de hoy, contamos con 324 catálogos y 12290 patrones - de los cuales 11675 están traducidos en español.
Nosotros trabajamos con mucho esmero para brindarte lo mejor que las labores de punto y ganchillo tienen para ofrecer,inspiración y consejos, así como hilos de magnífica calidad a precios increíbles! Te gustaría usar nuestros patrones para otro fin además del uso personal? Puedes leer acerca de lo que estás permitida a hacer en el texto de Copyright en la parte de abajo de todos nuestros patrones. Felices labores!
Escribe un comentario sobre DROPS 192-1
¡Nos encantaría saber qué piensas acerca de este patrón!
Si quieres escribir una pregunta referente al patrón, por favor asegúrate de elegir la categoría correcta en el formulario debajo, para acelerar el proceso de respuesta. Los campos obligatorios están marcados con un *.