
Categorías populares
¿Buscas un hilo?


Comentarios / Preguntas (47)
![]() Nemtanu Anisoara escribió:
Nemtanu Anisoara escribió:
Si puo tradure in italiano?
09.03.2026 - 15:27DROPS Design respondió:
Hi, the Italian version is availableHERE. Happy knitting!
08.04.2026 - 14:22
![]() Sabine escribió:
Sabine escribió:
Wer das Tuch auch in Big Merino (Garngruppe C) stricken möchte: meines wiegt 349 gr, ich habe 144 gr für den Zopf und 205 gr für den Hauptteil des Schals benötigt. Viel Spaß, es lohnt sich! :-)
28.09.2025 - 15:41
![]() Sabine escribió:
Sabine escribió:
Ein wunderschönes Tuch, das ich, um es etwas dünner zu haben, mit Drops Big Merino (Garngruppe C) gestrickt habe mit einer 6,5er Nadel und zweifarbig, so dass sich der Zopfrand noch mehr hervorhebt. Bei einer Länge von 85cm habe ich, damit sich die Spitze des Tuchs bei dieser dünneren Wolle nicht einrollt 5 verkürzte Reihen gestrickt (statt 3). Beim nächsten Mal stricke ich es wieder mit Garngruppe C mit einer 7 - 8er Nadel und mit 16 Maschen für den Zopf - freue mich schon!
28.09.2025 - 15:25
![]() Carol Maitland escribió:
Carol Maitland escribió:
Hi I was just answered my question by the Drops Team but my question was not really answered.I understand the increase in the first row,it’s the 4 row increase I do not understand.Where do I do this increase on the 4th row and where do I do the decrease on the 4th row, Thks again Carol.
12.09.2025 - 14:16DROPS Design respondió:
Dear Carol, you have one 4-row increase section explained in the pattern. In this section, in ROW 1 you increase 1 stitch, by working 2 stitches in the first stitch after the marker. Then you work ROWS 2-4 with knit and A.1. Now you repeat these 4 rows, increasing always in the ROW 1 repeat, in the stitch right after the marker. That is, you increase not in ROW 4 but in every 4th row (out of rows 1-4 you increase in one of them, row 1). The decreases follow the same format, where you decrease 2 stitches after the marker every time that you repeat ROW 1 of the decreases. Happy knitting!
15.09.2025 - 01:39
![]() Carol Maitland escribió:
Carol Maitland escribió:
Hi I sent a question yesterday,about where to add the extra stitch in the 4 th row.Has not been answered.
10.09.2025 - 18:01DROPS Design respondió:
Dear Carol, please see our answer above. Happy knitting!
15.09.2025 - 01:40
![]() Carol Maitland escribió:
Carol Maitland escribió:
Hi itsays on the shawl to increase every 4th row,where do I do this and when I decrease where do I do that. Thks Carol.c
09.09.2025 - 21:05DROPS Design respondió:
Hi Carol, After the first 14 rows, you work 4 new rows which are then repeated onwards increasing 1 stitch in the first stitch after the marker-thread on the first of these 4 rows. The decreases begin after the short rows, and again 1 stitch is decreased straight after the marker-thread on the first of the 4 rows which are repeated onwards. Regards, Drops Team.
12.09.2025 - 11:03
![]() Carol Maitland escribió:
Carol Maitland escribió:
Then it says repeat 1st to 4th row,so every 4th row I add a stitch,where at the beginning. sorry my keyboard keys were stuck,thks Carol Maitland
15.08.2025 - 19:56DROPS Design respondió:
Dear Mrs Maitland, work as previously explained under rows 1-4: you will increase 1 stitch just after A.1 on first row = you will increase 1 stitch on every 4th row. Happy knitting!
18.08.2025 - 08:15
![]() Carol Maitland escribió:
Carol Maitland escribió:
Hi I currently working on this pattern,have some questions. Row 2 on second part says knit until marker then A1 over the next 12 stitches,does this mean I purl them because the pattern says to purl from the wrong side. Row 3,is this the cable row.so I put 6 cable stitches at back and knit the next 6 then do the cable stitches,but have noticed that the beginning of my working yarn is at the cable end.Do I carry it at the back before knitting the 6 stitches on the cable needle.
15.08.2025 - 19:52DROPS Design respondió:
Dear Mrs Maitland, from wrong side you will purl the stitches of A.1, on 3rd row start diagram - see in this video how to work this diagram and how to work the cable at the beginning of the row. Happy knitting!
18.08.2025 - 08:13
![]() Renate Huber escribió:
Renate Huber escribió:
Sehr schön gefällt mir ausgezeichnet
03.09.2024 - 15:54
![]() Monique escribió:
Monique escribió:
Une fois le produit fini, avec la même laine et j'ai obtenu un châle beaucoup trop long par rapport à sa largeur. Il faut peut être faire des augmentations plus rapides pour avoir un châle plus large.
09.03.2023 - 09:08
|
|||||||
Winter Cozy#wintercozyset |
|||||||
 |
 |
||||||
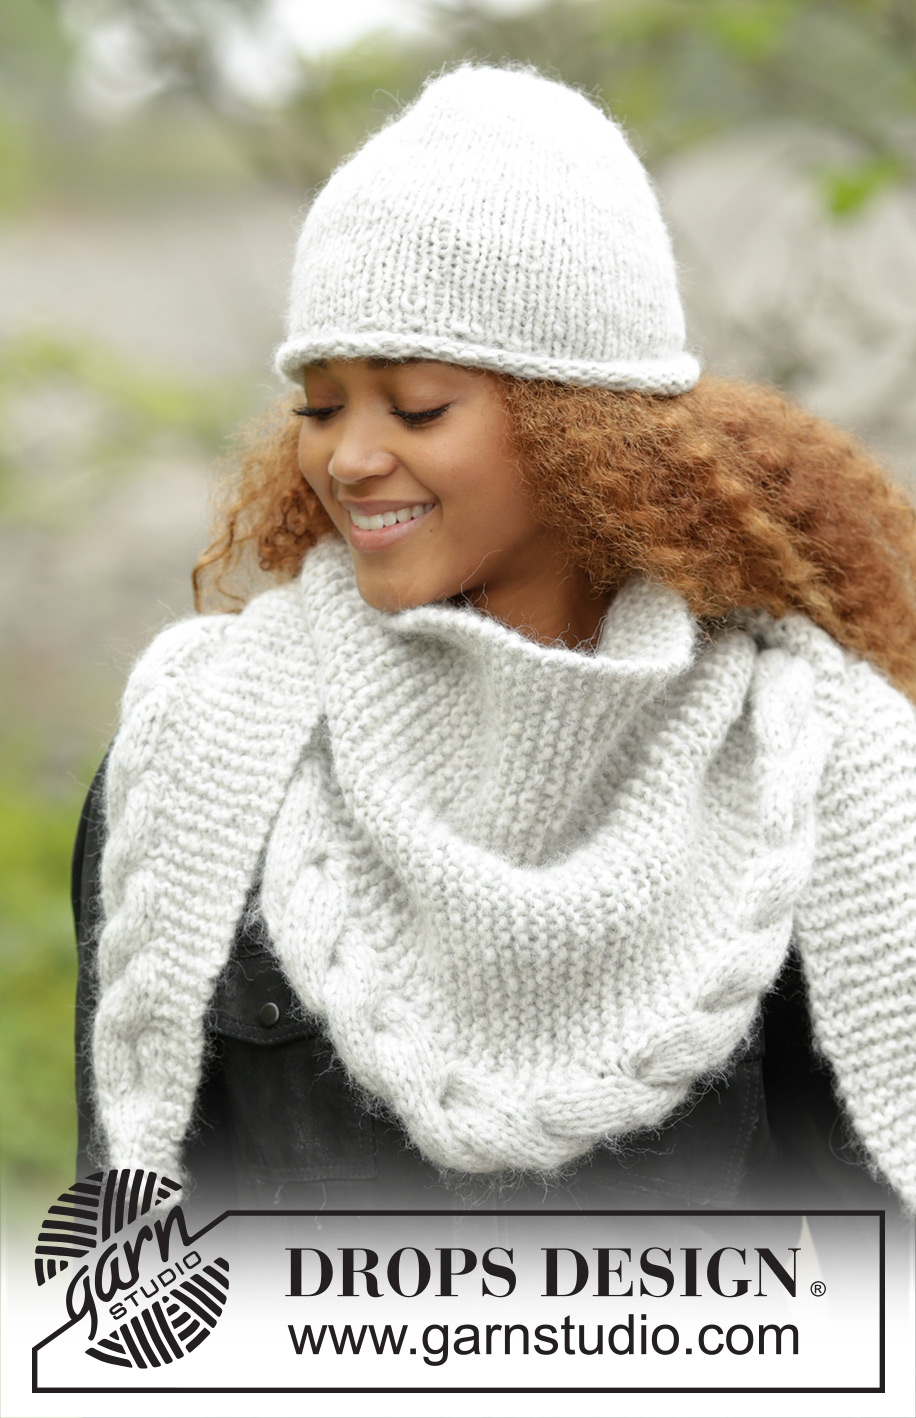
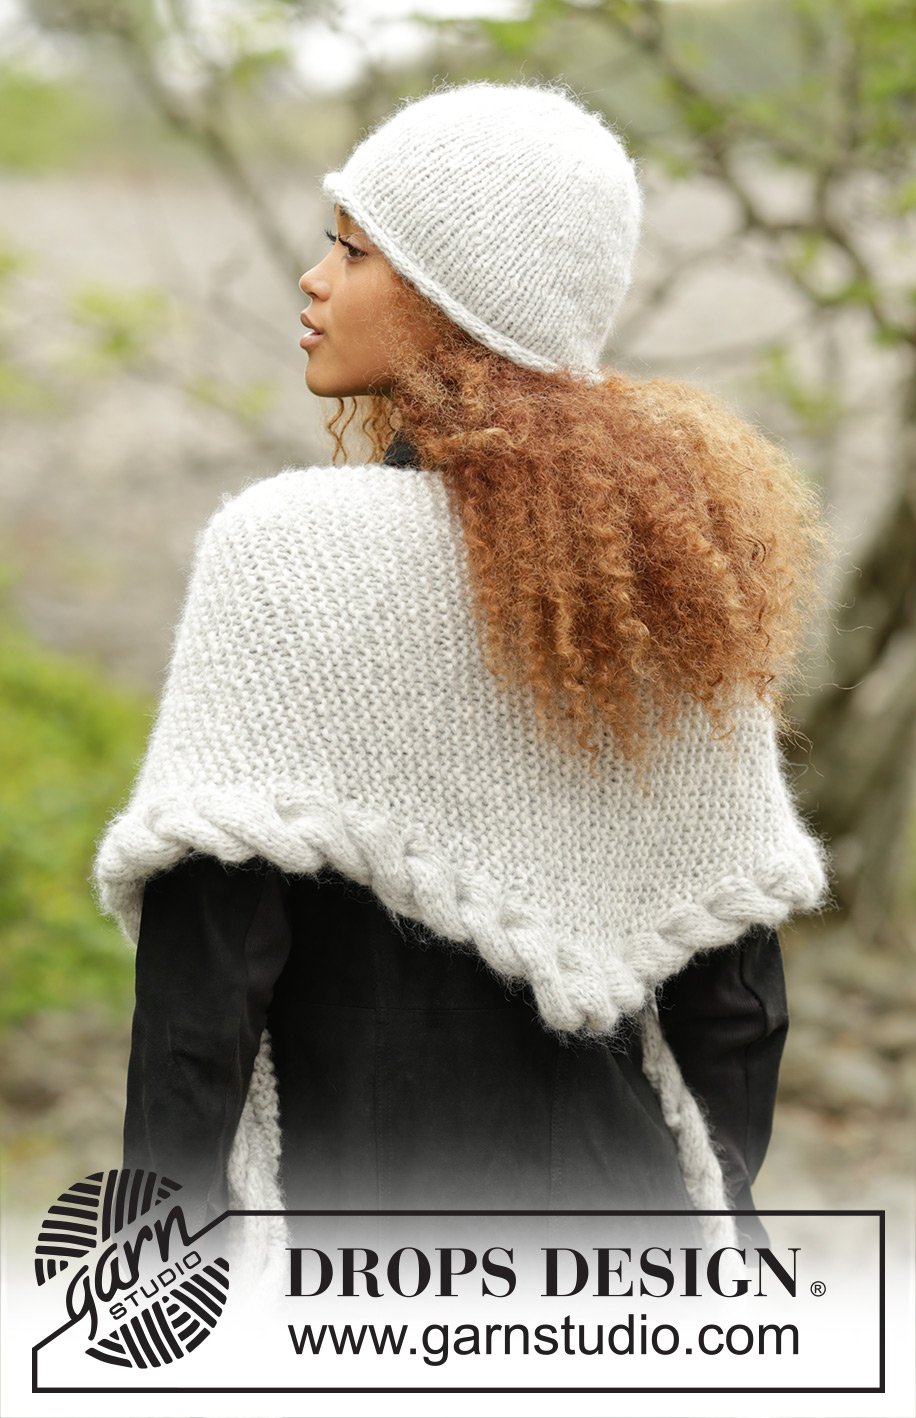
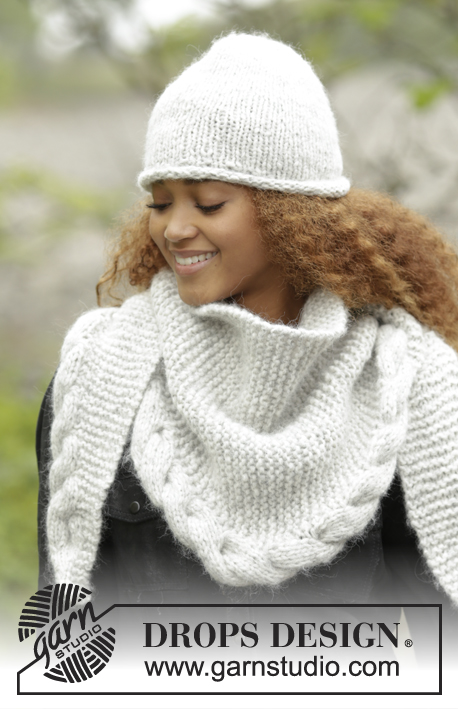
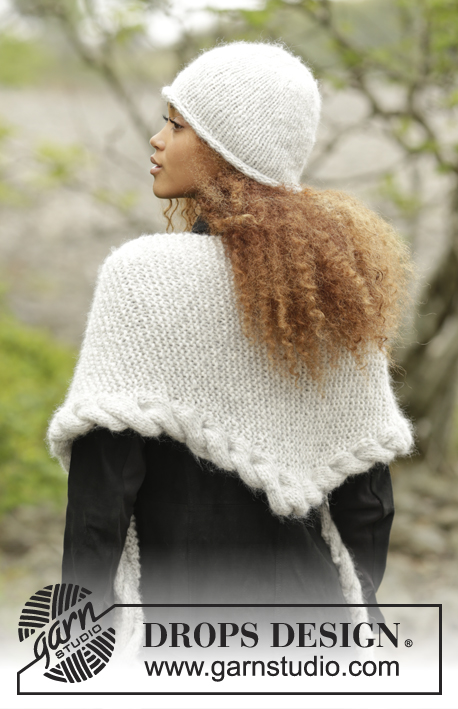
El conjunto se compone de: Gorro de punto DROPS en “Cloud” y chal tejido de lado a lado en punto musgo con cenefa trenzada en “Cloud”.
DROPS 172-10 |
|||||||
|
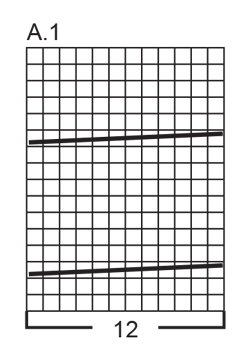
GORRO: TIP PARA LAS DISMINUCIONES: Desl 1 pt como de derecho, 1 d., pasar el pt desl por encima. -- -- -- -- -- -- -- -- -- -- -- -- -- -- -- -- -- -- -- -- -- -- -- -- -- -- -- -- GORRO: Mont 56-60 pts con ag circular tamaño 7 mm y Cloud. Trabajar 4 vtas en pt jersey (= borde enrollado). Trabajar la sig vta como sigue: *1 d., 1 r.*, repetir de *a* toda la vta. Trabajar una vta más con derecho sobre derecho y revés sobre revés. Ahora continuar en pt jersey hasta finalizar las medidas. RECUERDE MANTENER LA MISMA TENSIÓN DEL TEJIDO. Cuando la labor mida 21-22 cm, insertar 8-10 marcapuntos (MP) en la labor con 7-6 pts de separación. En la sig vta dism 1 pt después de cada MP - ver TIP PARA LAS DISMINUCIONES (= 8-10 pts disminuidos). Repetir las dism cada 2ª vta un total de 3 vcs, después cada vta dos vcs. En la sig vta trabajar todos los pts juntos de derecho retorcido de 2 en 2 = 8-5 pts en la aguja. Cortar el hilo y pasarlo por los pts restantes, fruncir y asegurar. La labor mide aprox 26-27 cm de arriba abajo (incl el borde vuelto/enrollado). ----------------------------------------------------------------------- CHAL: TIP PARA LA REALIZACIÓN DEL TRABAJO: El chal se trabaja en pt musgo con una trenza a lo largo del borde inferior. La cenefa de la trenza se trabaja sobre los 12 pts más externos. No trabajar pts orillo en la trenza (trabajar el pt más externo dentro del patrón A.1 como un pt normal en pt musgo por ambos lados), de lo contrario la trenza no cogerá el volumen correcto. PATRÓN: Ver el diagrama A.1. El diagrama muestra todas las filas del patrón visto por el LD. TIP PARA TOMAR LAS MEDIDAS: Medir el chal a lo largo del borde recto sin dism/aum. -- -- -- -- -- -- -- -- -- -- -- -- -- -- -- -- -- -- -- -- -- -- -- -- -- -- -- -- CHAL: Se trabaja de lado a lado. Mont 3 pts con ag circular tamaño 8 mm y Cloud y trabajar como sigue: FILA 1 (= LD): trabajar todos los pts de derecho. FILA 2 (= LR): 2 d., 1 d. pinchando en el bucle delantero y trasero del sig pt = 4 pts en la fila. FILA 3 (= LD): 1 d., 1 HEB, 3 d = 5 pts. FILA 4 (= LR): 3 d., trabajar la HEB de revés retorcido, 1 r. FILA 5 (= LD): 2 d., 1 HEB, 3 d. = 6 pts. FILA 6 (= LR): 3 d., trabajar la HEB de revés retorcido, 2 r. FILA 7 (= LD): 3 d., 1 HEB, 3 d. = 7 pts. FILA 8 (= LR): 3 d., trabajar la HEB de revés retorcido, 3 r. FILA 9 (= LD): 4 d., 1 HEB, 3 d. = 8 pts. FILA 10 (= LR): 3 d., trabajar la HEB de revés retorcido, 4 r. FILA 11 (= LD): 5 d., 1 HEB, 3 d. = 9 pts. FILA 12 (= LR): 3 d., trabajar la HEB de revés retorcido, 5 r. FILA 13 (= LD): Trabajar 1 d. pinchando en el bucle delantero y trasero del pt en cada uno de los primeros 6 pts, insertar 1 MP, 3 d. = 15 pts. FILA 14 (= LR): 3 d., MP, 12 r. Continuar trabajando y aumentando como sigue - LEER TIP PARA LA REALIZACIÓN DEL TRABAJO Y RECUERDE MANTENER LA MISMA TENSIÓN DEL TEJIDO. FILA 1 (= LD): Trabajar el patrón según el diagrama A.1 sobre los primeros 12 pts, trabajar 2 pts en el primer pt después del MP y trabajar de derecho el resto de la fila (= 1 pt aumentado). FILA 2 (= LR): trabajar de derecho hasta el MP y A.1 sobre los últimos 12 pts. FILA 3 (= LD): A.1 sobre los primeros 12 pts, MP, trabajar de derecho el resto de la fila. FILA 4 (= LR): Trabajar de derecho hasta el MP y A.1 sobre los últimos 12 pts. Repetir las filas 1- 4 (es decir, aum 1 pt cada 4ª fila) hasta que tengamos 56 pts en la fila. La labor mide ahora aprox 81 cm - LEER TIP PARA TOMAR LAS MEDIDAS. Ahora trabajar filas acortadas como sigue para evitar que la trenza quede tirante en las puntas: * Trabajar 2 filas de ida y vta sobre los 12 pts de A.1, trabajar 2 filas de ida y vta sobre todos los pts de la fila como antes pero sin aumentos *, repetir de *a* un total de 3 vcs, ahora trabajar 2 filas de ida y vta sobre los 12 pts de A.1 otra vez. Ahora trabajar y dism como sigue: FILA 1 (= LD): Trabajar el patrón según el diagrama A.1 sobre los primeros 12 pts, trabajar juntos de derecho los primeros 2 pts después del MP y trabajar de derecho el resto de la fila (= 1 pt disminuido). FILA 2 (= LR): trabajar de derecho hasta el MP y A.1 sobre los últimos 12 pts. FILA 3 (= LD): A.1 sobre los primeros 12 pts, MP, trabajar de derecho el resto de la fila. FILA 4 (= LR): trabajar de derecho hasta el MP y A.1 sobre los últimos 12 pts. Repetir las filas 1- 4 (es decir, dism 1 pt cada 4ª fila) hasta que queden 15 pts en la fila (la labor mide ahora aprox 159 cm). Ahora trabajar como sigue: FILA 1 (= LD): Trabajar todos los pts de A.1 juntos de 2 en 2, MP, 3 d. = 9 pts restantes en la aguja. FILA 2 (= LR): 3 d., 6 r. FILA 3 (= LD): 4 d., 2 pjd, 3 d. = 8 pts. FILA 4 (= LR): 3 d., 5 r. FILA 5 (= LD): 3 d., 2 pjd, 3 d. = 7 pts. FILA 6 (= LR): 3 d., 4 r. FILA 7 (= LD): 2 d., 2 pjd, 3 d. = 6 pts. FILA 8 (= LR): 3 d., 3 r. FILA 9 (= LD): 1 d., 2 pjd, 3 d. = 5 pts. FILA 10 (= LR): 3 d., 2 r.. FILA 11 (= LD): 2 pjd, 3 d. = 4 pts. FILA 12 (= LR): 4 d. FILA 13 (= LD): 2 pjd, 2 d. = 3 pts. FILA 14 (= LR): Rematar de derecho. |
|||||||
Explicaciones del diagrama |
|||||||
|
|||||||
 |
|||||||
¿Terminaste este patrón?Entonces, etiqueta tus fotos con #dropspattern #wintercozyset o envíalas a la galería #dropsfan. ¿Necesitas ayuda con este patrón?Encontrarás 25 videos tutoriales, un espacio para comentarios/preguntas y más visitando la página del patrón en garnstudio.com © 1982-2026 DROPS Design A/S. Todos los derechos reservados. Este documento, incluyendo todas sus sub-secciones, está protegido por los derechos de autor (copyright). Lee más acerca de lo que puedes hacer con nuestros patrones en la parte de abajo de cada patrón de nuestro sitio. |
|||||||


Con más de 40 años en el diseño de modelos de punto y de ganchillo, DROPS Design ofrece una de las más vastas colecciones de patrones gratuitos en el internet - traducidos en 17 idiomas. Al día de hoy, contamos con 325 catálogos y 12298 patrones - de los cuales 11726 están traducidos en español.
Nosotros trabajamos con mucho esmero para brindarte lo mejor que las labores de punto y ganchillo tienen para ofrecer,inspiración y consejos, así como hilos de magnífica calidad a precios increíbles! Te gustaría usar nuestros patrones para otro fin además del uso personal? Puedes leer acerca de lo que estás permitida a hacer en el texto de Copyright en la parte de abajo de todos nuestros patrones. Felices labores!
Escribe un comentario sobre DROPS 172-10
¡Nos encantaría saber qué piensas acerca de este patrón!
Si quieres escribir una pregunta referente al patrón, por favor asegúrate de elegir la categoría correcta en el formulario debajo, para acelerar el proceso de respuesta. Los campos obligatorios están marcados con un *.